Manage and secure your ESXi dedicated server from the outset
1060 Views
Objective
The purpose of this guide is to help you optimise security for your ESXi system.
In particular, this guide explains how to:
- Restrict access to your ESXi server to a specific IP address or network range.
- Disable services that increase your server's attack surface.
We will do this using the on-board features offered by VMware, as well as those offered by OVHcloud.
Recently, ESXi systems fell victim to a security flaw that malicious groups exploited very quickly across public networks.
You can find more information on this attack in an additional FAQ.
Security best practices reminder
- Update your ESXi systems regularly.
- Restrict access to trusted IP addresses only.
- Disable unused ports and services.
- Ensure access to your servers or network equipment is limited, controlled and protected with strong passwords.
- Back up your critical data to protected, isolated external disks and backup servers.
Optional:
- Set up the necessary logging solutions to monitor events on your critical servers and network equipment.
- Set up security packs for malicious action detection, intrusion detection (IPS/NIDS) and network traffic bandwidth control.
Requirements
- Access to the OVHcloud Control Panel
- A dedicated server with the ESXi solution deployed
- An offer compatible with our Network Firewall feature, if you would like to use it for filtering
Instructions
Native intrusion protection
Reminder of its definition and operating principle:
The ESXi system includes a security mechanism linked to the administrator account. This is because, in the event of several incorrect access attempts, the administrator account is temporarily locked. This mechanism helps protect your system from malicious connection attempts.
If this system triggers and you want to log into your ESXi immediately, you will need to manually unlock the administrator account.
To do this, you will need to reboot your ESXi server via the OVHcloud Control Panel.
You can view the access log history in the following files via SSH:
/var/run/log/vobd.logcontains the logs that can be used for monitoring and troubleshooting:
2023-02-13T16:22:22.897Z: [UserLevelCorrelator] 410535559us: [vob.user.account.locked] Remote access for ESXi local user account 'root' has been locked for 900 seconds after 6 failed login attempts.
2023-02-13T16:22:22.897Z: [GenericCorrelator] 410535559us: [vob.user.account.locked] Remote access for ESXi local user account 'root' has been locked for 900 seconds after 6 failed login attempts.
2023-02-13T16:22:22.897Z: [UserLevelCorrelator] 410535867us: [esx.audit.account.locked] Remote access for ESXi local user account 'root' has been locked for 900 seconds after 6 failed login attempts./var/run/log/hostd.logcontains ESXi host logs (tasks, access to the web interface, etc.):
2023-02-21T08:44:19.711Z error hostd[2101004] [Originator@6876 sub=Default opID=esxui-d48c-26a4] [module:pam_lsass]pam_do_authenticate: error [login:root][error code:2]
2023-02-21T08:44:19.711Z error hostd[2101004] [Originator@6876 sub=Default opID=esxui-d48c-26a4] [module:pam_lsass]pam_sm_authenticate: failed [error code:2]
2023-02-21T08:44:19.712Z warning hostd[2101004] [Originator@6876 sub=Default opID=esxui-d48c-26a4] Rejected password for user root from xxx.xxx.xxx.xxx
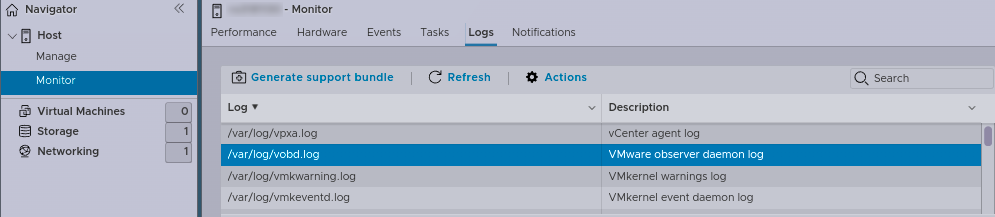
2023-02-21T08:44:19.712Z info hostd[2101004] [Originator@6876 sub=Vimsvc.ha-eventmgr opID=esxui-d48c-26a4] Event 175 : Cannot login root@xxx.xxx.xxx.xxxAll this information is also available through the web administration interface. Click the Host menu and navigate to the Monitor section, and then click Logs.
The Edge Network Firewall solution
As a reminder, the Edge Network Firewall is not taken into account within the OVHcloud network. As a result, the configured rules do not affect connections from this internal network.
You can enable and use our Edge Network Firewall filtering solution. This solution will allow you to easily manage legitimate access, in addition to the access you have set up through your ESXi system.
It will also prevent you from unexpectedly locking your administrator account in the event of an attack.
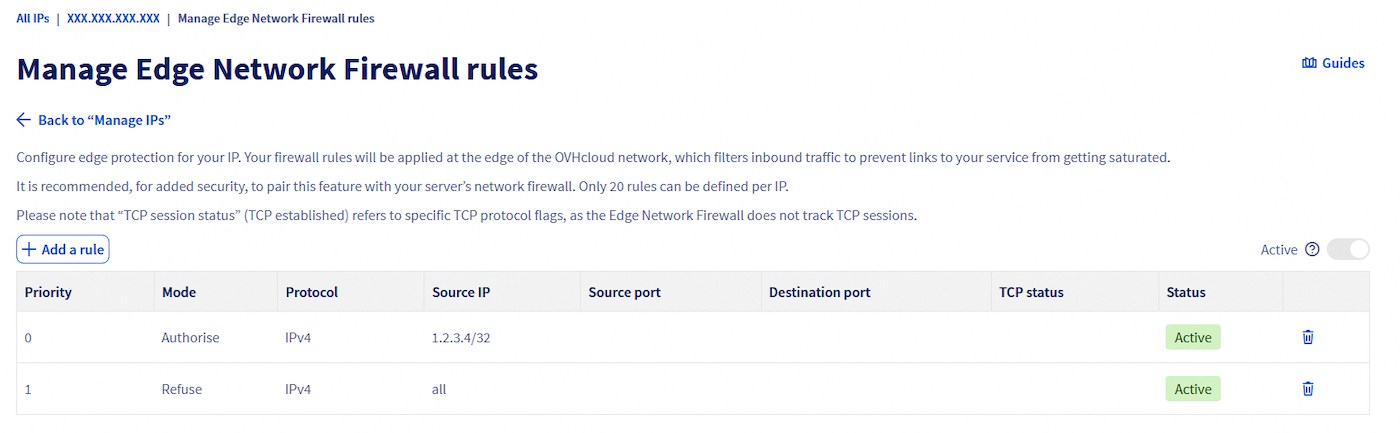
It is recommended that you filter legitimate access in this way:
- Rule 1 (Priority 0) allows trusted external networks to access your ESXi system.
- Rule 2 (Priority 1) blocks everything else.
You can access the Edge Network Firewall settings in the OVHcloud Control Panel, by selecting Network, then choosing Public IP Addresses under "Public Network". There, you can find your dedicated server by searching for its IP address.
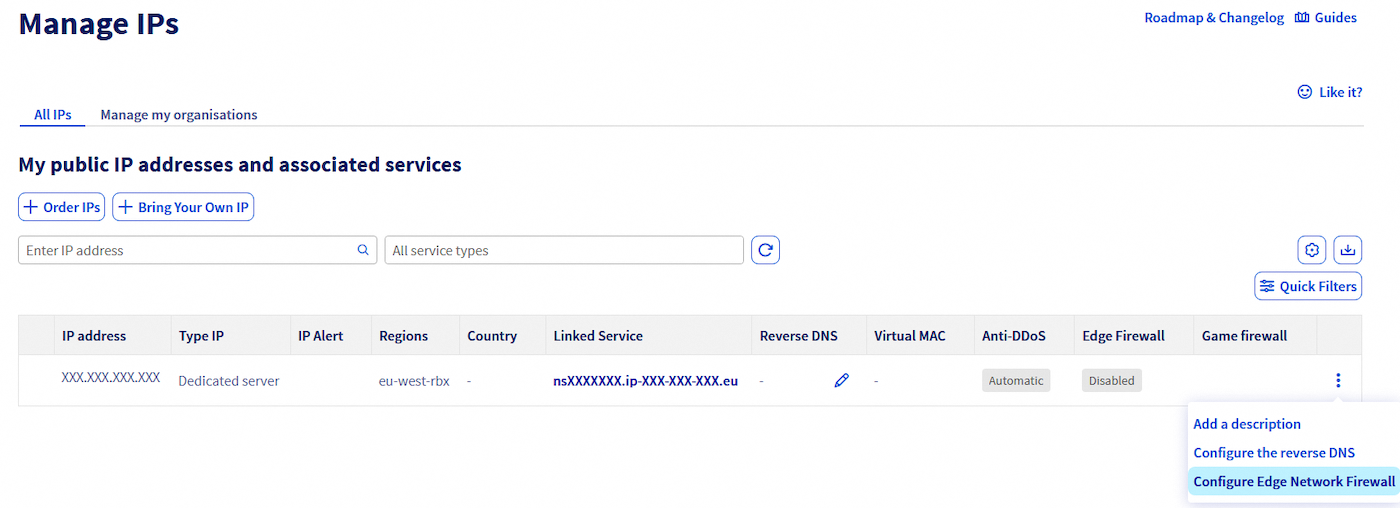
To the right of the table, click the ... button corresponding to your dedicated server, then select Configure Edge Network Firewall.
Filtering in ESXi
You can also filter access to your ESXi system with the built-in firewall. You can also disable unnecessary services, depending on your usage.
We strongly advise disabling SSH and SLP services. If you still use the SSH service, restrict its use and access as much as possible. This also applies to shell access. Prioritise only what is strictly necessary for each of your needs.
Manipulation via the graphical interface
In ESXi 8.0 GA and newer, the SLP service is hardened, disabled by default, and filtered by the ESXi firewall. This means that you no longer have to disable it manually. You can find more information on this official VMware blog post
Services
Click the Host menu and navigate to the Manage section, then click Services.
In the list, find the TSM-SSH service and right-click on the associated line.
Stop the service by clicking Stop:

Select the Policy, then edit it as shown in the example.
Choose the Start and stop manually option to prevent the service from being active when the server starts.

Apply the same settings for the slpd service:

Firewall rules
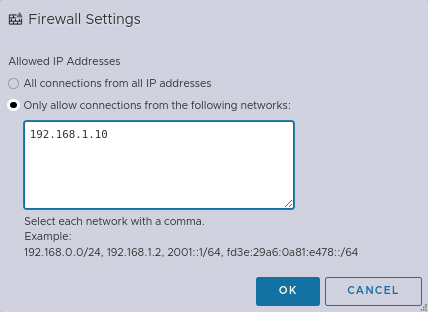
Click the Networking menu, then Firewall rules, and choose Edit settings for each service you want to protect:
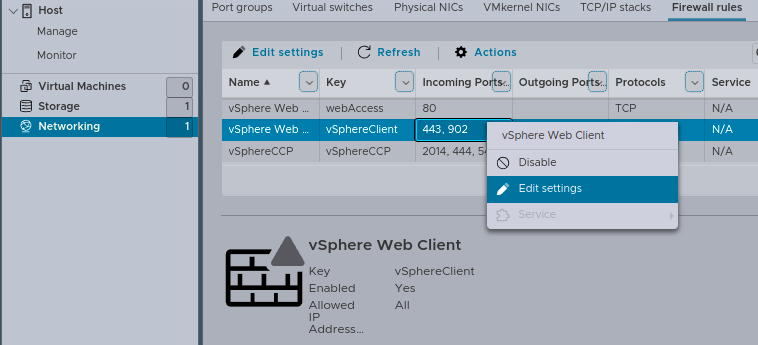
Edit the rule to add only IP addresses or networks that need access to your ESXi system.
Example that only allows connections from IP 192.168.1.10:
Shell manipulation
Services
In ESXi 8.0 GA and newer, the SLP service is hardened, disabled by default, and filtered by the ESXi firewall. This means that you no longer have to disable it manually. You can find more information on this official VMware blog post
Disable unnecessary services:
- SLP Service
- SSH Service
Check all active services at startup:
Firewall rules
View existing firewall rules:
Explanations for changing/adapting access rules:
- The
vSphereClientservice: This service corresponds to the web administration interface on port 443 (HTTPS).- The
sshServerservice: This service corresponds to SSH access on port 22.
Example with the vSphereClient service:
Ensure that the firewall rule is active:
Display the list of authorised IPs for this rule:
Result:
Ruleset        Allowed IP Addresses
-------------  --------------------
vSphereClient  All
Change the status of the tag by disabling it:
Authorise only the legitimate IP address 192.168.1.10:
Check the access list for the address:
Result:
Ruleset        Allowed IP Addresses
-------------  --------------------
vSphereClient  192.168.1.10
If you still want to use the SSH service, we will explain here how to set up SSH key access.
Generate the keys on the machine that needs to connect to the ESXi server. The 521-bit ECDSA algorithm should be used for maximum security:
Authentication works with a key pair: one public and one private. Do not share your private key, it must remain on the machine where it was generated.
Run the following command:
Generating public/private ecdsa key pair.
Enter file in which to save the key (/path-to-my-key/key-ecdsa_rsa):
Enter a strong password:
Enter passphrase (empty for no passphrase):
Enter same passphrase again:
Only the public key (key-ecdsa.pub) must be sent or stored on the machines you want to connect to.
Your identification has been saved in /path-to-my-key/key-ecdsa.
Your public key has been saved in /path-to-my-key/key-ecdsa.pub.
The key fingerprint is:
SHA256:******************************************* key-ecdsa-esxi-host
Transfer the public key to your ESXi host so that it can be declared as trusted:
Go further
You can find even more details on security best practices in this VMware suggested guide.
Join our community of users.

