Zimbra - Synchronise a CalDAV calendar in an application
2185 Views
Objective
Zimbra email accounts can be configured on different compatible email software. This allows you to use your email address from your preferred device. Zimbra includes an online calendar feature, which can be synchronised from software compatible with the CalDAV protocol.
Find out how to add a Zimbra calendar to an application via the CalDAV protocol.
Requirements
- An OVHcloud Zimbra email account
- An application supporting the CalDAV calendar protocol installed
- Login details for the email account on which to configure the calendar
Instructions
What is the CalDAV protocol?
CalDAV is a protocol for editing online calendars and tasks. Zimbra email addresses have calendars that use the CalDAV protocol.
CalDAV calendar configuration is similar to email account configuration and requires an application that supports this protocol.
Share a calendar
This section only concerns the Zimbra Starter or Pro offers, which include the calendar sharing feature.
Public sharing in ICS format
The ICS file format used here is static: the file version corresponds to the moment when the user generates the link. This means that an event added after the link to the ICS file is generated will not be present in the file or in the calendar into which it is imported. There is no synchronisation.
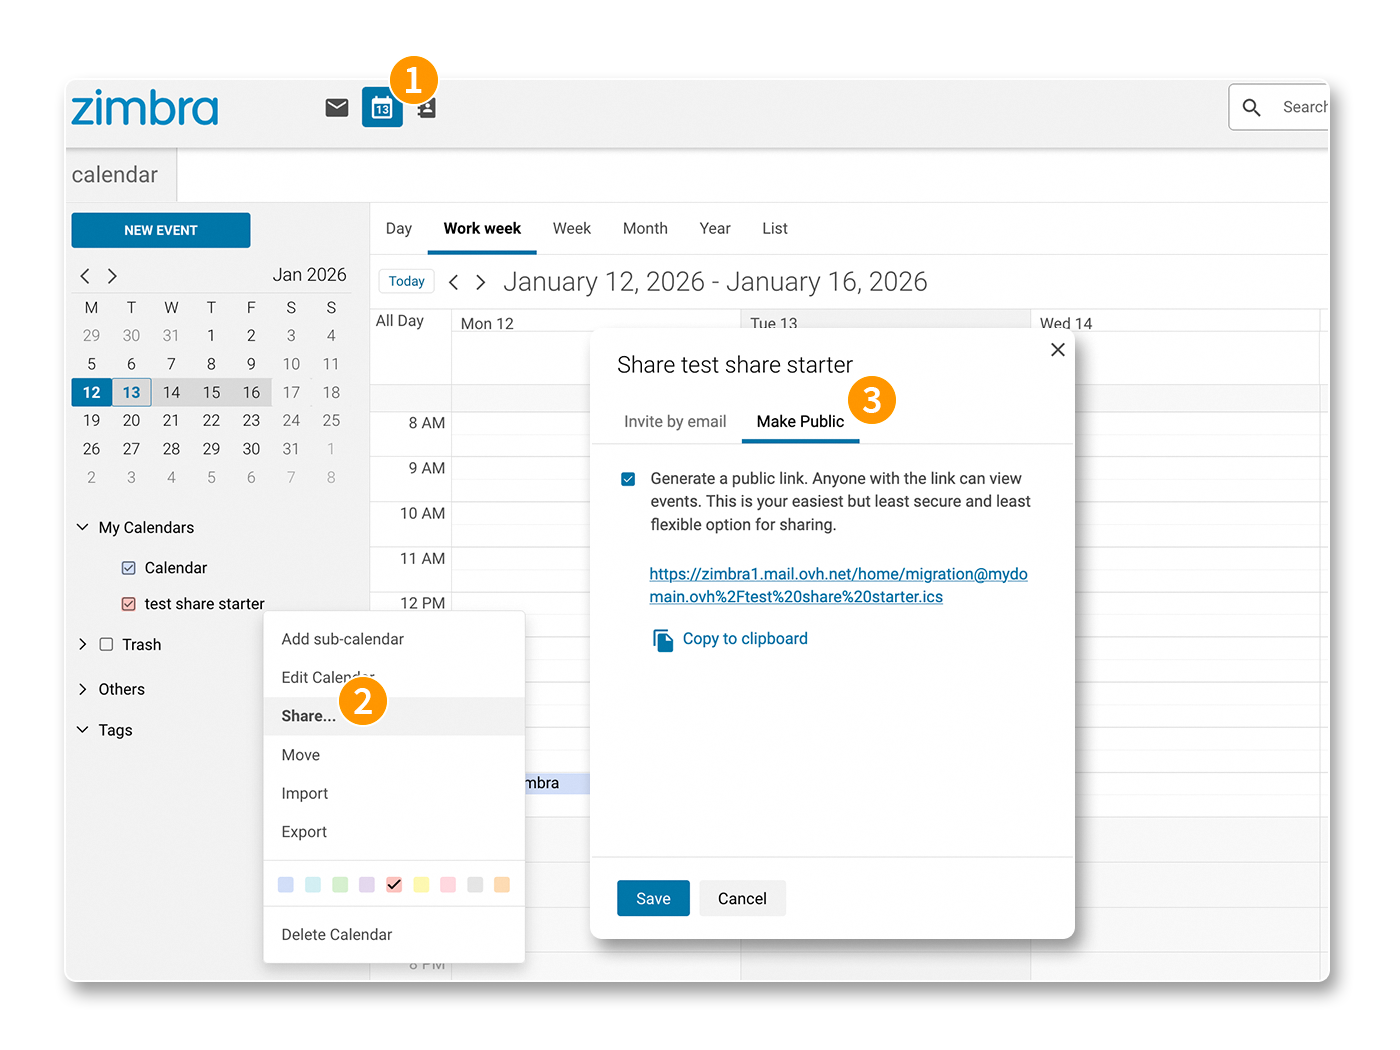
To generate an ICS file link, follow the steps below:
- Log in to your Zimbra email address via the webmail.
- Go to the
Calendartab. - Right-click on the relevant calendar and click on
Share.... - Click on the
Make publictab. - Tick the box
Generate a public link, copy or open the link in a new tab and download the ICS file.
The ICS file you have downloaded can be imported into an existing or newly created calendar.
Sharing by email invitation
Unlike ICS file sharing, sharing by email invitation allows you to dynamically share a calendar with other email accounts from the same domain name. Events and actions on the shared calendar will be synchronised.
Only email addresses from the same domain name can receive this type of sharing.
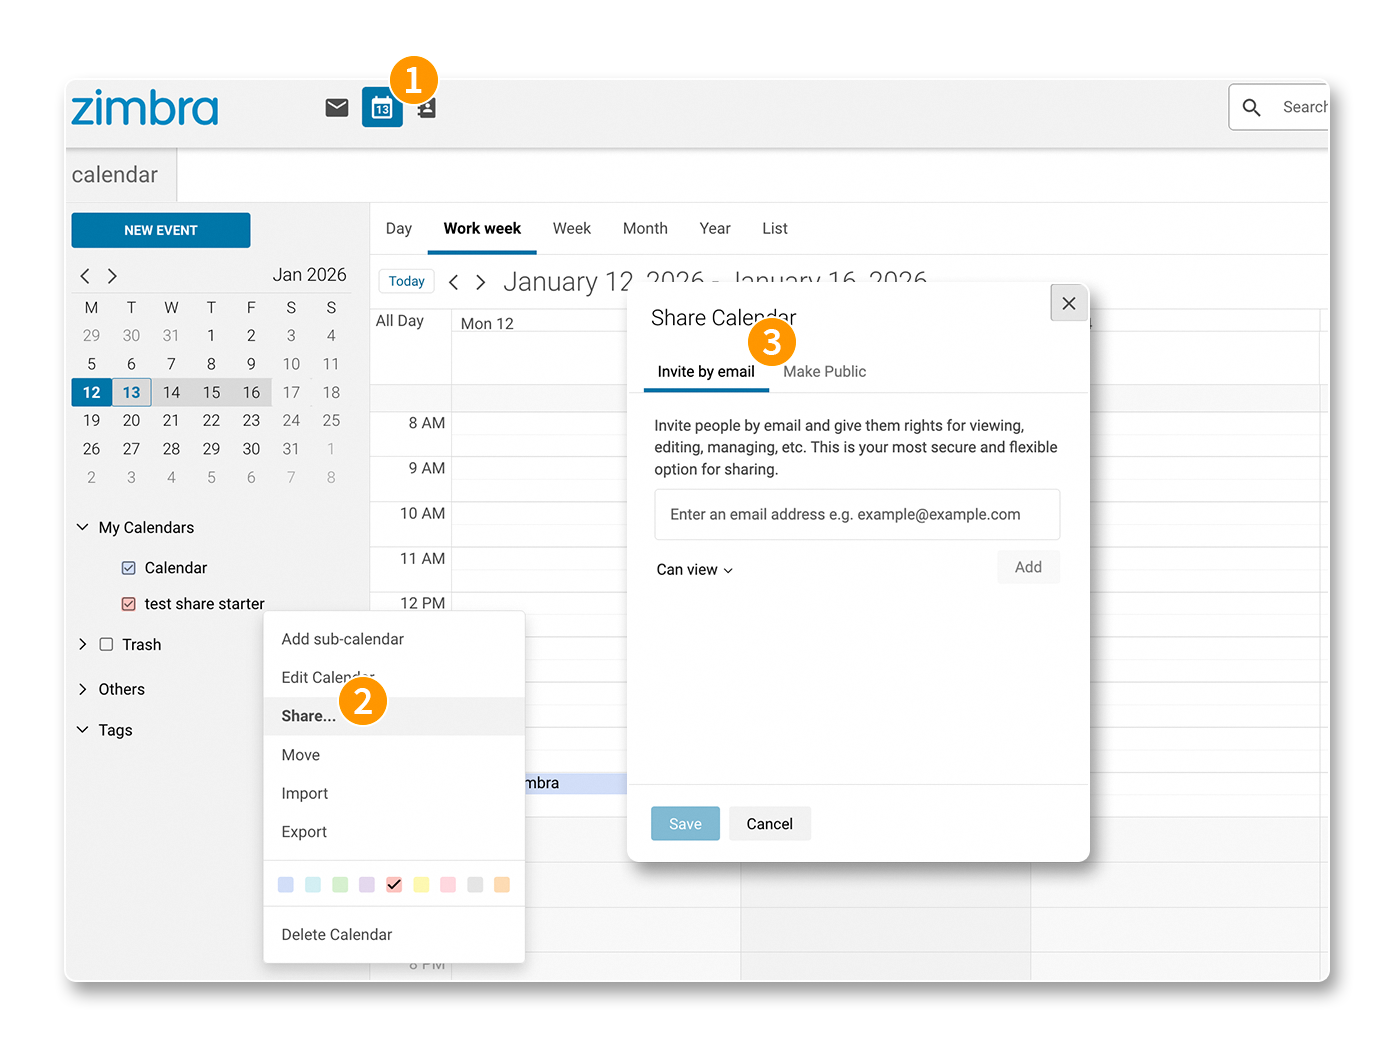
To initiate a sharing on another email address:
- Log in to your Zimbra email account via the webmail.
- Go to the
Calendartab. - Right-click on the relevant calendar and click on
Share.... - Click on the
Invite by emailtab.
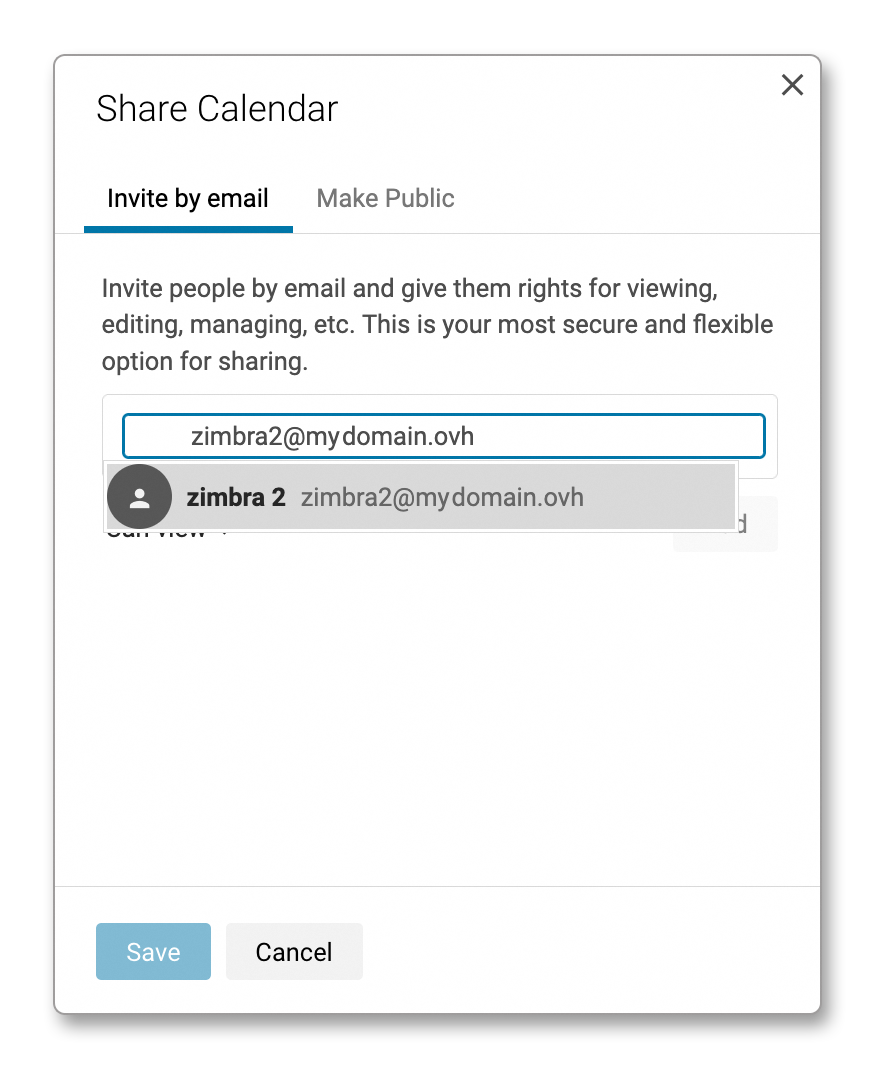
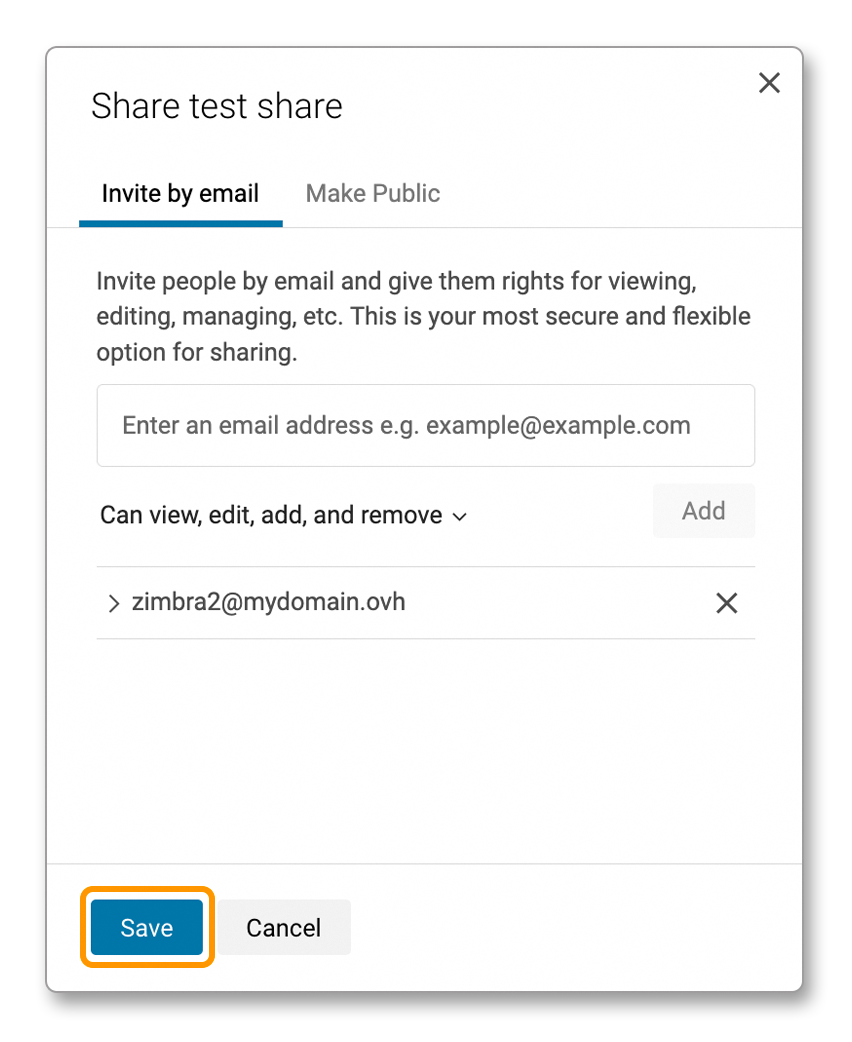
Follow the steps below to share a calendar with one or more email accounts:
Enter the email address with which you want to share the calendar.
Set the permissions of the email account on the calendar, then click on Add.
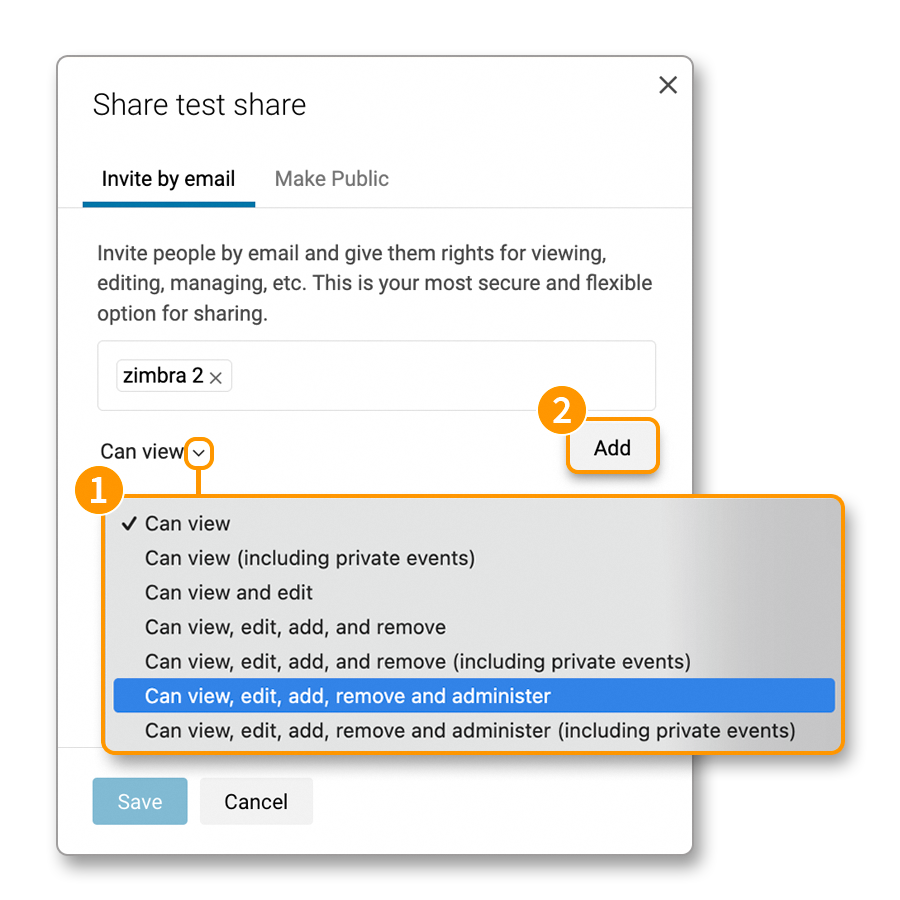
Repeat steps 1 and 2 to share the same calendar with other email accounts from the same domain name, then click on Save.
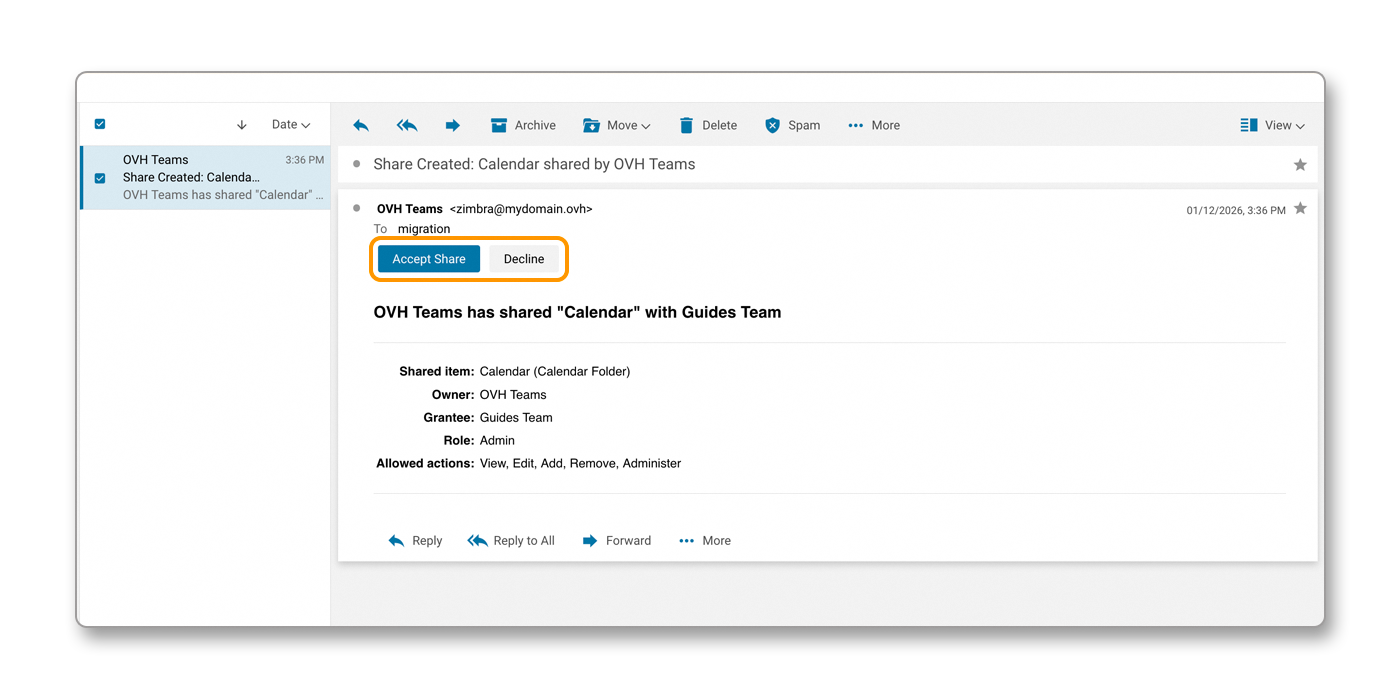
An email is sent to each recipient of the sharing and allows them to accept or reject the shared calendar. It also indicates the rights granted on this calendar.
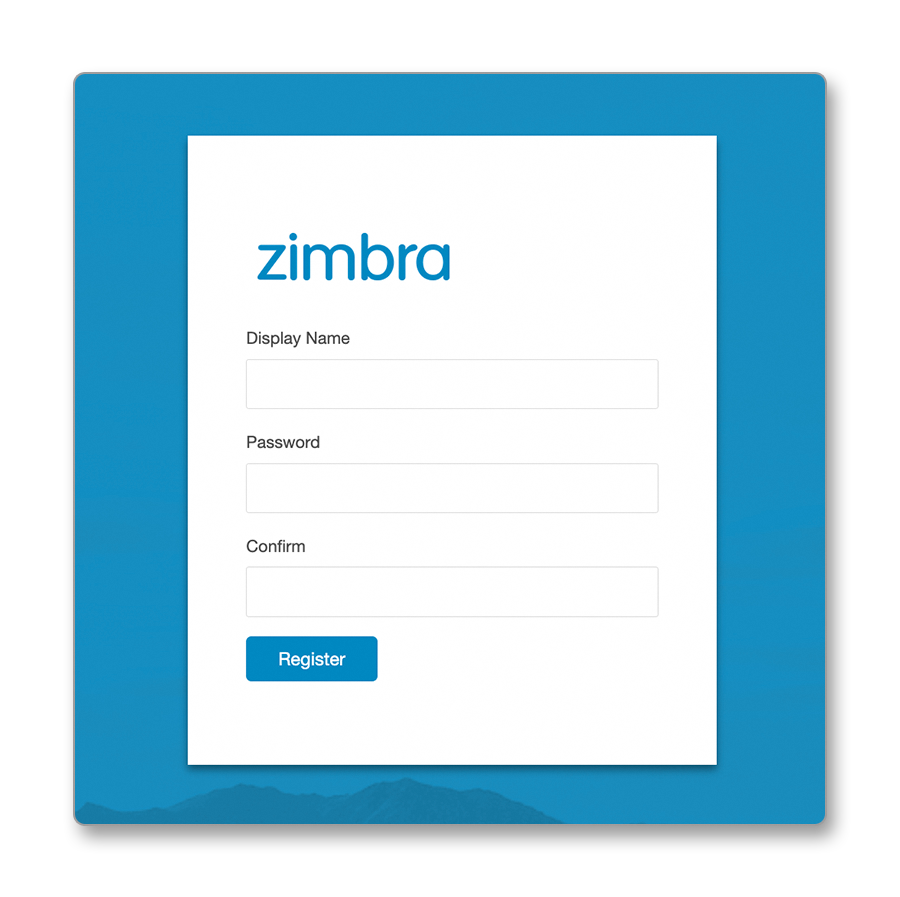
If you share your calendar with an email account from the same domain name using the Roundcube webmail (MX Plan offer) or OWA (Email Pro and Exchange offers), the recipient email address receives a link to access the Zimbra webmail, allowing them to create a "guest" account to view the calendar.
Configuring the CalDAV calendar on compatible software
We have selected stable applications that are compatible with the CalDAV protocol.
- For Windows: Follow the Add a calendar on Thunderbird section.
- For macOS: Follow the section Add a calendar on macOS or Add a calendar on Thunderbird.
- For Linux: Follow the Add a calendar on Thunderbird section.
- For iPhone and iPad: Follow the Add a calendar on iOS and ipadOS section.
- For Android: Follow the guide Zimbra - Configuring your email account on the Zimbra mobile application.
Android devices do not currently offer native support for the CalDAV protocol, neither is there currently a stable third-party app that is able to sync Zimbra calendars for our offers.
Only the Zimbra app, based on its webmail, is able to view online calendars on an Android device.
General settings for a CalDAV Zimbra calendar
If you are using a CalDAV-compatible application, here are the general settings you need to set up a CalDAV Zimbra calendar:
- Server/Address/URL: Enter the value
zimbra1.mail.ovh.net. For some software applications, you will need to include the “https” protocol in the address. Enter the value “https://zimbra1.mail.ovh.net”. - Username: Enter the full email address associated with the calendar.
- Password: Enter the password for the email account associated with the calendar.
Adding a calendar on Thunderbird
Mozilla Thunderbird is available on Windows, macOS and Linux. The following installation steps have been carried out from macOS, but they apply the same way to Windows and Linux.
Open Thunderbird and click on the "Agenda" icon in the left-hand column.
Follow the installation steps by clicking on the tabs below:
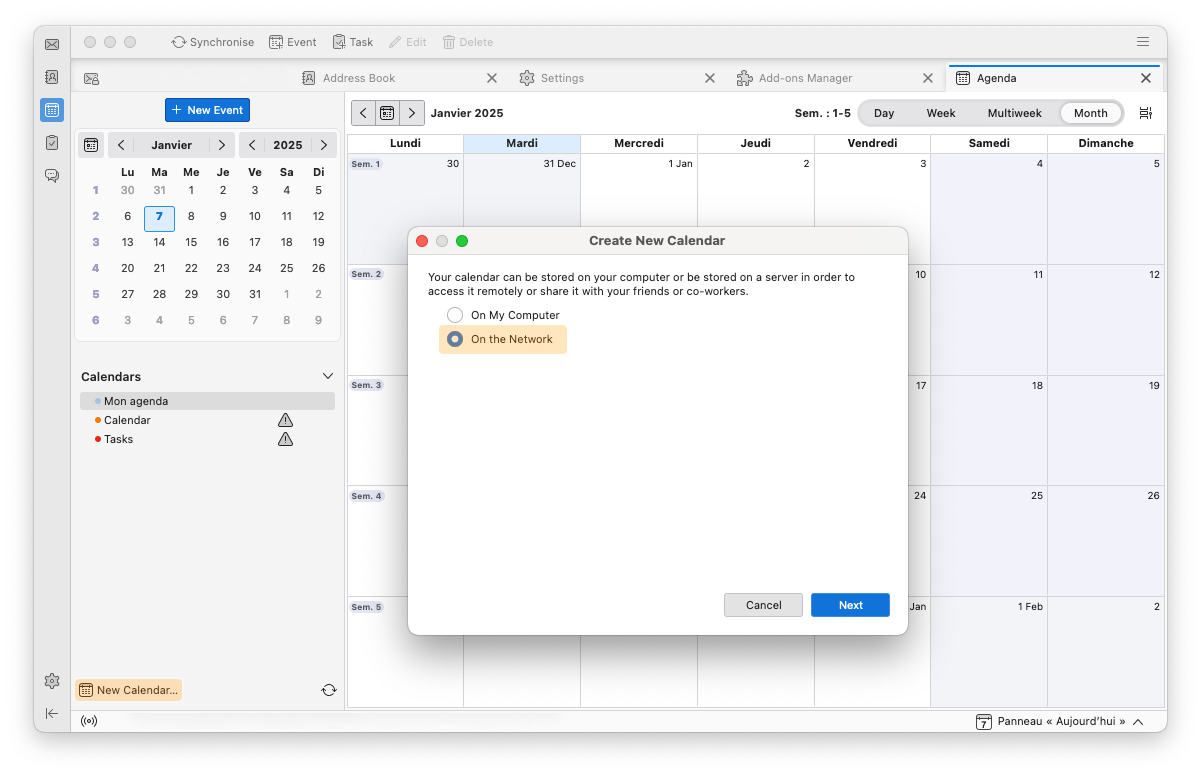
- Click
New Calendarat the bottom of the calendar column or right-click an existing calendar and selectNew Calendarfrom the drop-down menu that appears. - Select
On the network, then clickNext.
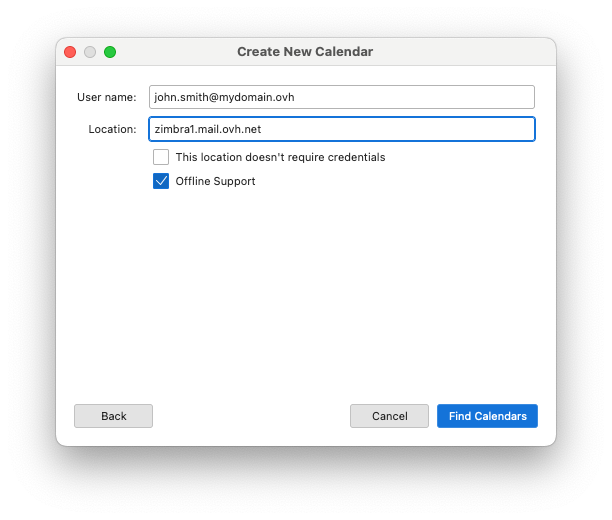
Enter calendar login information:
- Username: Enter the full email address associated with the calendar.
- Address: Enter the value
zimbra1.mail.ovh.net. - This address does not request a login ID: leave this box unticked, you will be asked to enter the password associated with the email account entered above.
- Offline support: You can leave this option checked.
Click Find Calendars to begin calendar synchronization. Enter the password for the email account associated with the username in the window that appears, and confirm your entry.
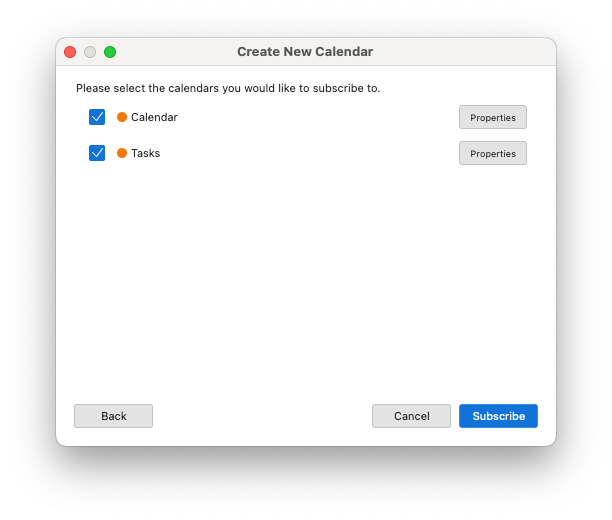
The window below will appear with the CalDAV elements present in a Zimbra email account. Tick the items you want to appear in the Thunderbird calendar and click Log in to complete the configuration.
Adding a calendar on iOS and ipadOS
The configuration below was made from an iPhone. However, the procedure is the same from an iPad.
To add a CalDAV calendar on the Apple Calendar app on your iPhone or iPad, follow the installation steps by clicking on the tabs below:
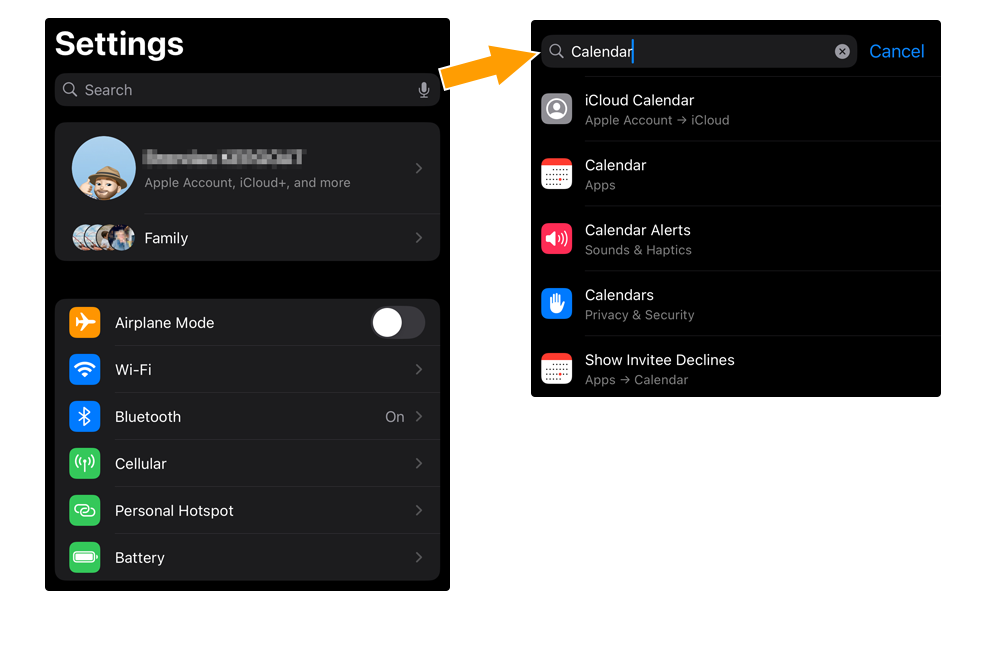
Go to the Settings of your iPhone or iPad. Find the Calendar section by scrolling through the menu, or by entering "calendar" in the settings search bar.
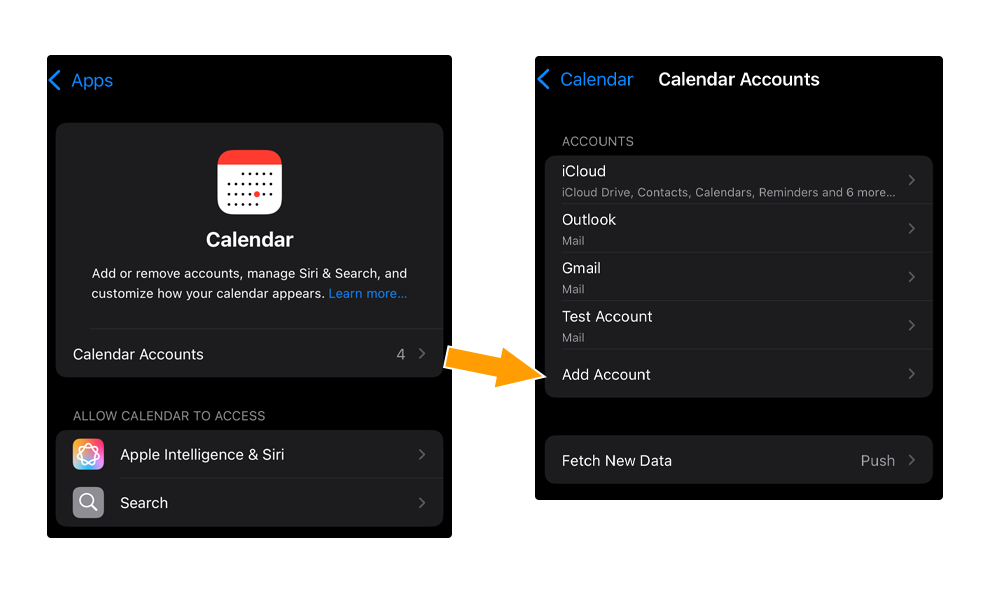
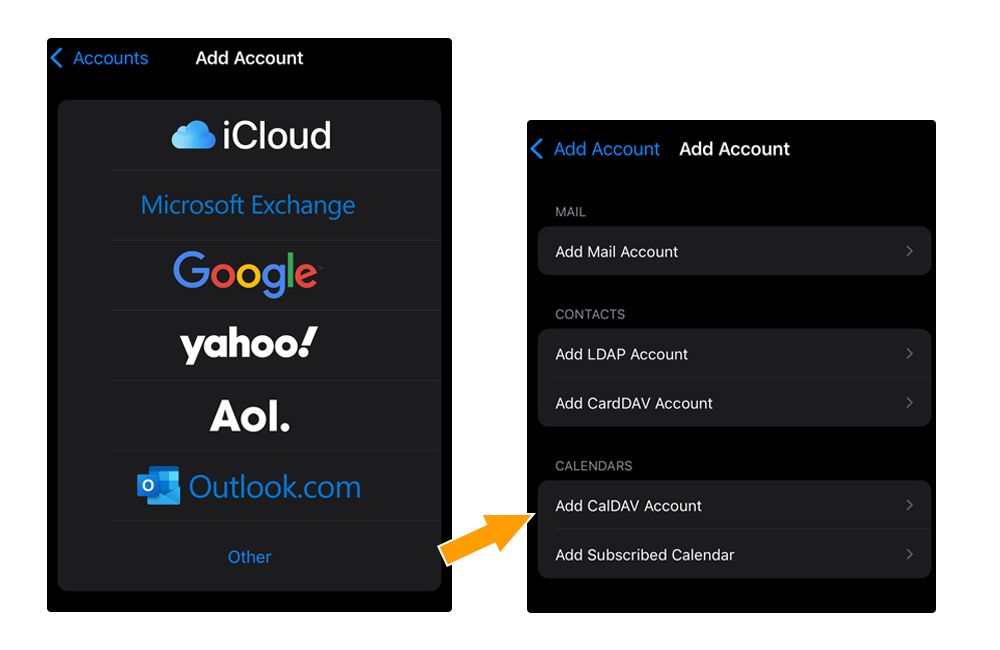
Go to Calendar Accounts then select Add Account.
Choose Other, then select Add a CalDAV account in the "CALENDAR" section.
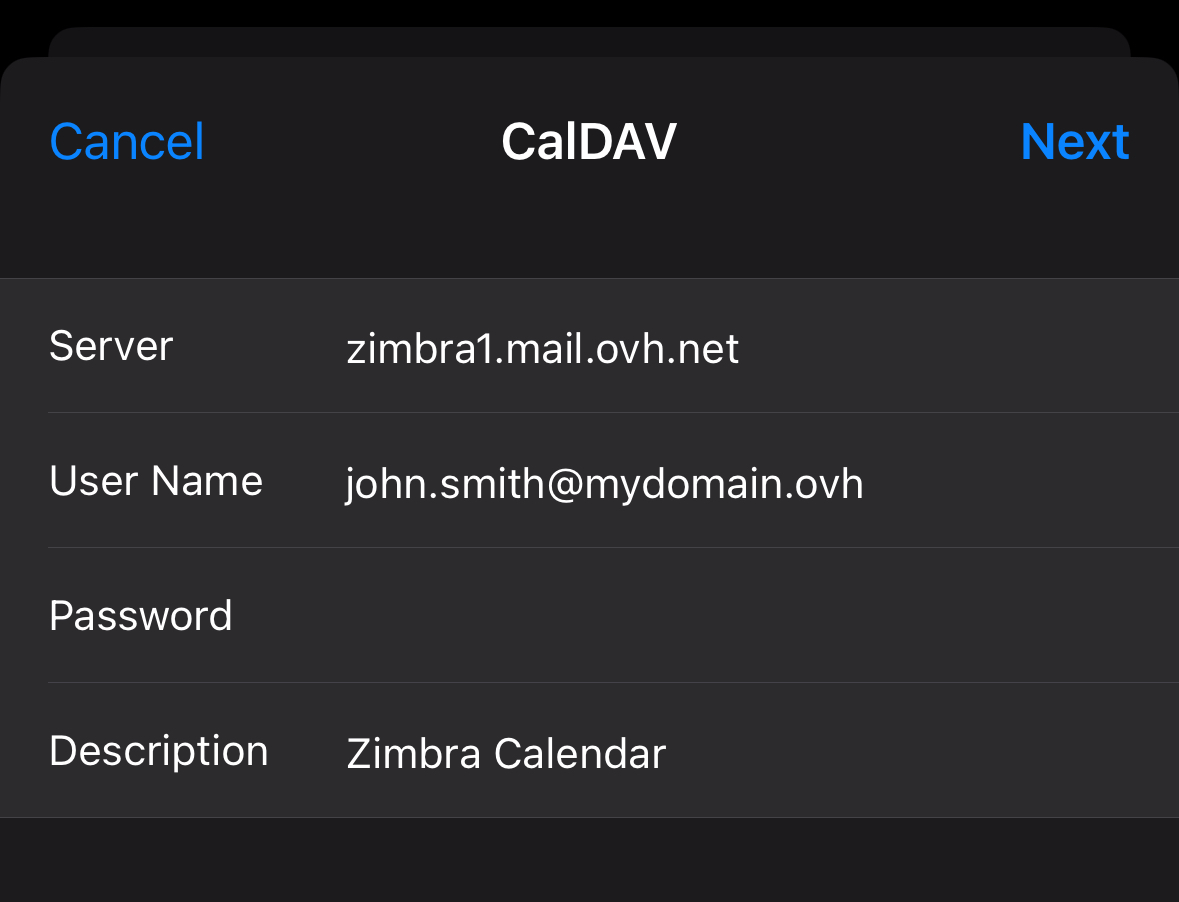
Enter calendar login information:
- Server: Enter the value
zimbra1.mail.ovh.net. - Username: Enter the full email address associated with the calendar.
- Password: Enter the password for the email account.
- Description: Add a description to the calendar.
Confirm by clicking the Next button.
Choose the Calendar and Reminder applications that will use the Zimbra calendar information.
Adding a calendar on macOS
To add a CalDAV calendar on the Apple "Calendar" app on your Mac, launch the app and follow the installation steps by clicking on the tabs below:
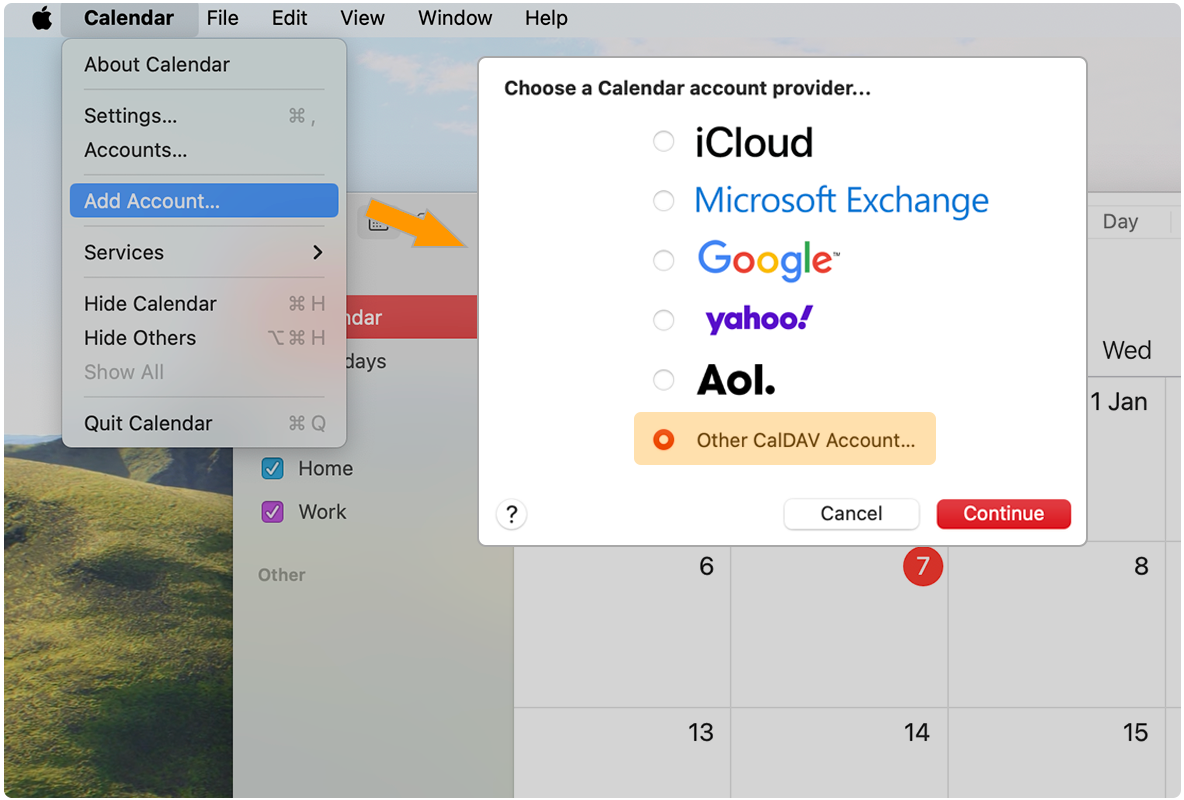
Click Calendar in the top menu bar, then Add Account. Select Add a CalDAV account, then click Continue.
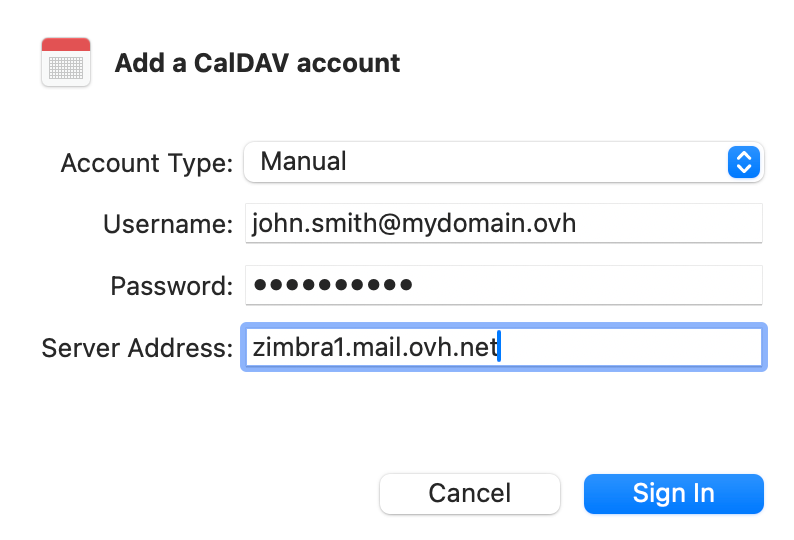
In the configuration window, enter the following information:
- Account type: Choose
Manualfrom the dropdown menu. - Username: Enter the full email address associated with the calendar.
- Password: Enter the password for the email account.
- Server address: Enter the value
zimbra1.mail.ovh.net.
To finish, click Log in.
Go further
Configuring your Zimbra email address on an email client
For specialised services (SEO, development, etc.), contact OVHcloud partners.
If you would like assistance using and configuring your OVHcloud solutions, please refer to our support offers.
Join our community of users.

