Web Hosting - How to change your solution
2363 Views
Objective
In your OVHcloud Control Panel, you can increase the capacity of your web hosting plans. A subscription upgrade provides the following advantages:
- More powerful hosting
- More FTP storage space
- Additional databases
- Additional email accounts
- Additional features such as mailing lists (from the Professional offer) or the Web Cloud Databases service (included in the Performance offers)
This guide explains how to upgrade your OVHcloud hosting plan without any service interruptions.
Requirements
OVHcloud Control Panel Access
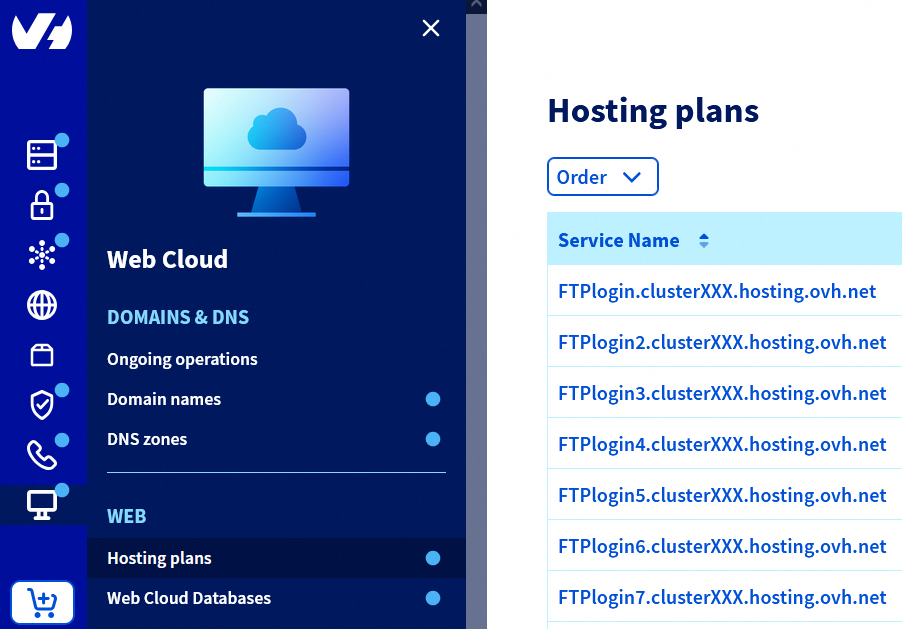
- Direct link: Hosting plans
- Navigation path:
Web Cloud>Hosting plans> Select your web hosting plan
Instructions
Before you make any changes to your current subscription, please check if you are affected by any of these questions:
Modifying your web hosting plan
To modify your subscription, click on the tabs below to view each of the 2 steps.
Go to the Hosting plans page, then select the web hosting plan concerned.
In the Plan box, click the ... button to the right of Solution, then Change plan.
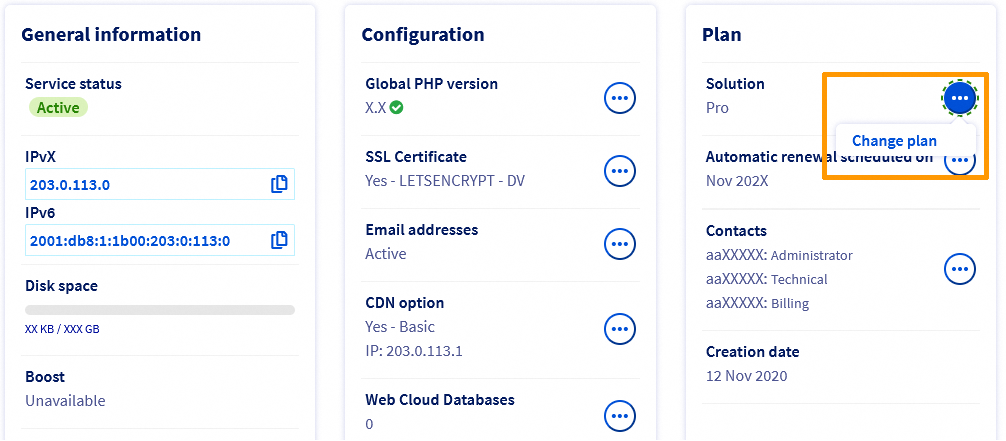
Then select your new subscription and its duration. Confirm the corresponding contracts, then click Send.
Checking that your web hosting plan is compatible with a lower range solution
You can only change your subscription to a lower range plan if it is the next lower plan. For example, you cannot switch from a Performance 2 plan to a Pro plan in a single operation. You will first need to downgrade your web hosting plan from the Performance 2 plan to the Performance 1 plan, and then to the Pro plan.
Before changing to a lower range, please check the following 6 points:
1 - Start SQL databases
Make sure there are enough databases in the new plan. Also check that they are of sufficient size.
Otherwise, delete unused databases and reduce the amount of data in them, if necessary. This quantity must not exceed the maximum database size for the new solution. If you need assistance with how to proceed, please contact OVHcloud partners.
Once you have deleted data from your databases, recalculate the quota used. To do this, click on the tabs below to view each of the 4 steps.
Go to the Hosting plans page, then select the web hosting plan concerned.
On the page that pops up, click on the Databases tab.

On the new page, a table will appear containing the databases you have created. To the right of the database concerned, click the ... button, then Recalculate the quota.

In the window that pops up, click the Confirm button.
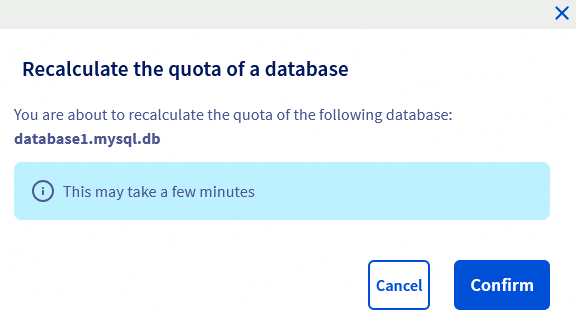
Once launched, the operation may take several minutes. When it ends, the "READ ONLY" status of your database disappears.
Your database is now fully operational again.
Recalculating your database quota may take up to 15 minutes. Refresh the page in your web browser if the recalculated quota does not appear after that time.
2 - Web Cloud Databases
If you are using the Web Cloud Databases solution included with your web hosting plan Performance, and you want to change your web hosting plan to a Pro solution, you will need to detach the Web Cloud Databases solution from your web hosting plan.
To do this, click on the tabs below to view each of the 2 steps.
Go to the Hosting plans page, then select the web hosting plan concerned.
In the Configuration box, click the ... button to the right of the Web Cloud Databases heading, then Detach.
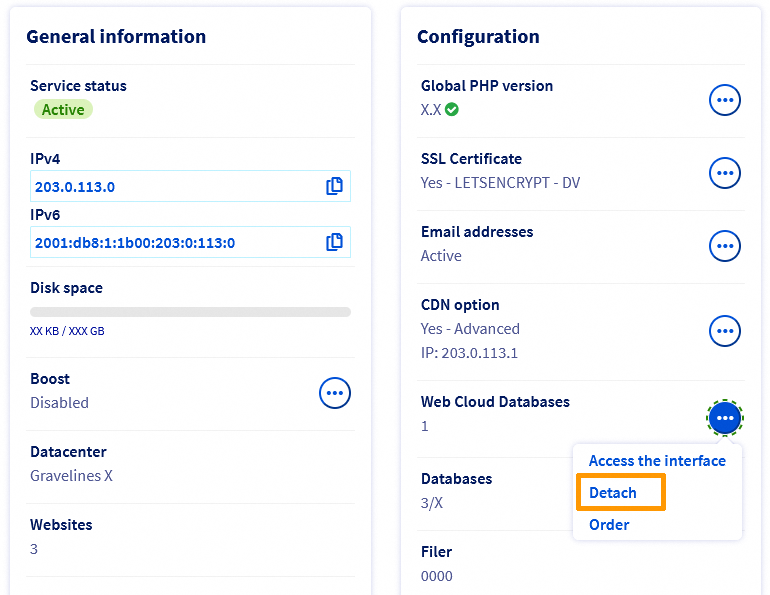
With this action, you can order a Web Cloud Databases solution that is independent of your Performance subscription. Your server data will be stored.
If you do not want to keep this data, you can also delete your Web Cloud Databases solution before switching to the Pro solution:
- Back up your data by following the instructions in this guide.
- Delete your Web Cloud Databases server via your OVHcloud Control Panel. To do this, click on the tabs below to view each of the 2 steps.
Go to the My services page.
Click the ... button to the right of the line for the Web Cloud Databases/Private SQL solution concerned, then Delete my Private SQL hosting plan.
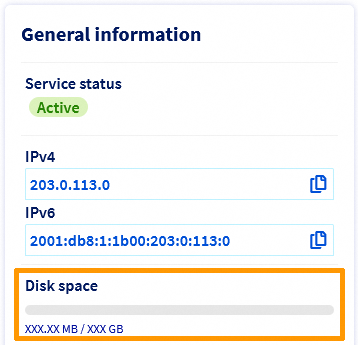
3 - FTP storage space
Make sure that the new solution offers enough FTP storage space for you to be able to import files from your current hosting plan.
To check the FTP storage space quota used on your web hosting plan, click on the tabs below to view each of the 2 steps.
Go to the Hosting plans page, then select the web hosting plan concerned.
You can find the storage space utilization of your hosting in the General information box, under Disk space.
4 - Email accounts
Check that your new solution has a sufficient number of available email accounts. Otherwise, delete any unused email accounts after you have saved their content, if necessary.
If you would like to keep the same number of mailboxes and before downgrading your web hosting plan to a lower plan, you can also order a new MX Plan email solution. To do this, click on the tabs below to view each of the 2 steps.
Go to the MX Plan page, then select the domain concerned.
In the Subscription box, to the right of Solution, click the ... button, then Change plan.

If the plan change is unavailable on your email solution, it is linked to a web hosting plan.
You can unlink the email solution from your web hosting plan. To do this, click on the tabs below to view each of the 2 steps.
Go to the Hosting plans page, then select the web hosting plan concerned.
In the Configuration box, click the ... button to the right of Email addresses, then Detach my email option.
5 - Mailing lists
The Mailing lists feature is optional on Personal hosting plans.
To upgrade your web hosting plan to a Personal plan, you will first need to delete the mailing lists, or order an email solution that includes this feature (MX Plan 100 or MX Plan Full) from your OVHcloud Control Panel. To do this, click on the tabs below to view each of the 2 steps.
Go to the MX Plan page, then select the domain concerned.
In the Subscription box, to the right of Solution, click the ... button, then Change plan.
If the plan change is unavailable on your email solution, it is linked to a web hosting plan.
You can unlink the email solution from your web hosting plan. To do this, click on the tabs below to view each of the 2 steps.
Go to the Hosting plans page, then select the web hosting plan concerned.
In the Configuration box, click the ... button to the right of Email addresses, then Detach my email option.
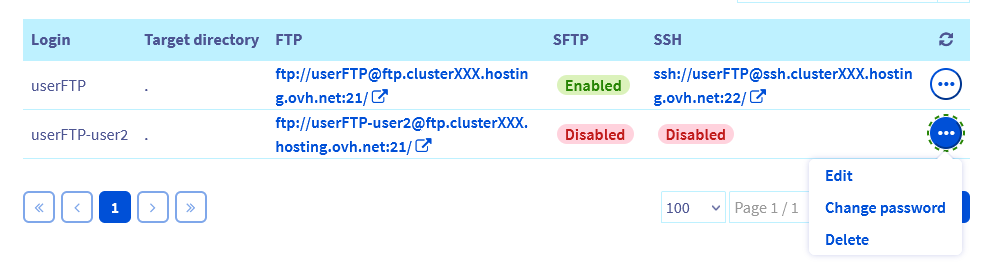
6 - FTP users
Make sure that the new plan offers enough FTP users.
You can view the number of FTP users in your OVHcloud Control Panel. To check this, click on the tabs below to view each of the 3 steps.
Go to the Hosting plans page, then select the web hosting plan concerned.
On the page that opens, click on the FTP - SSH tab. At the bottom of the page, a table lists all the FTP users created for your web hosting plan.
To delete FTP users, click the ... button to the right of the FTP user concerned, then Delete.
Finalisation
Once these 6 points have been verified, you can complete your solution change.
Special cases
You have a free 100M hosting plan
If you are changing your plan from a 100M free hosting plan, only the Personal plan will be available. However, after changing to the Personal plan, you can upgrade it to all of our web hosting plans.
Follow these instructions to change your solution.
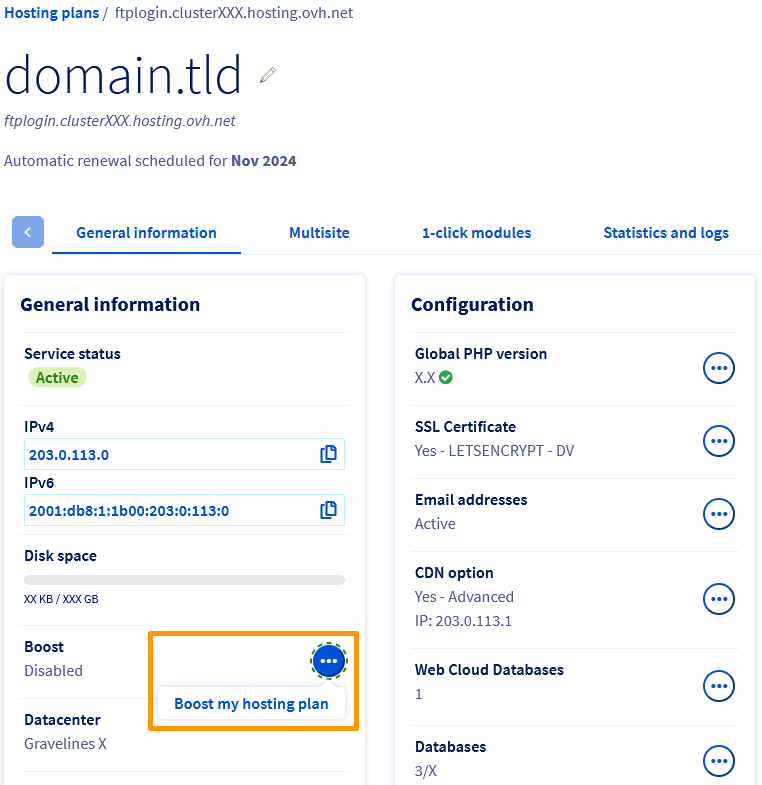
Temporarily boost your Performance hosting
With the Boost option, available on our Performance plans, you can temporarily increase your web hosting plan’s CPU and RAM resources to absorb a one-off increase in traffic. If this increase continues over time, you can also switch to the higher-level Performance plan so that you have these resources permanently.
When you choose to enable the Boost option, it will remain active and billed until you disable it.
If the Boost option is right for you, please find instructions below on how to enable or disable this option on your web hosting plan.
To enable the Boost option, click on the tabs below to view each of the 2 steps.
Go to the Hosting plans page, then select the web hosting plan concerned.
In the General information box on the page that opens, click the ... button to the right of Boost, then Boost my hosting plan.
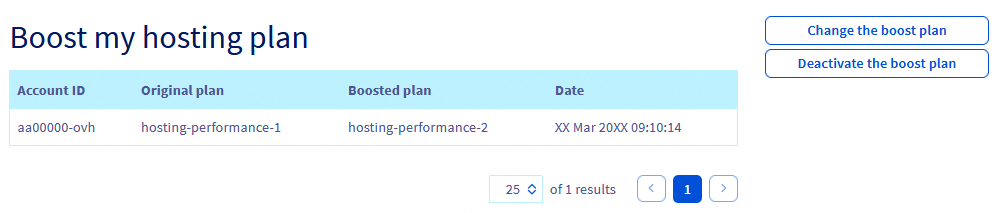
To disable the Boost option, click on the tabs below to view each of the 3 steps.
Go to the Hosting plans page, then select the web hosting plan concerned.
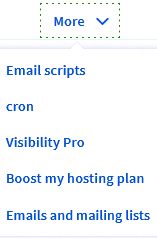
On the page that pops up, click on the More tab, then click Boost my hosting plan.
The usage table for the Boost option will appear. Click Disable boost plan.
Billing when you change plans
Case 1: When you upgrade your plan to a higher plan, a pro rata calculation will be applied until the next renewal date for this initial subscription. This calculation is the price difference between your original plan and your new plan.
Example:
You subscribed to a Personal subscription on 1 January 2024.
On October 31, 2024, you upgrade this Personal plan to the Pro plan.
Therefore, the amount corresponding to the remaining duration on the Personal subscription (2 months, from 01 November 2024 to 01 January 2025) is automatically deducted from the cost of the new Pro subscription, until 01 January 2025. You will only pay the difference.
From 01 January 2025, the Pro subscription will then be billed at its current price.
Follow these instructions to change your solution.
Case 2: When you downgrade your original plan, the remaining subscription time for the original plan is permanently lost. No refund will be made for this remaining time, even if the subscription has several months left. As a result, you will need to pay the full price for your new plan at the time of the downgrade.
Example:
You subscribed to a Pro subscription on 1 January 2024.
On October 31, 2024, you downgrade this Pro plan to the Personal plan.
As a result, the amount corresponding to the remaining duration on the Pro subscription (2 months, from 01 November 2024 to 01 January 2025) is lost. From 01 November 2024, the Personal subscription is billed at the current price (even if you had paid for the remaining 2 months of the Pro offer).
Follow these instructions to change your solution.
Go further
Accessing a website’s logs and statistics on a web hosting
Optimising your website’s performance
For specialised services (SEO, development, etc.), contact OVHcloud partners.
If you would like assistance using and configuring your OVHcloud solutions, please refer to our support offers.
Join our community of users.

