How to create an SMS recipient list
553 Views
Objective
To send an SMS campaign to multiple contacts, you can import one or more recipient lists into your OVHcloud Control Panel.
Find out how to create a list of SMS recipients via a spreadsheet or text editor, and import it into the OVHcloud Control Panel.
Requirements
- an active OVHcloud SMS account
- a spreadsheet or text editor tool
OVHcloud Control Panel Access
- Direct link: SMS
- Navigation path:
Telecom>SMS> Select your SMS account
Instructions
Step 1: Creating your recipient list
Creating your list via a spreadsheet
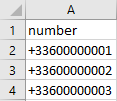
You can create a recipient list via a spreadsheet, or use a list that already exists. This list must be in .csv format, and have the layout below in a spreadsheet:
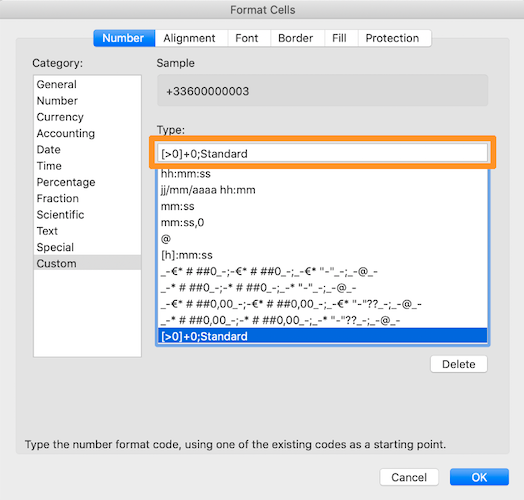
To ensure that the spreadsheet does not perform any automatic calculations on your numbers, you must customise the format of your number column.
In Microsoft Excel, select your entire number column, right-click, and click Format Cells. Click Custom and enter the following value in the Type field: [>0]+0;Standard.
Under LibreOffice, select your entire number column, right-click, and click Format Cells.... Enter the following value in the Format Format code: [>0]+0;Standard

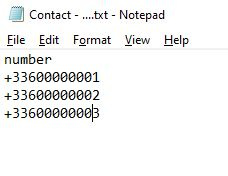
If you open a .csv file with a notepad program, it should look similar to this:
The following points are vital for your recipient list to be processed properly on the OVHcloud Control Panel:
- All of your contacts must be on the same sheet in your spreadsheet file, in a number column.
- Delete special characters (like accents) — they won't be accepted when importing the .csv file to the OVHcloud Control Panel.
- Phone numbers must be entered in international format (e.g. for a UK phone number: +44712345678).
- Save your spreadsheet file in .csv format (separator: semi-colon).
Creating your list with a text editor
An alternative method involves creating a .txt file via a text editor or notepad program.
- Enter
numberinto the first line. - Enter your phone numbers in international format (+44712345678), with one number per line.
You should end up with the result below:
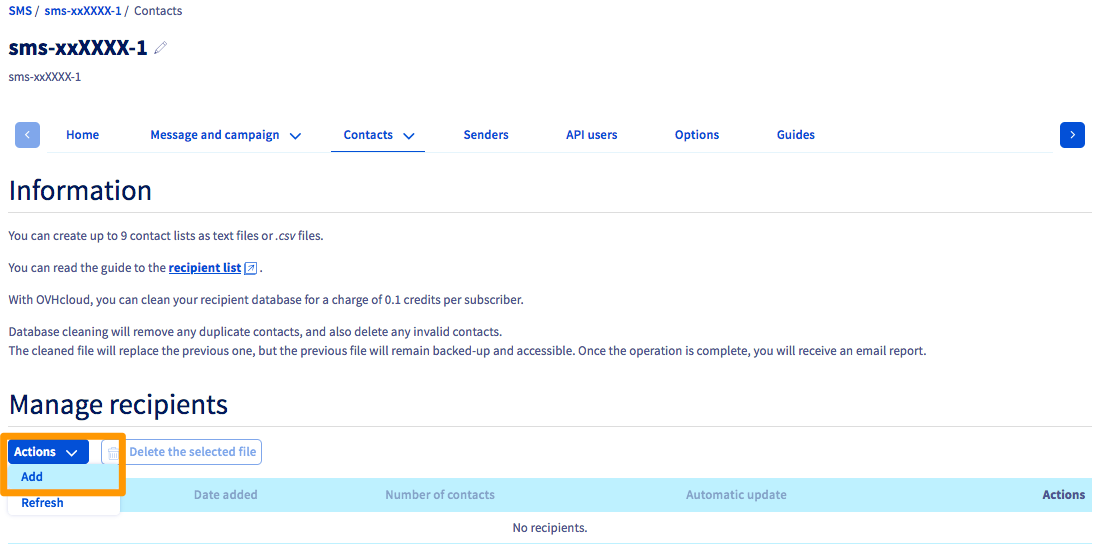
Step 2: Importing your list into the OVHcloud Control Panel
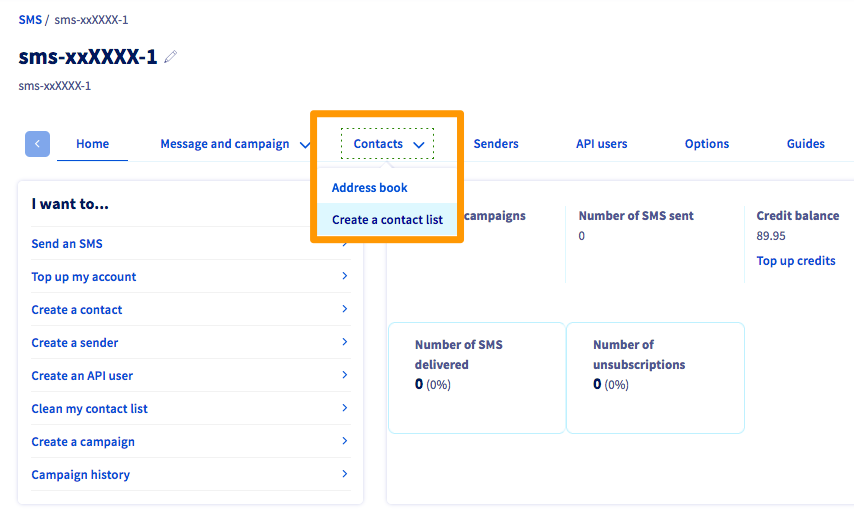
Click on the Contacts tab and Create a contact list.
You can create up to 9 contact lists.
To do this, click Actions, then Add.
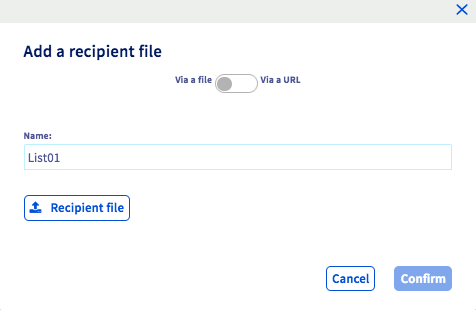
Name your recipient list, and import your local file on to the OVHcloud Control Panel.
Step 3: Sending an SMS to your recipient list
Now that your list has been imported, you can follow the instructions in our guide on Sending SMS messages via the OVHcloud Control Panel to send an SMS to the recipients of this list.
Go further
Sending SMS messages via the OVHcloud Control Panel
Join our community of users.

