Near real-time threats detection with Falco on OVHcloud Managed Kubernetes
454 Views
Objective

Falco is an Open Source cloud-native runtime security tool. It provides near real-time threat detection for cloud, container, and Kubernetes workloads by leveraging runtime insights. Falco can monitor events from various sources, including the Linux kernel, and enrich them with metadata from the Kubernetes API server, container runtime, and more.
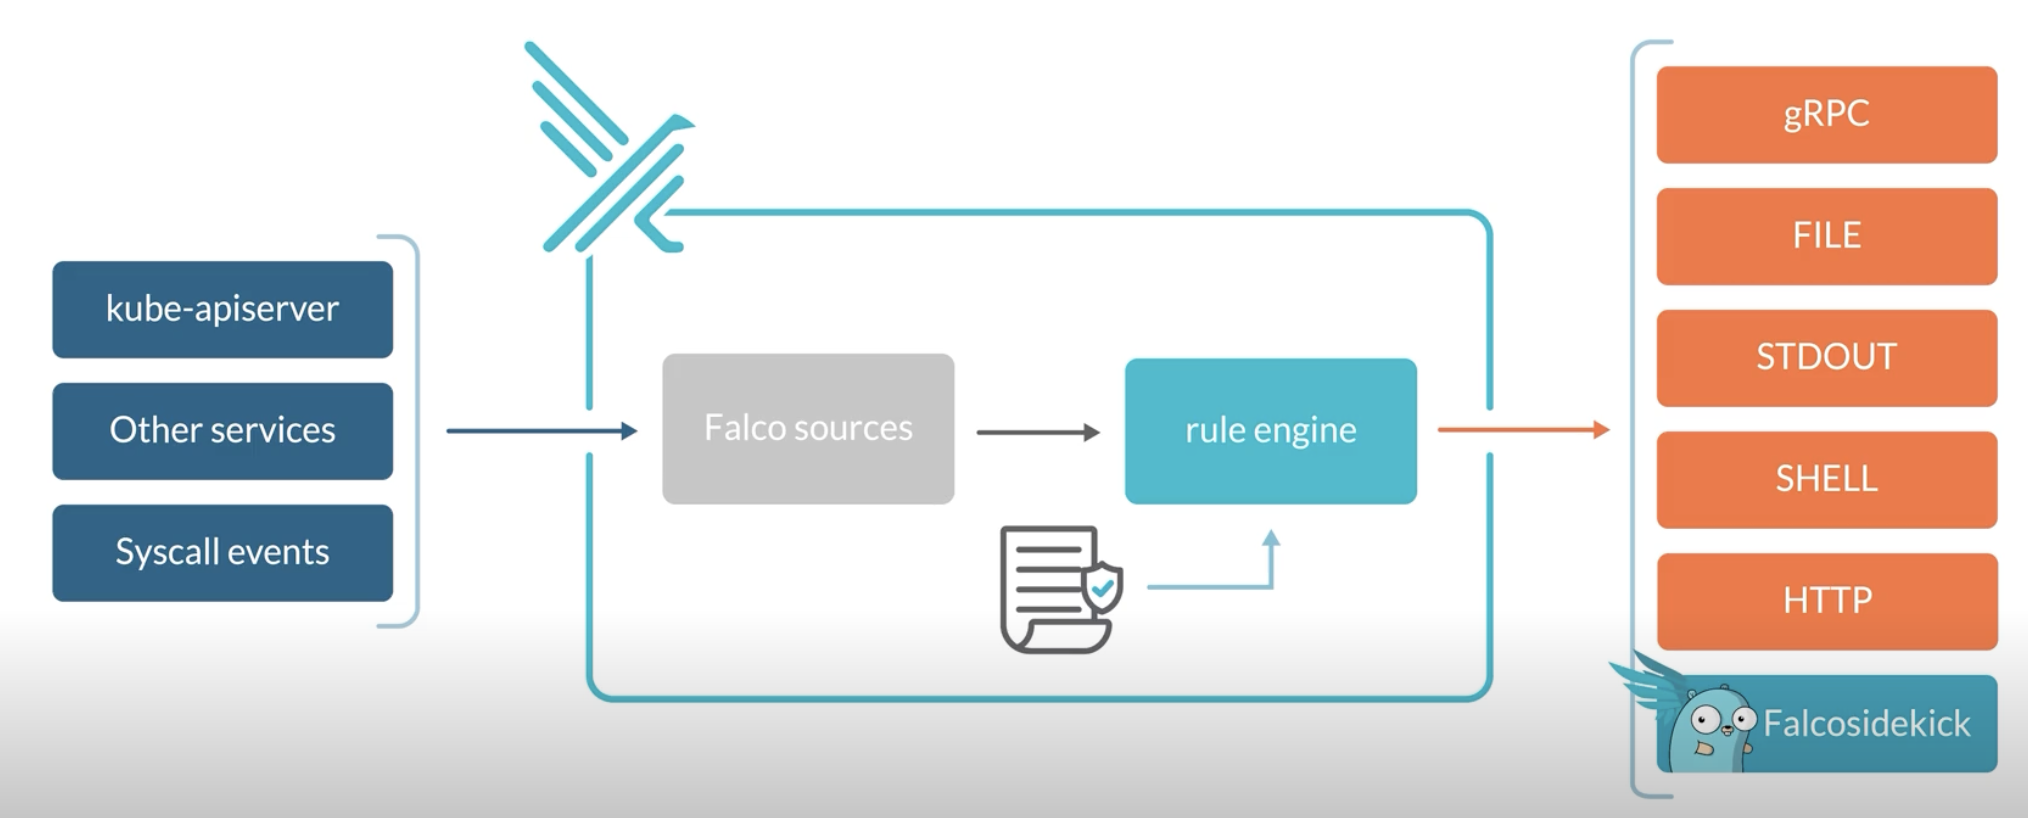
Concretely, Falco:
- Receives Events
- Compares them to a set of Rules to determine the actions to perform
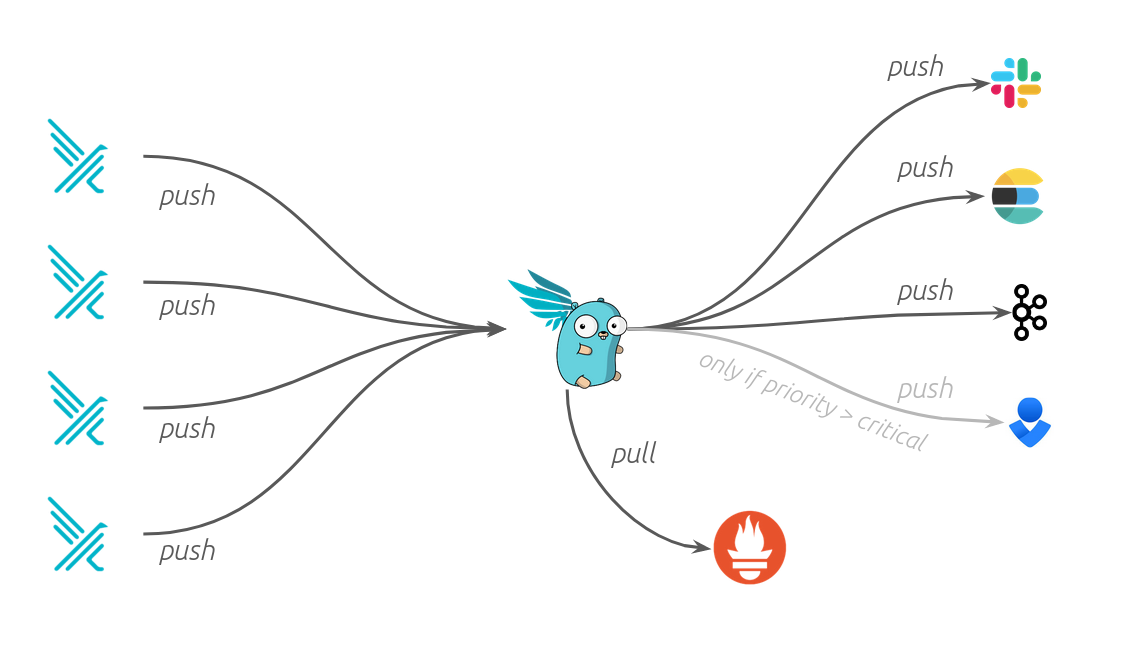
- Generates Alerts: you can forward the Falco events to different endpoints (syslog, stdout, https, graph...) or to different apps (slack, discord, elasticsearch, kafka...) through falcosidekick
At OVHcloud, we like to provide you with the best products and services. As for us security is important, we want to help you discover Falco which will help you secure your OVHcloud Managed Kubernetes with a runtime security tool.
In this guide you will:
- Install Falco & Falcosidekick
- Test the behaviour
- Visualize the events in UI
- Forward and store the events in an OVHcloud Object Storage bucket
You can use the Reset cluster function in the Public Cloud section of the OVHcloud Control Panel to reinitialize your cluster before following this tutorial.
Requirements
This tutorial presupposes that you already have a working OVHcloud Managed Kubernetes cluster, and some basic knowledge of how to operate it. If you want to know more on those topics, you can read the deploying a Hello World application documentation.
Instructions
Installing Falco
For this tutorial we are using the Falco Helm chart.
Add the Falco Helm repository:
These commands will add the Falco Helm repository to your local Helm chart repository and update the installed chart repositories:
Install the latest version of Falco with helm install command:
This command will install the latest version of Falco, with falcosidekick UI and create a new falco namespace:
As you can see, we also install Falcosidekick thanks to several flags:
--set falcosidekick.enabled=trueenables deployment of Falcosidekick aside Falco and configures Falco for sending its events to Falcosidekick--set falcosidekick.webui.enabled=trueenables deployment of Falcosidekick-UI and configures Falcosidekick for using it as output--set falcosidekick.webui.service.type=LoadBalancerallows to access the UI through an OVHcloud Load Balancer (and an external IP)
Don't forget to change the login and the password in the helm install command, and specifically in the --set falcosidekick.webui.user parameter, so you can access the UI.
The Falco Helm chart installs a DaemonSet to add Falco Pods to all Nodes in the Kubernetes cluster to monitor abnormal behaviour:
You can check if the Falco and falcosidekick pods are correctly running:
Wait and execute the command again if the pods are in "Init" or "ContainerCreating" state.
Once the falco pod is ready, run the following command to see the logs:
You should see logs such as the following:
The logs confirm that Falco and its rules have been loaded correctly.
Testing Falco
Even without adding new rules, Falco contains existing default rules that we can use to test the behaviour. Follow the steps below to trigger an alert if someone executes a shell into a running container.
Start an Alpine container:
Execute a shell on the running container:
Now check the Falco logs to see the alert:
You should see logs with "Notice A shell was spawned in a container with an attached terminal" message.
Using the Falcosidekick UI
Now we have Falco installed and we test it, we can see the events visually in the Falcosidekick UI.
Display the external IP:
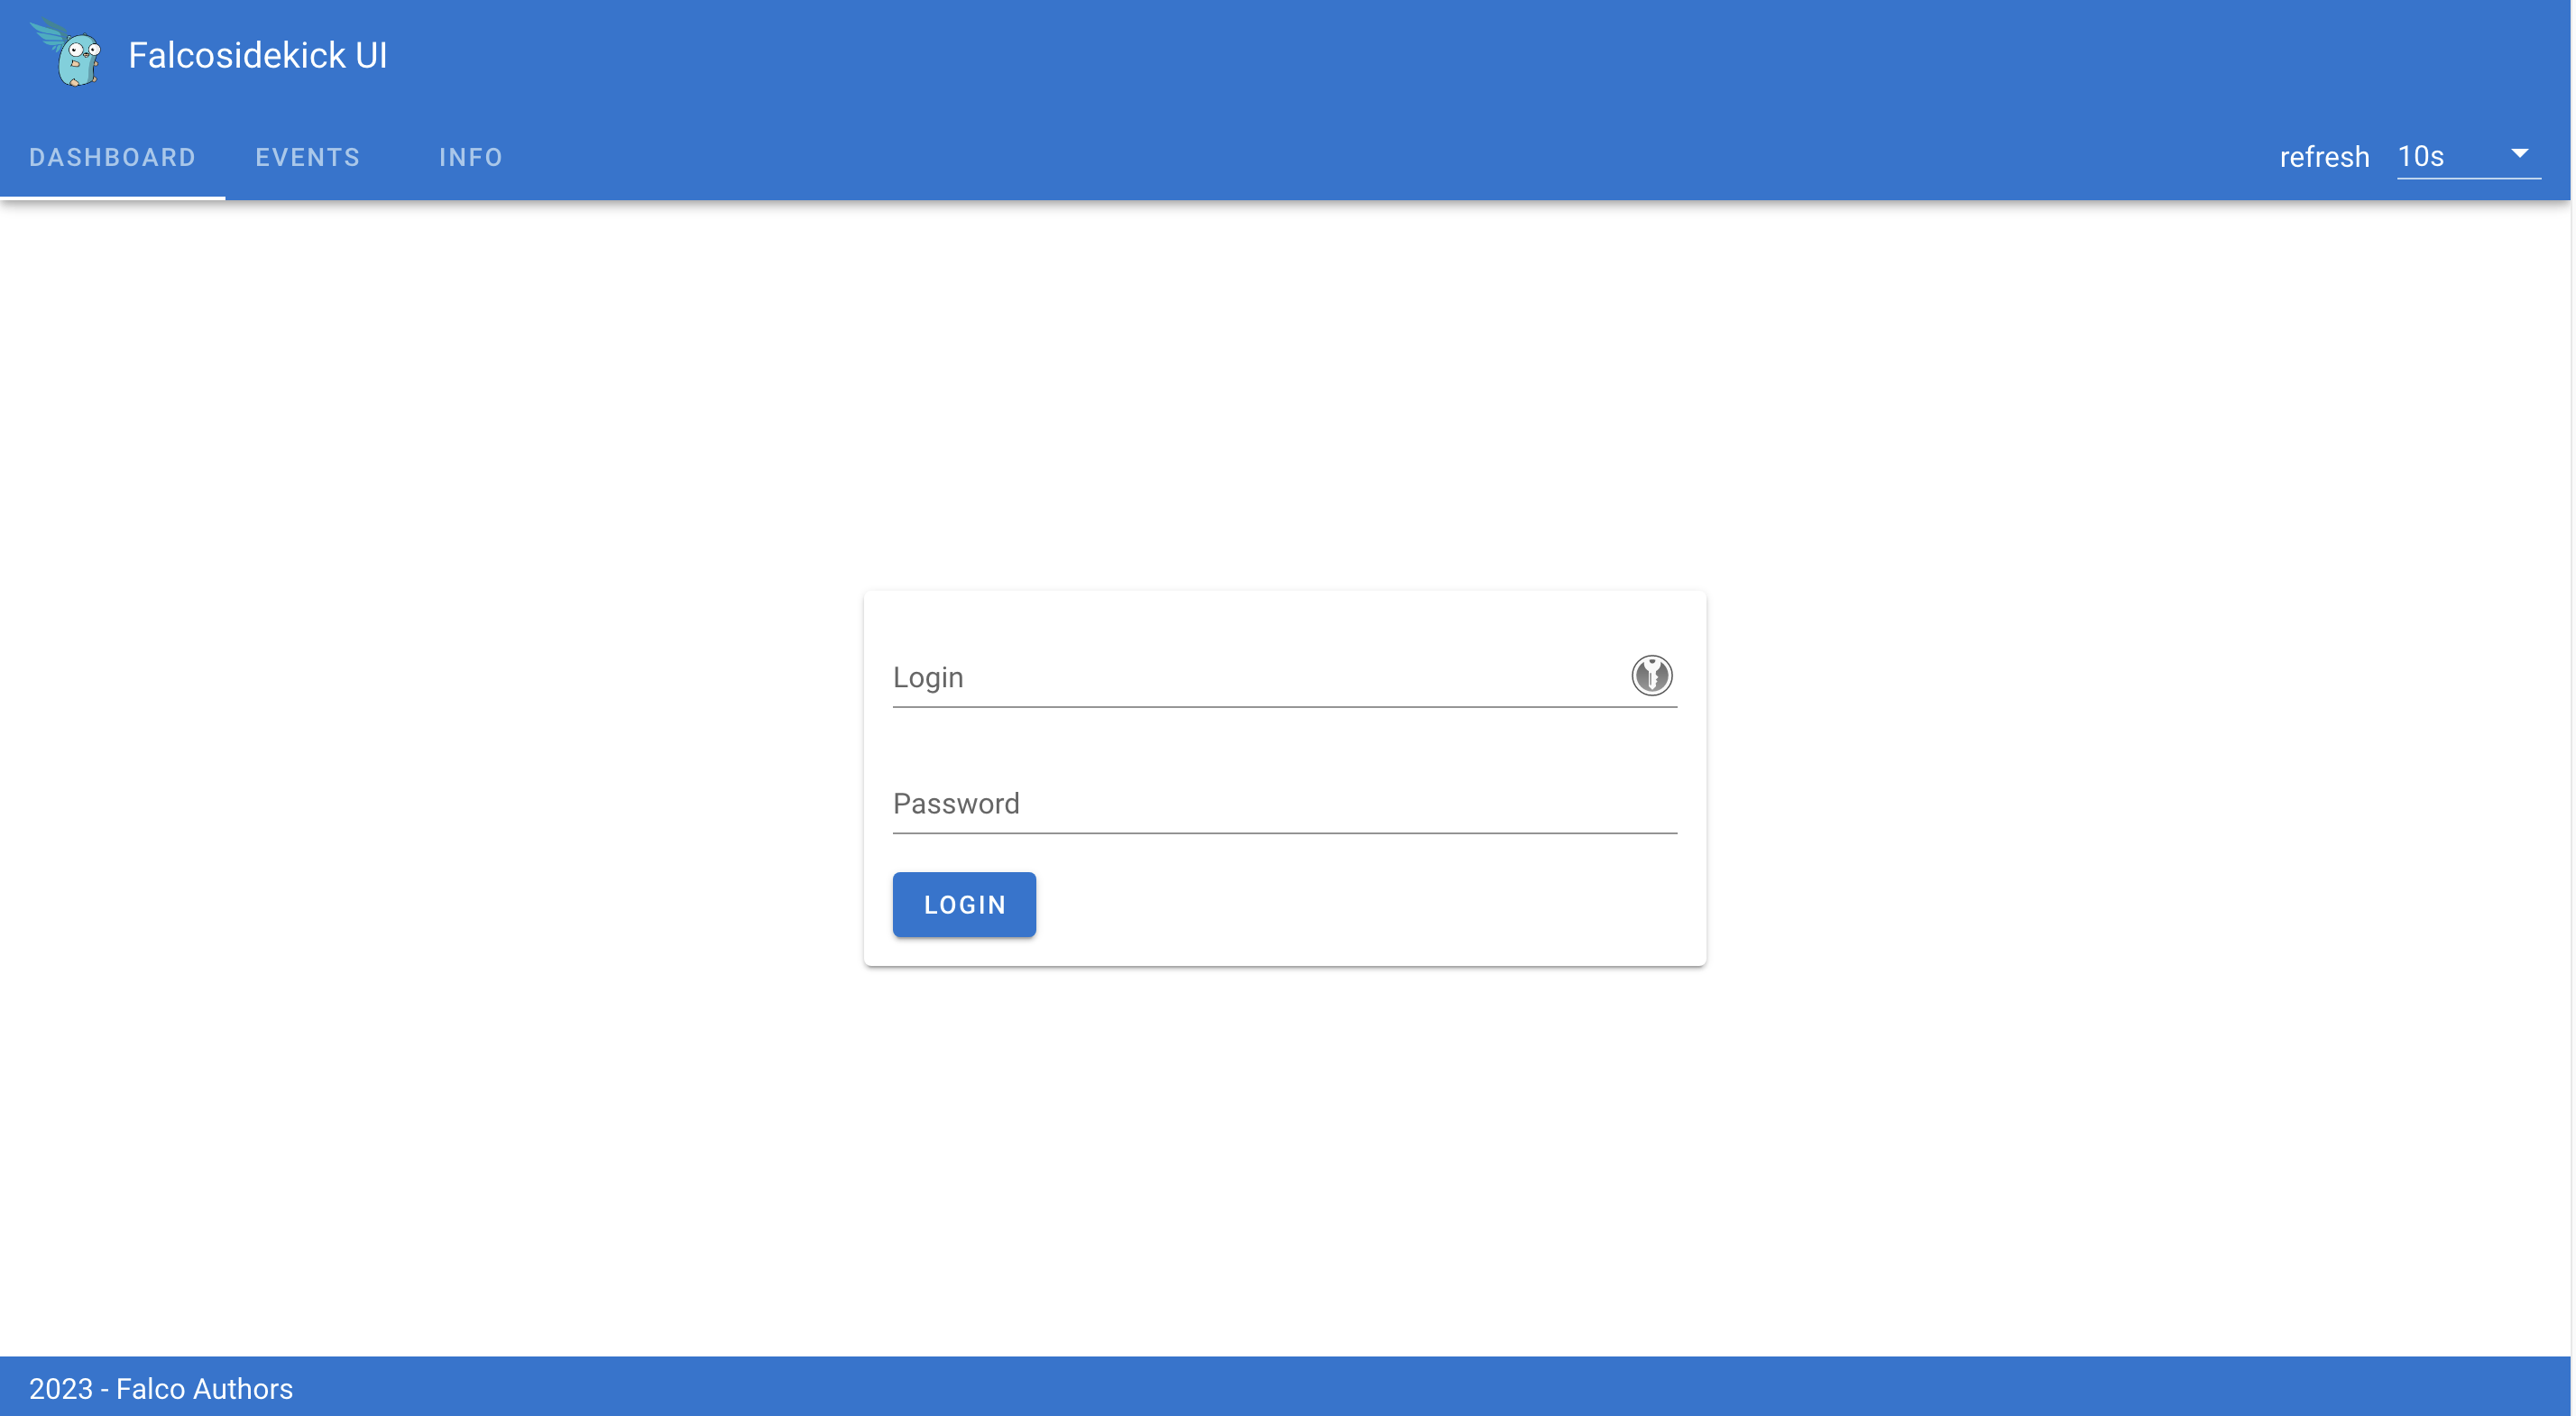
Open your browser and go to http://< EXTERNAL-IP >:2802 using the credentials below:
- Login: my-user (or the login you defined in the
helm installcommand) - Password: my-password (or the password you defined in the
helm installcommand)
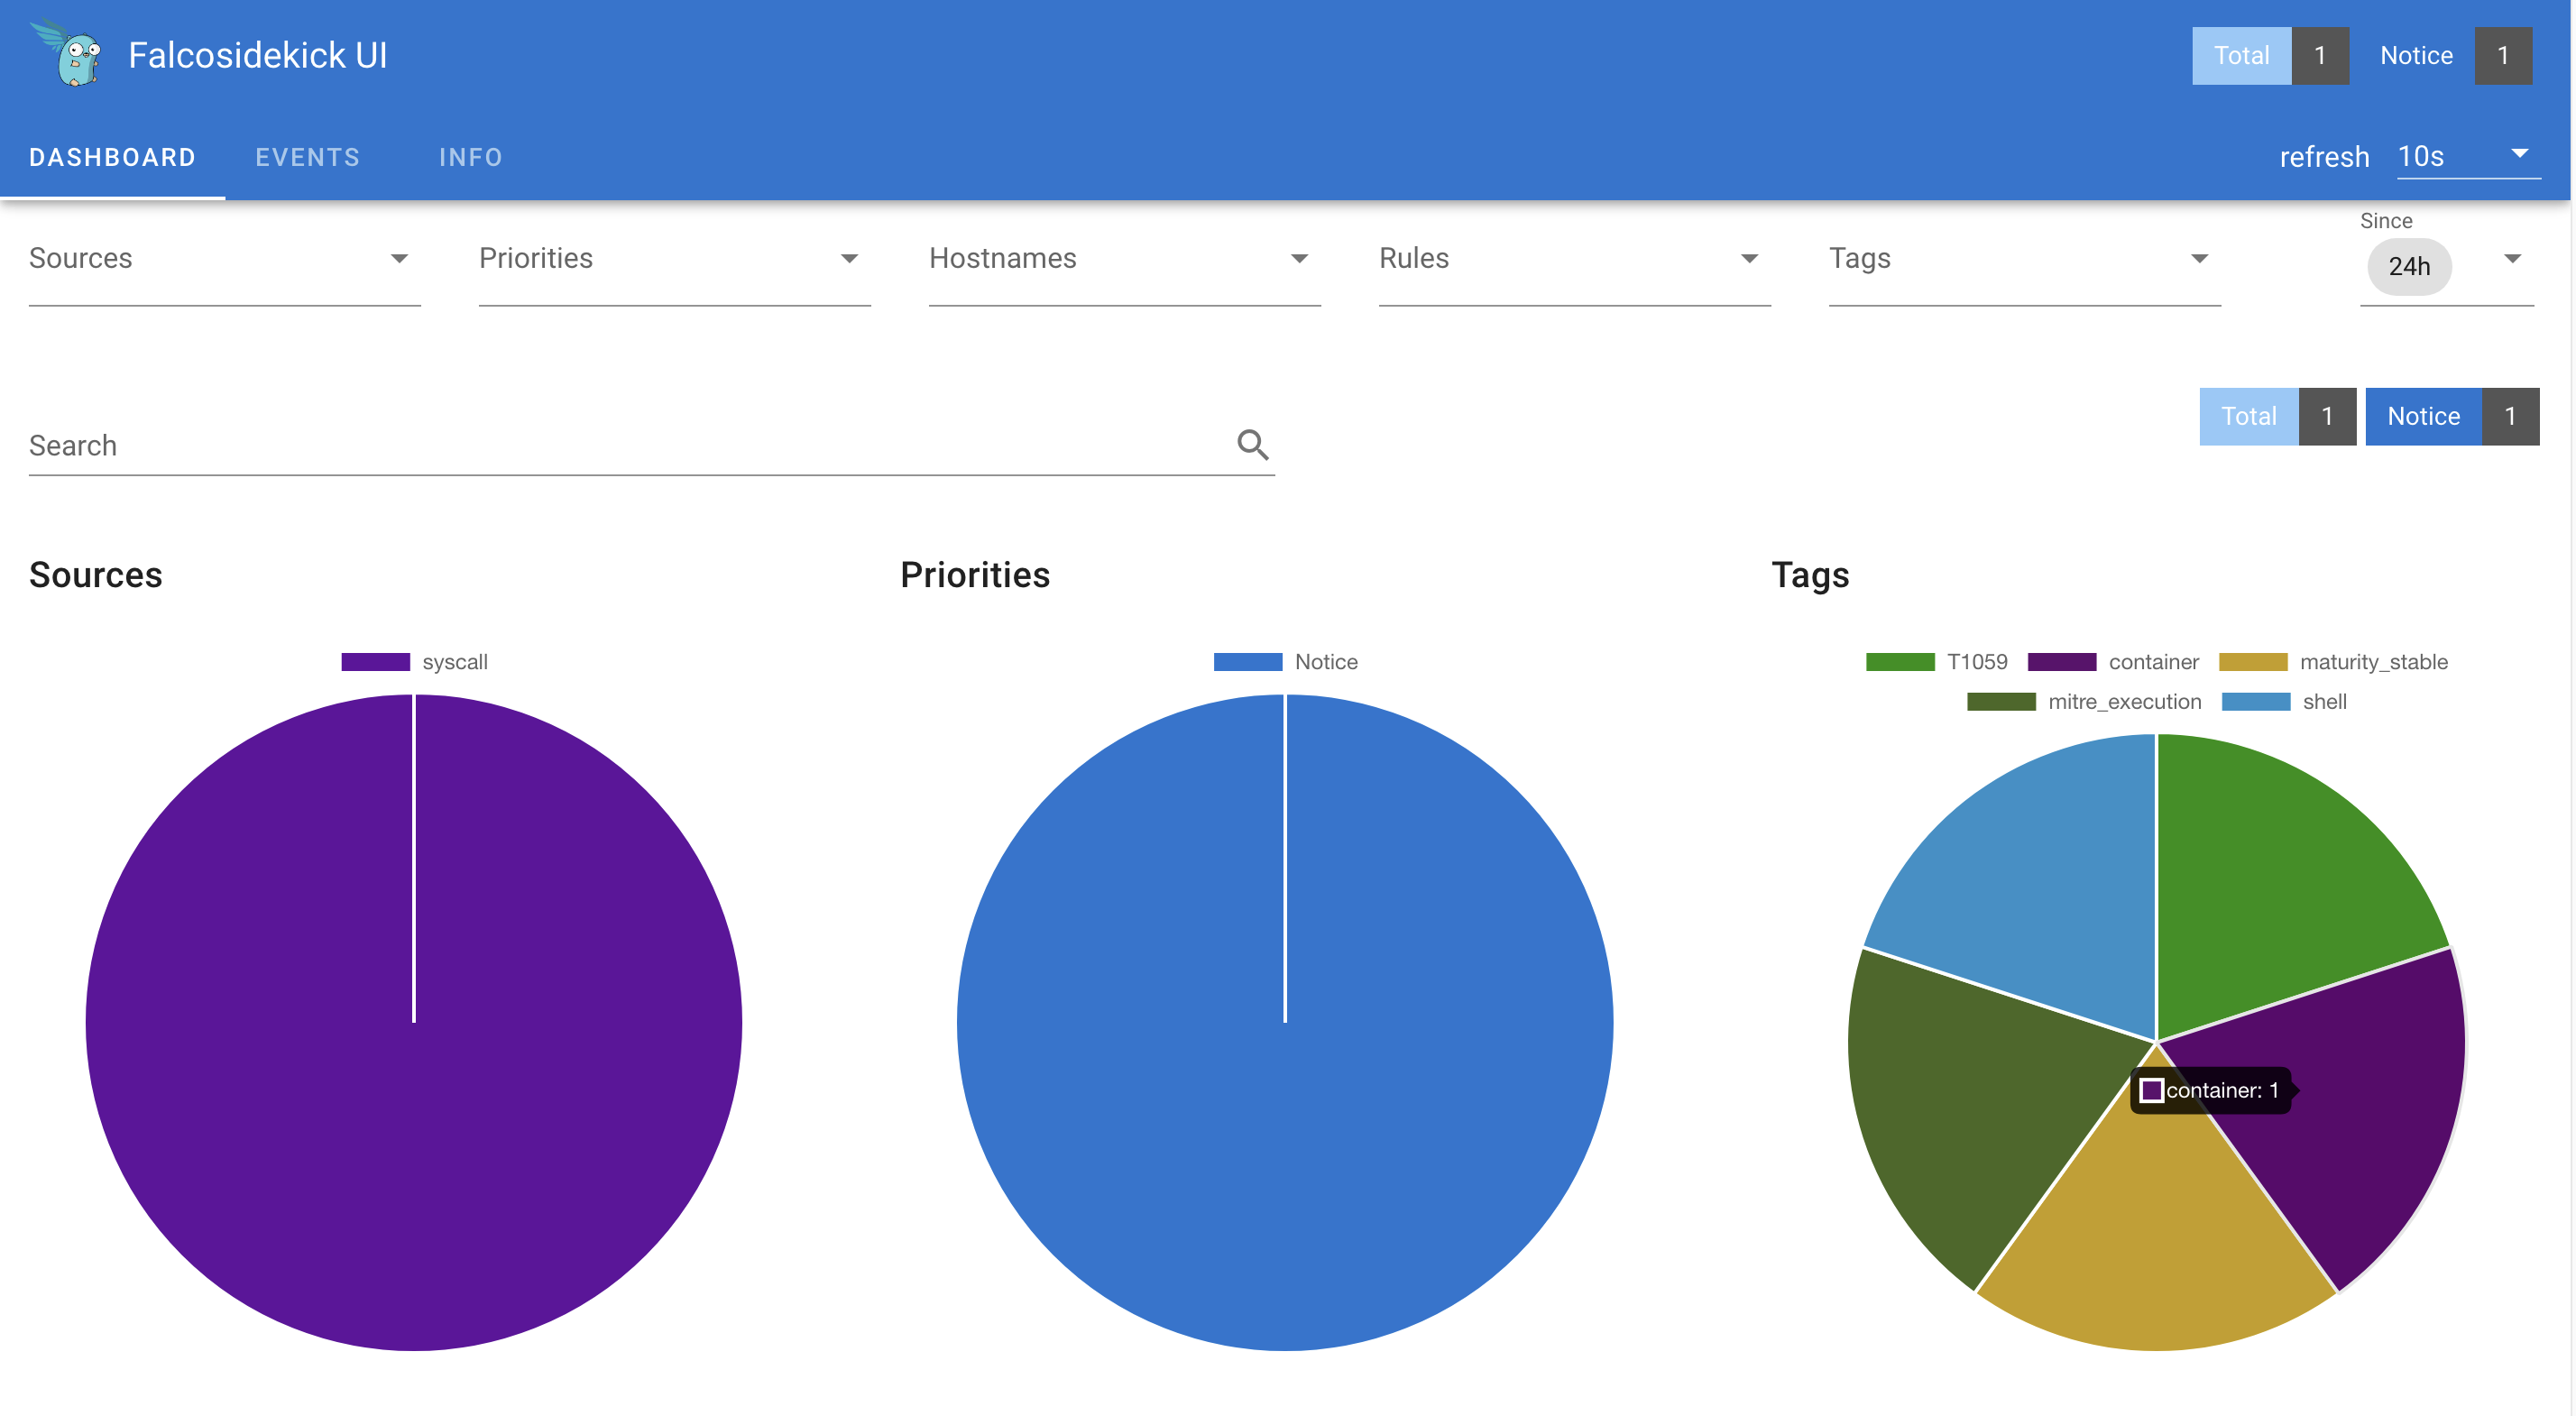
Click the "EVENTS" tab:
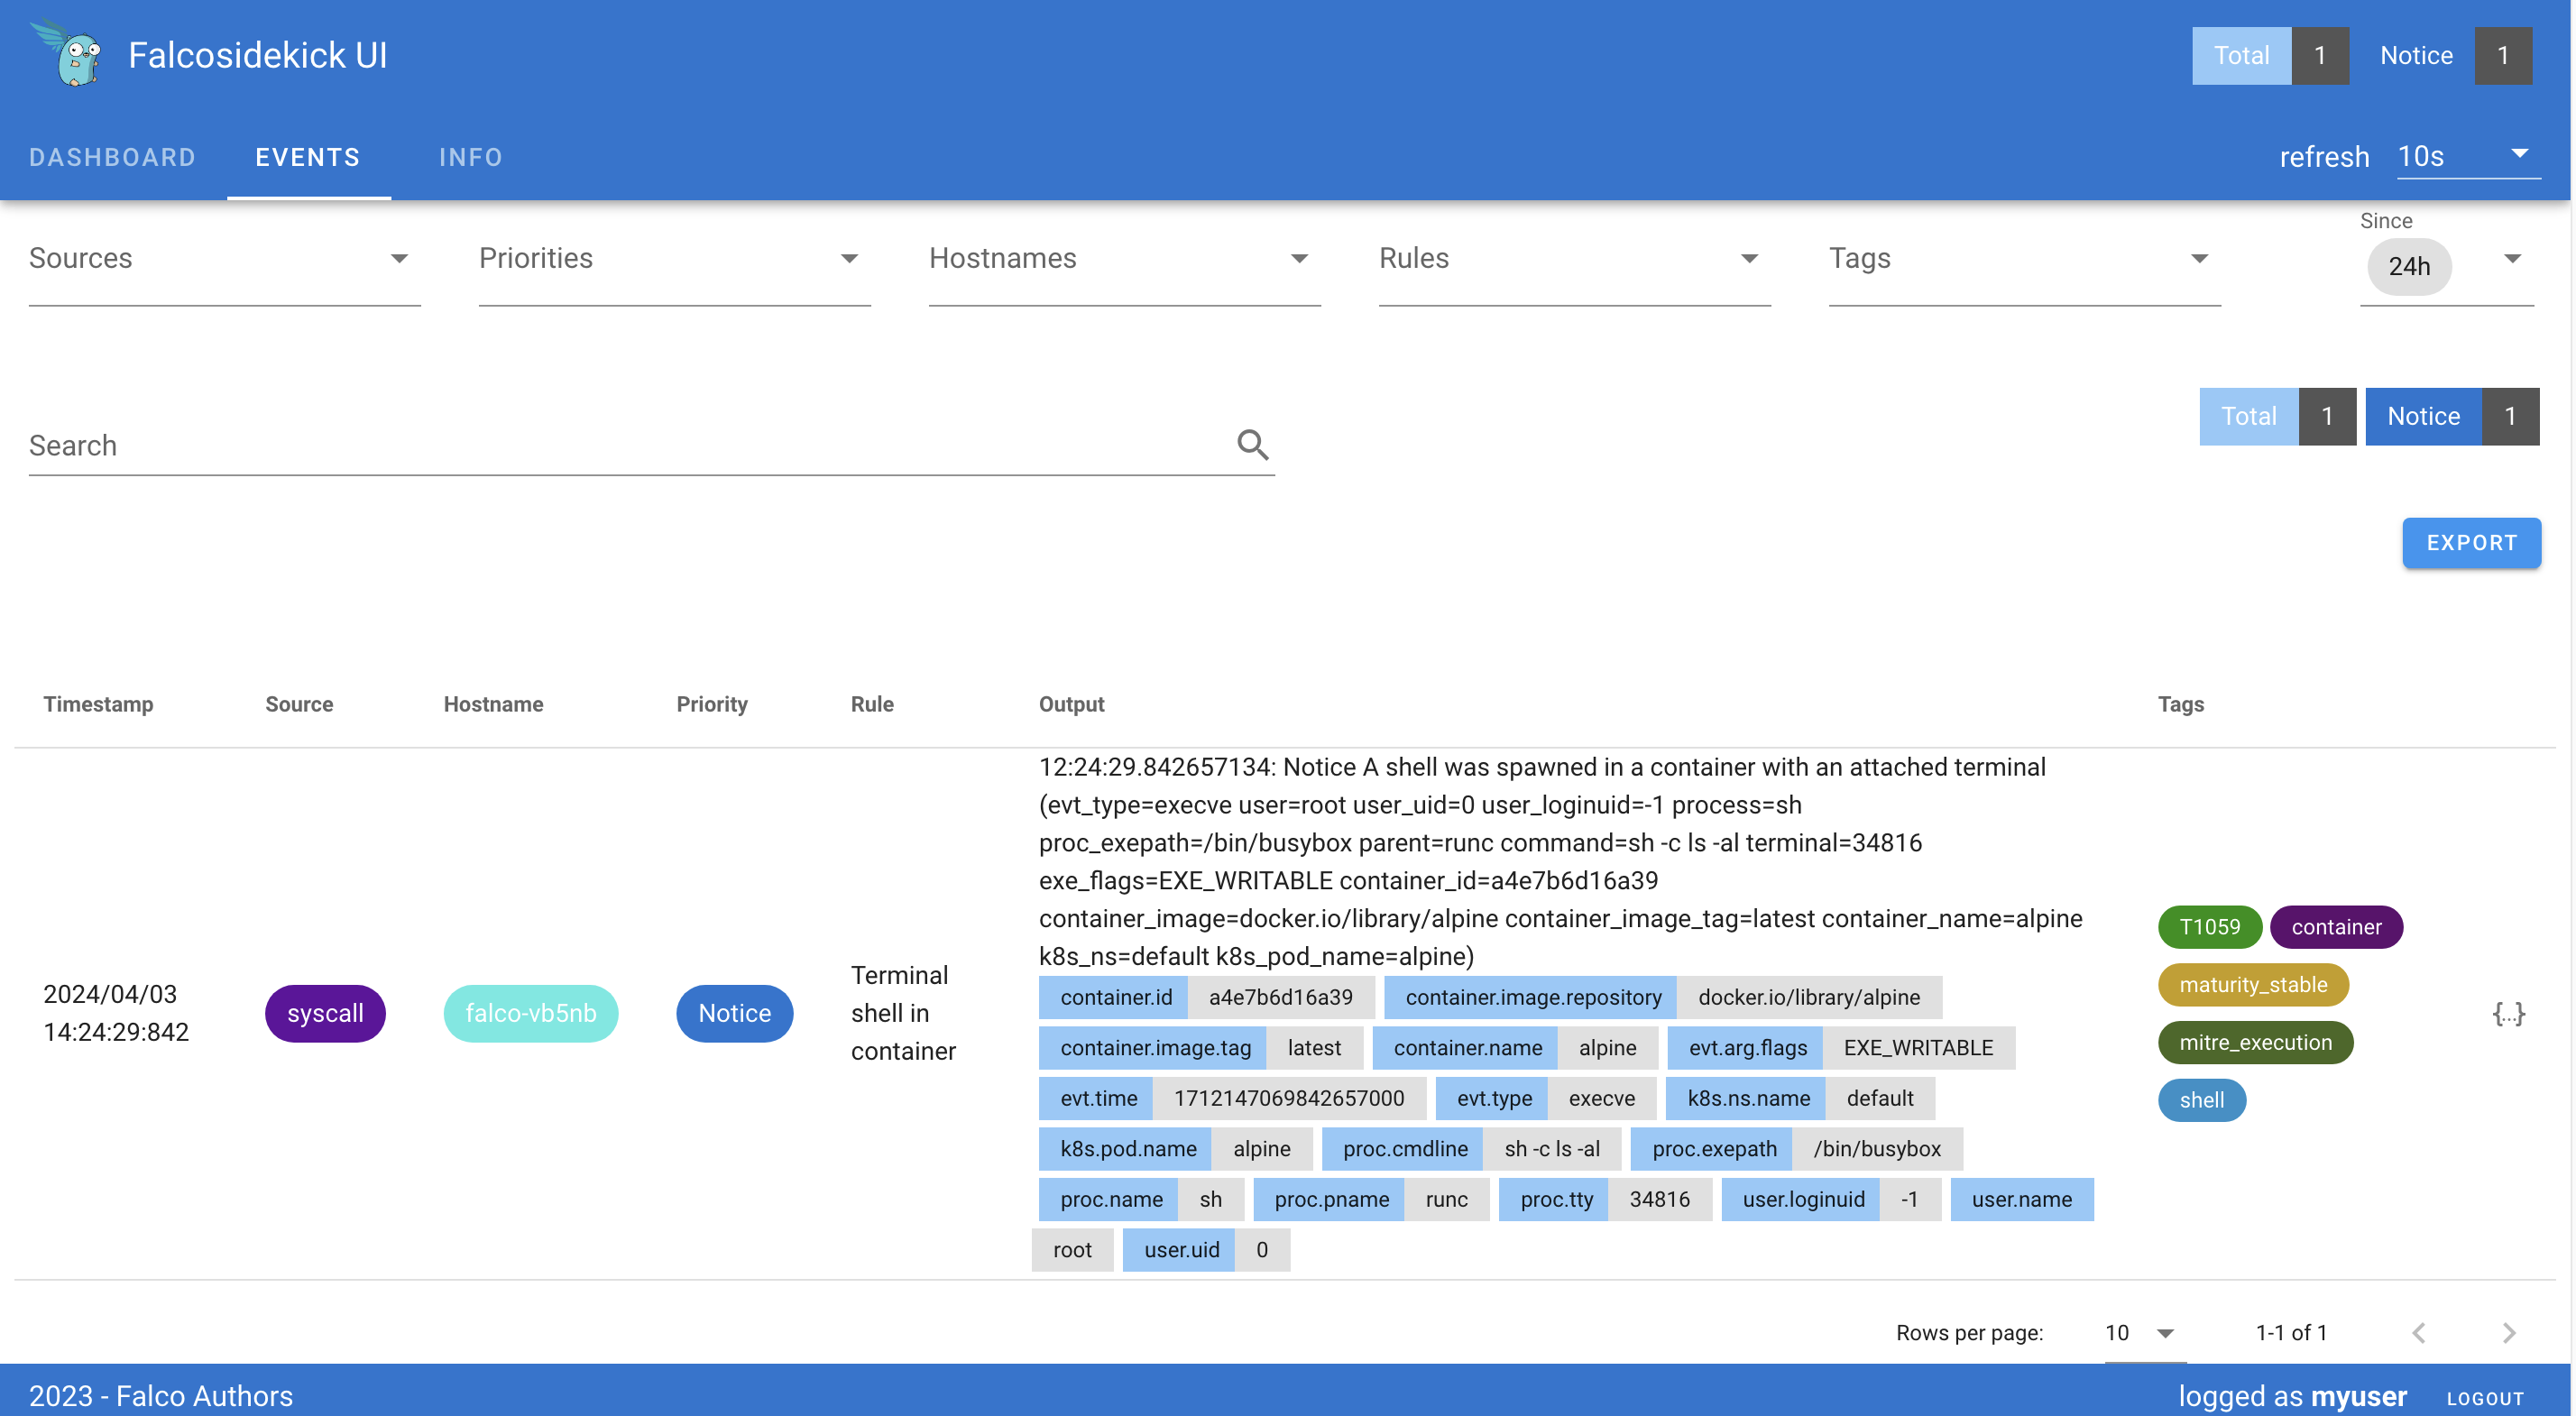
You should see the previous events generated thanks to our tests.
Archiving the events to an OVHcloud Object Storage container
You can also save/push the events to an OVHcloud Object Storage bucket (compatible with the S3 * API) to archive the outputs and be able to analyze them later if you want.
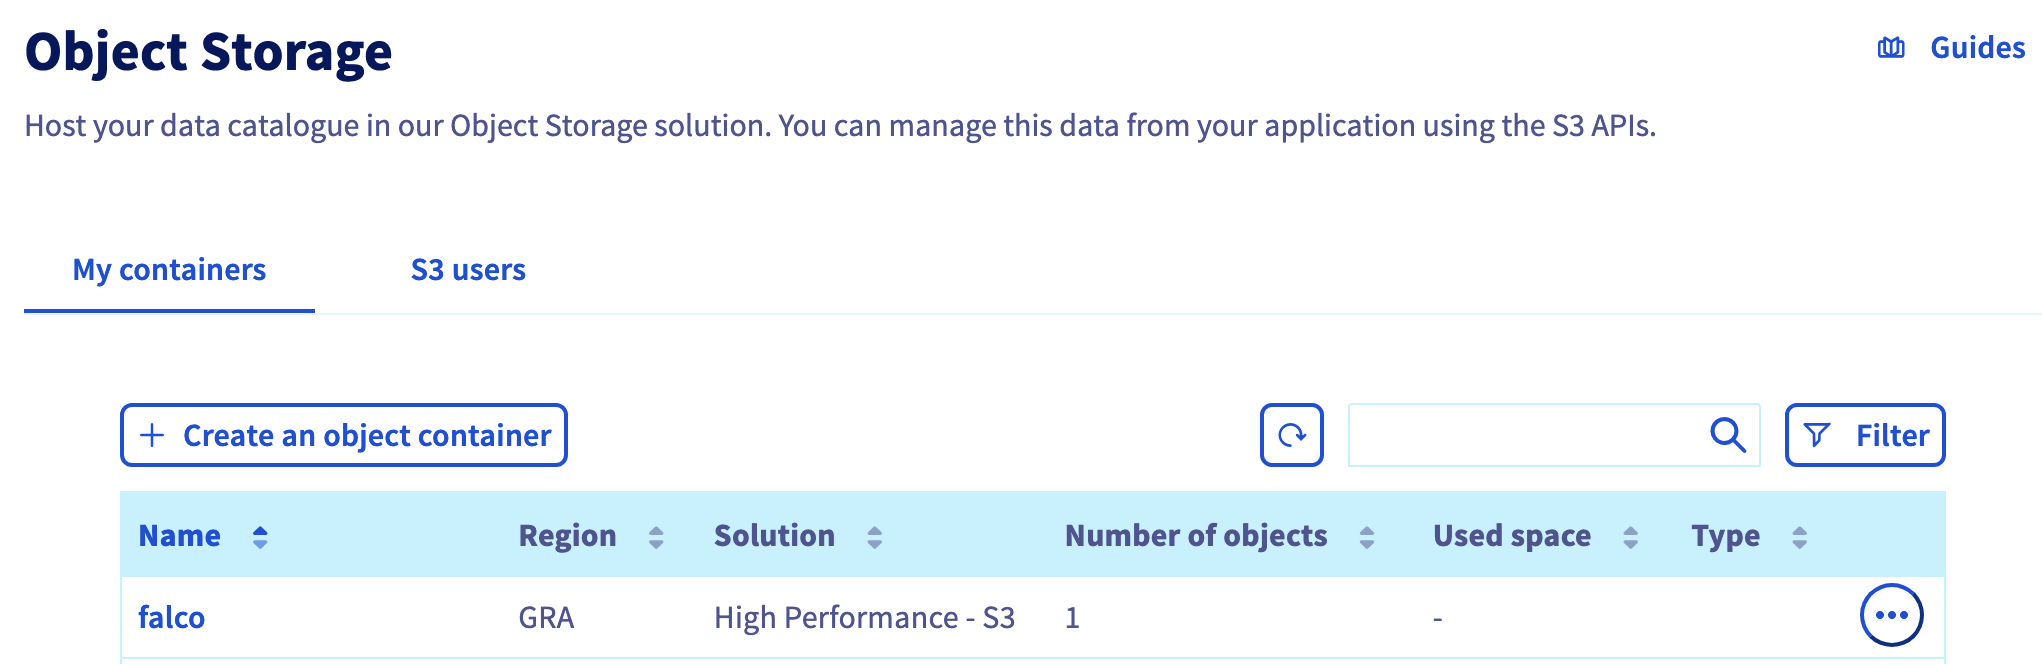
To do that, you need to have an Object Storage container. If you don't already had one, you can follow the Creating an Object Storage container guide.
For this guide, our Object Storage container is:
- a
S3 compatible Object Storage - High Performance - in
GRAregion - with a newly created user
- named
falco
Save the Object Storage credentials, you will use the Object Storage access key and the Object Storage secret key in the coming helm install command.
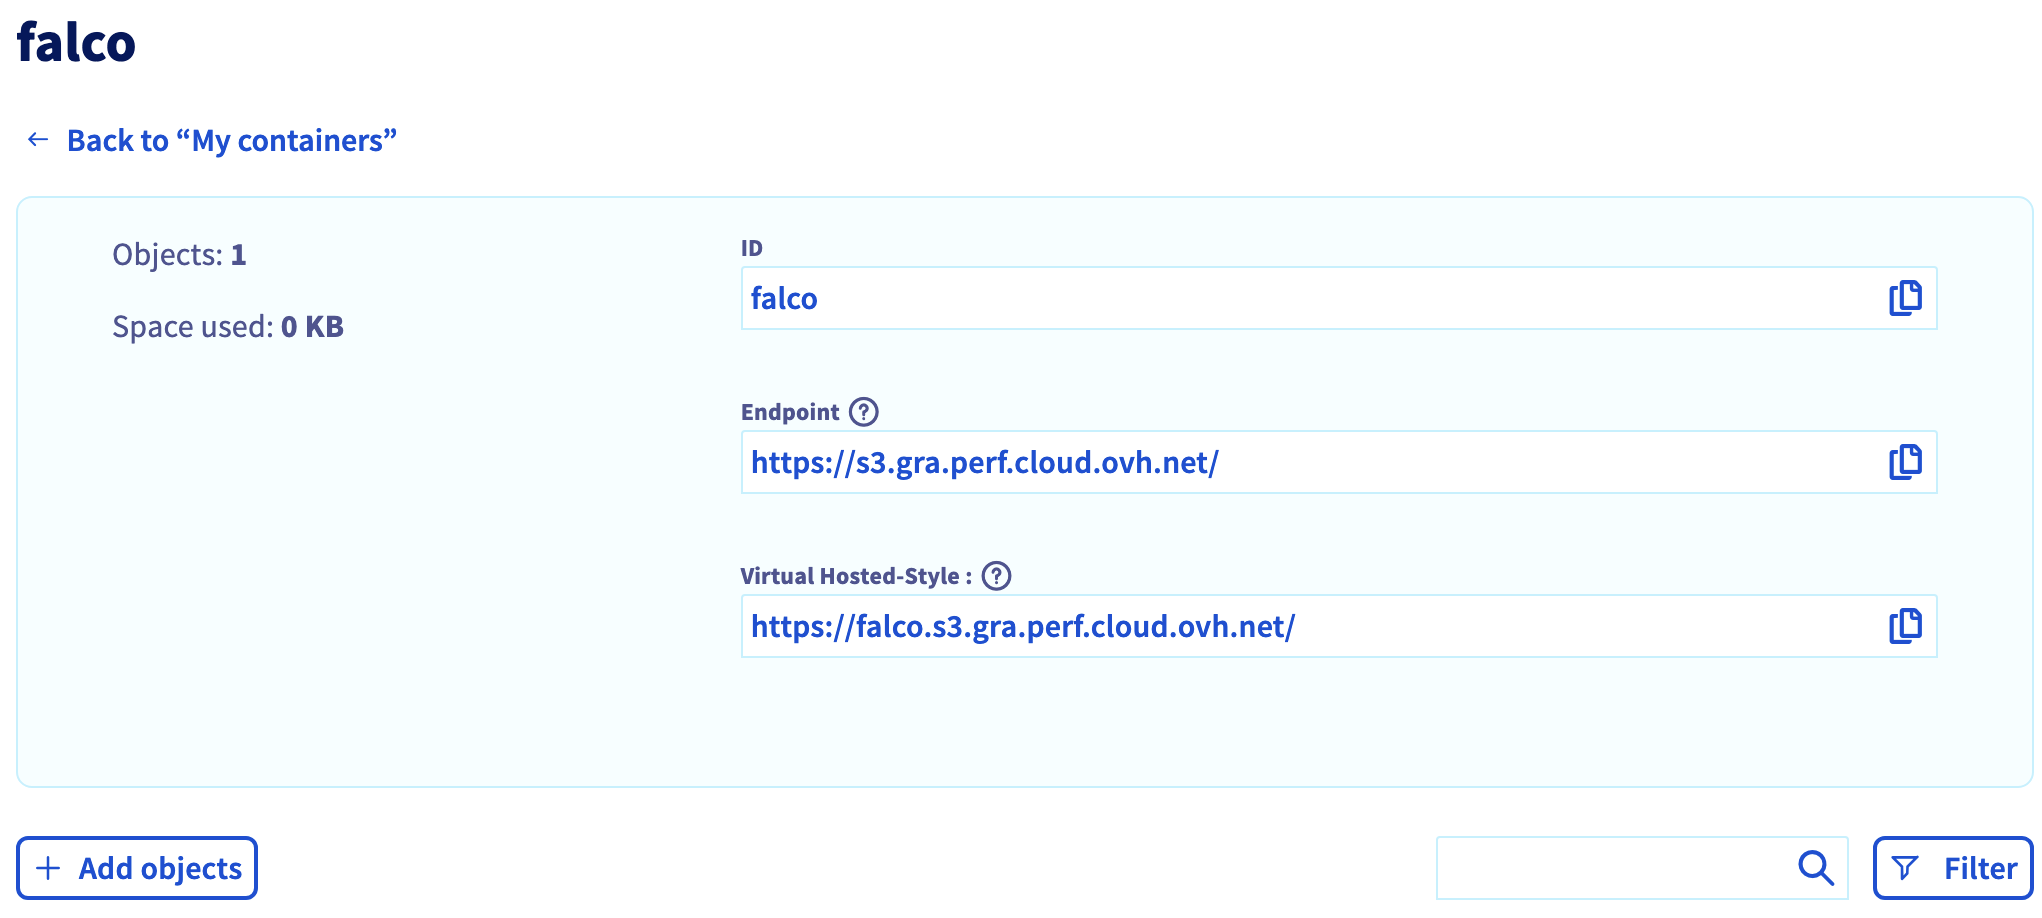
Click on the falco bucket to enter it and display its information, including the useful endpoint.
Now it's time to upgrade our Falco installation:
noglob is necessary if you are in a zsh environment. Indeed, zsh will try to interpret [] chars and noglob will skip it.
This command will upgrade your Falco installation with a new Falcosidekick source to push the outputs to our OVHcloud Object Storage bucket:
Don't forget to replace the AWSAccessKeyID and the AWSSecretAccessKey (in the helm upgrade command, and specifically in the --set falcosidekick.config.aws.accesskeyid and --set falcosidekick.config.aws.secretaccesskey parameters) with the credentials you retrieved during the OVHcloud Object Storage container creation.
Run the command that generates a Falco event that will send the output in the bucket:
Display the logs:
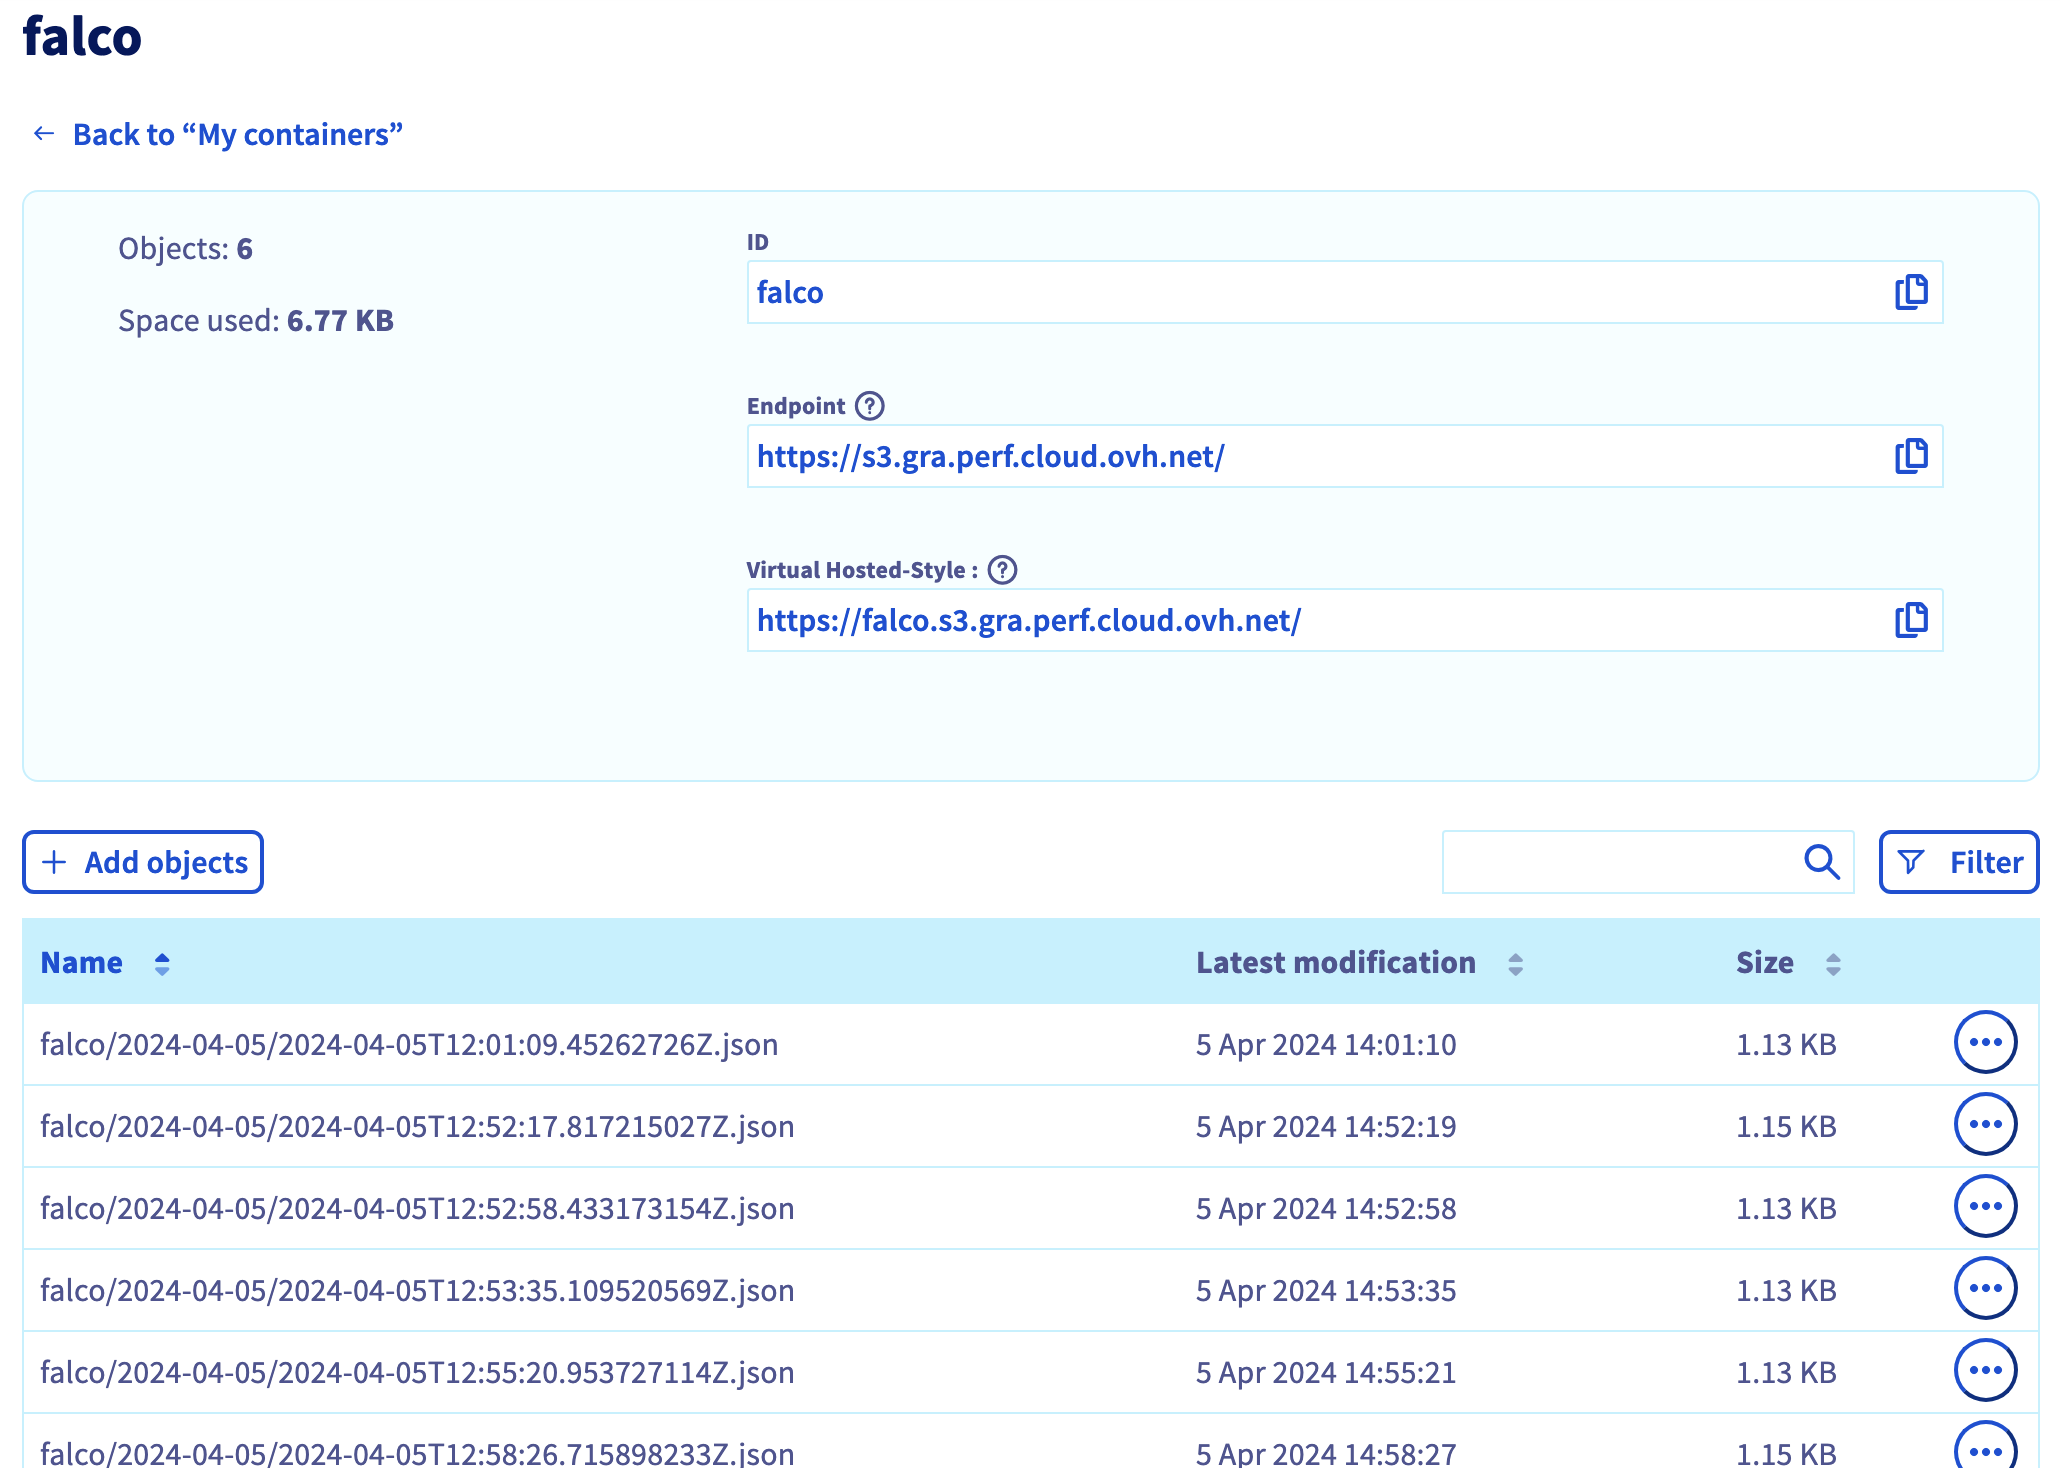
Great, the logs confirm that the events have been pushed to the UI and also to the OVHcloud Object Storage bucket.
You can check on your OVHcloud Object Storage falco container/bucket that the output has been correctly stored:
What's next?
We installed Falco & falcosidekick, discovered how to test it, visualize the events and how to forward the alerts in a bucket but we didn't see all its features. If you are interested in them, visit the Falco official website.
After receving events we can, for example, forward the alerts to other multiples apps thanks to Falcosidekick:
- Slack
- Discord
- Elasticsearch
- Amazon S3 (done)
- SMTP
- Opsgenie
- Webhook
- Prometheus
- Grafana
- Datadog
- ...
If you have any questions or troubles about Falco, visit the Falco Slack community.
Cleanup
First, delete the demo-falco pod with the following command:
To uninstall Falco, as you installed it through Helm, you can use the helm uninstall command in order to delete the Falco Helm installed chart:
Go further
- If you need training or technical assistance to implement our solutions, contact your sales representative or click on this link to get a quote and ask our Professional Services experts for assisting you on your specific use case of your project.
Join our community of users.
*: S3 is a trademark of Amazon Technologies, Inc. OVHcloud’s service is not sponsored by, endorsed by, or otherwise affiliated with Amazon Technologies, Inc.

