Setting OpenStack environment variables
2548 Views
Objective
By setting OpenStack environment variables on your desktop, you can use the OpenStack API to manage your infrastructure.
Requirements
- An OpenStack user account
- OpenStack installed on your system
OVHcloud Control Panel Access
- Direct link: Public Cloud Projects
- Navigation path:
Public Cloud> Select your project
Instructions
Step 1: Retrieve the variables
To retrieve your environment variables, you can download the OpenRC file from the OpenStack user account you have created.
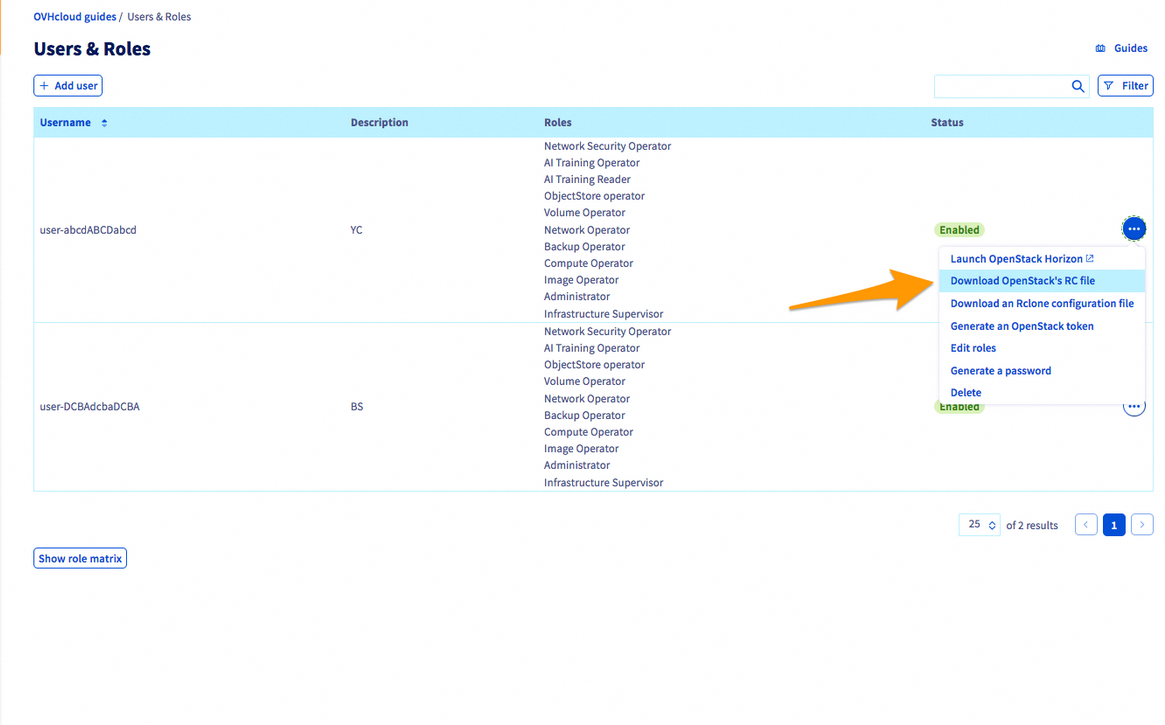
In the left-hand menu, click on Users & Roles under Settings. Next, click on the ... to the right of your user, then select Download OpenStack's RC file.
An OpenRC file corresponds to a specific user and zone. You cannot manage multiple zones in the same file.
Step 2: Set the variables
On Linux
- Open a terminal, or connect via the user who will be making the OpenStack API calls.
- Load the file’s contents in the current environment. You will then be prompted to enter the Horizon user password.
As outlined in this guide, the password is only visible once — when it is created.
If you forget your password, you will need to reset it.
If the CLIs are already installed, check if they are working properly:
On Windows
The OpenRC file is not designed to be launched on Windows.
There are two ways of setting environment variables:
- You will need to adapt the file by changing certain commands. The export part can be replaced with set:
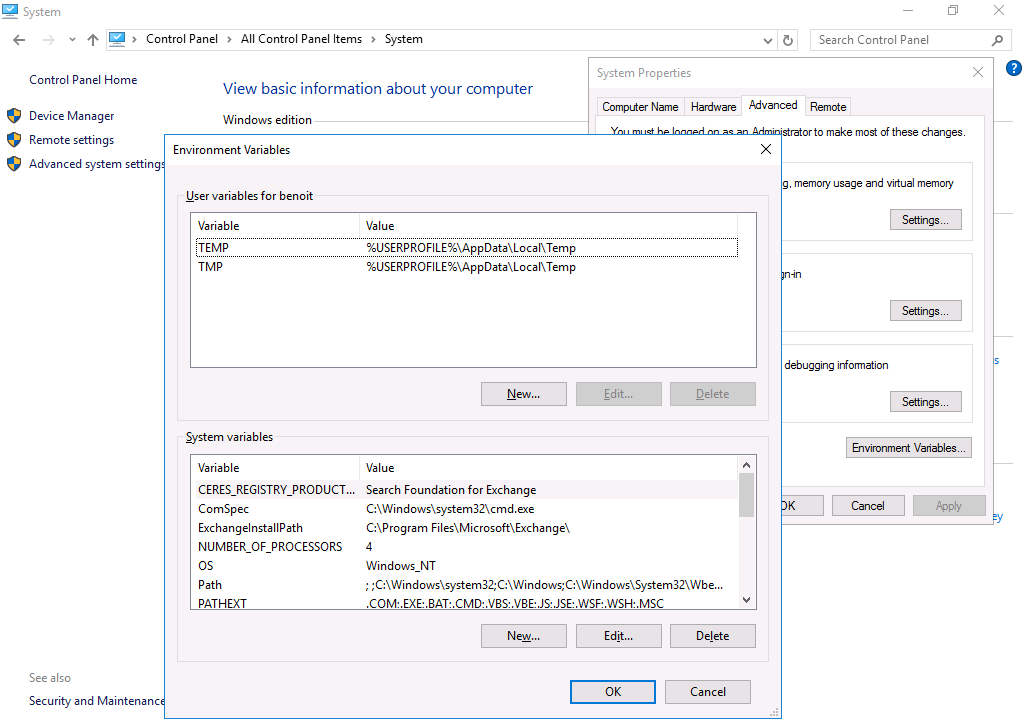
- You can set the variables directly via the system settings: Control Panel > System > Advanced System Properties > Environment Variables:
Go further
To learn how to use OpenStack: OpenStack documentation
Join our community of users.

