Lifecycle of an OPCP Node
71 Views
Objective
A node in OpenStack represents the configuration of a physical server in the OPCP rack. It must be distinguished from instances, which represent the operating system running on a node.
This guide details the different statuses of a node in an OPCP rack and how to modify them.
Requirements
- Have an active OPCP service.
- Have a user account with admin rights to log in to Horizon on the OPCP offering.
- (Optional) Have access to the OpenStack APIs for your project.
- (Optional) Have installed the Ironic client.
Instructions
Log in to the Horizon interface of your OPCP on the admin project.
If you want to follow the OpenStack API section, you will need to install the Ironic packages on your environment:
Check the status of a node
You can check the status of a node directly from Horizon via the Admin > System > Ironic Bare Metal Provisioning tab:
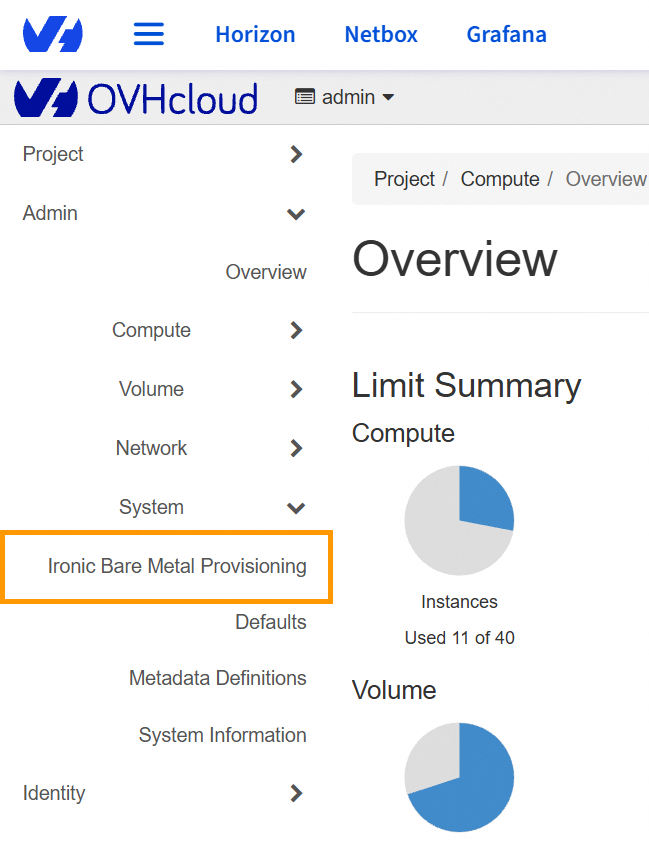
You will find the list of your nodes and their various statuses.
From the OpenStack APIs, you can retrieve the same list using the following command:
You can also check the status of a specific node:
Possible statuses
| Status | Description |
|---|---|
| Enroll | First state of the node when it has been automatically discovered by OPCP. The server has not yet been validated and must be manually transitioned to Manageable. |
| Manageable | The node has been verified and is managed by Ironic, but it is not yet installable. The node must be moved to the Available state before it can be deployed. |
| Available | The node is available and can be installed. |
| Active | The node is installed and has an active instance on it. |
| Verifying | Transitional state when a node moves from Enroll to Manageable. Ironic verifies it can manage the node using the drivers and hardware properties configured during control-plane discovery. |
| Cleaning / Clean-wait | Transitional state when an instance is deleted or when leaving the Manageable state before becoming Available again. Disks are wiped during this step. |
| Deploying / Wait call-back | Transitional state when the node is being deployed. |
You can find detailed explanations for the different statuses in the official OpenStack documentation.
Node lifecycle
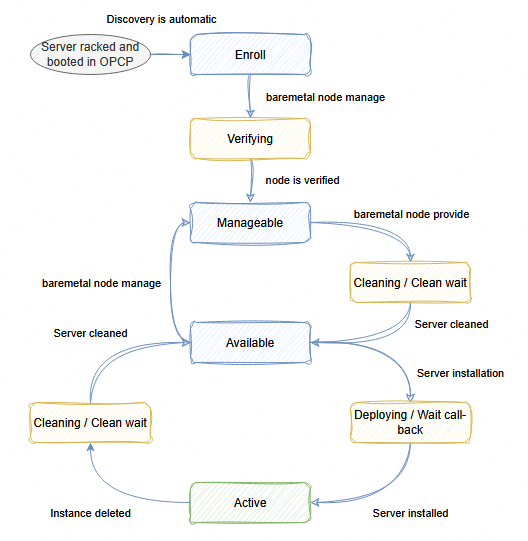
When a node is installed and booted in an OPCP rack, its discovery is automatically performed by the control plane. At this moment, the node retrieves its properties and traits based on its hardware profile.
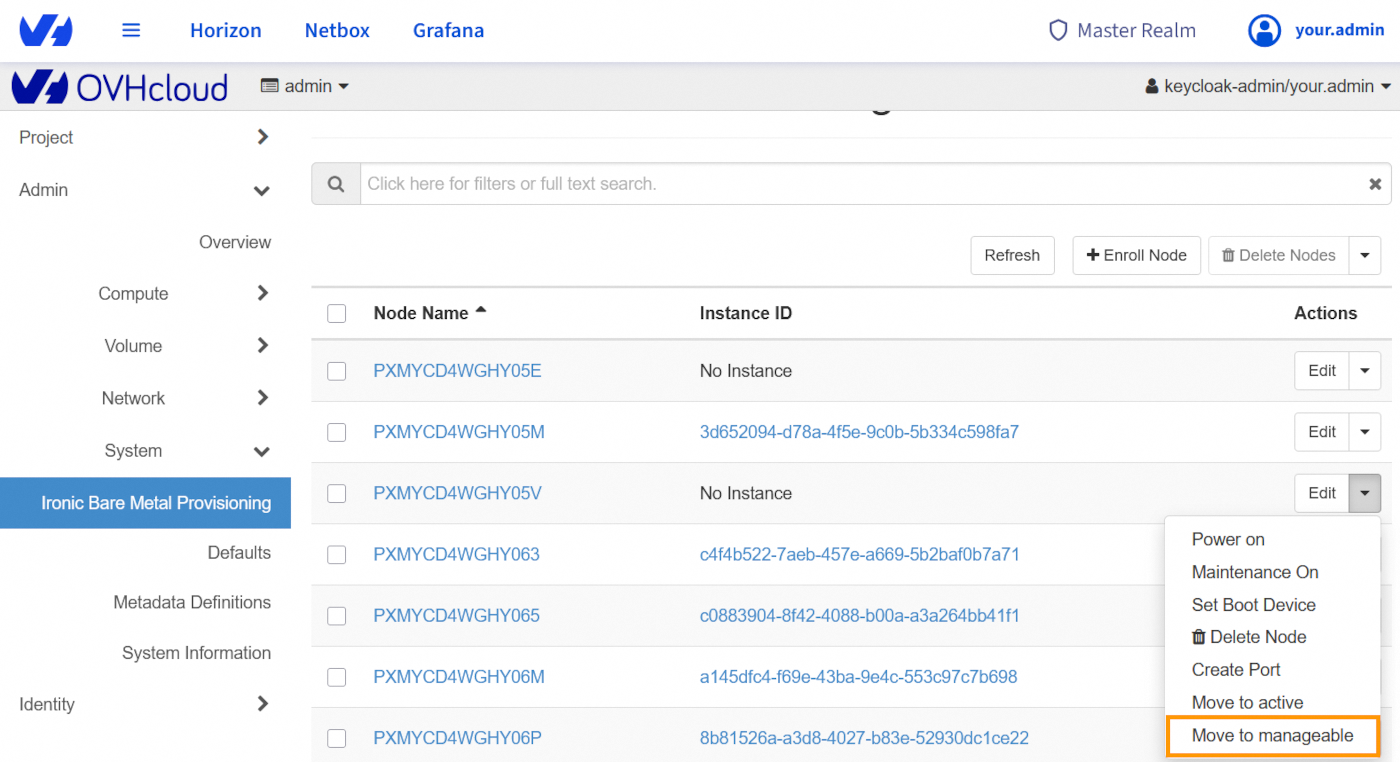
Once the node is in the Enroll state, you can change its state so that it is managed by Ironic.
From the Horizon interface:
From the OpenStack APIs:
To make the node available for installation, it must then be transitioned to the Available state:
From the Horizon interface:
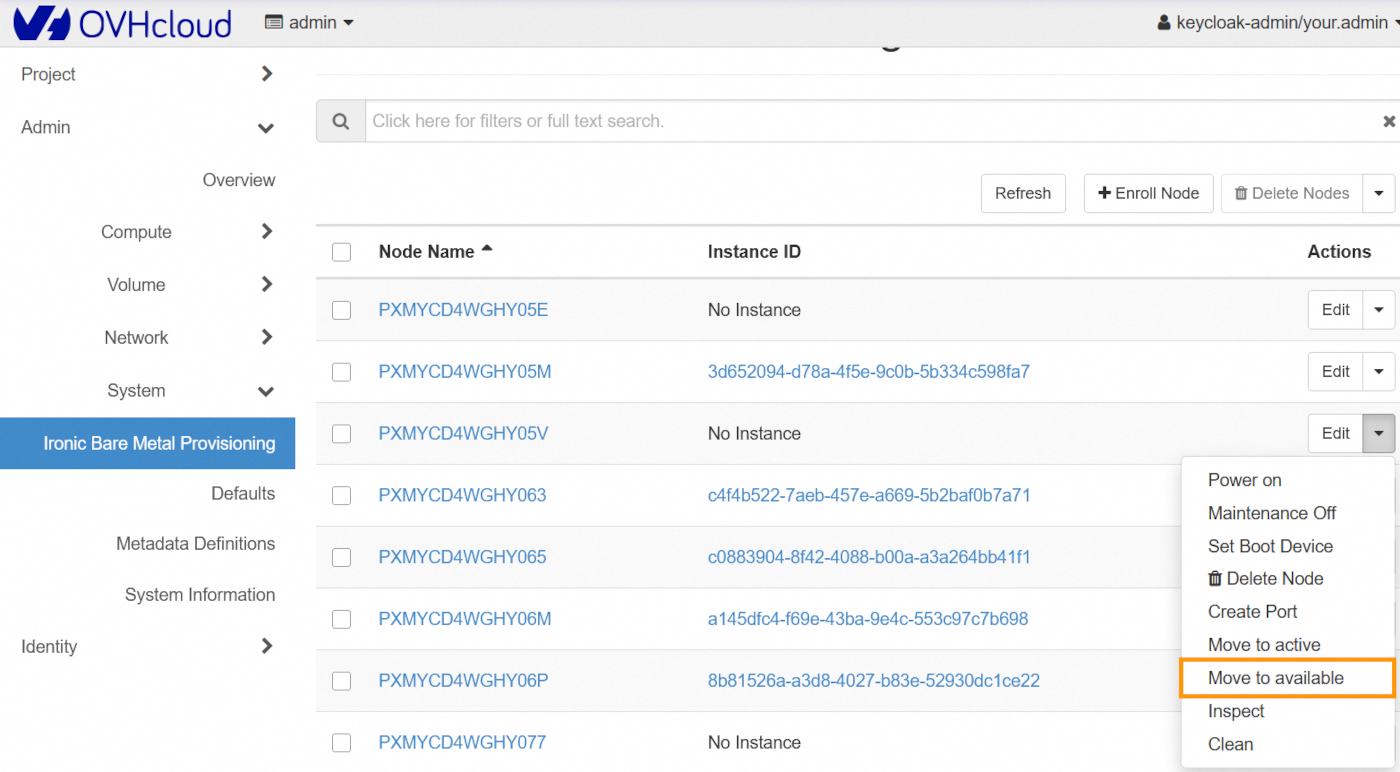
From the OpenStack APIs:
The node then transitions to the Cleaning state before reaching Available, making it deployable by the various projects in your OPCP environment.
Maintenance mode
This mode can be enabled to ensure a node cannot be used for installation, even if it is in the Available state.
From the Horizon interface:
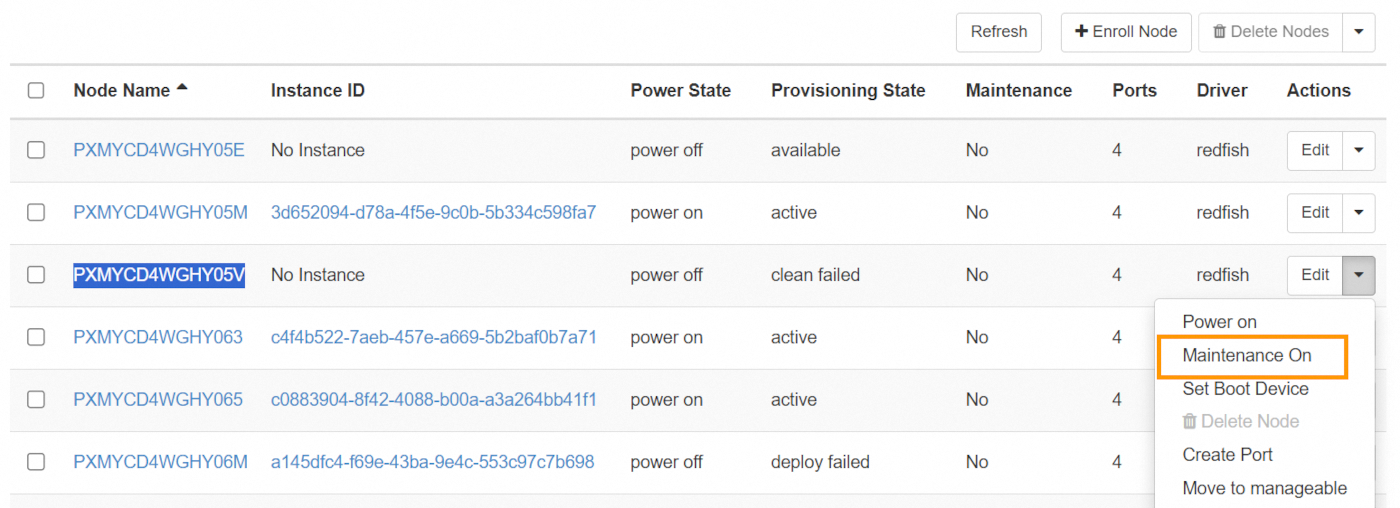
When enabling maintenance, you may specify a reason so that the team responsible for the nodes has the information. This reason is optional.

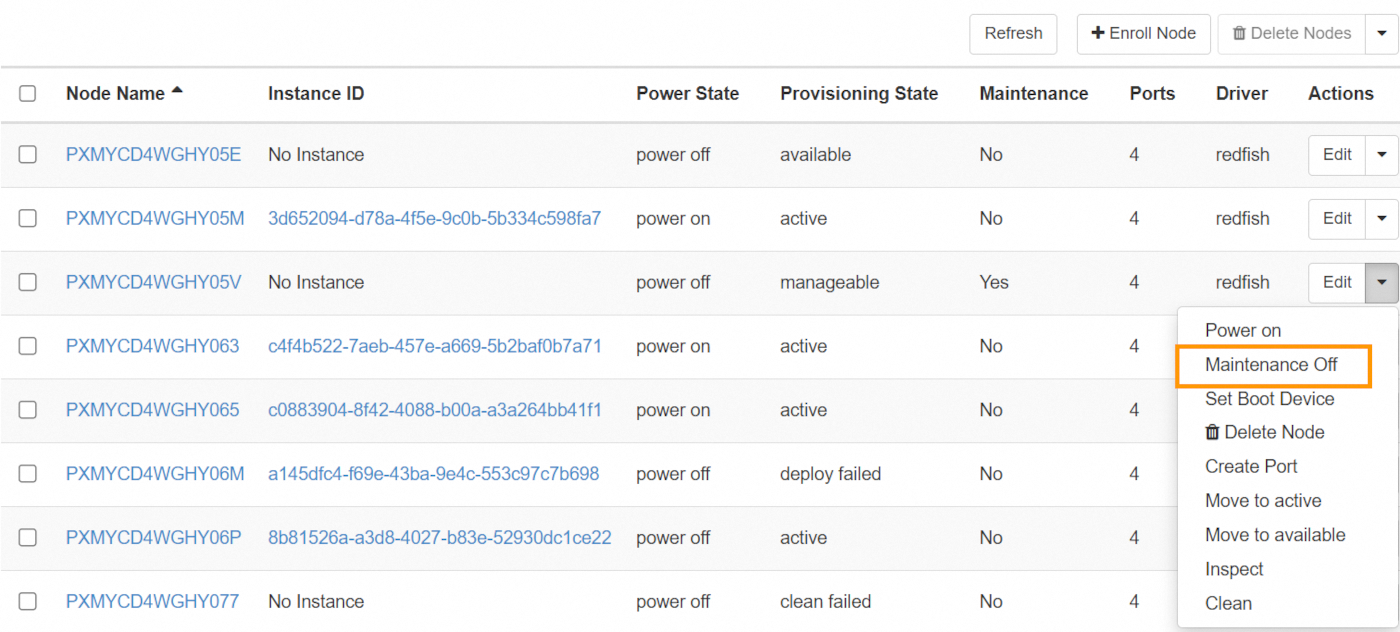
Once your maintenance operations are complete, you can disable maintenance:
From the OpenStack APIs:
You can then retrieve the maintenance status and the reason using the following command:
You will find the following lines:
To remove the node from maintenance, use the command:
References
- OpenStack Official Documentation - Horizon
- OpenStack Ironic States
- OpenStack Ironic Troubleshooting - Maintenance
Go further
If you need training or technical assistance for the implementation of our solutions, contact your sales representative or click this link to request a quote and have your project analyzed by our Professional Services team experts.
Join our community of users.

