Setting up NCM Self Service (CALM)
439 Views
Objectif
Find out how to set up NCM Self-Service (Calm) on your Prism Central.
This tutorial will show you how to use one or more OVHcloud solutions with external tools, and will describe the actions to be carried out in a specific context. You may need to adapt the instructions according to your situation.
If you encounter any difficulties performing these actions, please contact a specialist service provider and/or discuss the issue with our community. You can find more information in the Go further section of this tutorial.
Requirements
- A Nutanix cluster in your OVHcloud account
- You must be connected to the cluster via Prism Central
- Have Self Service (CALM) licences. These licences are available with the Nutanix on OVHcloud packaged service (with limitations for Starter pack)
- An additional VLAN in your cluster that distributes IPAM IP addresses and has internet access
Overview
NCM Self Service (CALM) is a heterogeneous orchestration solution that allows the automation and management of deployments, it runs on Prism Central and grants the administration of various environments (Nutanix Cluster, bare metal server, etc...).
Instructions
We will enable CALM, create two applications for our Nutanix cluster and publish them on the application portals which are:
- An Nginx Web server with Linux Ubuntu.
- An IIS Web server on Windows server.
Activating CALM
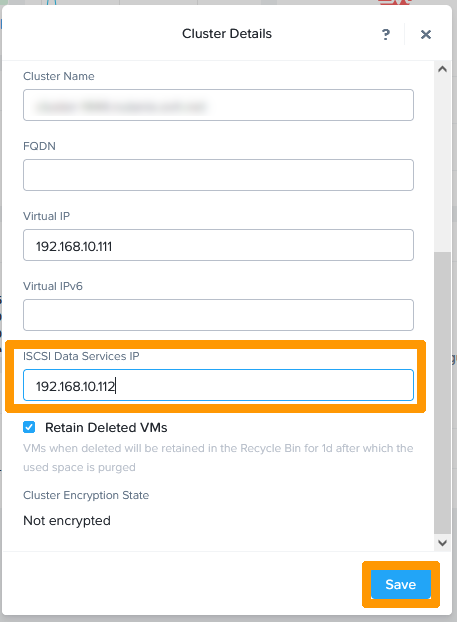
Before deploying CALM, check the IP address for the ISCSI Data Services IP.
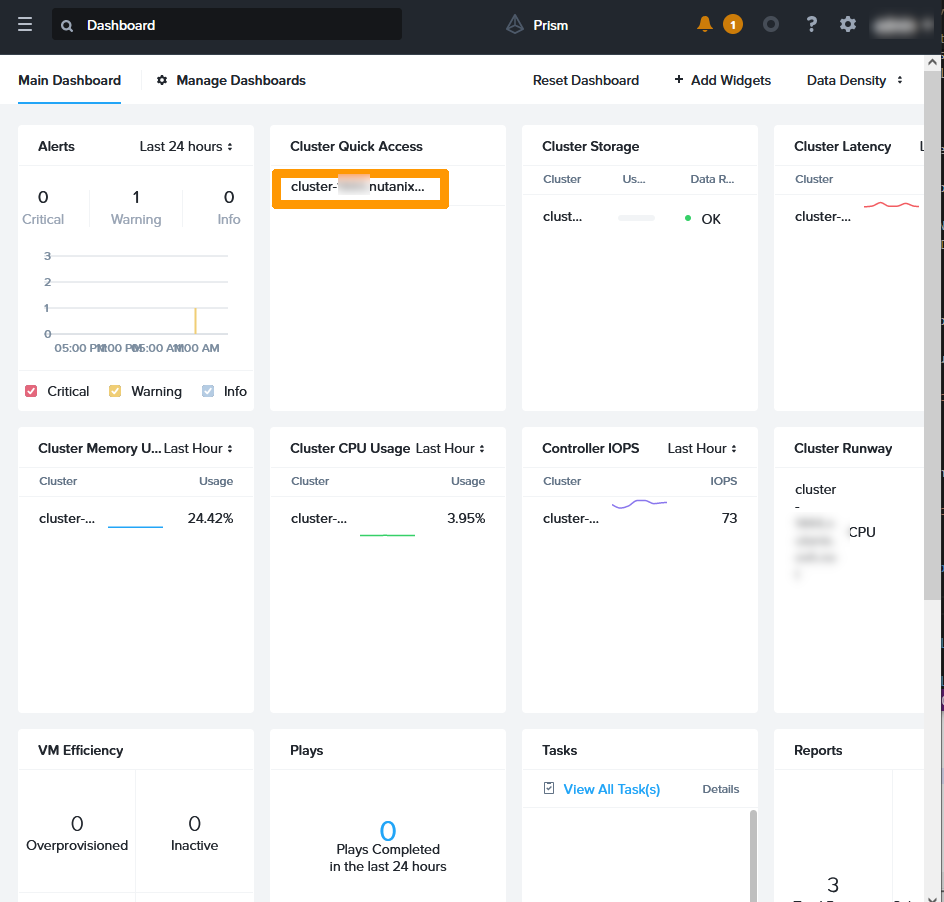
From the Prism Central dashboard, click on your Cluster in the Cluster Quick Access section.
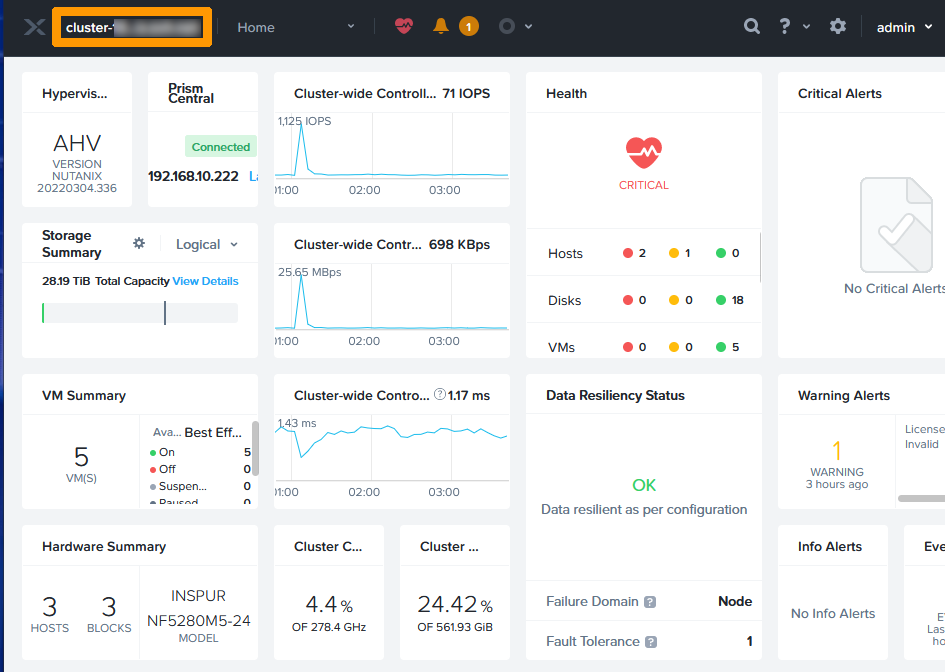
In the Prism Element, click on the cluster settings in the top left-hand corner.
Check the IP address in ISCSI Data Services IP.
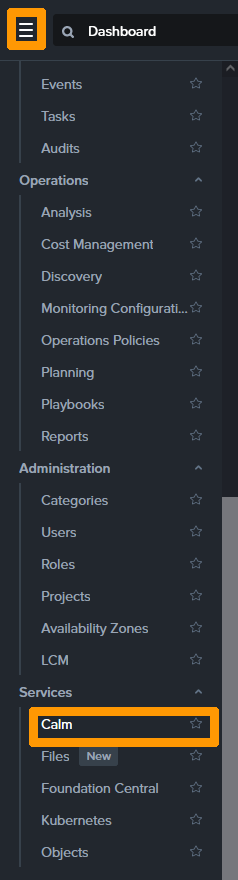
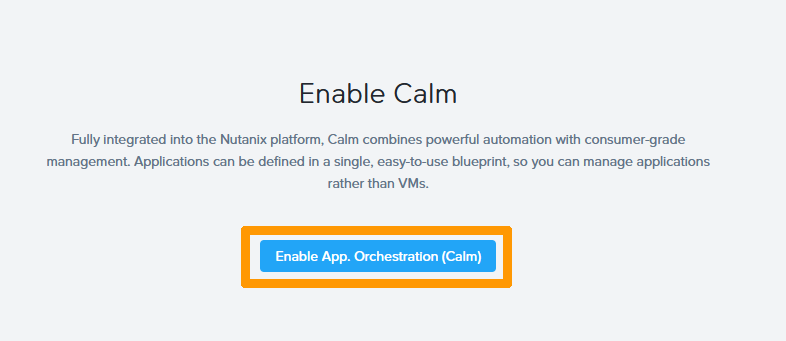
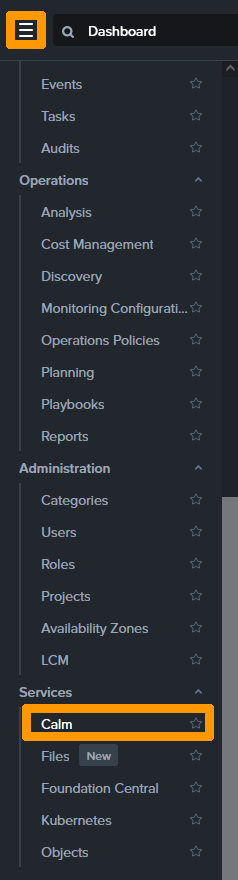
Go back to Prism Central, go to the main menu on the left and click on Calm in the Services section
Click Enable App. Orchestration(Calm).
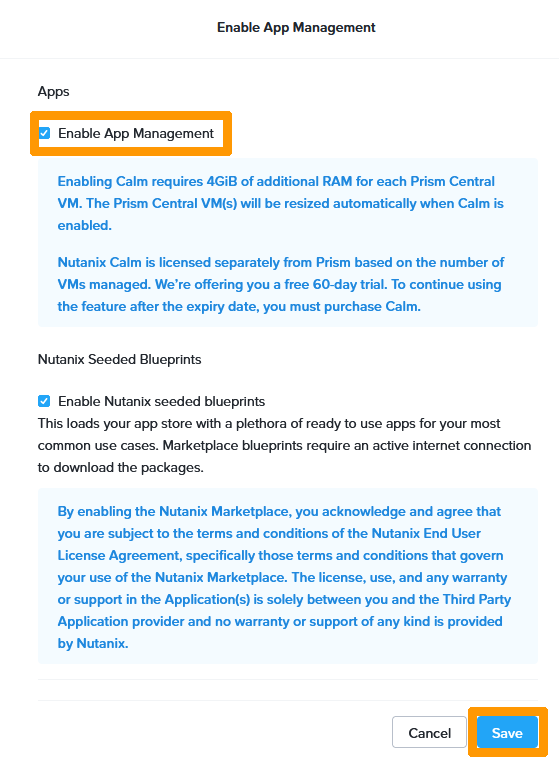
Select the Enable App Management check box and click Save.
CALM is being activated.
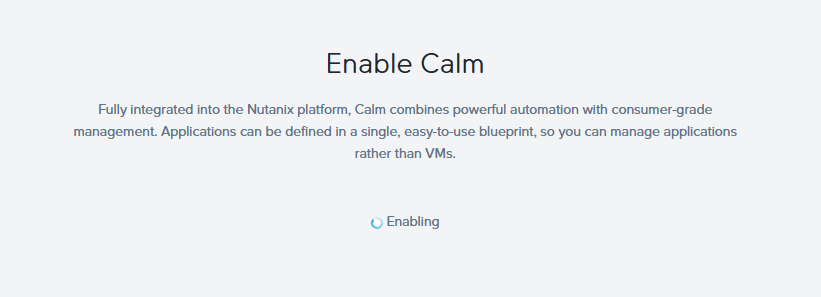
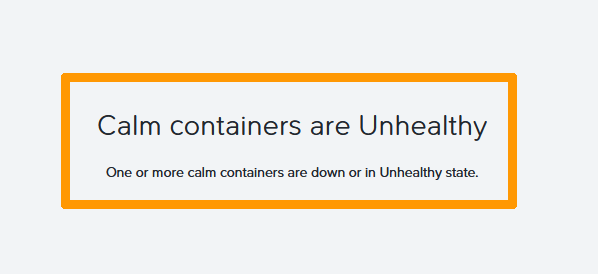
An error message appears during CALM deployment, ignore it, exit the window and wait until the installation is complete.
Creating a project
You need to create a project to deploy applications.
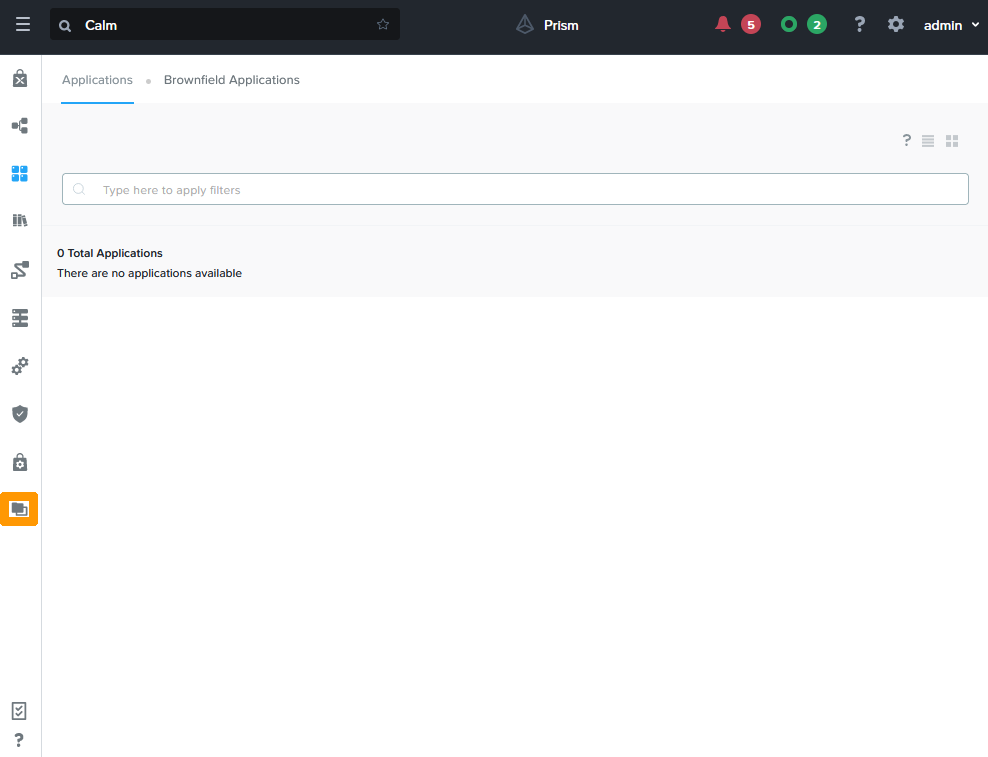
From the Prism Central menu, click on Calm in the Services section.
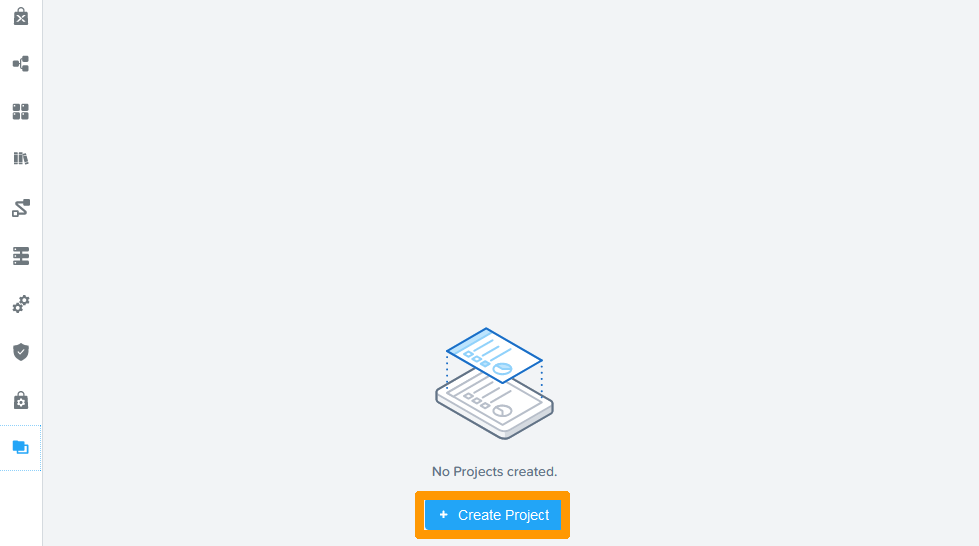
Click the Projects icon in the vertical menu bar.
Click the + Create Project button.
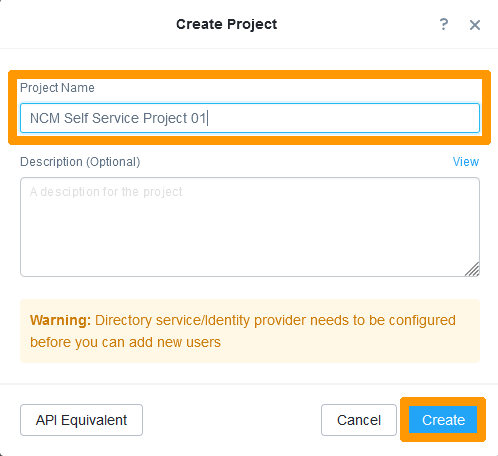
Type the project name in Project Name field and click Create
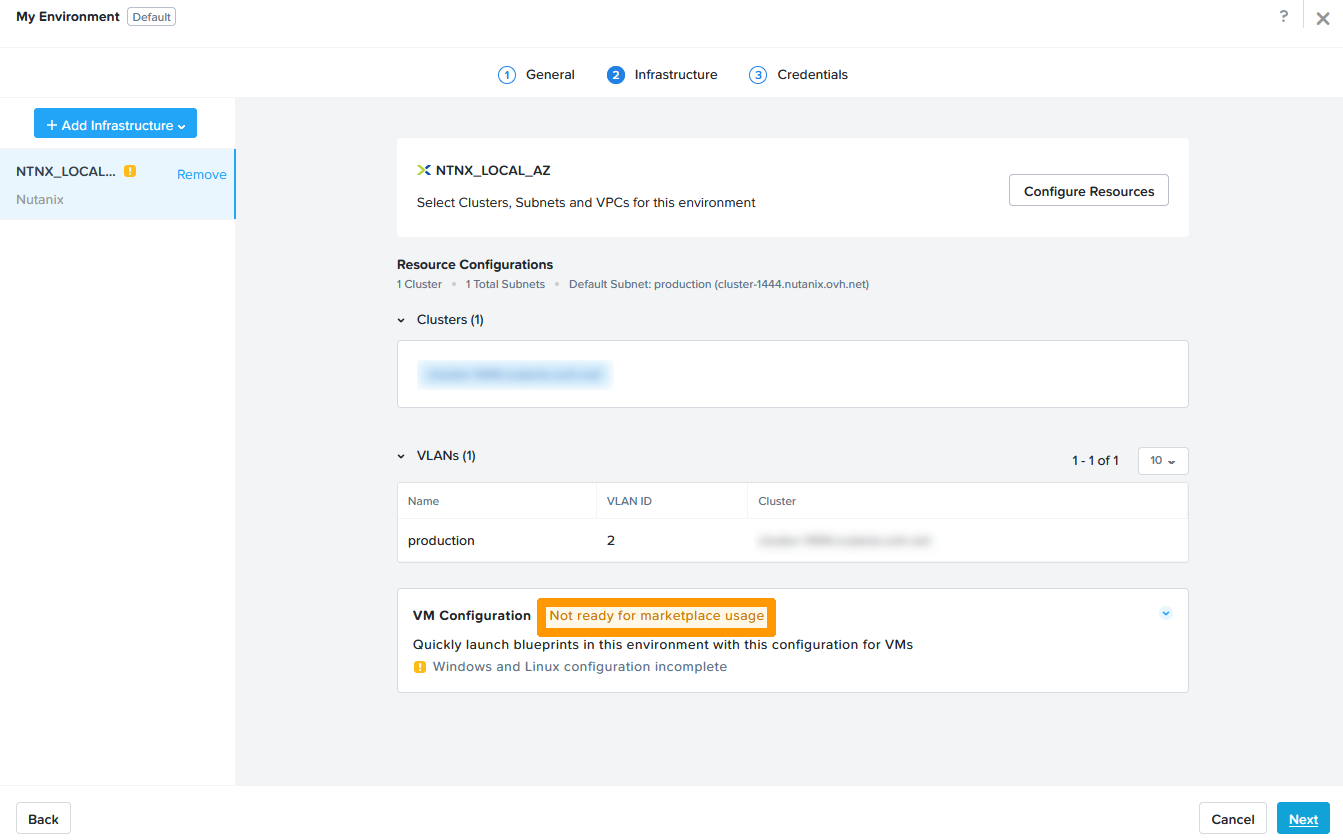
click + Add infrastructure.
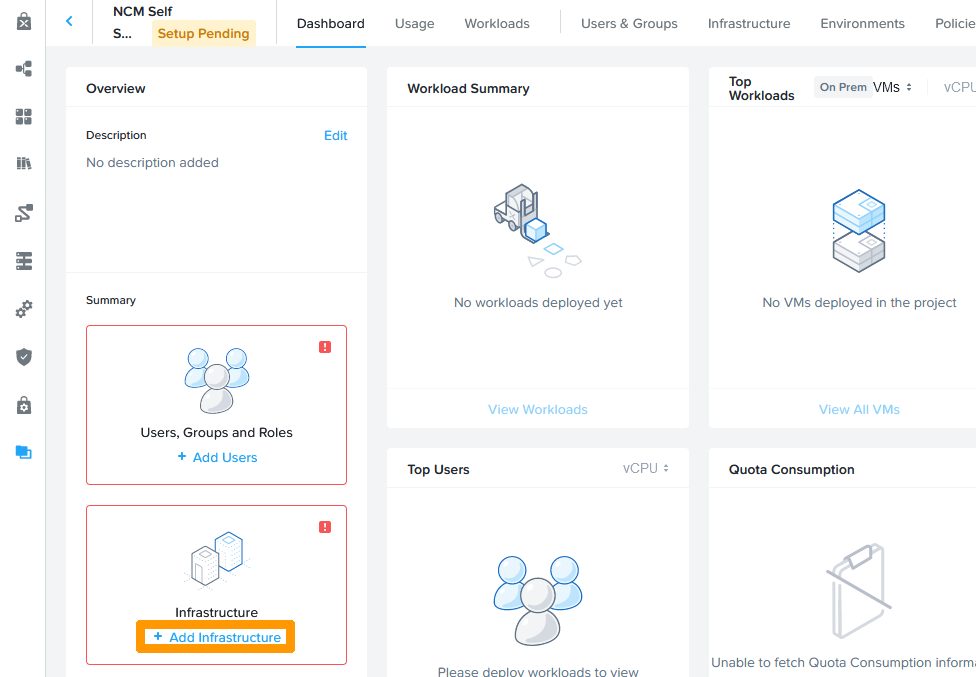
Click Add infrastructure.
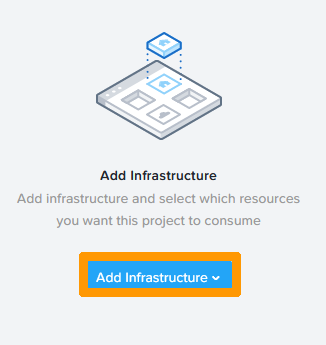
Select NTNX_LOCAL_AZ from accounts.
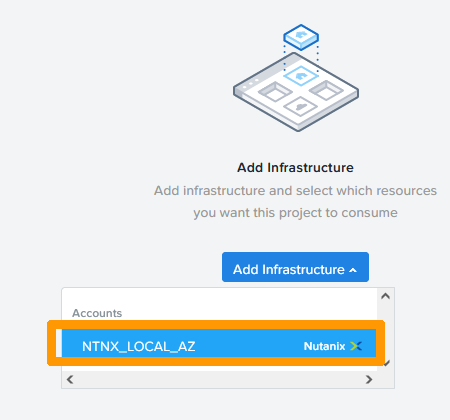
Click Configure Resources.
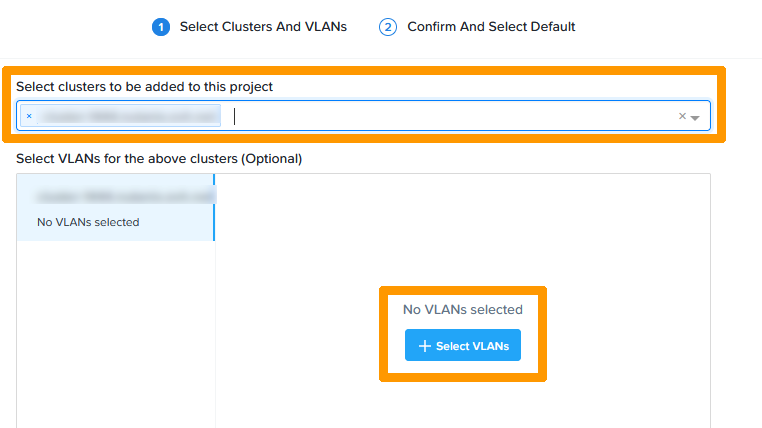
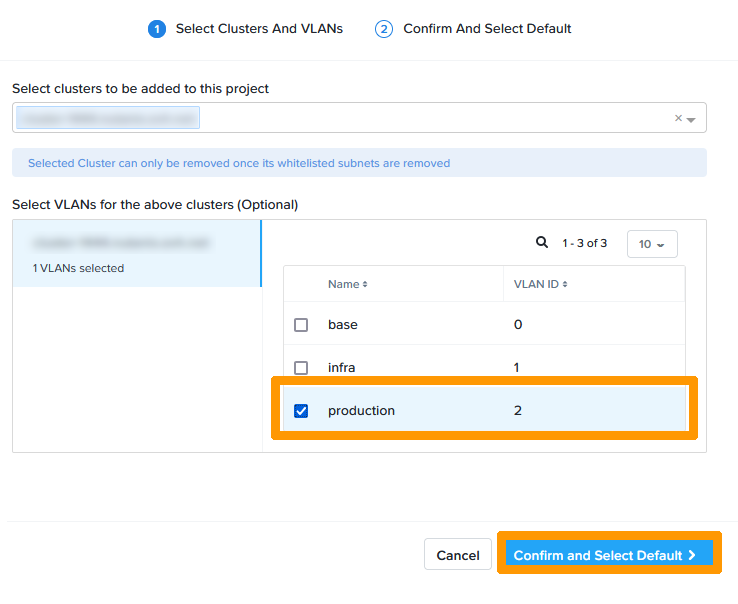
Select your Cluster from Select clusters to be added to this project and click + Select VLANs.
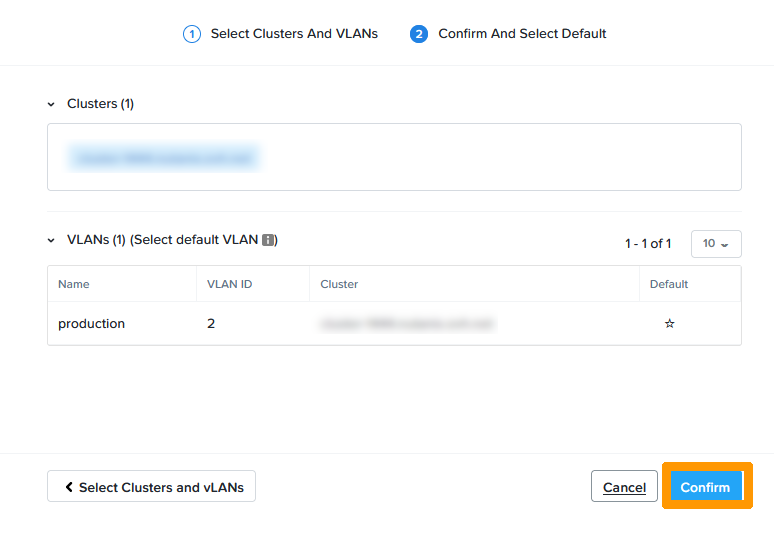
Check the production VLAN box and click Confirm and Select Default.
Click Confirm.
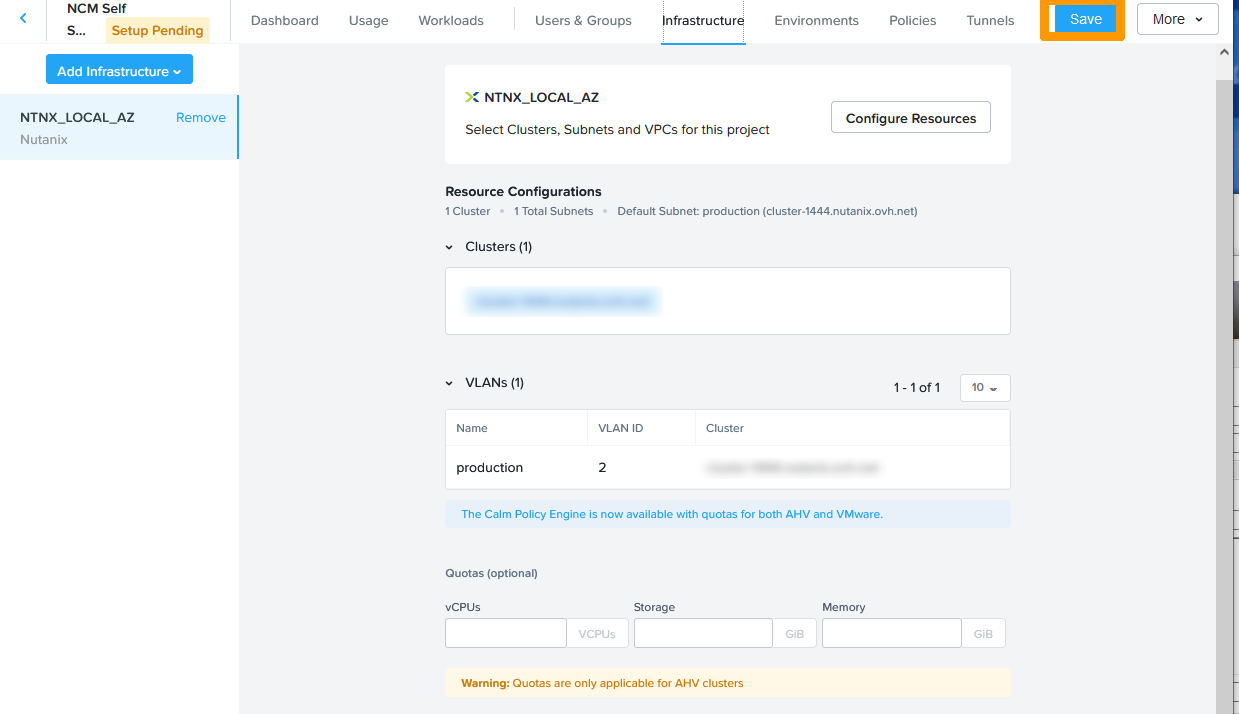
Click Save.
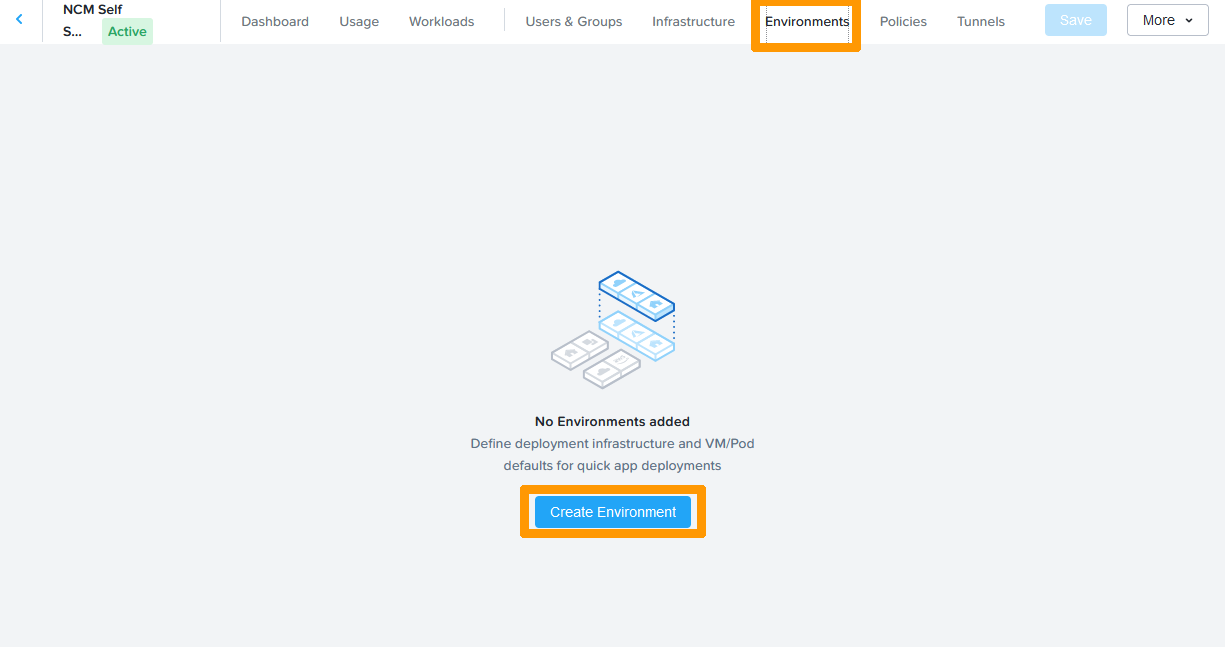
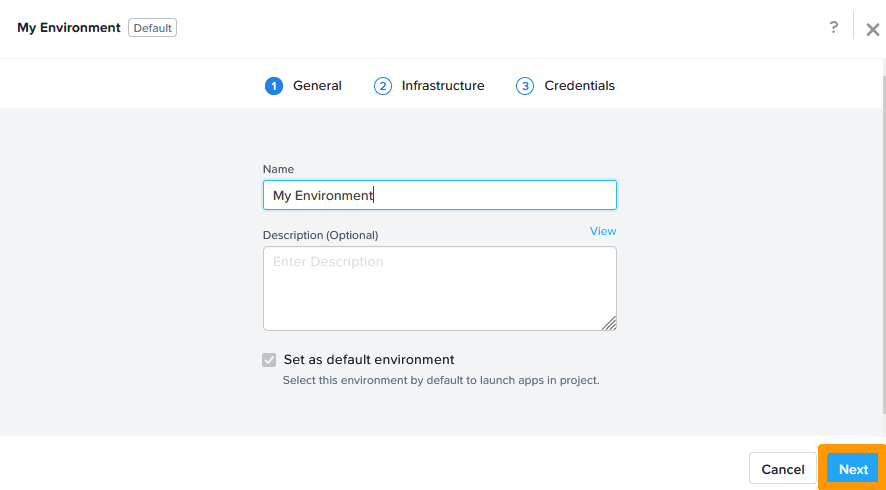
In the tab bar go to Environments and click Create Environment.
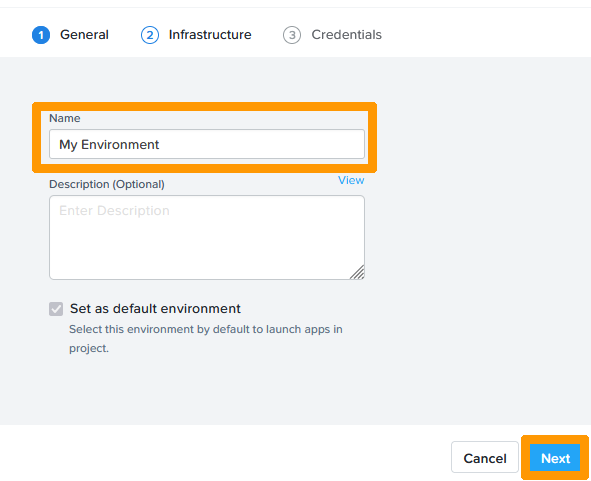
Type a Name in the Name field and click Next.
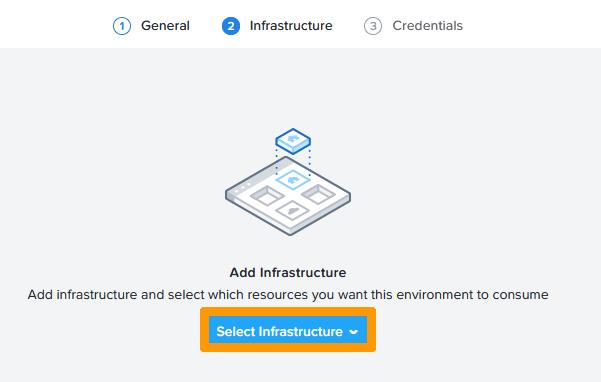
Click Select Infrastructure.
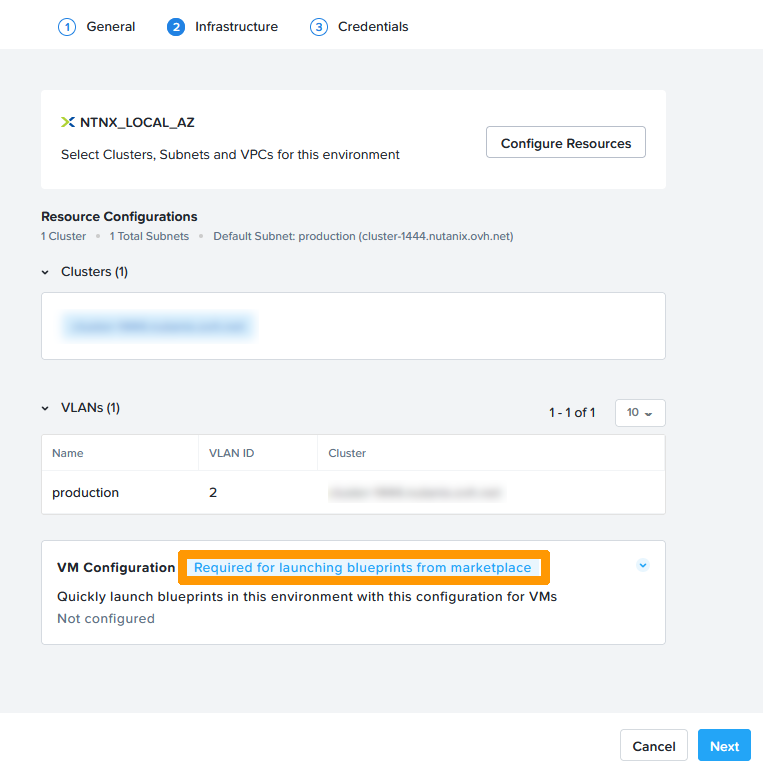
Click NTNX_LOCAL_AZ.

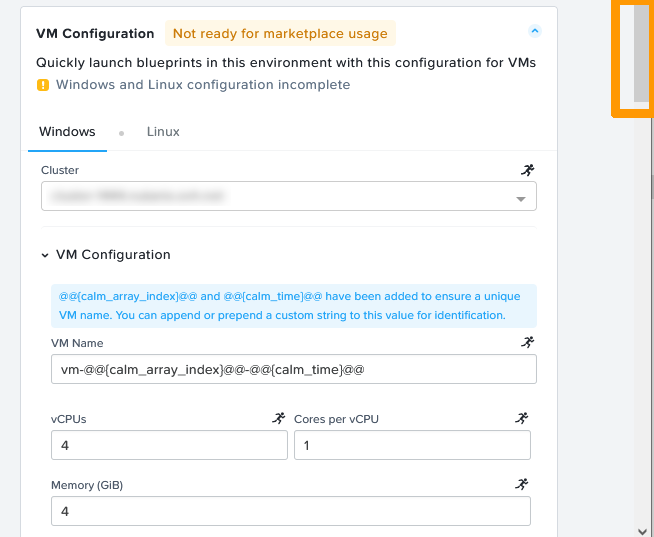
Click Required for lauching blueprints from marketplace to the right of VM Configuration
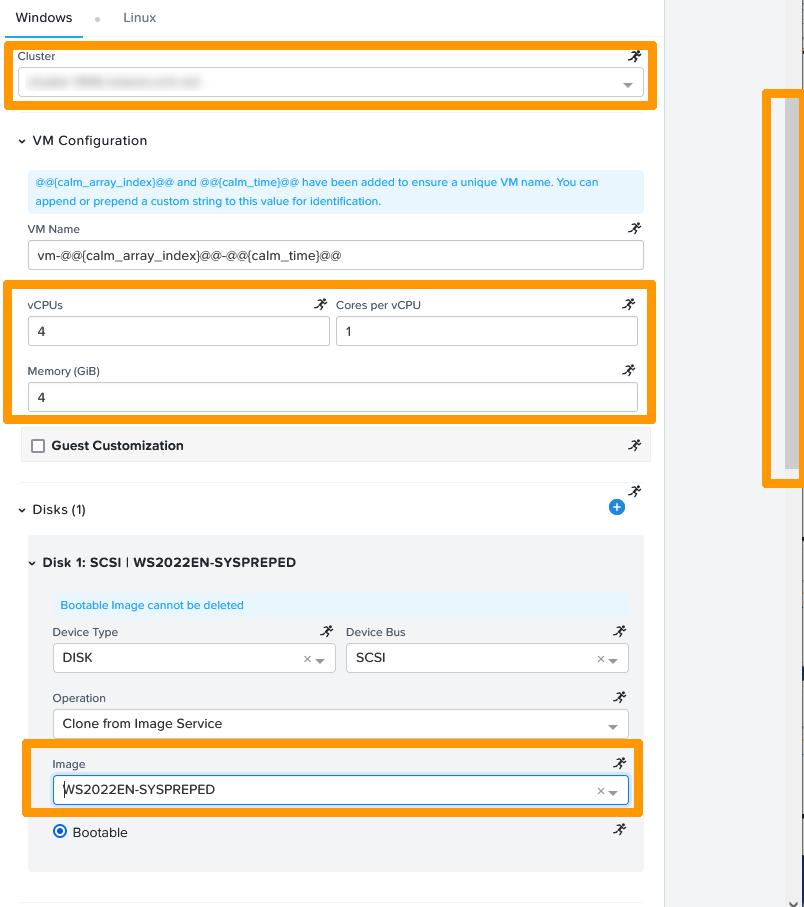
Enter this information:
- Cluster:
choose your cluster - vCPUs:
4 - Core per vCPU:
1 - Memory (GiB):
4 - Image :
WS2022EN-SYSPREPED
The image is generated from a VM WINDOWS Server 2022 on which a sysprep was applied to reset the default configuration. When used with CALM, it is possible to automate the installation of a Windows OS from this type of image and apply settings stored in an XML file to it.
Then, scroll down the window.
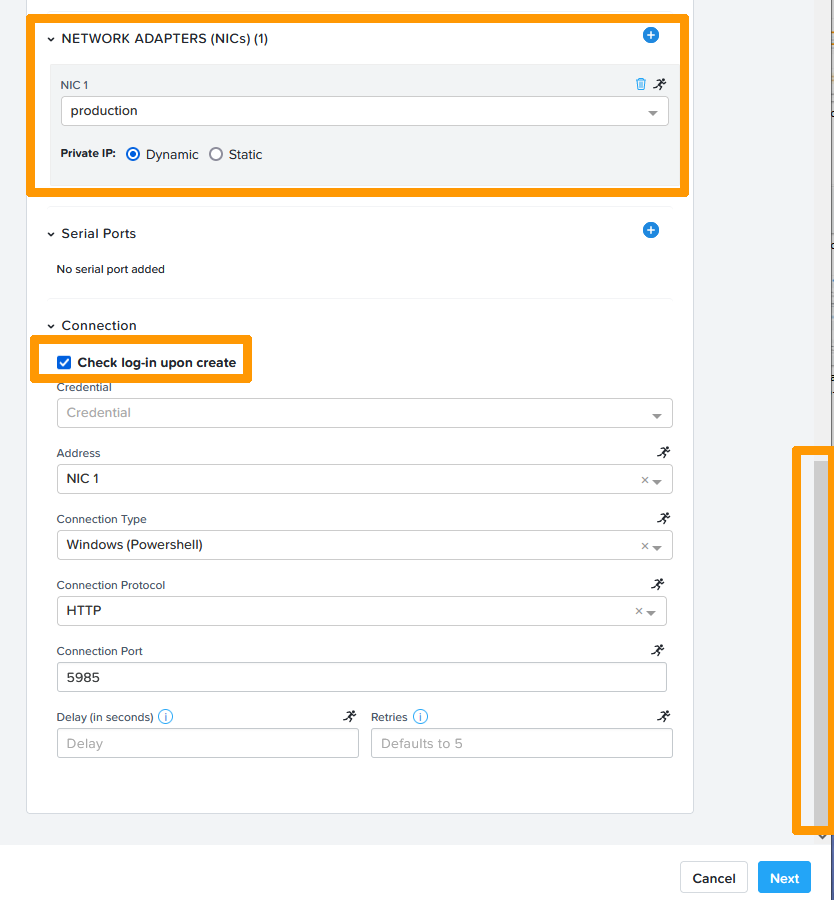
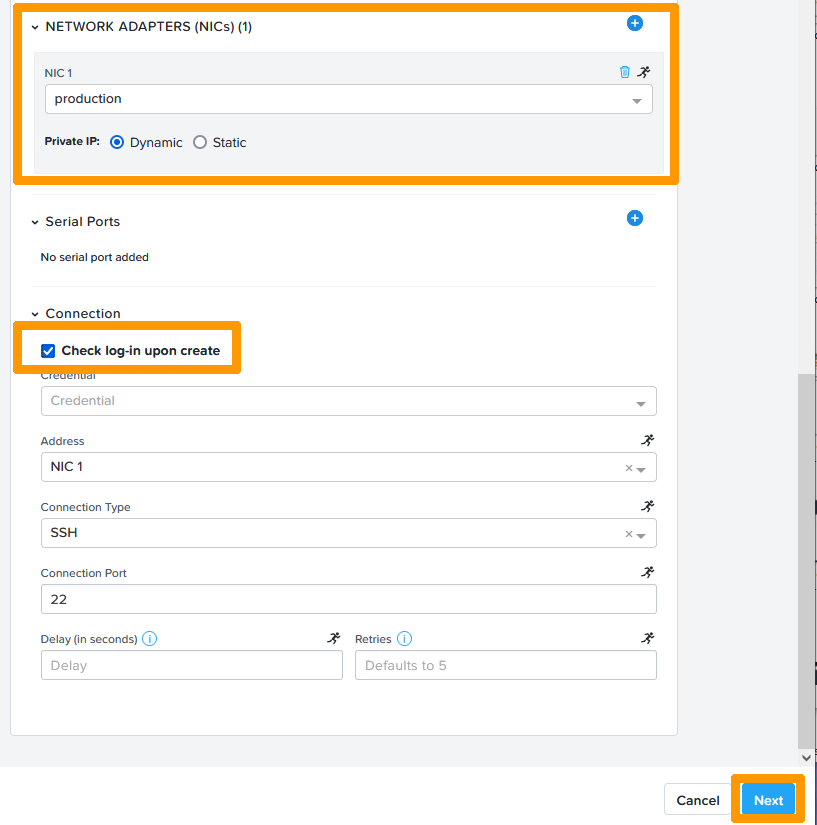
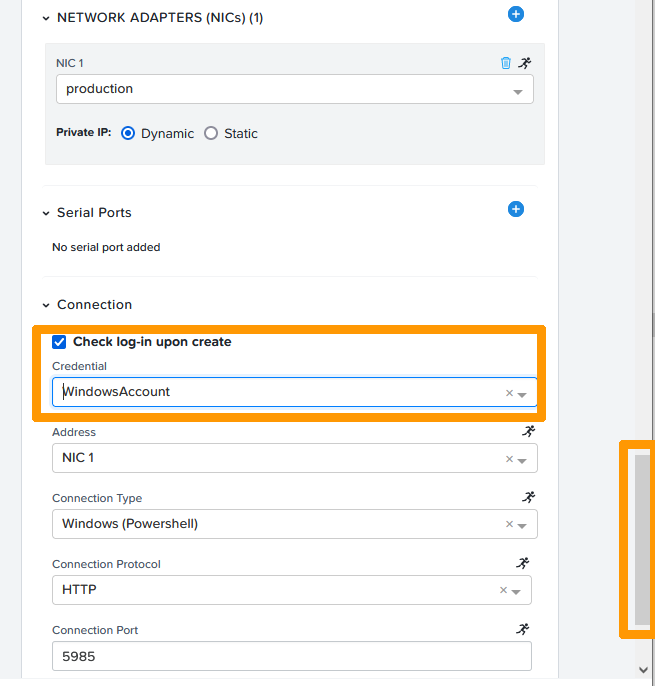
Click the + button to the right of NETWORK ADAPTERS (NICs).

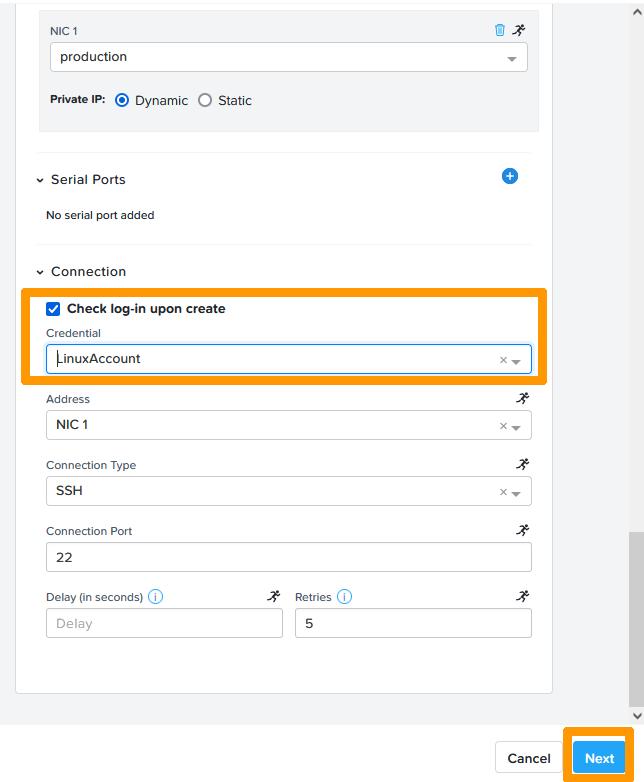
Choose the network adapter in the production VLAN, check the Check log-in upon create box and scroll up in the window.
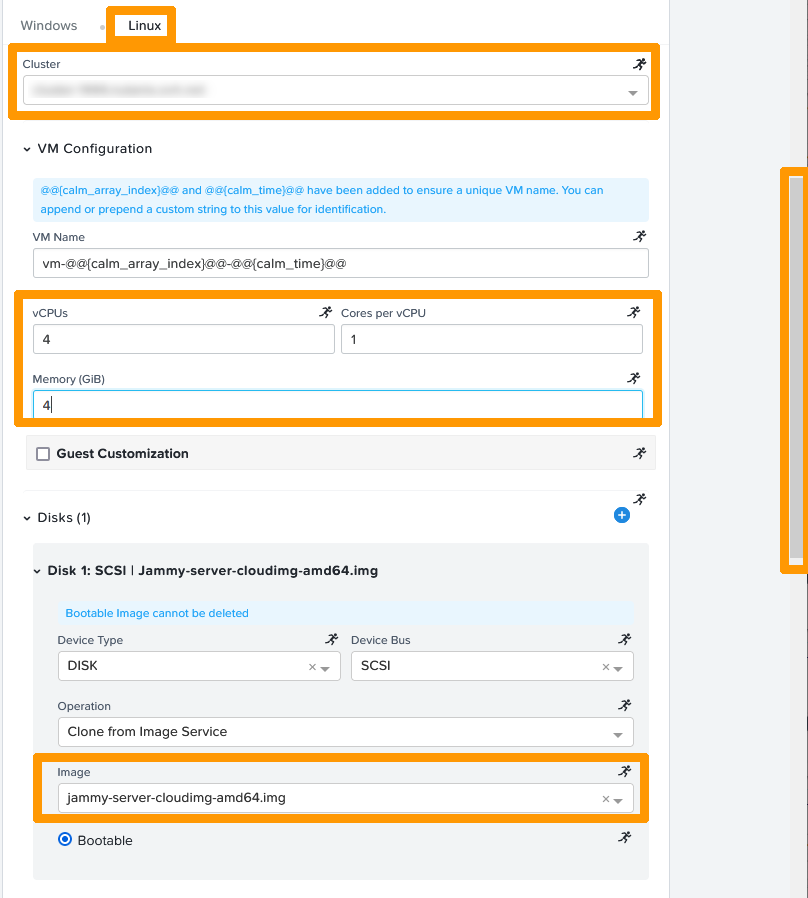
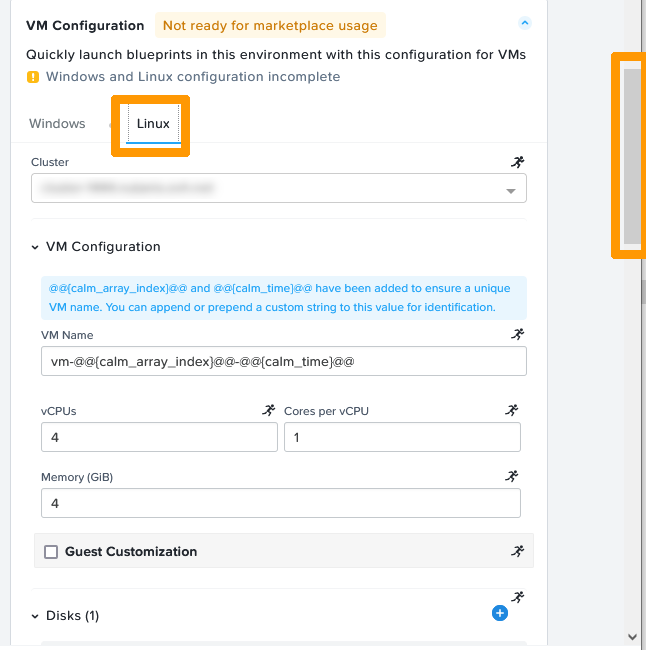
Go to the Linux tab, enter this information:
- Cluster:
choose your cluster - vCPUs:
4 - Core per vCPU:
1 - Memory (GiB):
4 - Image:
jammy-server-cloudimg-amd64.img
The image is pre-configured for UBUNTU Cloud-init use and can be downloaded from the Internet at Ubuntu Cloud Images. CALM allows the automation and customisation of a Linux installation through these types of images and YAML configuration files.
Then scroll down the window.
Click the + button to the right of NETWORK ADAPTERS (NICs).
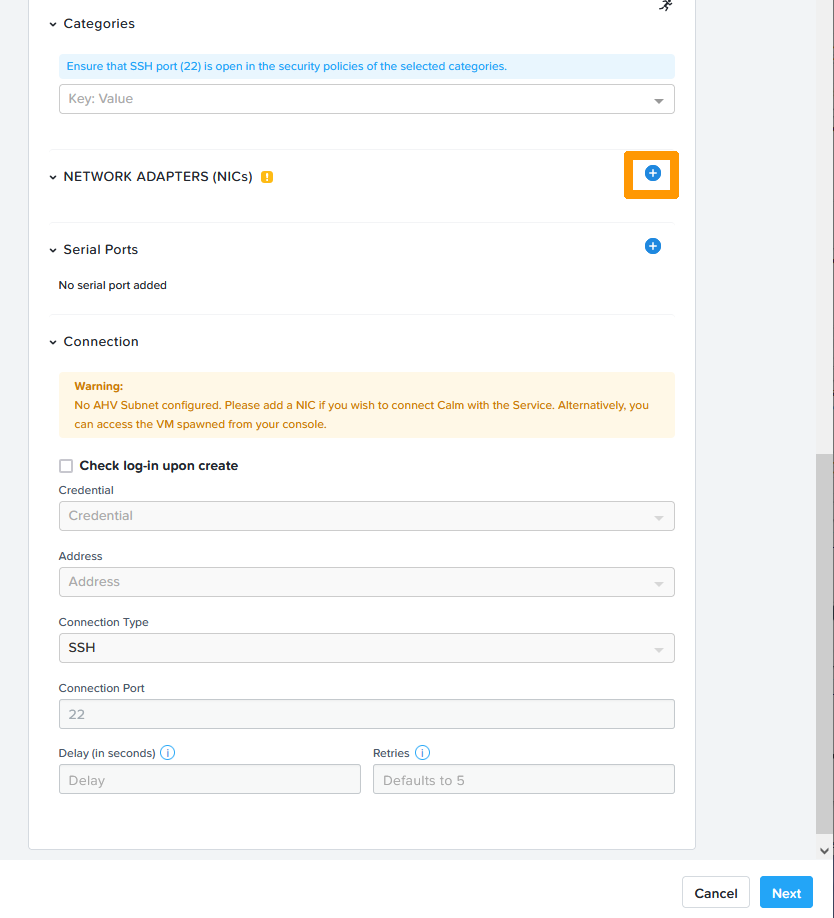
Choose the network adapter in the production VLAN, check the Check log-in upon create box and click Next.
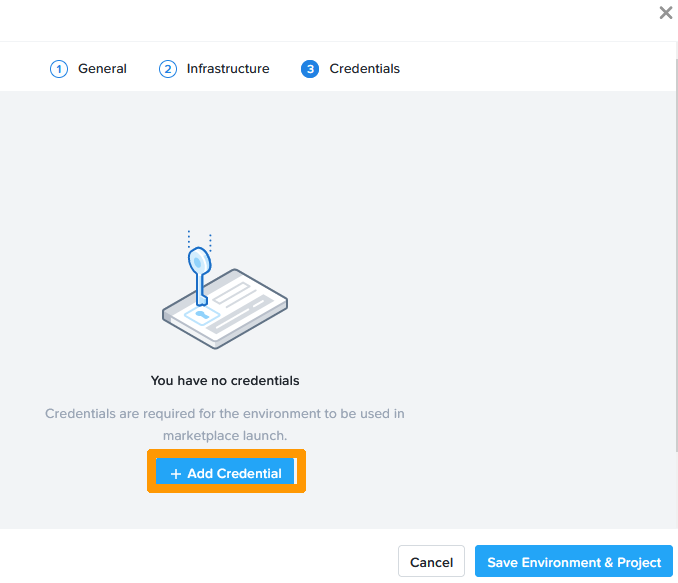
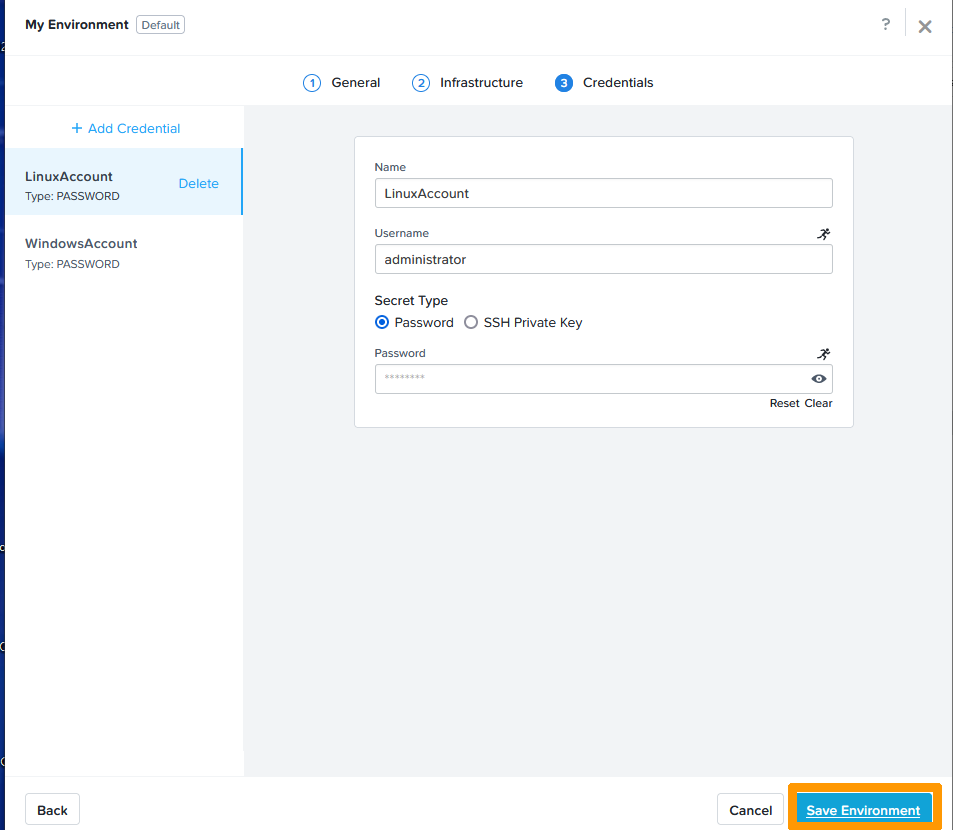
Click + Add Credential.
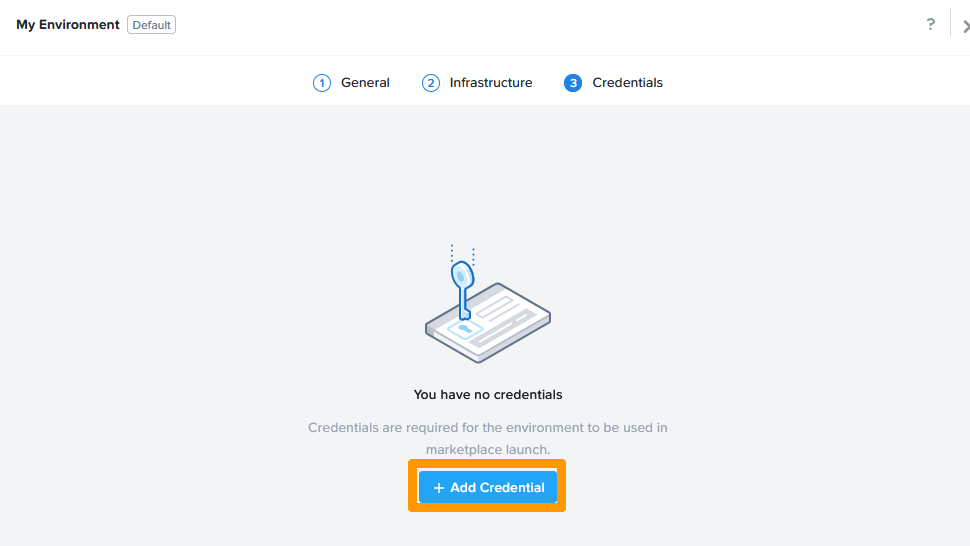
Click + Add Credential.
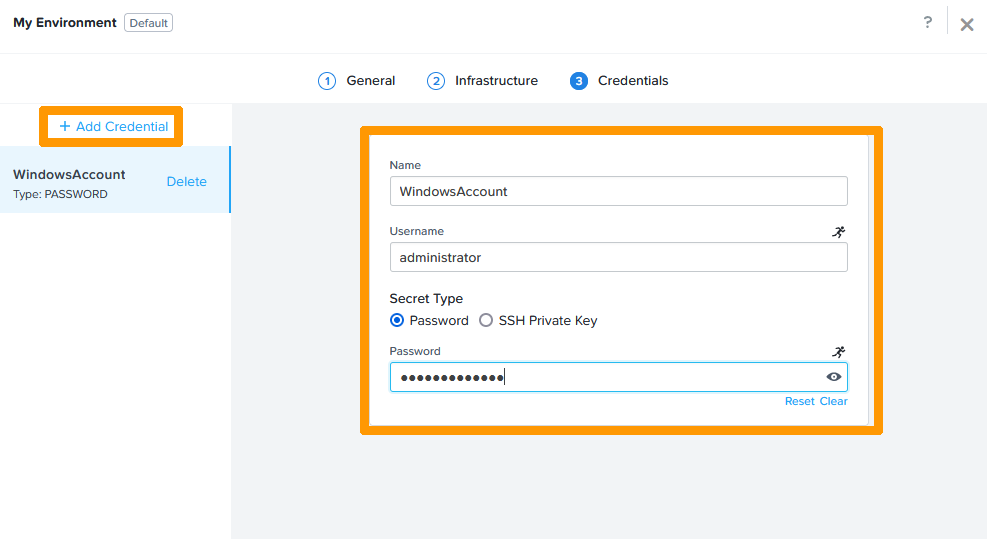
Enter this information:
- Name:
WindowsAccount - Username:
administrator - Password:
administrator account password
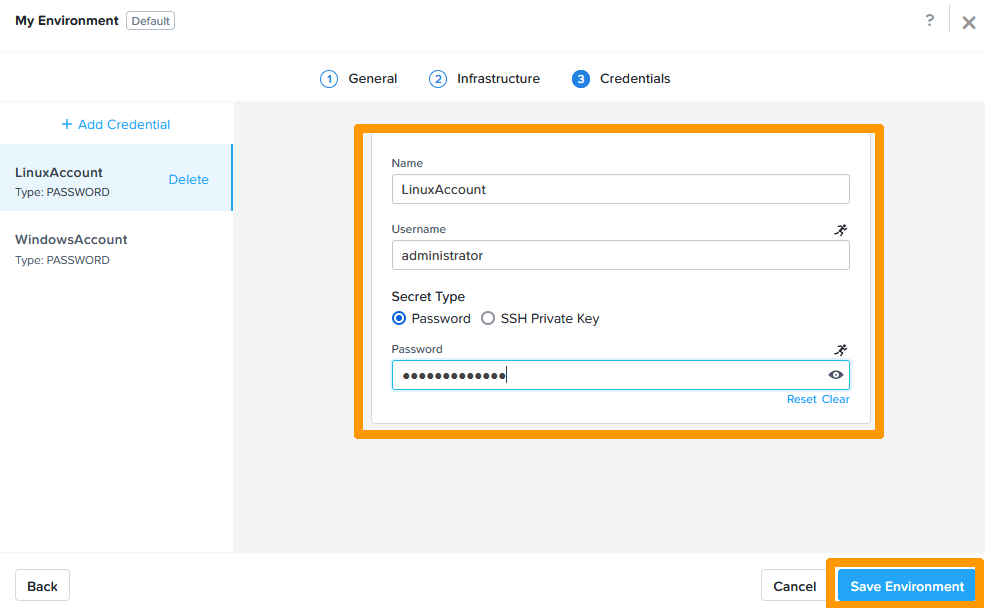
Then, click + Add Credential.
Enter this information:
- Name:
LinuxAccount - Username:
administrator - Password:
administrator account password
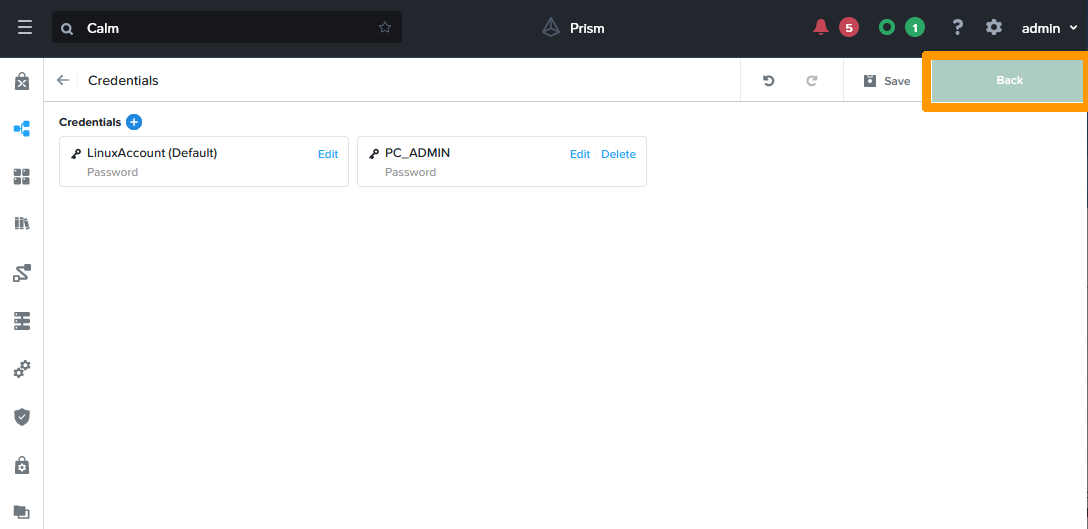
Then, click Save Environment.
Click Marketplace Usage.
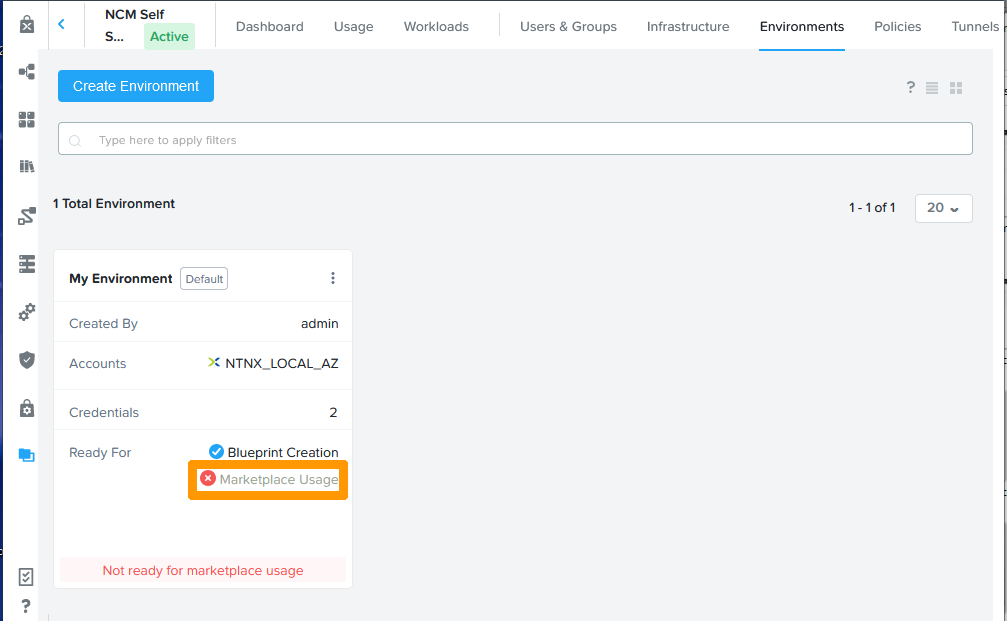
Click Update.
Click Next.
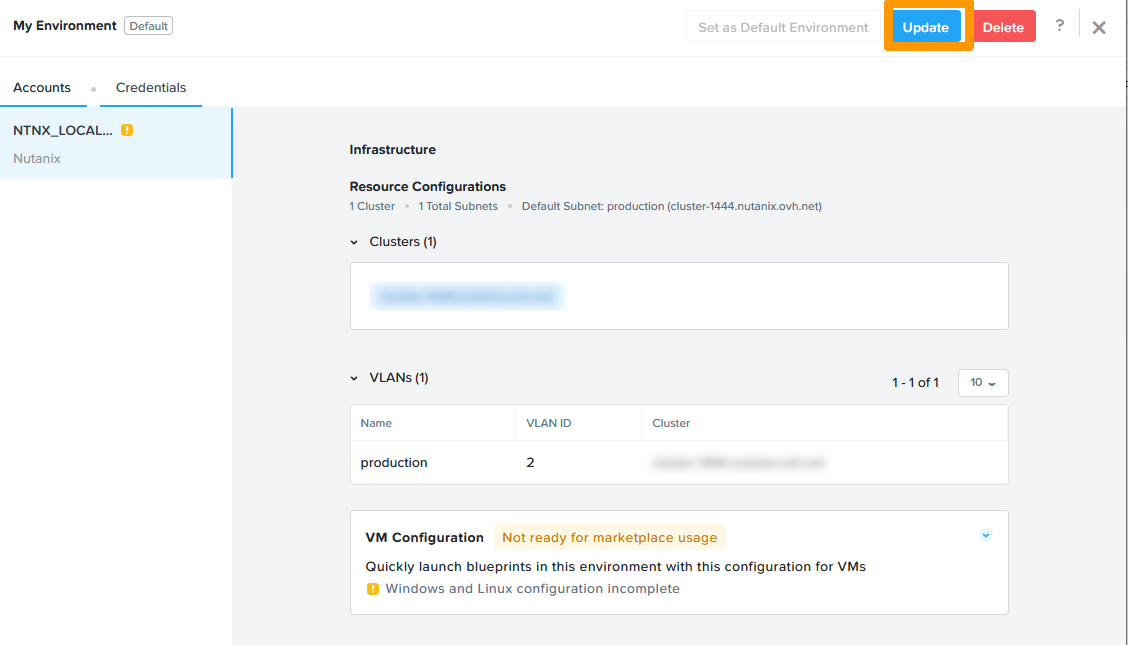
Click Not ready for marketplace usage to the right of VM Configuration.
Scroll down the window.
Choose WindowsAccount from Credential and scroll up the window.
Click the Linux tab in Credential and scroll down the window.
Choose LinuxAccount from Credential and click Next.
Click Save Environment.
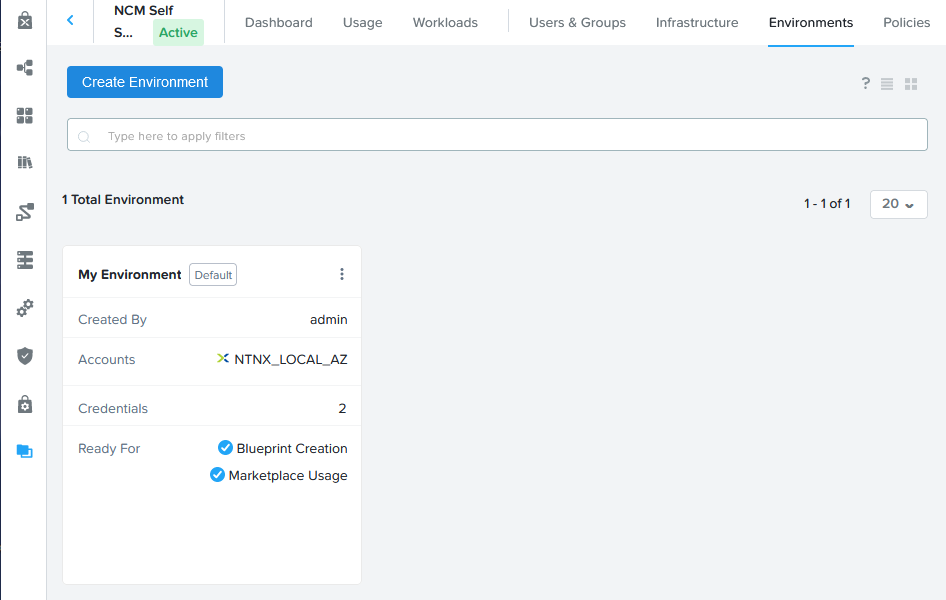
Your environment is ready for application creation and distribution.
Creating applications
We will create two applications, test how they work, and publish them to the cluster marketplace.
Creating IIS Web Application on Windows
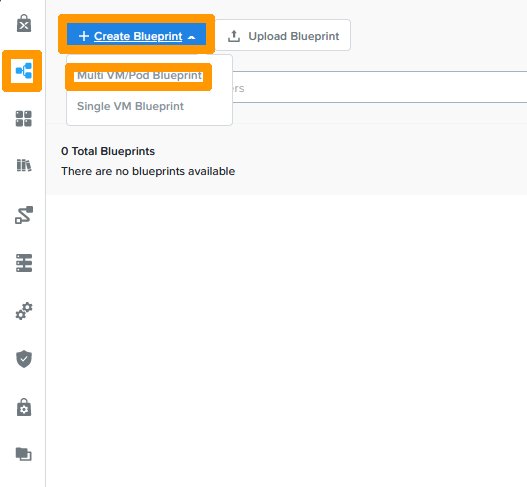
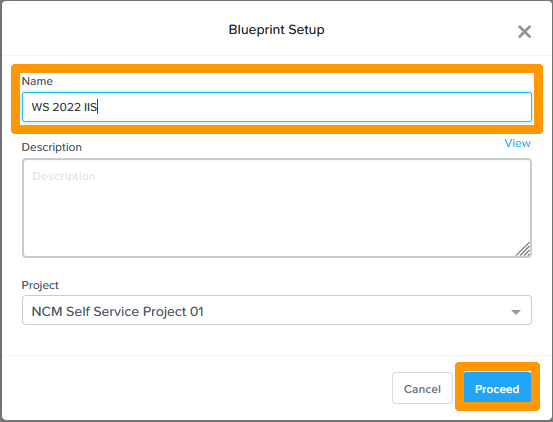
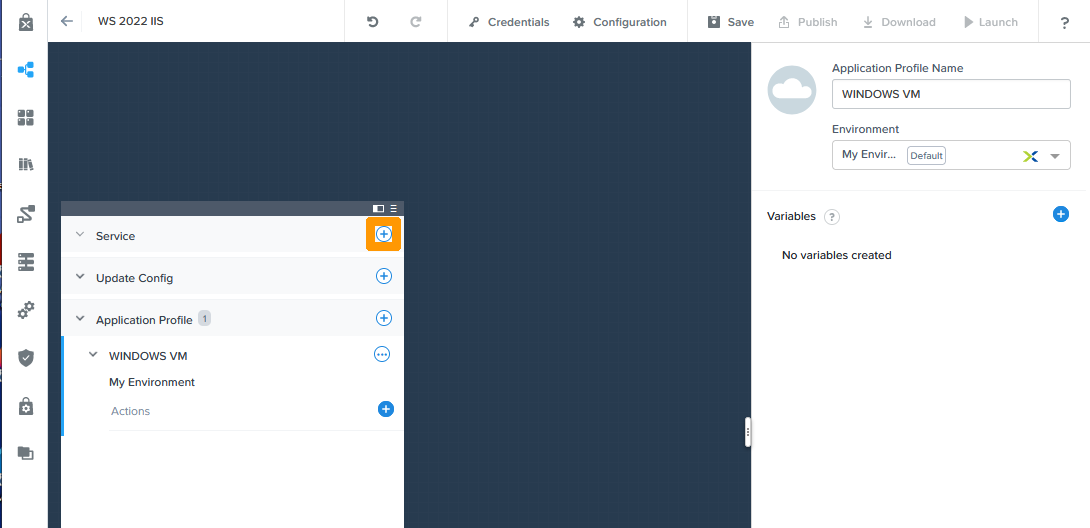
In the vertical bar ,choose Blueprints, scroll to the Create Blueprint menu and click on Multi VM/Pod Blueprint.
Choose the name of your blueprint from Name and click on Proceed.
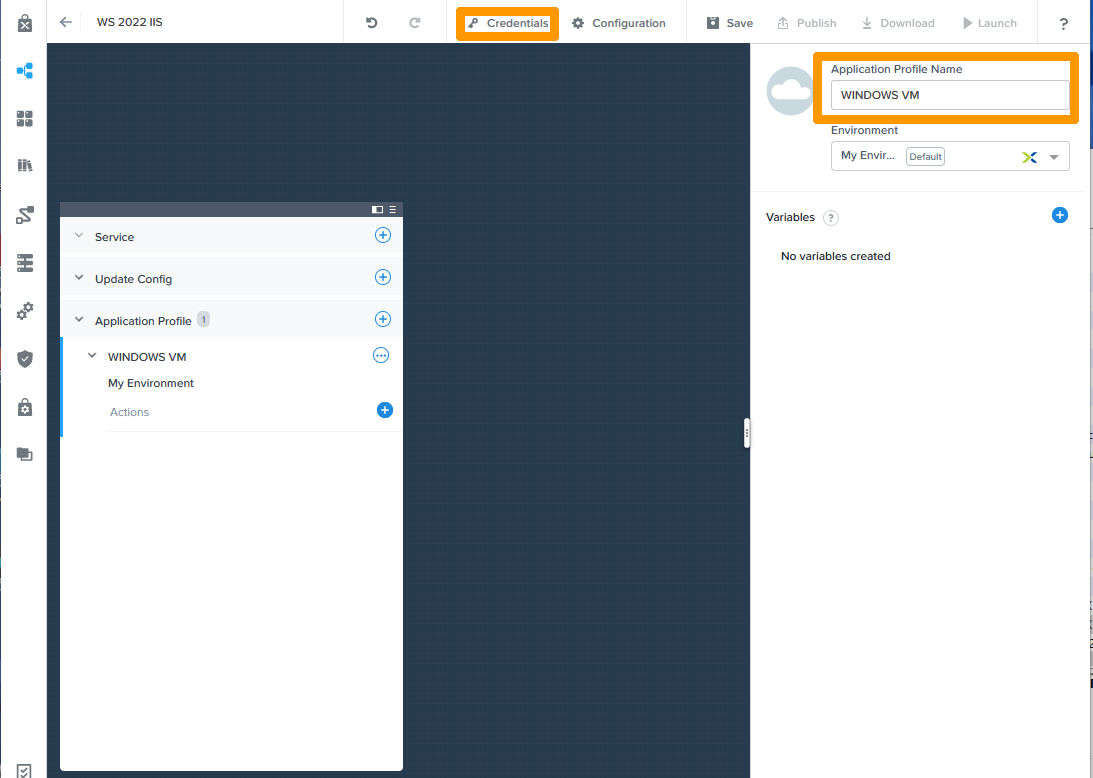
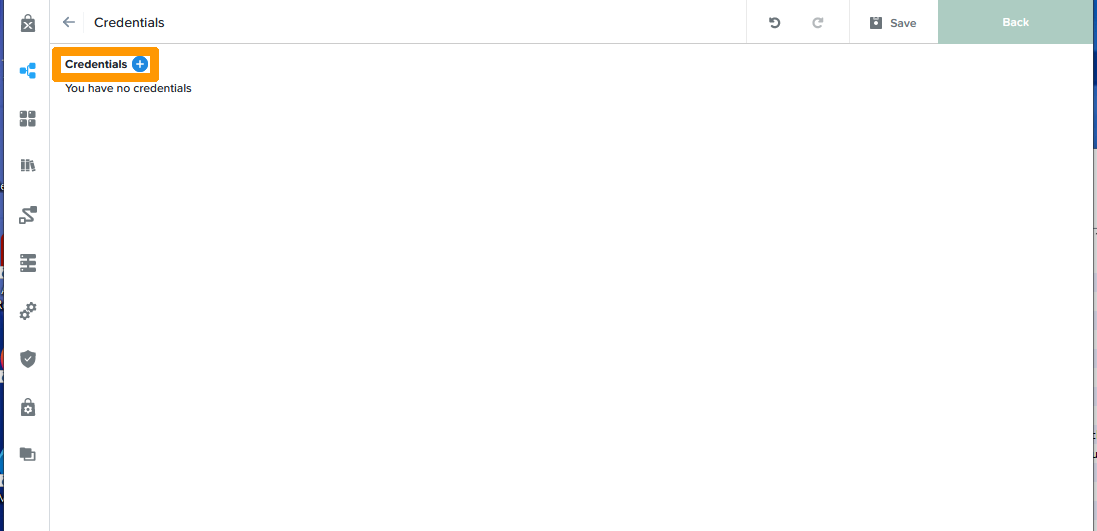
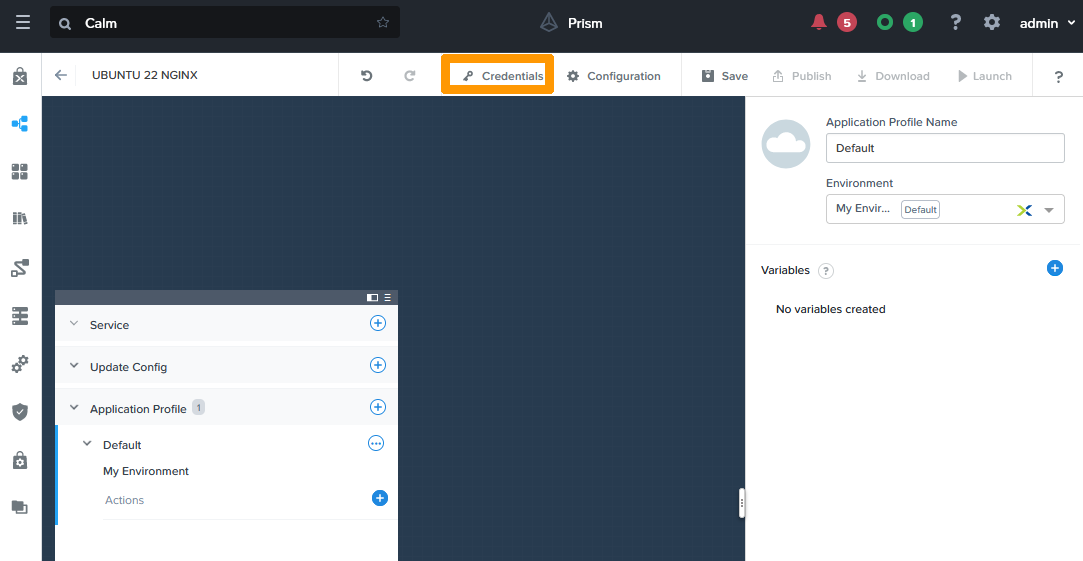
Type the name in Application Profile Name and click on Credentials at the top.
We will create the Windows account, it will be used inside sysprep as variable, in the configuration of the blueprint installation tasks and for the remote connection test.
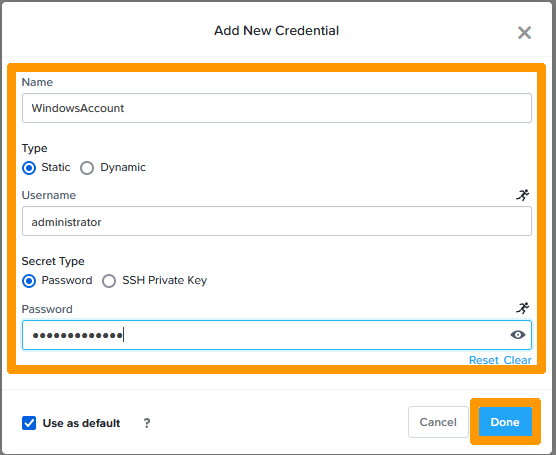
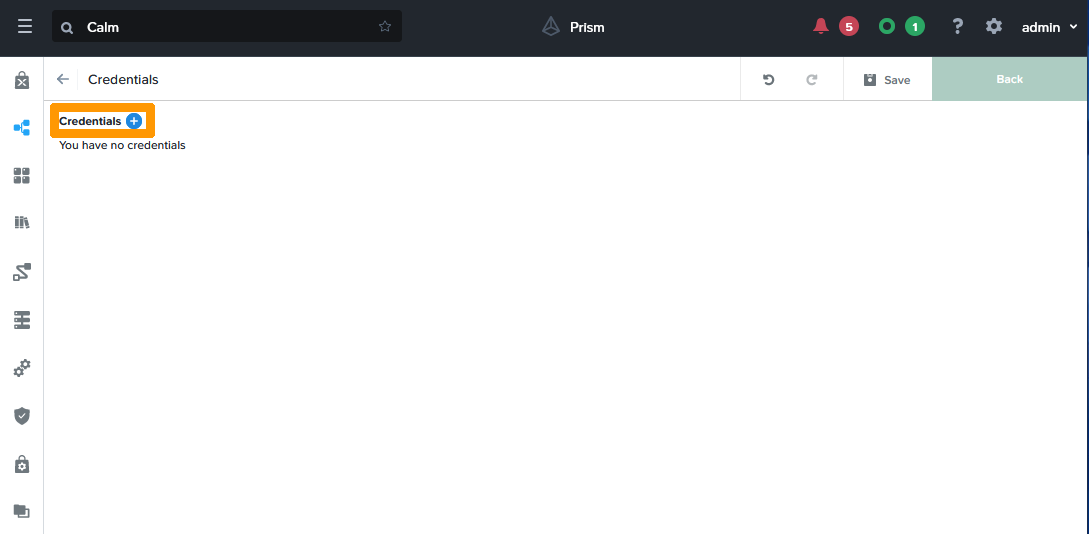
Click on the + button next to Credentials.
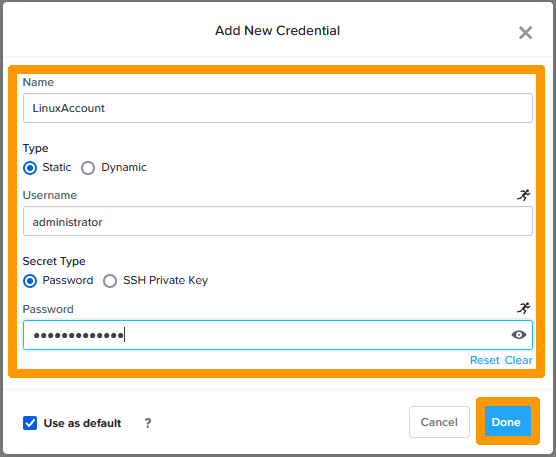
Enter this information:
- Name:
WindowsAccount - Username:
administrator - Password:
Administrator account password
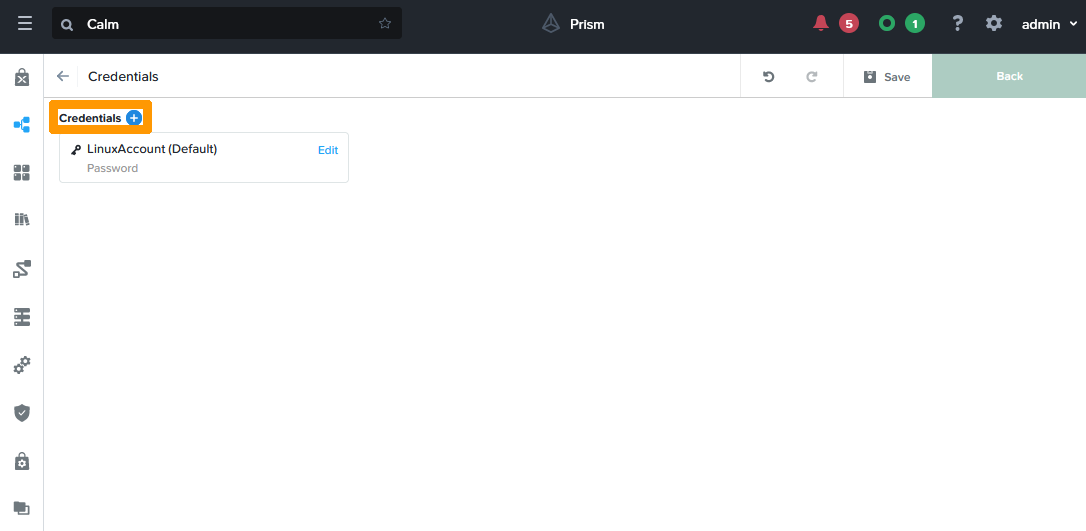
And click on Done.
Click Back.
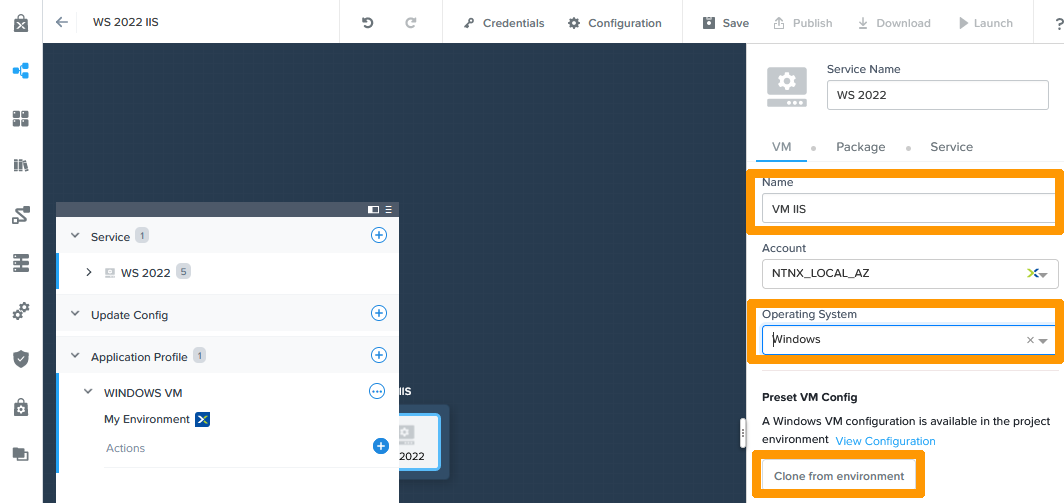
Click the + button in the left window next to Service.
Enter this information:
- Name:
VM IIS - Operation System:
Windows
And click on Clone from environment.
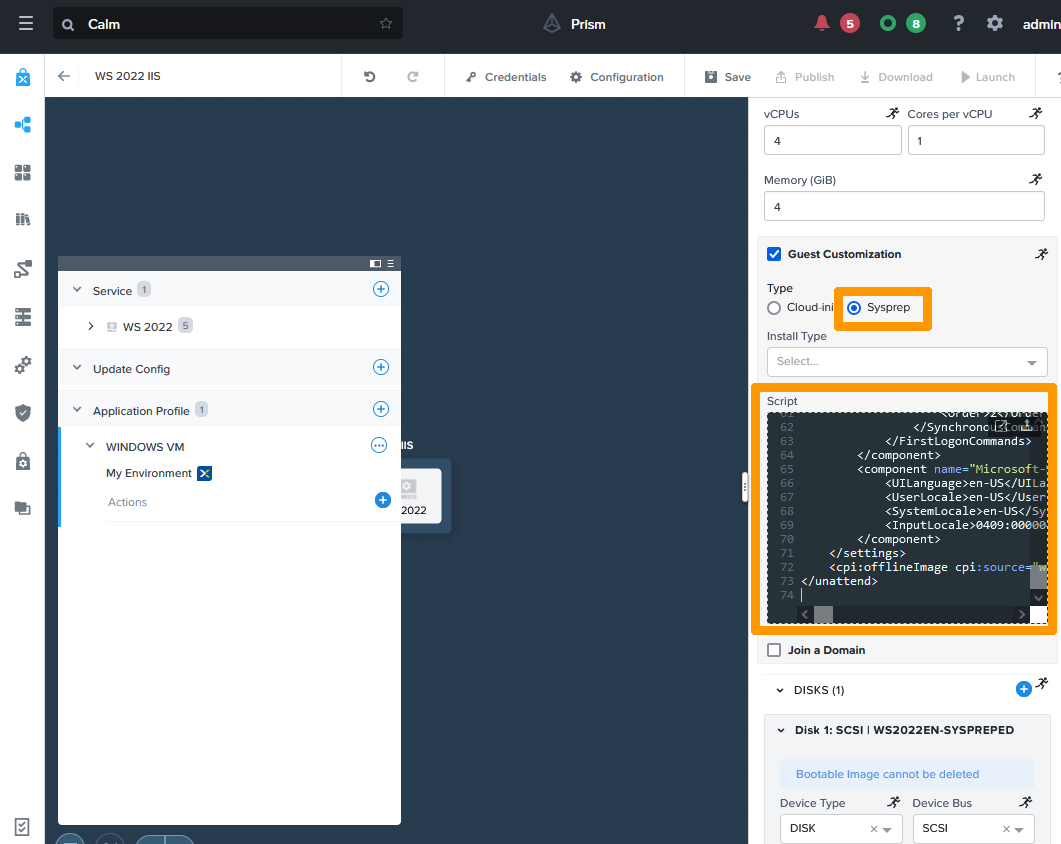
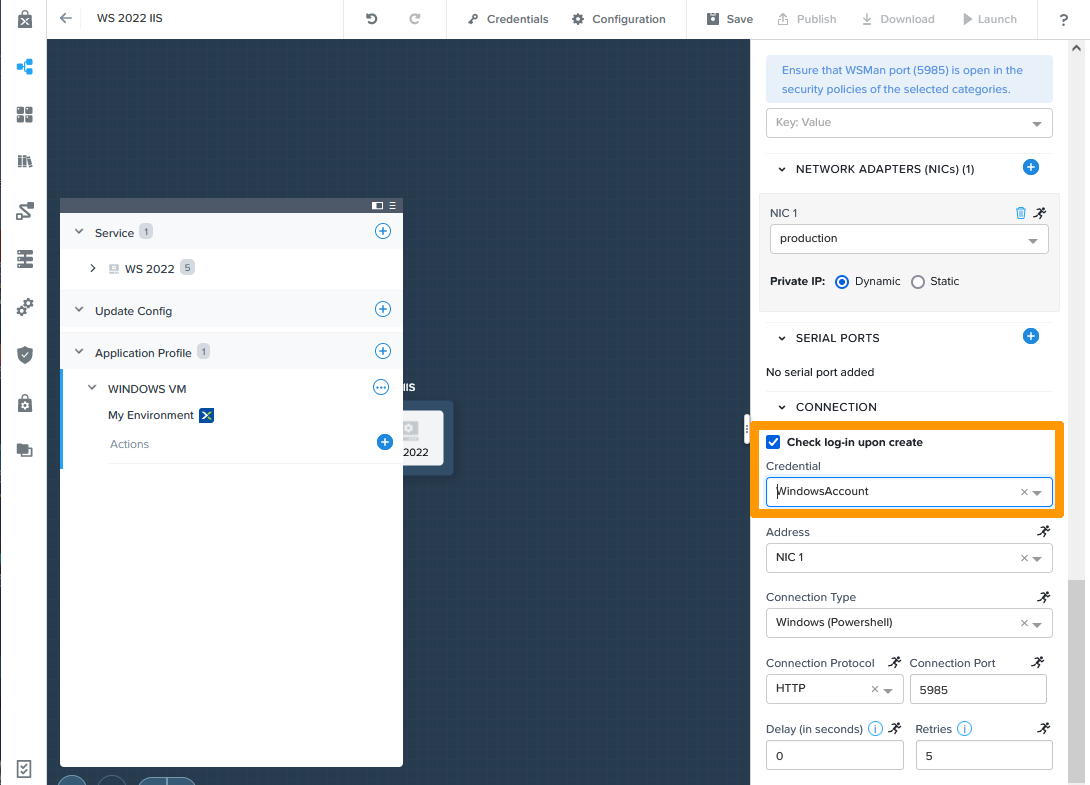
Scroll down the window on the right and check the Guest Customisation box. Next, click Sysprep and then copy the contents of the sysprep file below to Script:
This file is generated from the Windows ADK tools downloadable via this link and has been adapted by adding variables from Nutanix CALM such as '@@{WindowsAccount.secret}@@' that represents the password of the WindowsAccount.
Continue to scroll through the window and check that Check log-in upon create is checked and choose WindowsAccount from Credential.
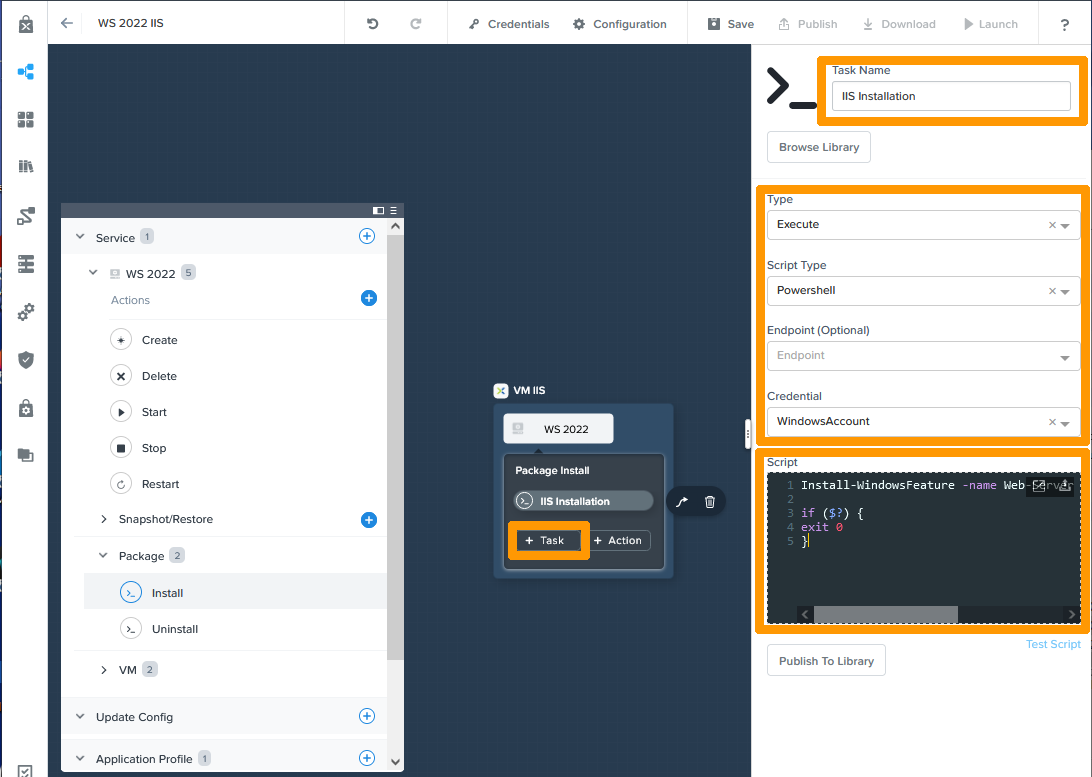
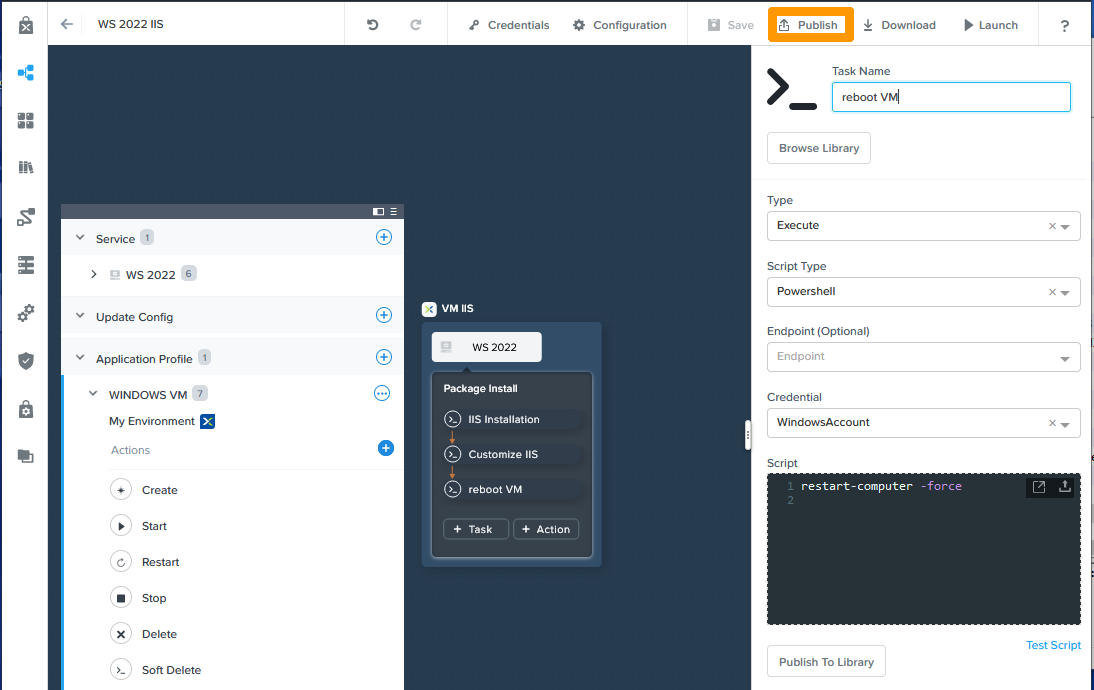
We will now create tasks in Powershell that will run after Windows installation and customisation. Each of these tasks runs in sequence.
In the left-hand window, go to Install below the Package category and click on + Task.

Enter this information:
- Task Name:
IIS Installation - Type:
Execute - Script Type:
Powershell - Credential:
WindowsAccount
Copy this content to Script:
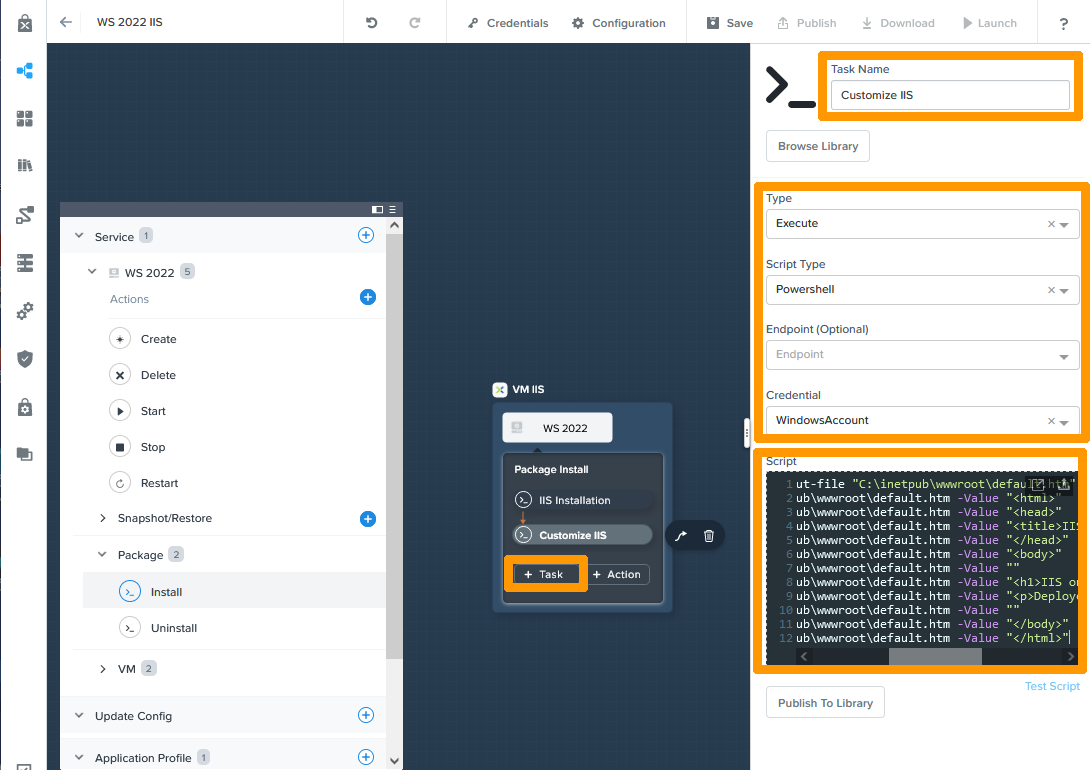
Click + Task.
Fill in this information:
Task Name: Customize IIS
Type: Execute
Script Type: Powershell
Credential: WindowsAccount
Copy this content to Script:
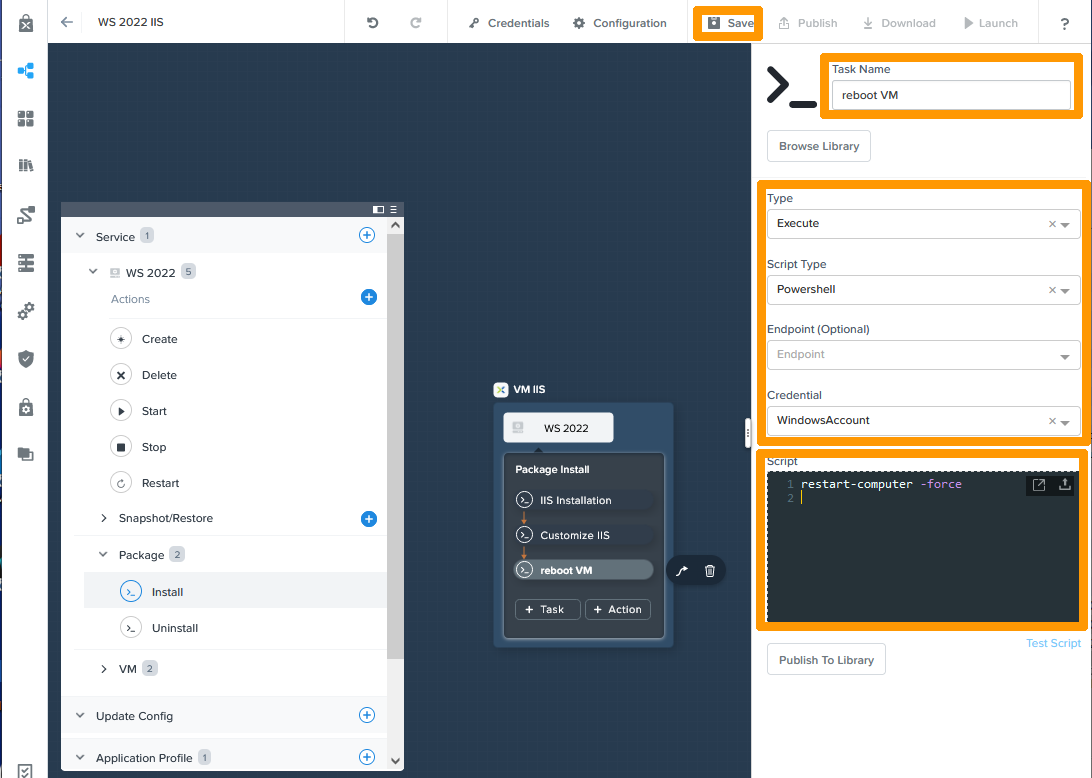
Then click + Task.
Enter this information:
Task Name: reboot VM
Type: Execute
Script Type: Powershell
Credential: WindowsAccount
Copy this content to Script:
Click Save at the top of the window.
The application is created, click Launch to test your application.

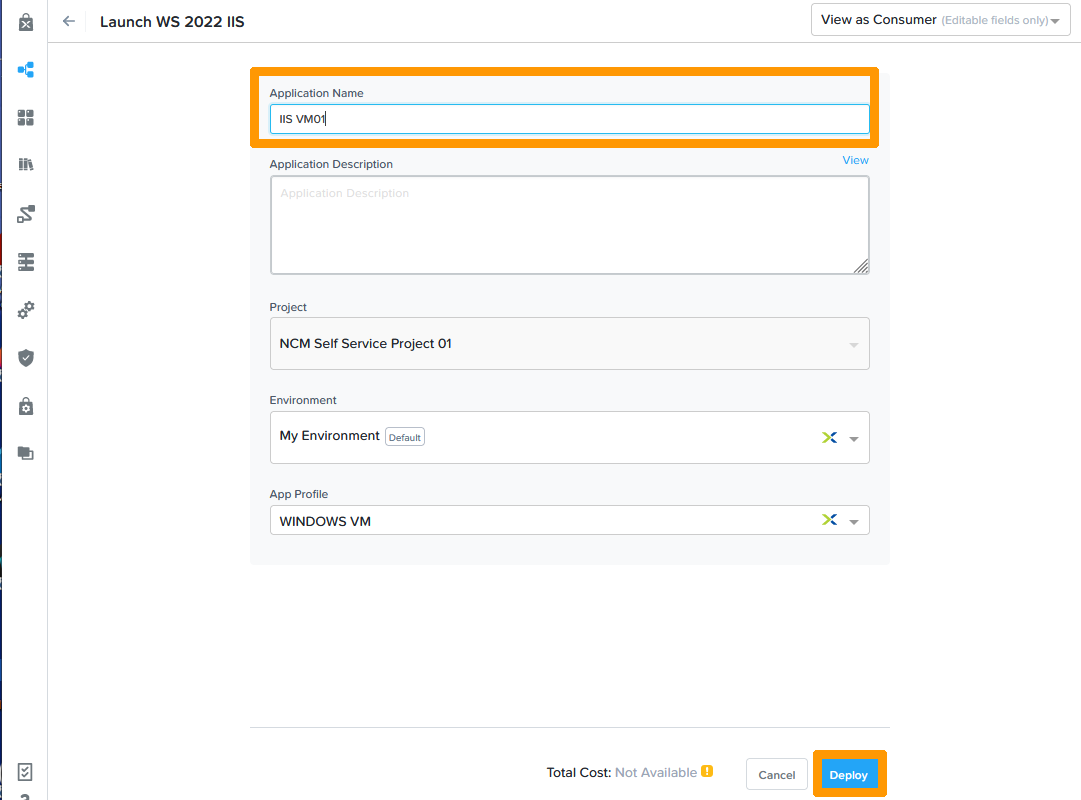
Type a Name in Application Name and click Deploy.
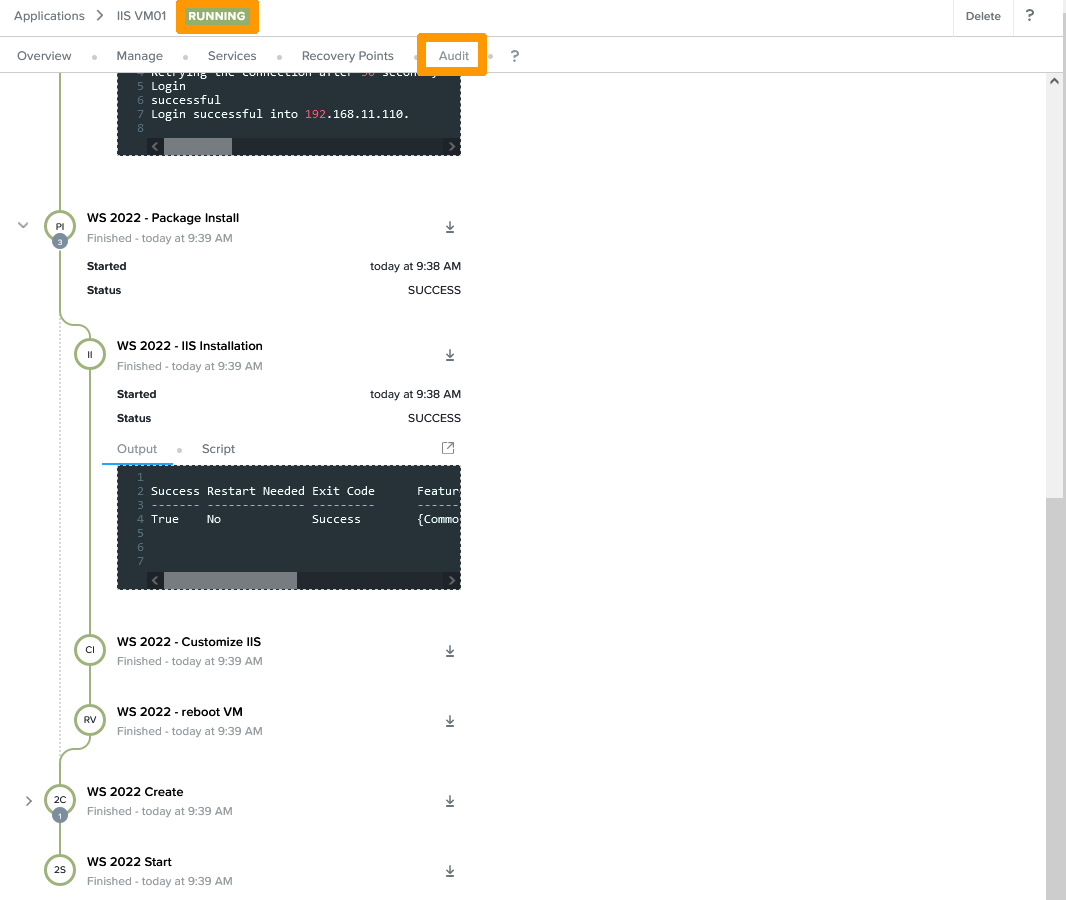
A new window will appear, click on Audit to see the steps for deploying your application. When the deployment is complete you can see at the top of the window the RUNNING indication that the application is deployed and active.
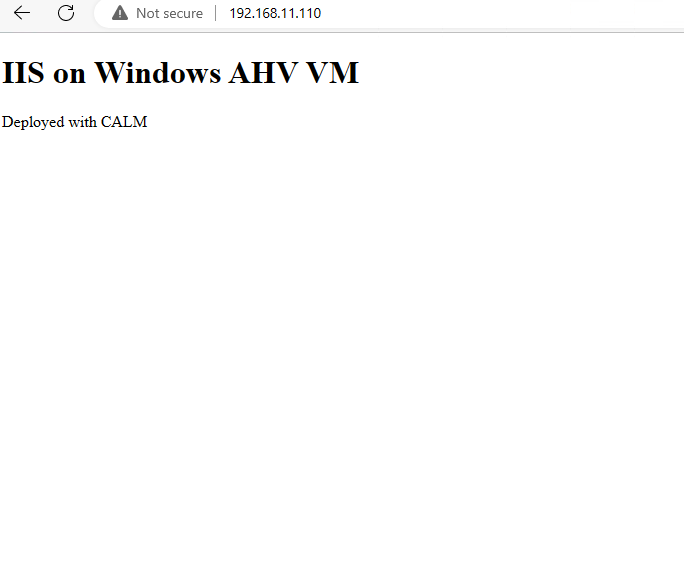
In our case, the IIS server is active and displays a message on the IP address of the virtual machine in HTTP.
Creating the Nginx web application on Linux Ubuntu
We will create another application under Linux Ubuntu with Nginx installed as a WEB server.
Go to the Blueprints icon in the CALM vertical menu bar, click on Multi VM/Pod Blueprint from the Create Blueprint menu.

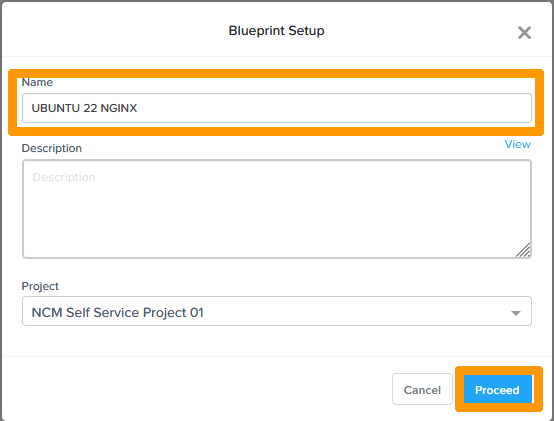
Type the Name in Name and click Proceed.
Click Credentials.
Click Credentials +.
Enter this information for the Linux administration account:
- Name:
LinuxAccount - Username:
administrator - Password:
Administrator account password
Then click Done.
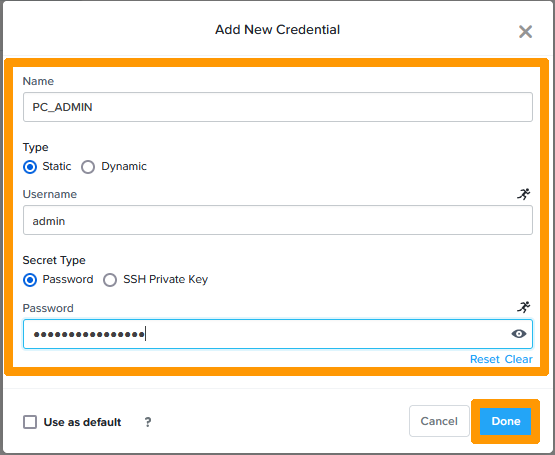
Click on Credentials +.
Enter this information about the Prism Central administration account:
- Name:
PC_ADMIN - Username:
admin - Password:
Prism Central Password
This password is used if you use EScript (Python Scripts) in your deployment tasks, it will be used when using the Prism Central API. In this example, you will find an EScript that will resize the Ubuntu NGINX virtual machine storage.
Then click Done.
Click Back.
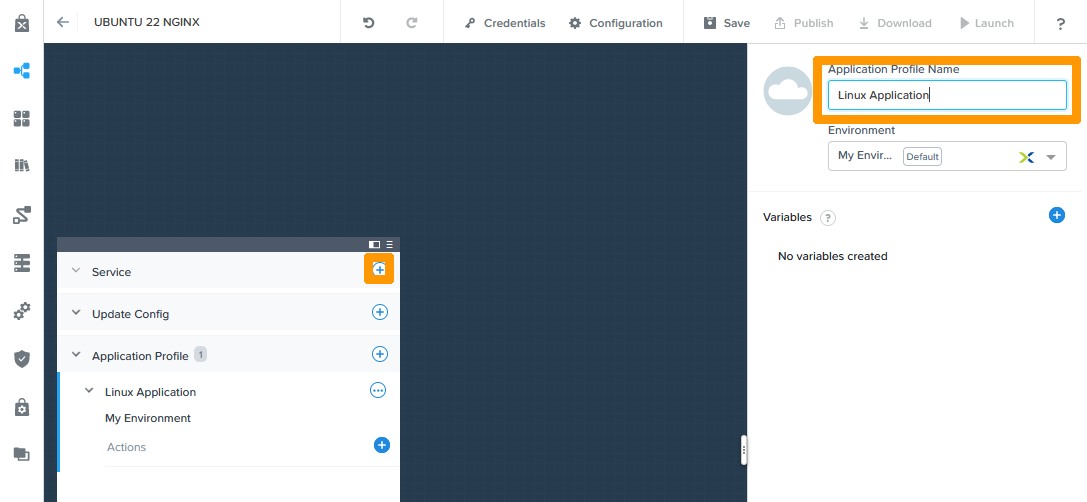
Type Linux Application in Application Profile Name and click + in the left-to-right window of Service.
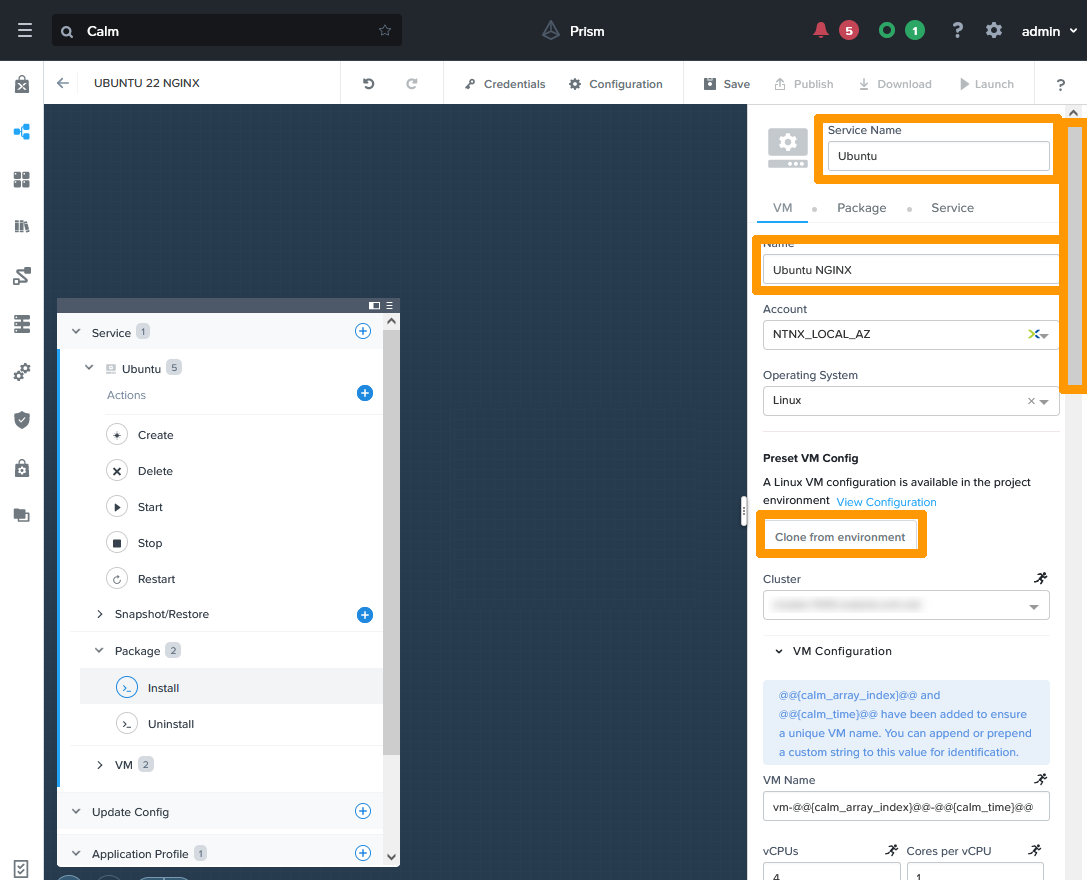
Enter this information:
- Service Name:
Ubuntu - VM Name:
Ubuntu NGINX
Then click on Clone from environment and scroll down the window on the right.
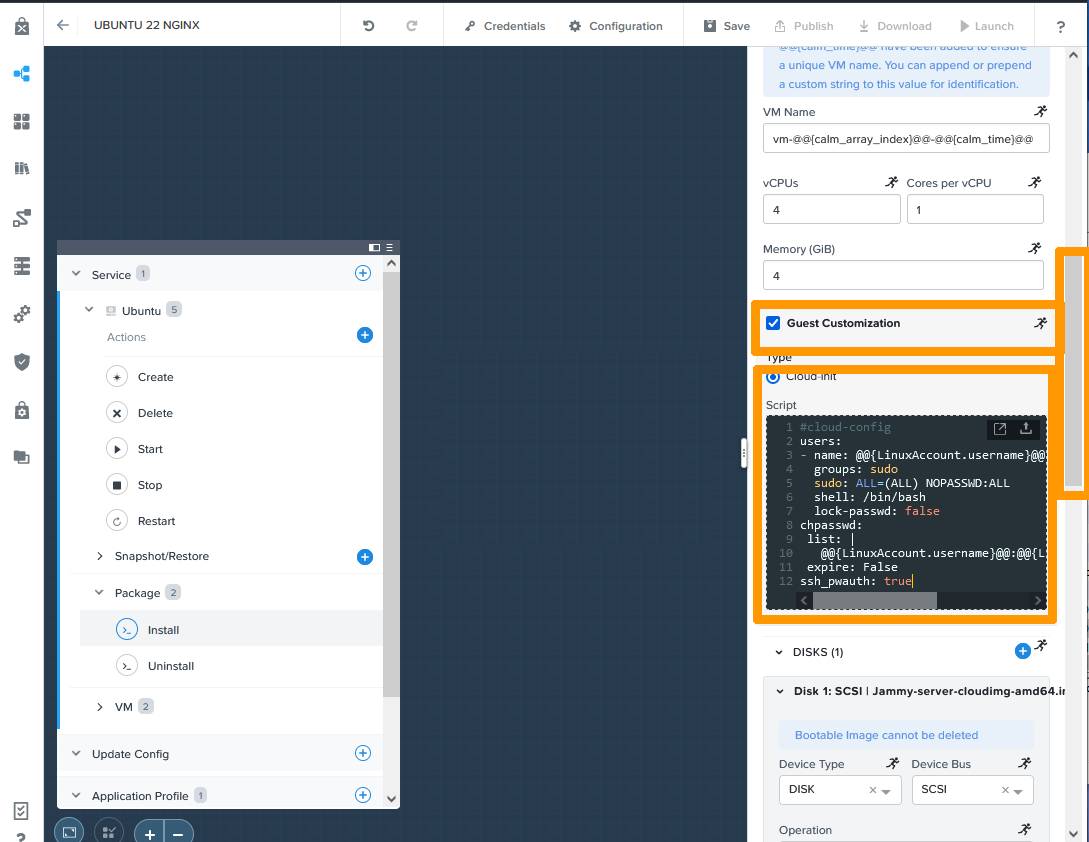
Check Guest Customization and copy the content below in script.
This file is the Linux initialisation file with cloud-init images, it uses the information from the LinuxAccount account that comes from CALM through macro-instructions that have this form: @@{LinuxAccount.username}@@ for the user account and @@{LinuxAccount.secret}@@ for the password.
Scroll down the window on the right.
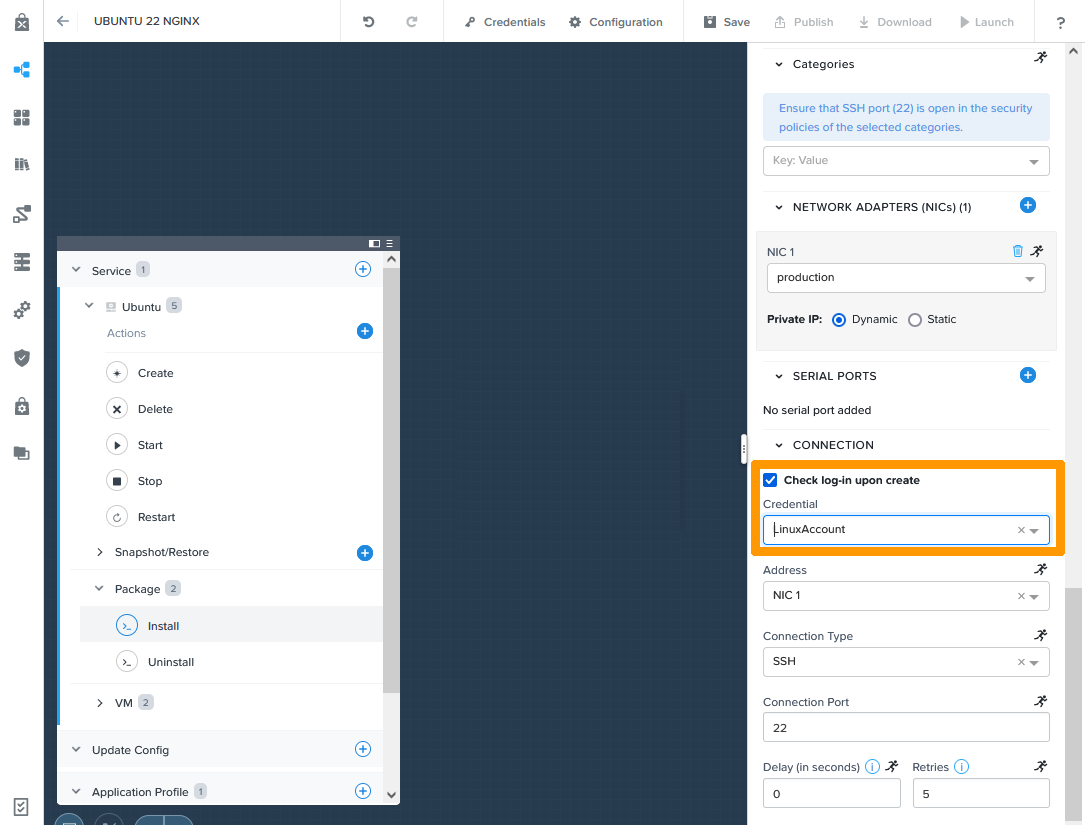
Choose LinuxAccount from Check log-in upon create.
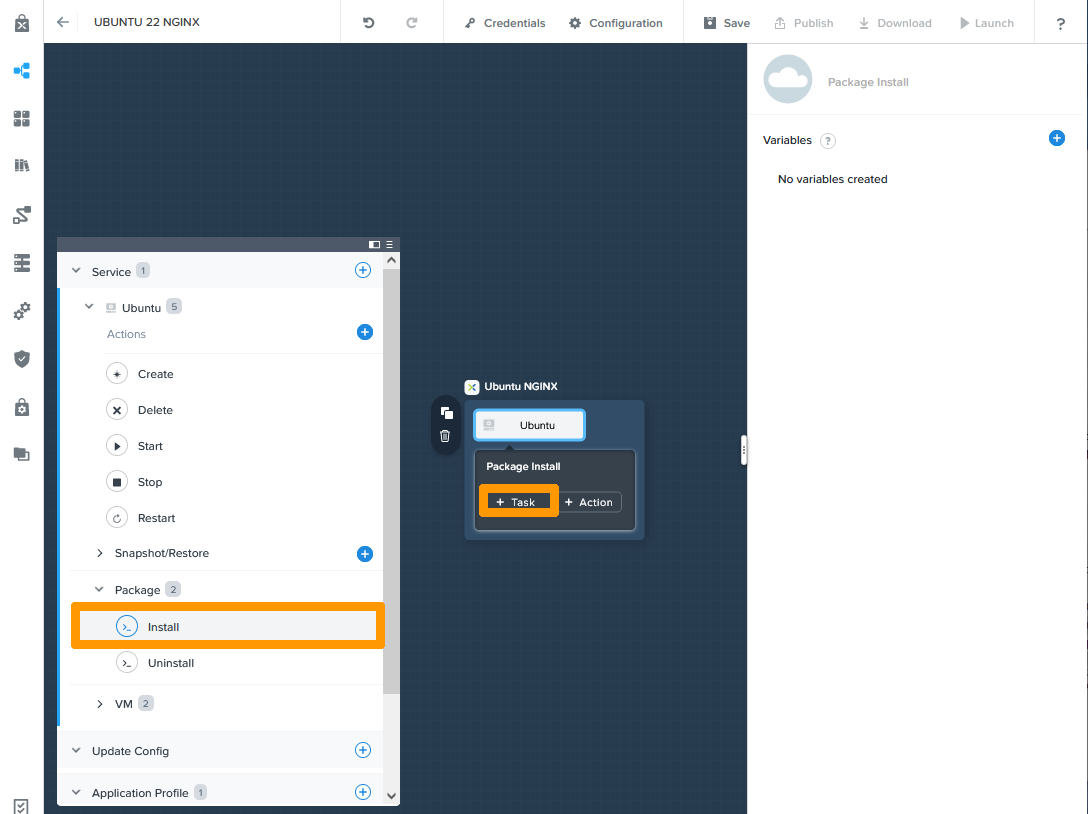
In the left window, go to Install below Package and click on + Task.
Enter the information for your virtual machine's disk resize task.
- Task Name:
Disk resize - Type:
Execute - Script Type:
EScript
Then copy the content of this script:
This script uses the passwords that come from CALM through variables that have this form: @@{PC_ADMIN.username}@@ for the user account and @@{PC_ADMIN.secret}@@ for the password.
Click + Task.

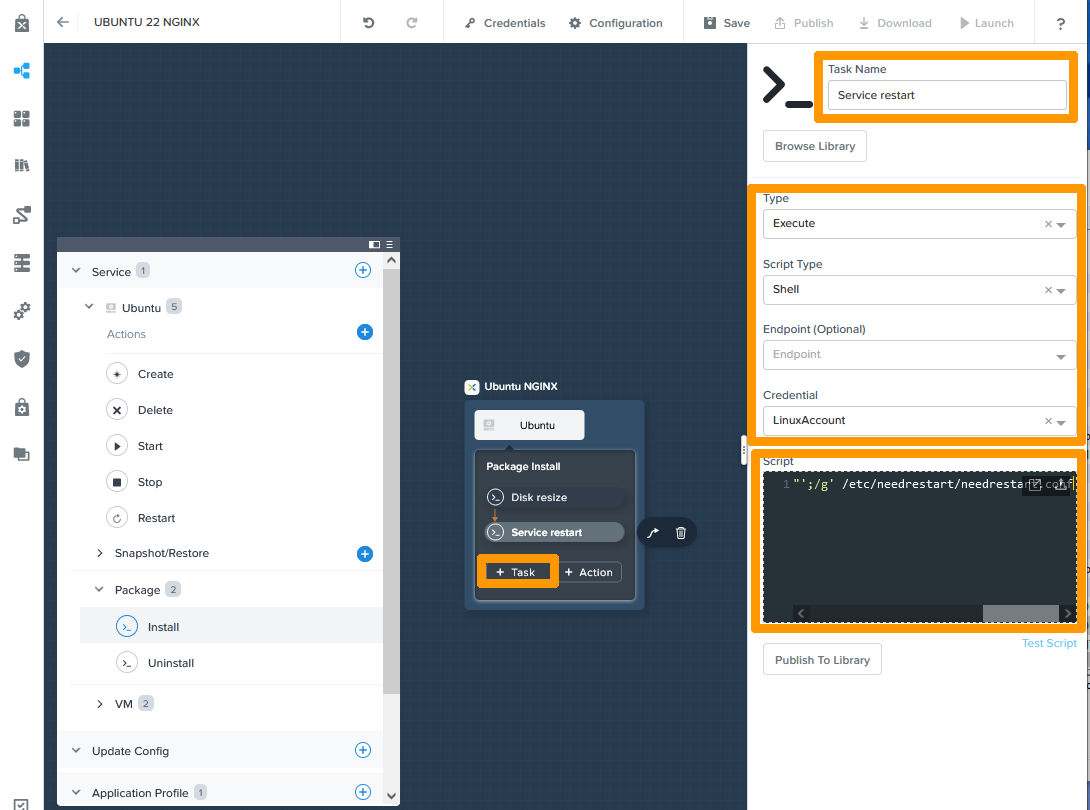
Enter this information about the Linux service verification task:
- Task Name:
Service restart - Type:
Execute - Script Type:
Shell - Credential:
LinuxAccount
Then copy the content below to Script:
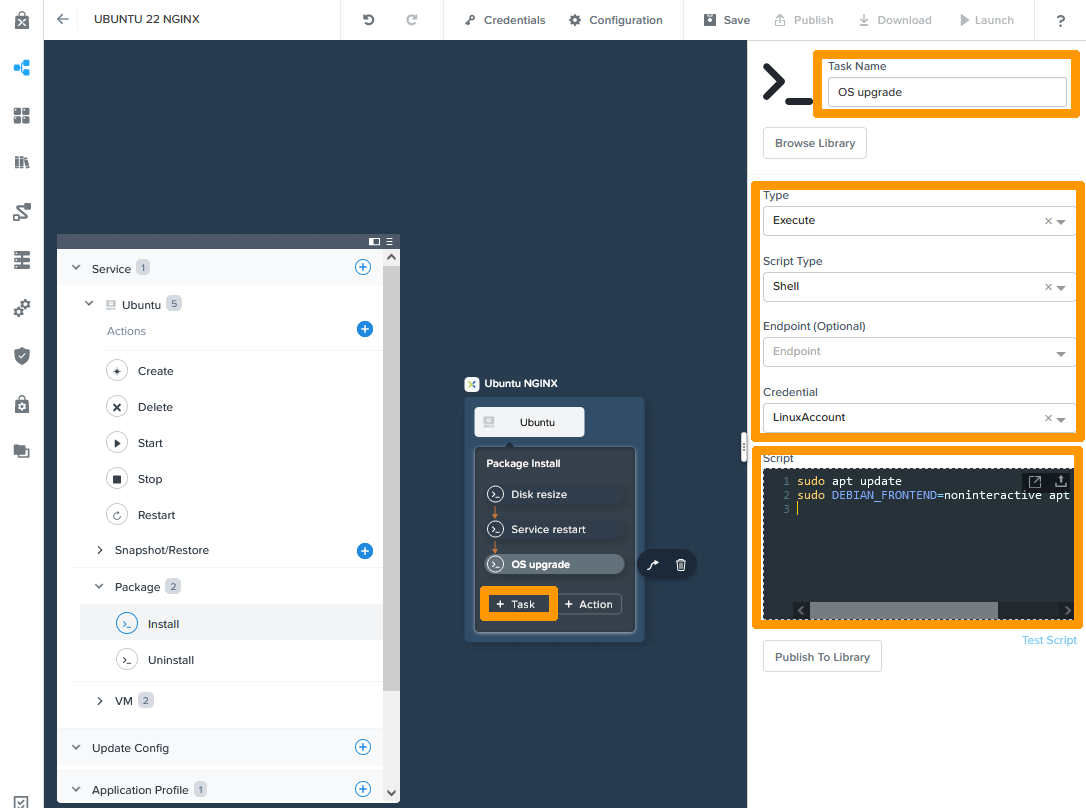
Click + Task to add a new task in sequence.
Enter this information about the UBUNTU update task:
- Task Name:
Service restart - Type:
Execute - Script Type:
Shell - Credential:
LinuxAccount
Then copy the content below to Script:
And click + Task to add a new task in sequence.
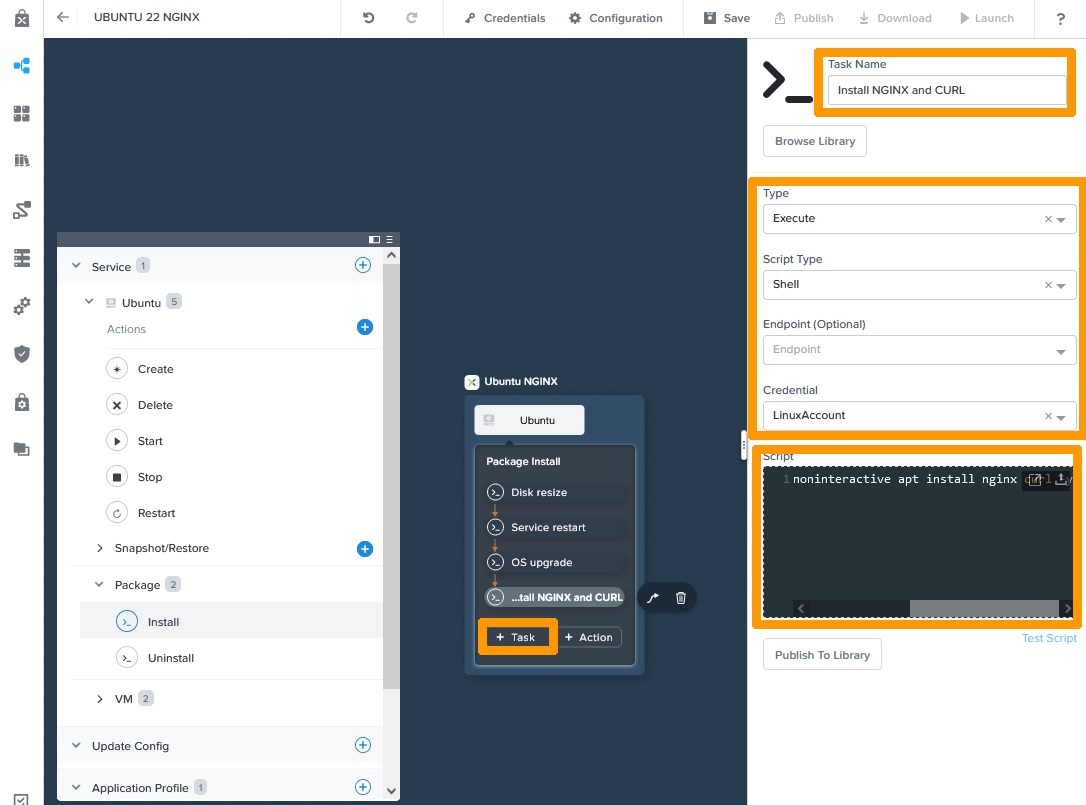
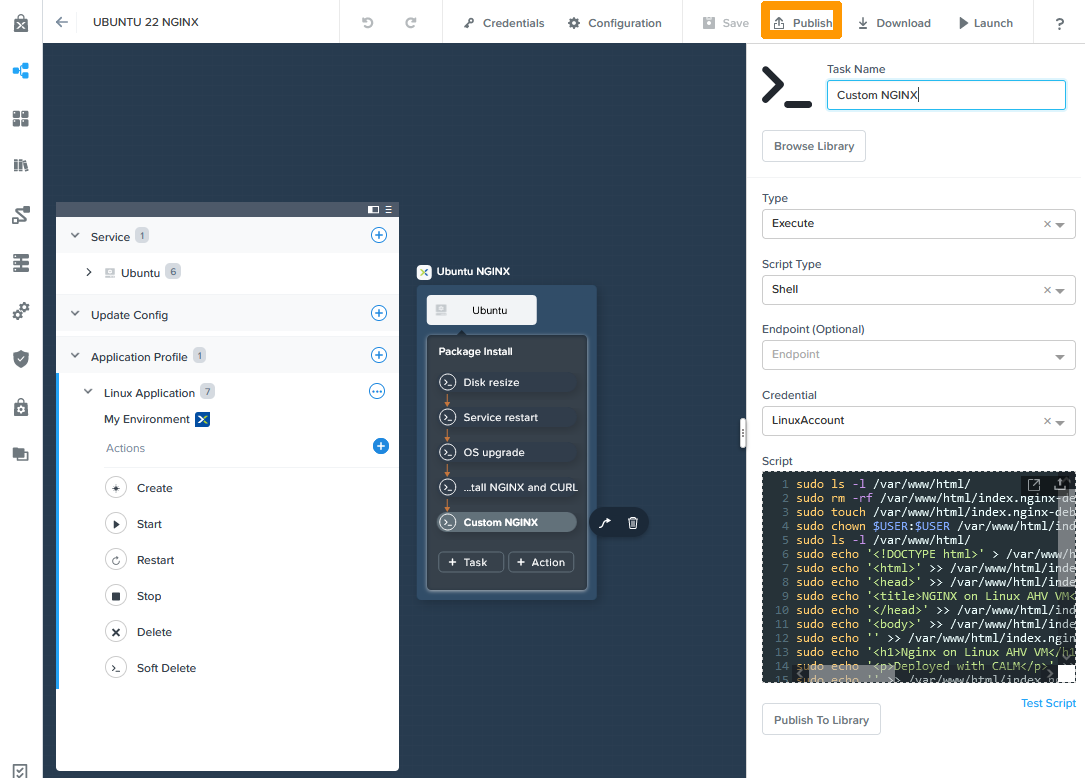
Enter this information about the NGINX and CURL installation task:
- Task Name:
Service restart - Type:
Execute - Script Type:
Shell - Credential:
LinuxAccount
Then copy the content below to Script:
Click + Task to add a new task in sequence.
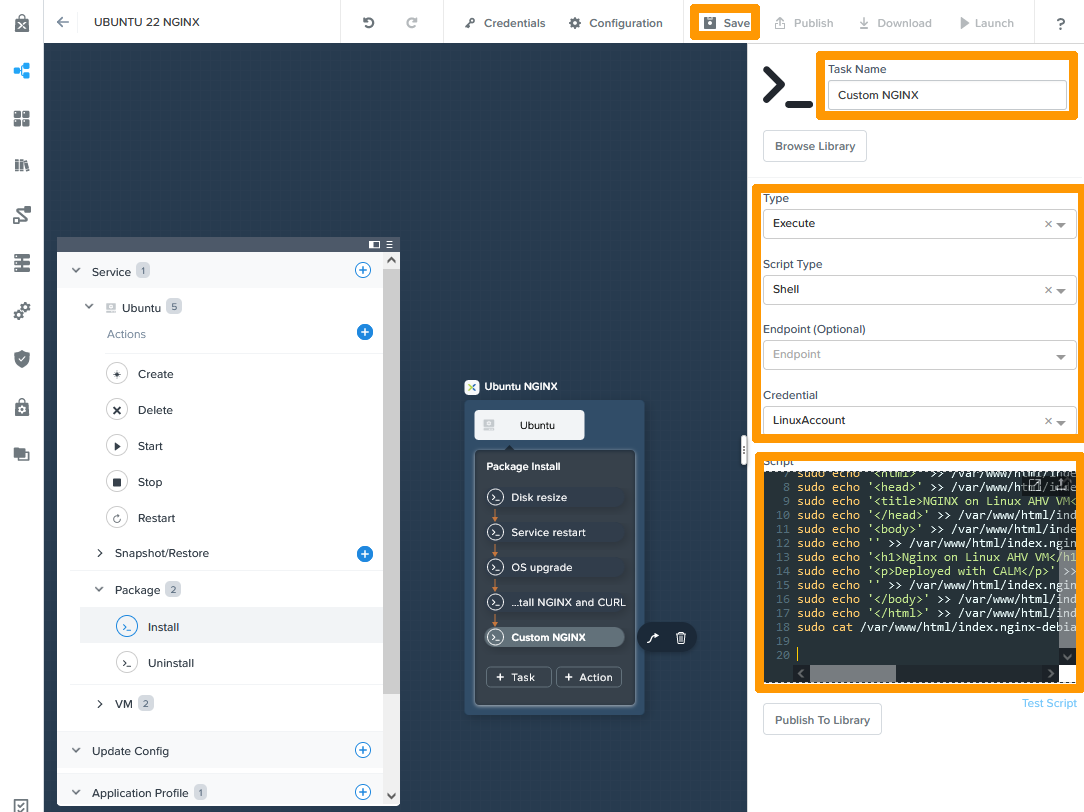
Enter this information about the last NGINX customisation task:
- Task Name:
Service restart - Type:
Execute - Script Type:
Shell - Credential:
LinuxAccount
Then copy the content below to Script:
Click + Save to finish creating your blueprint.
Click Launch to test your blueprint.
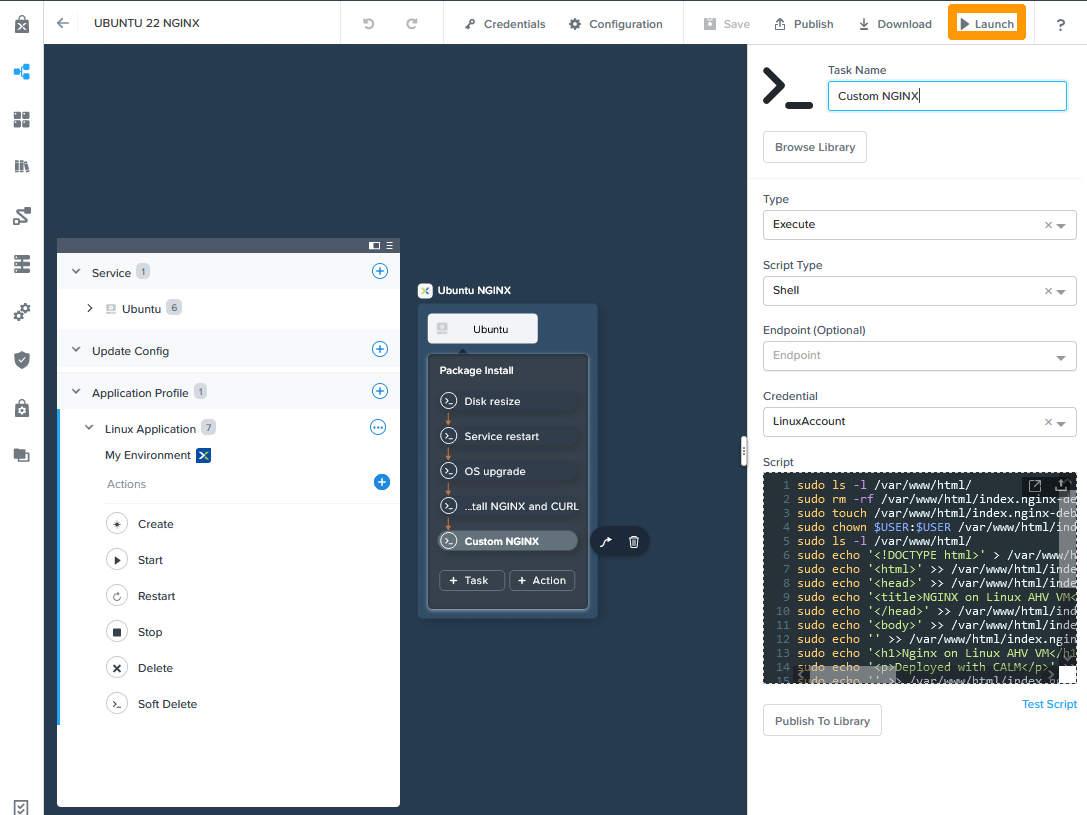
Type the name of your test deployment in Application Name and click Deploy.
Deployment begins.
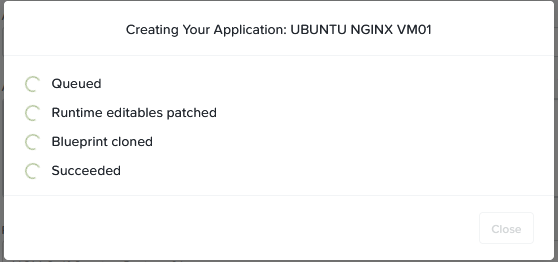
Click Audit to view your deployment progress.
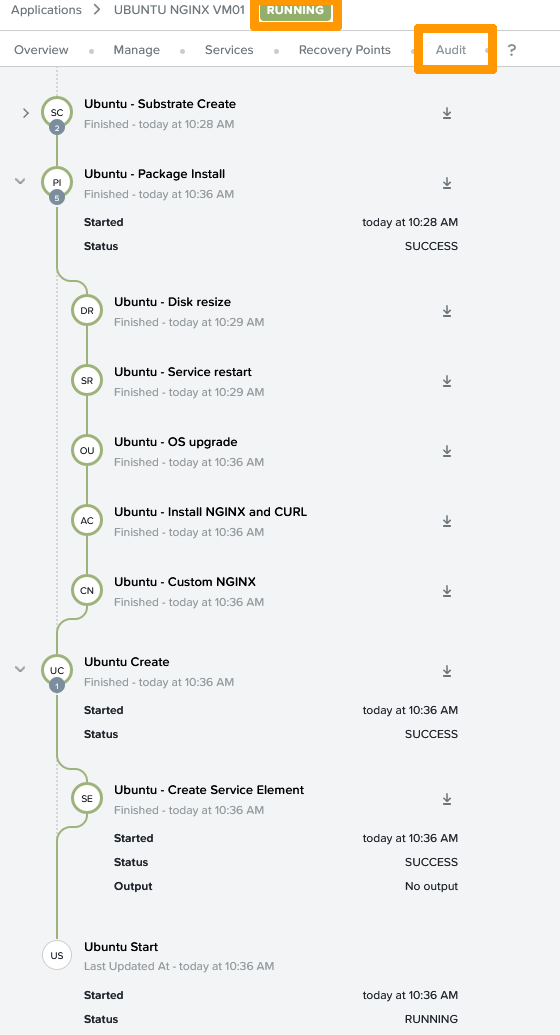
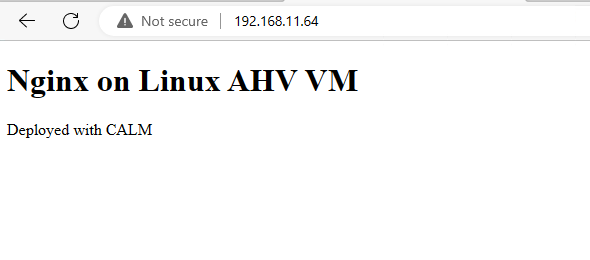
Once the deployment is complete, you can access the IP address of your NGINX VM via HTTP to view the welcome message.
Publishing applications
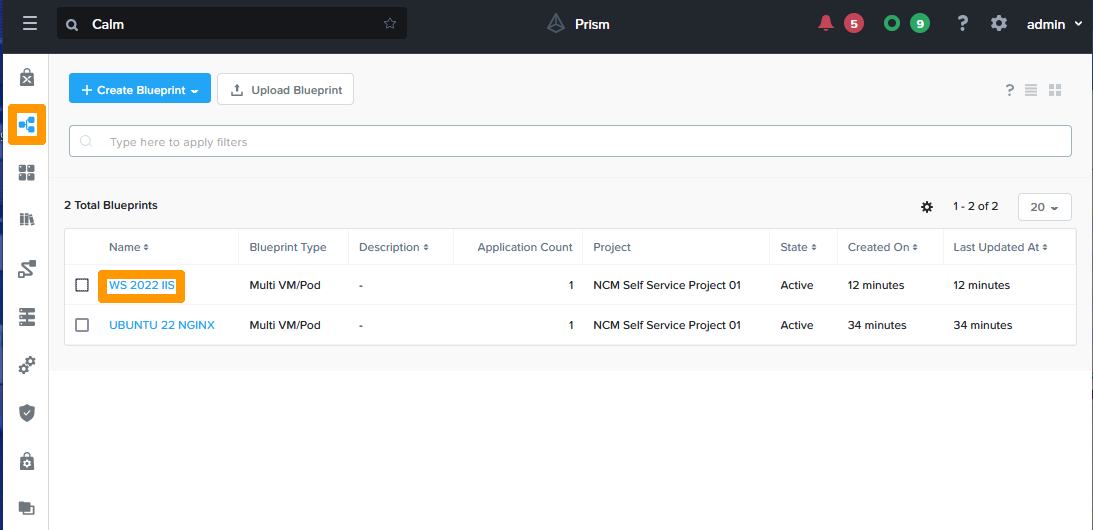
Go to the Blueprints icon in the CALM vertical bar on the left and click on the WS 2022 IIS map.
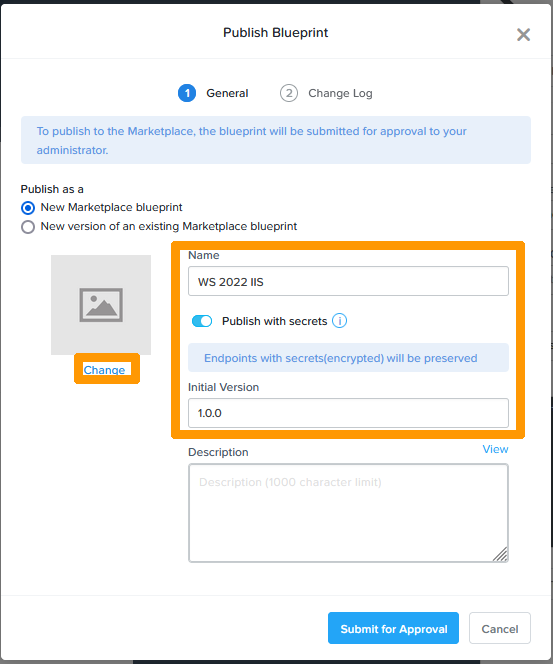
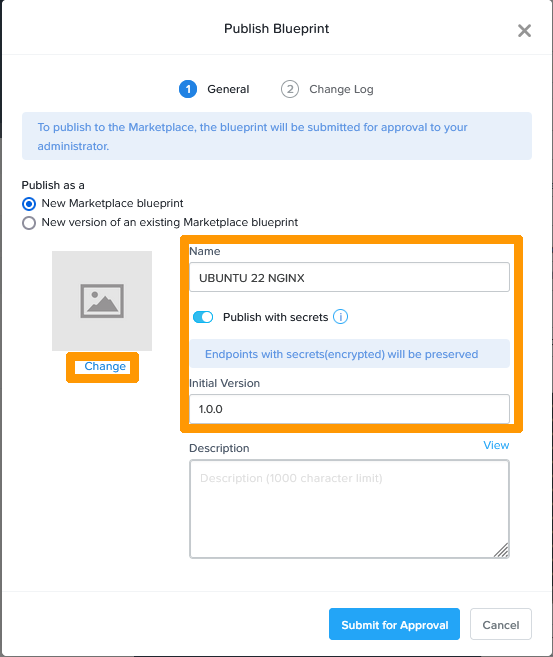
Click Publish.
Apply these values:
- Name:
WS 2022 IIS - Publish with secrets:
enabled - Initial Version:
1.0.0
Then click on Change on the left.
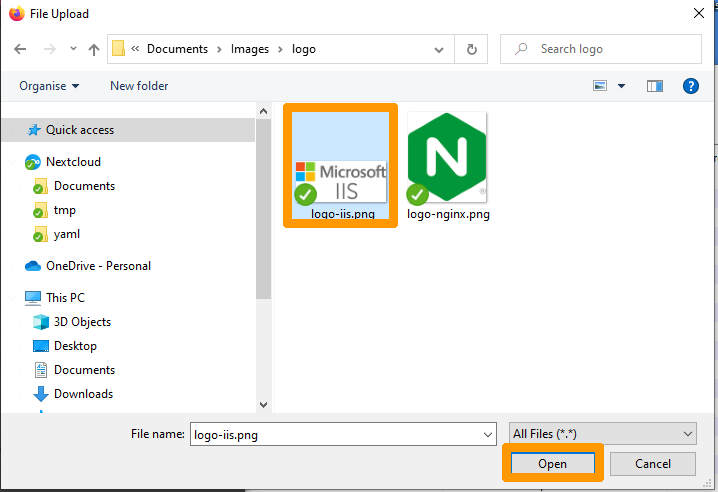
Click Upload from computer.
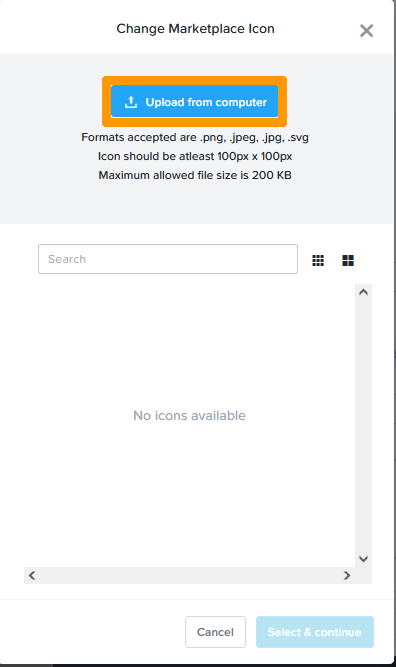
Choose the image on your computer and click Open.
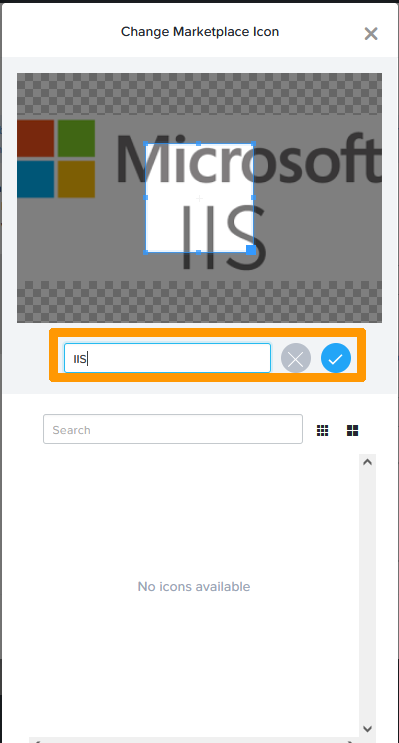
Name your Icon IIS and click on the blue validation button.
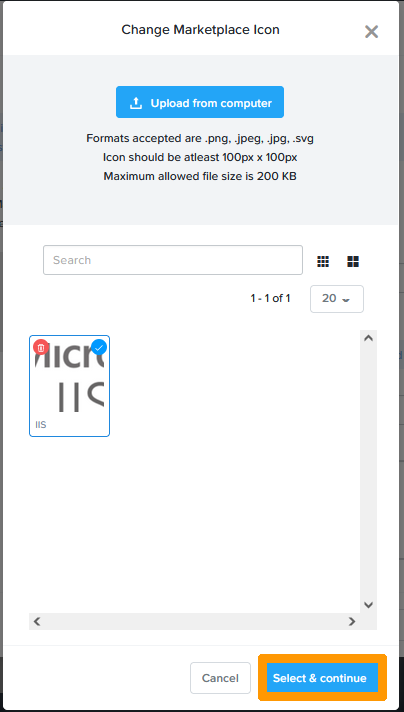
Click Select & continue.
Click Submit for approval.
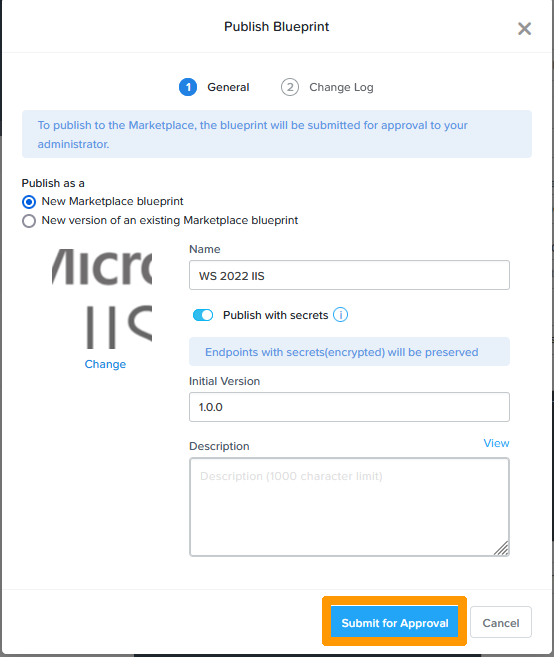
The Windows application is in the marketplace awaiting approval.
Click the UBUNTU 22 NGINX blueprint.
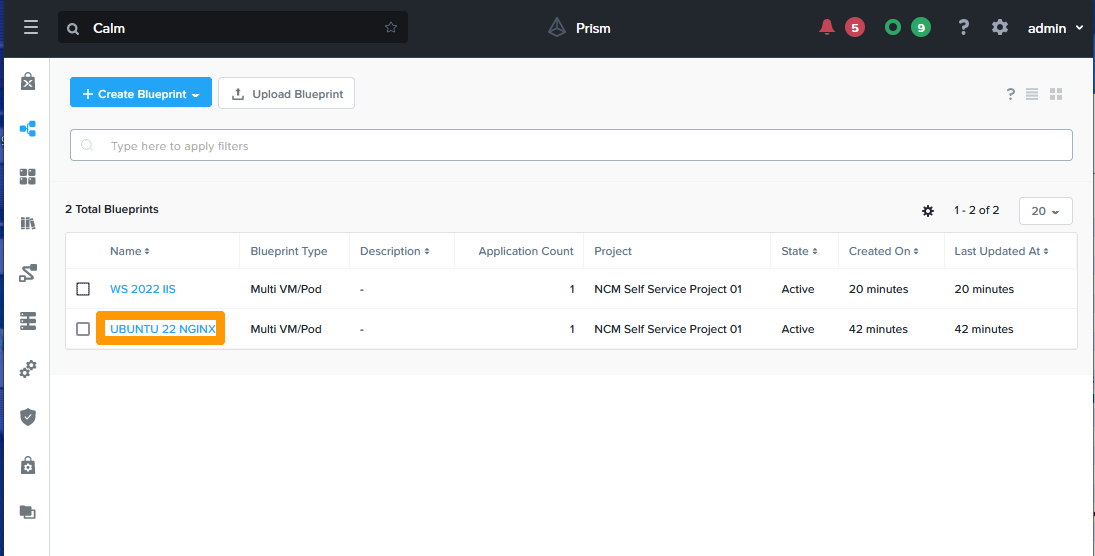
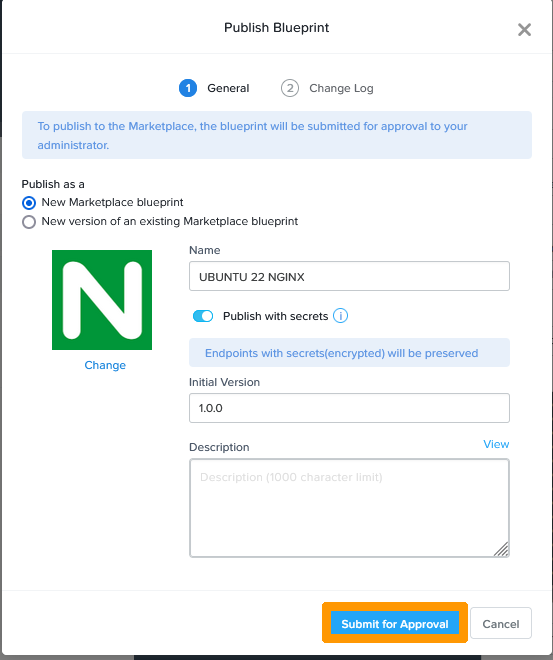
Click Publish.
Apply these values:
- Name:
UBUNTU 22 NGINX - Publish with secrets:
enabled - Initial Version:
1.0.0
Then click Change on the left.
Click Upload from computer.
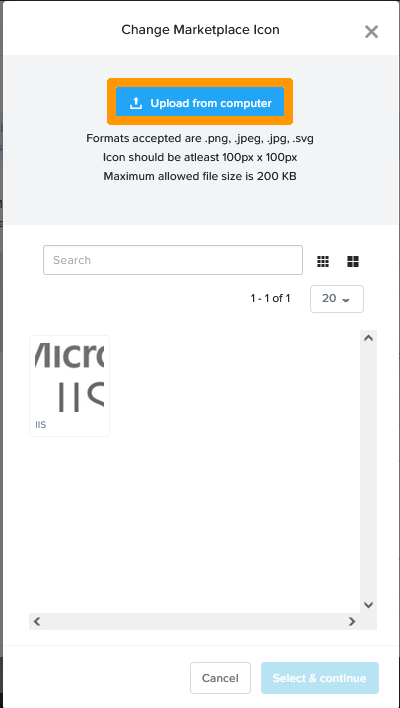
Choose the image on your computer and click Open.
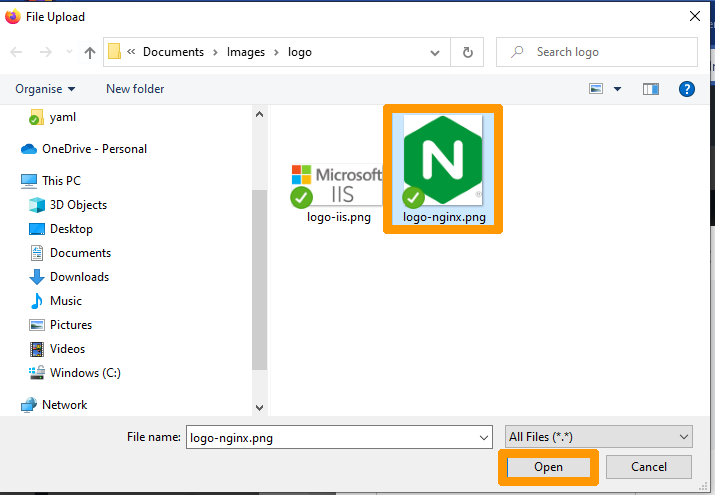
Name your icon NGINX and click the blue validation button.
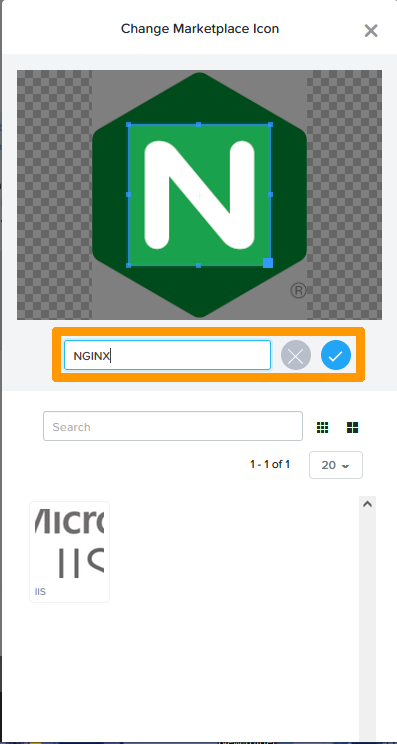
Select your icon and click Select & continue.

Click Submit for approval.
The Linux application is in the marketplace awaiting approval.
Adding applications published on the CALM portal
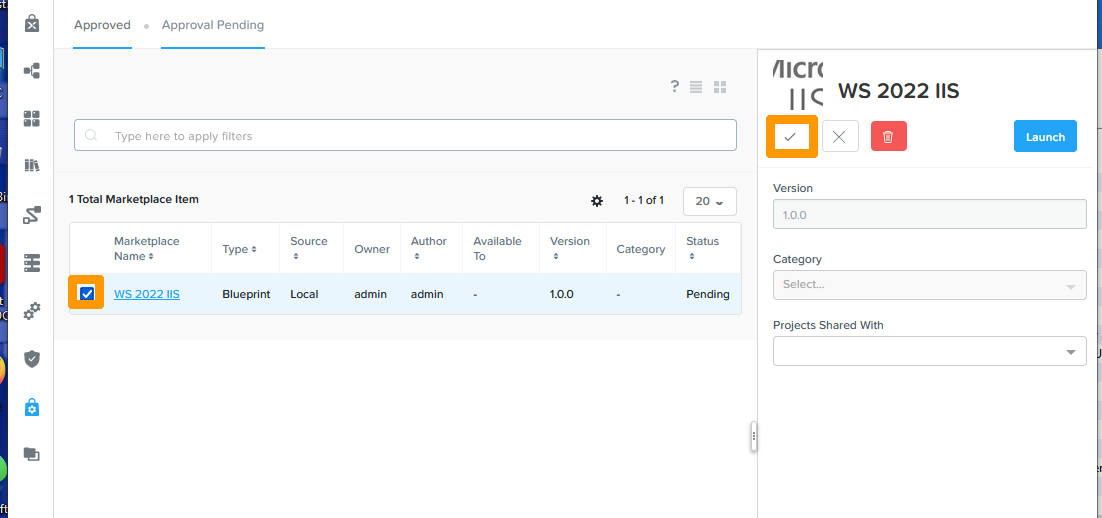
Click on the Marketplace Manager icon, go to the Approval Pending tab, check the UBUNTU 22 NGINX application, and click the validation icon on the right.
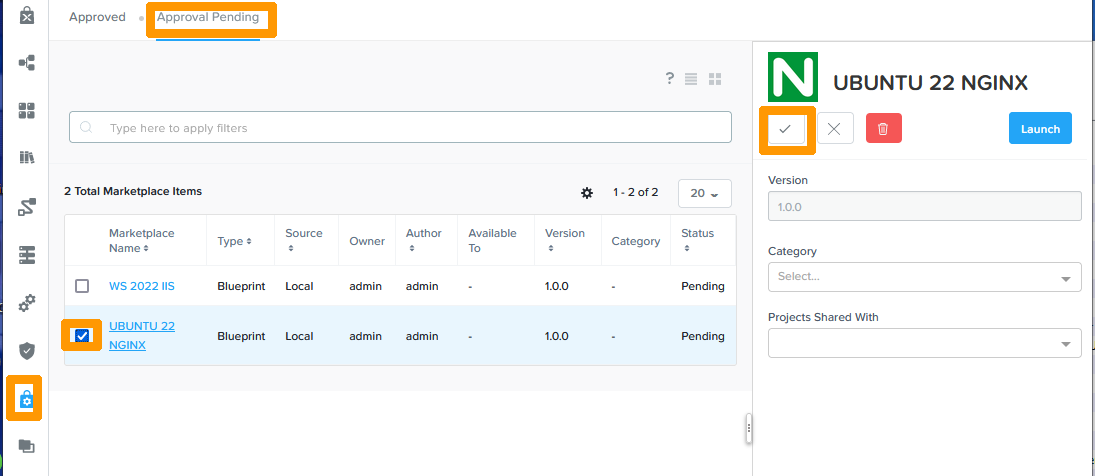
Check the WS 2022 IIS application and click the validation icon on the right.
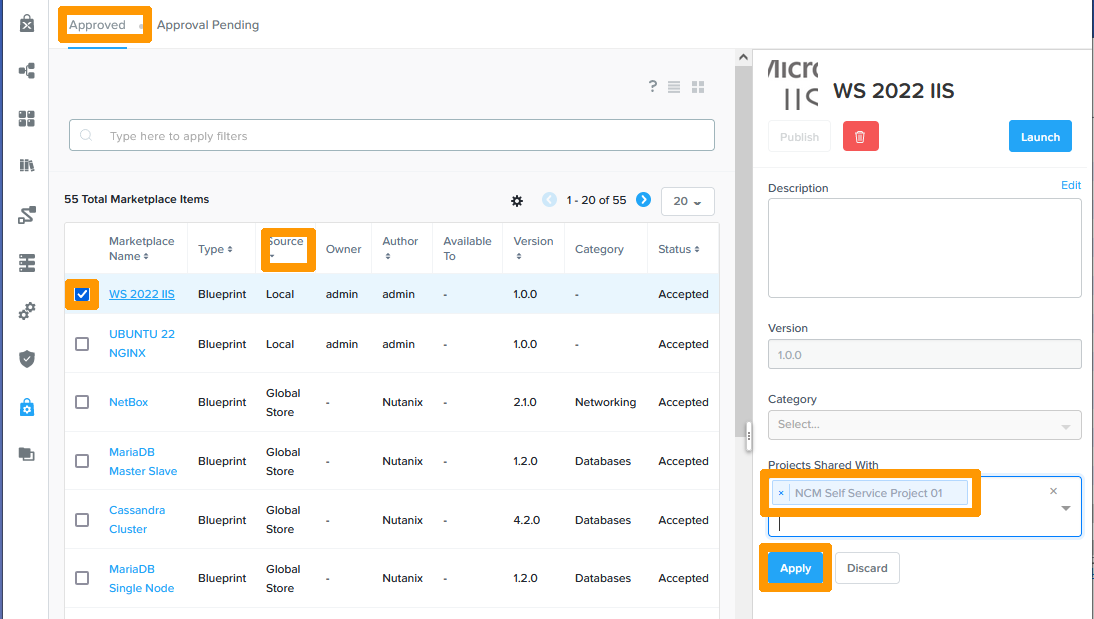
Go to the Approved tab, click on the Source column to display the local applications first, check WS 2022 IIS, select NCM Self Service Project 01 at the bottom right and click Apply.
Click Publish.
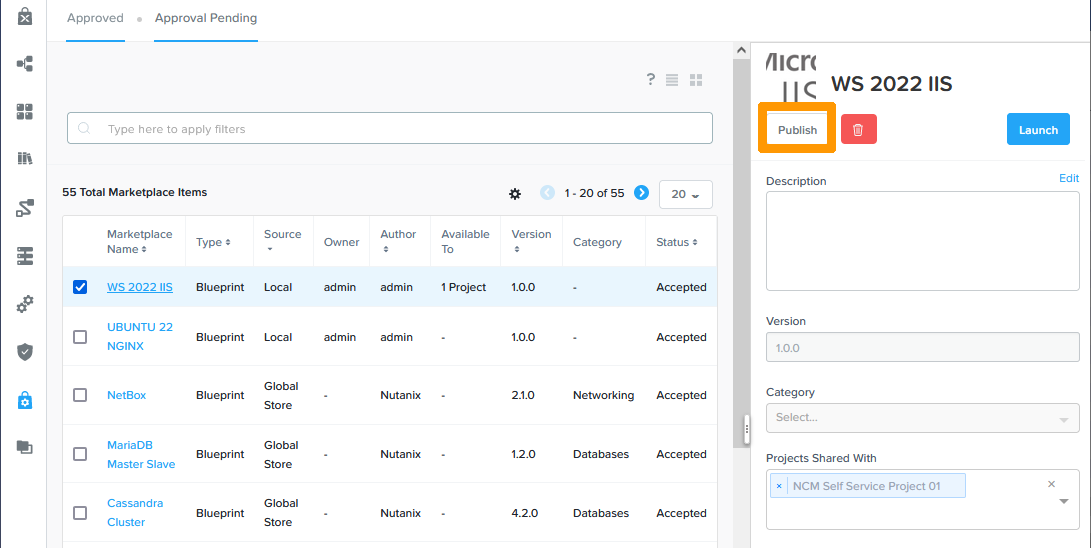
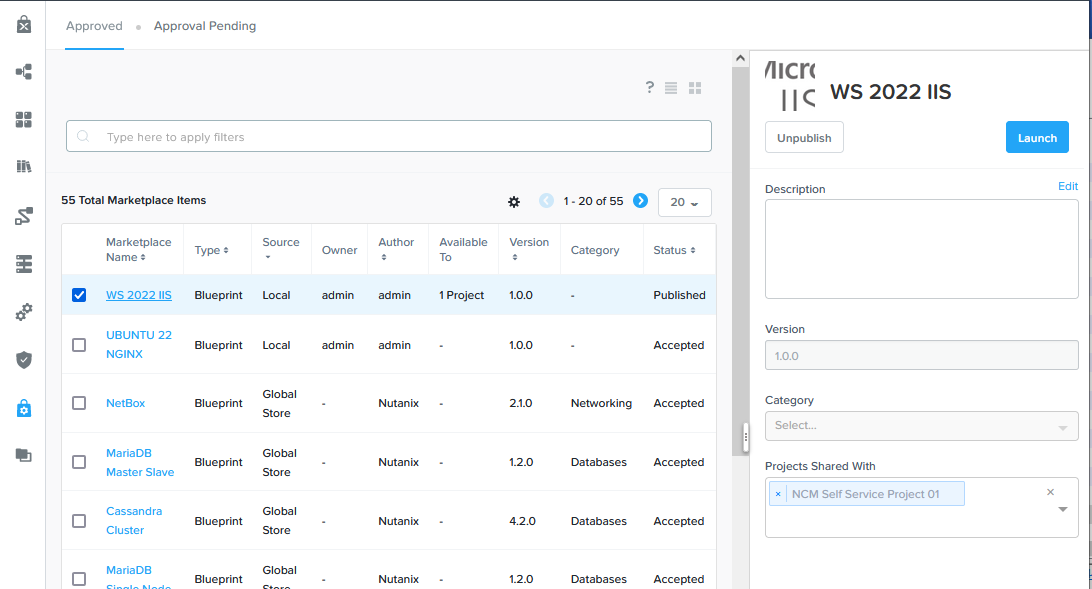
The Windows application is published.
Check Ubuntu 22 NGINX, select NCM Self Service Project 01 on the right and click Apply.
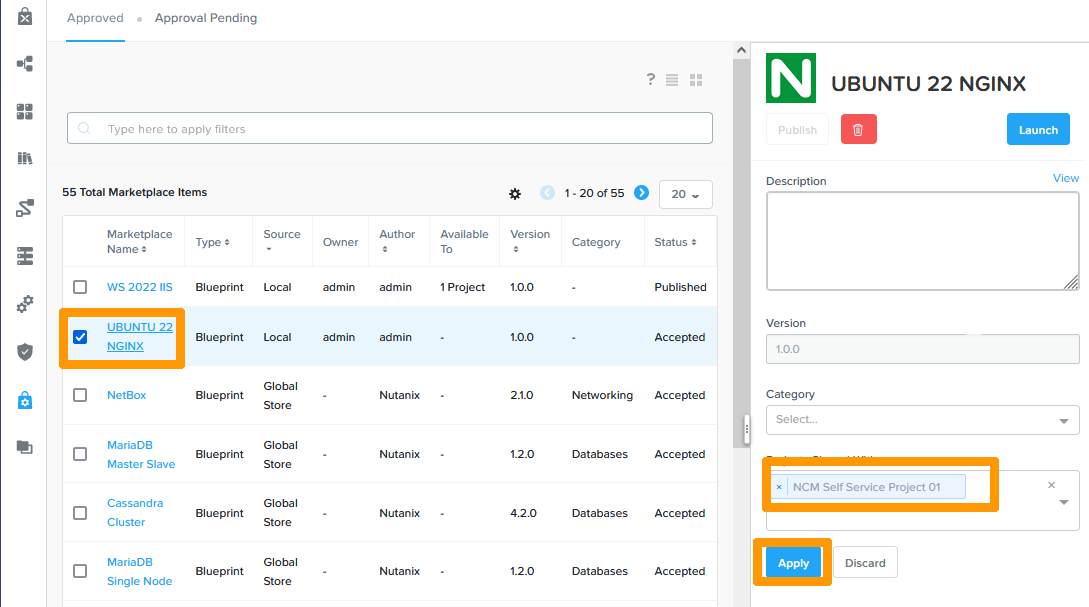
Click Publish.
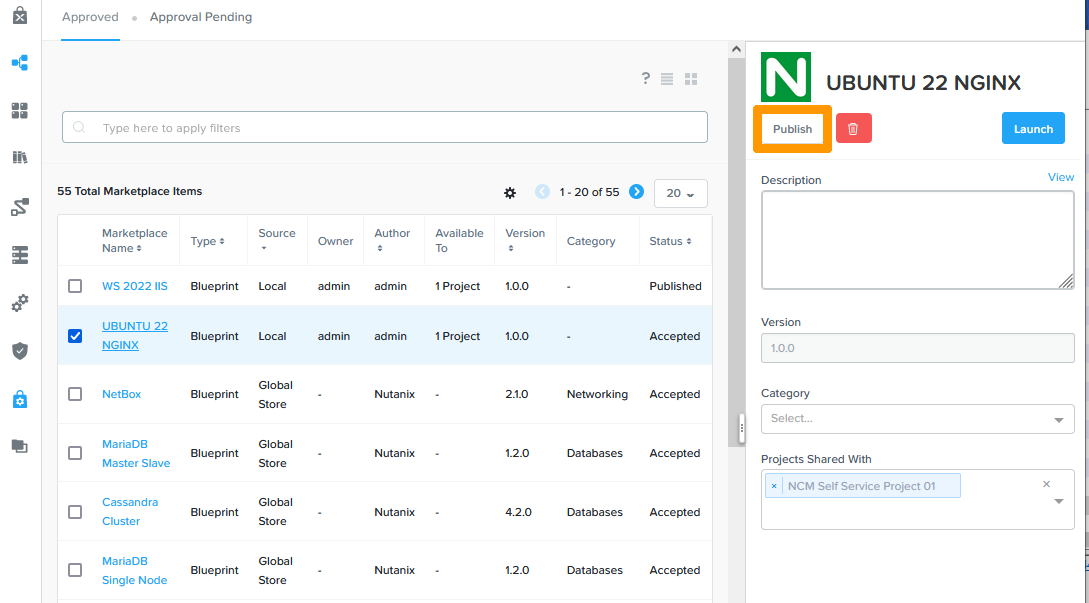
The Ubuntu application is published.

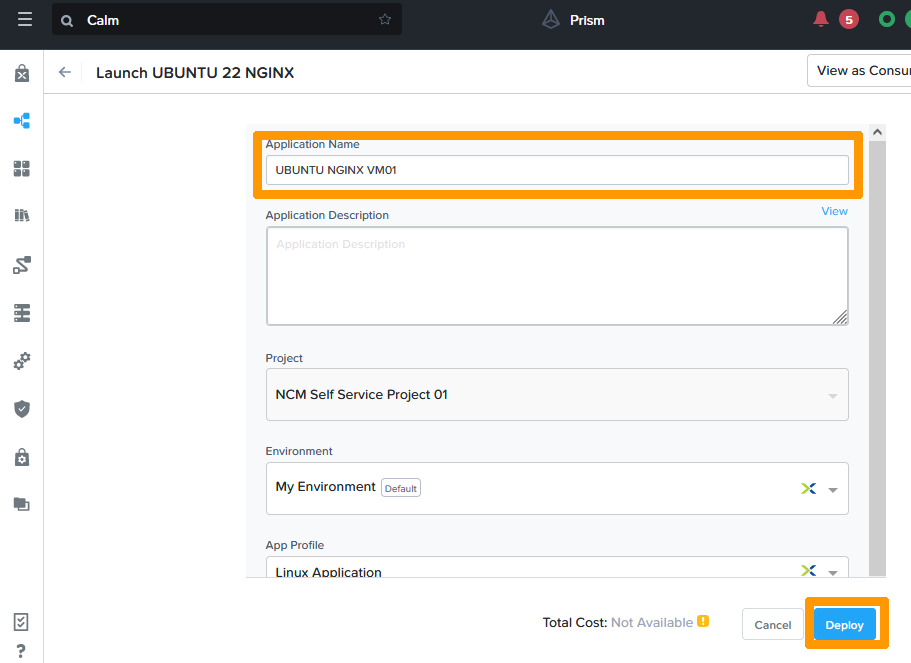
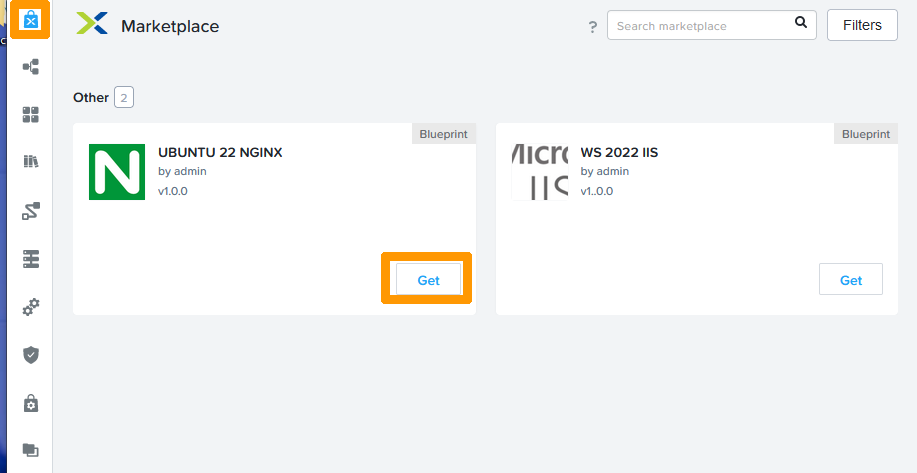
Click the Marketplace icon at the top of the vertical menu bar on the left and click Get below the UBUNTU 22 NGINX application.
Click Launch.
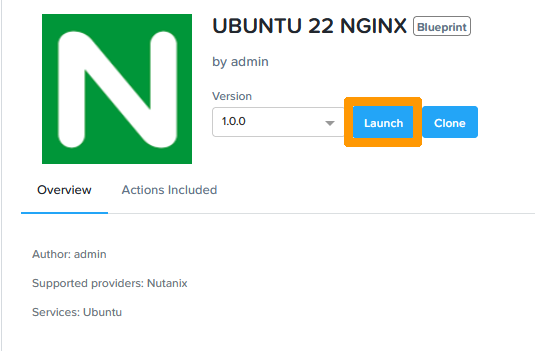
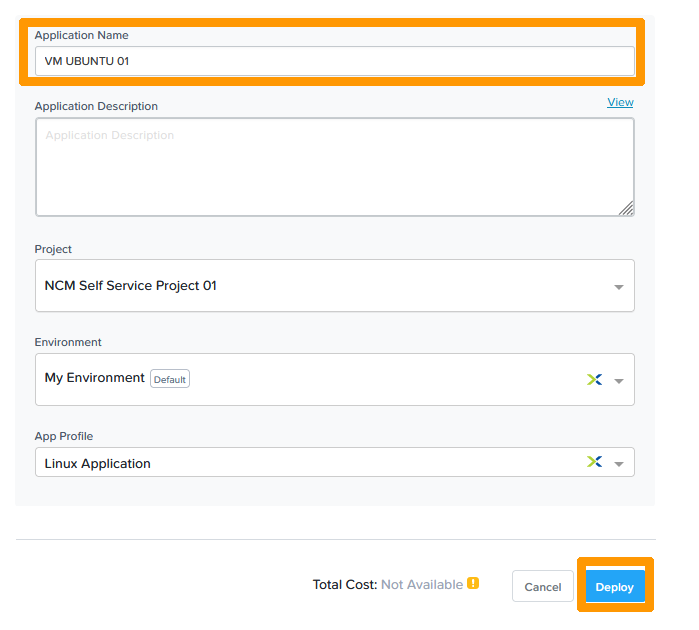
Type a Name in Application Name and click Deploy to deploy an application.
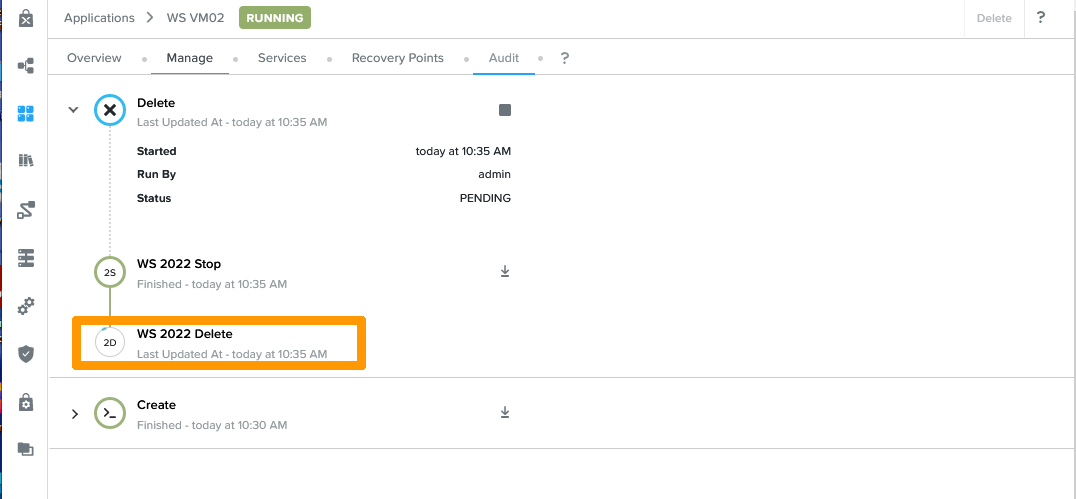
Deleting a deployed application
Deleting a deployed application is as simple as deploying it.
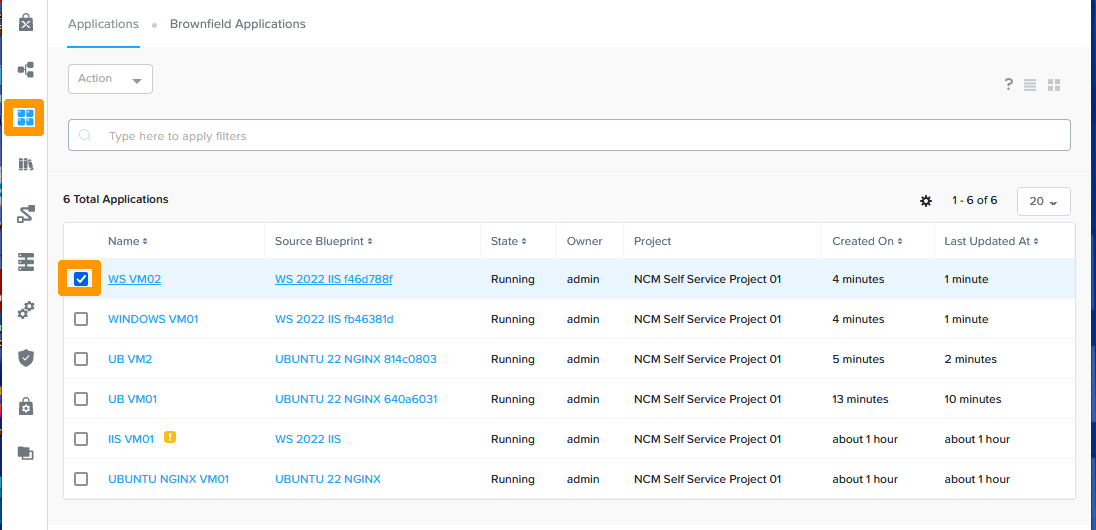
Click on the Blueprints icons on the left and check a deployed application.
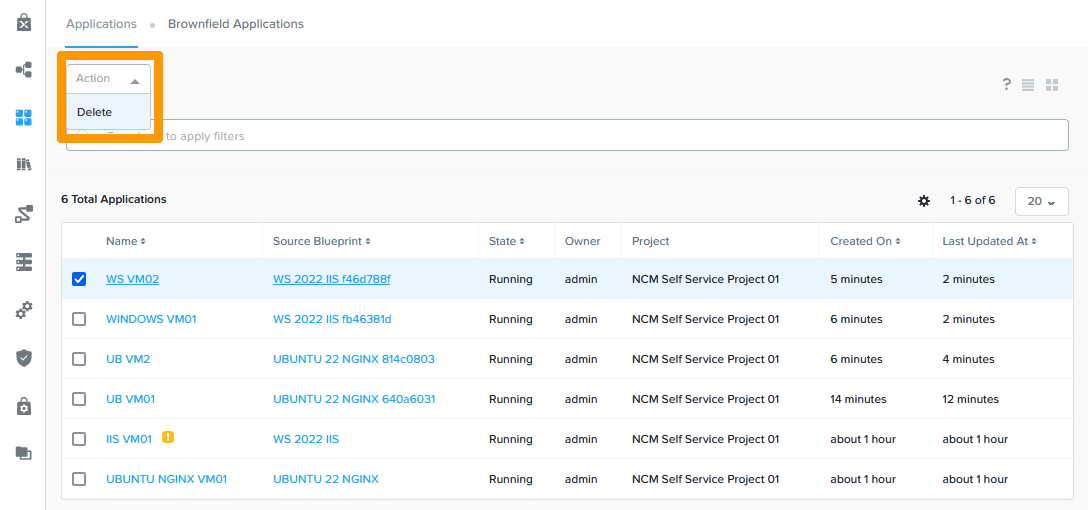
From the Action menu, click Delete.
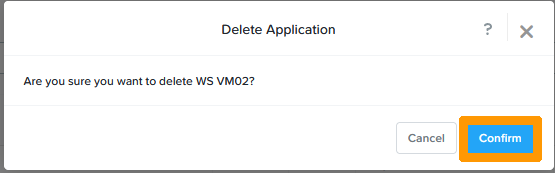
Click Confirm.
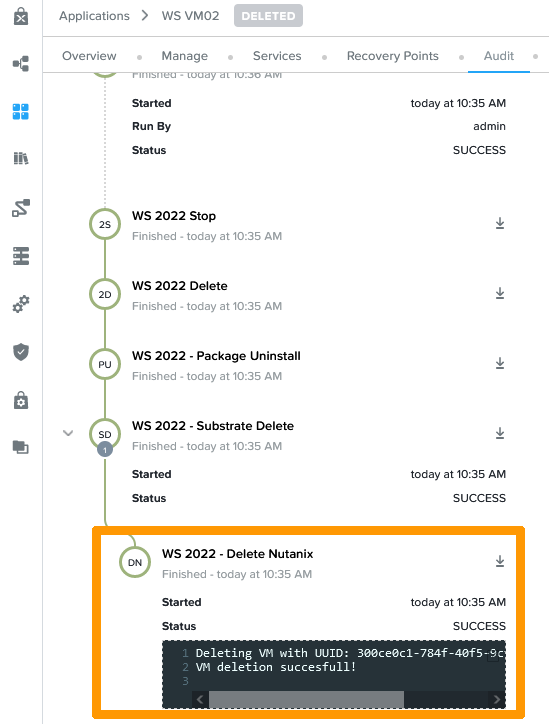
You can view the progress of a deletion as you would for a deployment.
The application is completely deleted.
Go further
If you need training or technical assistance to implement our solutions, contact your sales representative or click on this link to get a quote and ask our Professional Services experts for assisting you on your specific use case of your project.
Join our community of users on https://community.ovh.com/en/.

