Email Pro - Configure your email account on Outlook for macOS
1581 Views
Objective
You can configure Email Pro accounts on email clients, if they are compatible. By doing so, you can use your email address with your preferred email application.
OVHcloud is providing you with services for which you are responsible, with regard to their configuration and management. You are therefore responsible for ensuring they function correctly.
This guide is designed to assist you in common tasks as much as possible. Nevertheless, we recommend contacting a specialised provider and/or the software publisher for the service if you encounter any difficulties. We will not be able to assist you ourselves. You can find more information in the “Go further” section of this guide.
Requirements
- You must have an Email Pro solution.
- You must have Microsoft Outlook installed on your Mac.
- You need to have the required credentials for the email address you would like to configure.
OVHcloud Control Panel Access
- Direct link: Email Pro
- Navigation path:
Web Cloud>Email Pro> Select your platform
Are you using Outlook for Windows? Read this guide: Configuring your email address in Outlook for Windows.
Instructions
Step 1: Add the account
In this guide, we will use as the server name: "pro?.mail.ovh.net". You will need to replace the "?" with the actual number indicating the appropriate server for your Email Pro service.
Click this link to access the Email Pro section. The server name is visible in the Connection section of the General information tab.
Once you have launched Outlook on your device, you can add an account in two different ways:
-
When you start the application for the first time. A setup wizard will appear and prompt you to enter your email address.
-
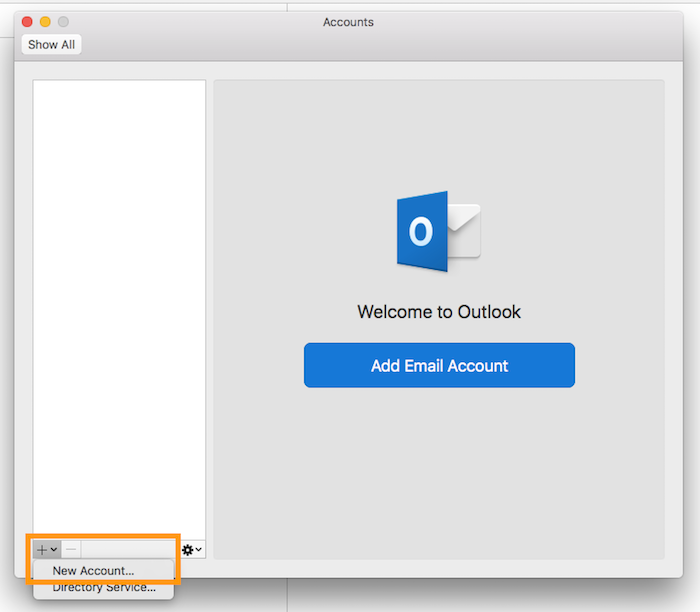
If you have already added an account. Click
Toolsin the menu bar at the top of your screen, thenAccounts. In the window that pops up, click+, thenNew account.
Enter your email address, then click Continue. For the provider, click on IMAP/POP, then enter the information requested.
| Information | Description |
|---|---|
| Account type | Leave IMAP (selected by default). |
| Mail address | Enter a name that will distinguish this account from any other accounts added in your Outlook app. |
| Username | Enter your full email address. |
| Password | Enter the password for your email address. |
| Incoming server | Enter “pro?.mail.ovh.net”. Leave the "Use SSL to connect" box ticked. |
| Incoming port | Enter port 993. |
| Outgoing server | Enter “pro?.mail.ovh.net”. Leave the "Use SSL to connect" box ticked. |
| Outgoing port | Enter port 587. |
Once you have entered this information, click Next. If the information is correct, Outlook will successfully connect to the account.
To check that the account has been configured correctly, you can send a test email.

If you need to enter any settings manually in your account preferences, the technical settings you will need to use with our Email Pro solution are listed below.
| Server type | Server name | SSL | Port |
|---|---|---|---|
| Incoming | pro?.mail.ovh.net | Yes | 993 |
| Outgoing | pro?.mail.ovh.net | Yes | 587 |
Step 2: Use the email address
Once you have configured your email address, you can start using it! You can now send and receive emails.
OVHcloud also offers a web application that includes various collaborative features, accessible at Webmail. You can log in using your email credentials.
Go further
For more information on configuring an email address from the Outlook app on macOS, see the Microsoft Help Center.
Configuring your Exchange account in Outlook for Mac
Join our community of users.

