How to manage messages in your OVHcloud Control Panel
209 Views
Objective
When you created your OVHcloud account, you specified a contact email address. If you want to share or delegate the management of your messages related to your customer account, you can add new contact email addresses and configure rules to manage these messages.
This guide explains how to add additional email contact addresses to your OVHcloud account and configure notification delivery rules.
Requirements
OVHcloud Control Panel Access
- Direct link: My messages
- Navigation path: Click your name in the top right >
My messages
Instructions
My messages
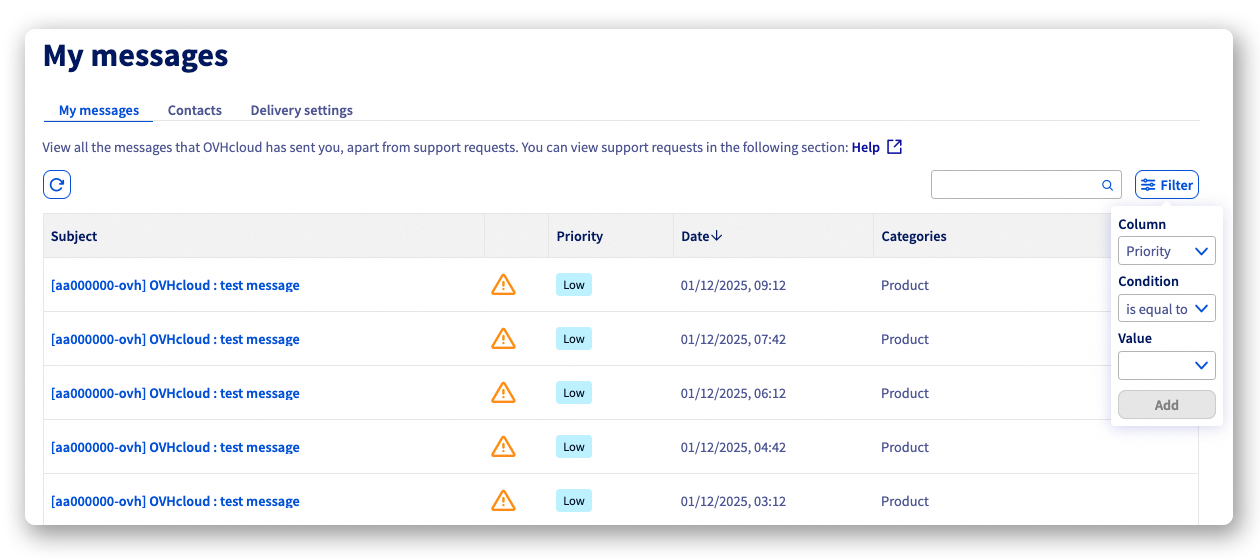
From the My messages tab, you can view all messages that have been sent to your contact email address. In the top right corner of the table, you can activate a filter to sort your messages by priority, date, and category.
Contacts
From the Contacts tab, you can find the reference email address of the OVHcloud account, which cannot be removed or modified from the customer account.
If you no longer have access to your main contact email address and do not have a backup email address, you will need to follow this procedure to request a change from our teams.
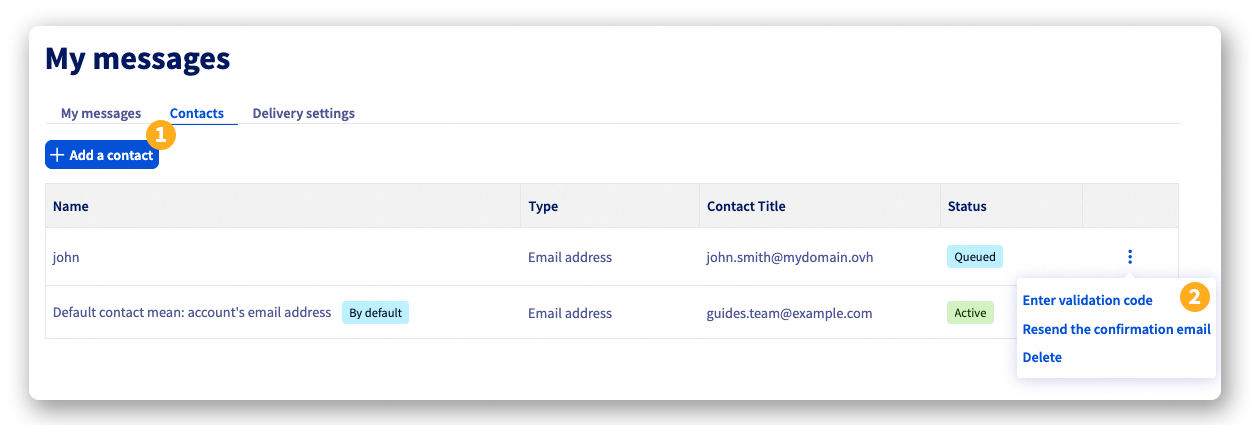
In addition to your default contact, you can add new contact email addresses to your OVHcloud account:
-
(1): Click on the
Add a contactbutton, enter the email address and the contact's name, then click onAdd. A validation code will then be sent to this email address. -
(2): Click on the
⋮button to the right of the new contact to display the options:Enter validation code: Allows you to enter the validation code sent to the new contact by email.Resend the confiramtion code: Allows you to resend an email containing a validation code to this contact.Delete: Allows you to delete this contact.
Delivery settings
From the Delivery settings tab, you can create rules to organize the delivery of messages to your contact email addresses.
-
(1): Click on the
Create a rulebutton to define which contacts will receive the messages, based on the categories and priority levels you select. -
(2): Click on the
⋮button to the right of a rule to access the options:Enable / Disable: Allows you to enable or disable the rule without deleting it.Editthe rule.Deletethe rule.

Rules are applied based on two criteria:
- The category: Account, Billing, Incident, Maintenance, Product, and Security.
- The priority: Set on 3 levels: Low, Medium, and High.
You can create your rules one by one; they will all be applied when a message is sent to your account.
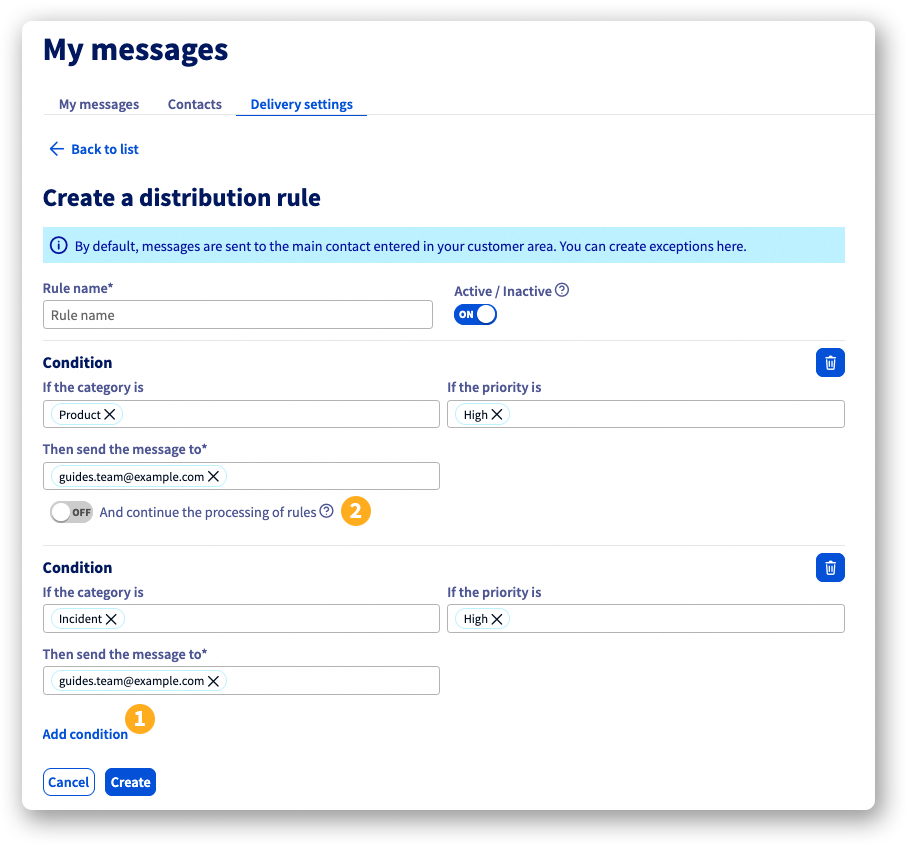
You can also create a rule that includes multiple conditions that will be applied in sequence. To do this, when configuring a rule, click on the Add condition (1) button. You can add as many conditions as needed.
By default, if a condition applies, the process stops. If you want the process to continue applying the following conditions, enable the And continue the processing of rules (2) button under the rule you have configured.
Go further
Join our community of users.

