Migrating an MX Plan email address to an Exchange account
6407 Ansichten
Objective
OVHcloud offers several email solutions: MX Plan (included in a Web Hosting plan) and Exchange. They have their own features, and can be adapted to suit a number of uses. Are your needs changing? OVHcloud offers a migration tool you can use to switch from one solution to another.
Find out how to migrate an MX Plan email address to an Exchange account.
OVHcloud Mail Migrator allows you to migrate your messages from one email server to another.
If your emails are only stored locally (POP configuration or local archiving), you can perform an export from your email software, then import your PST file via OMM or import directly from your email software.
Requirements
- an MX Plan email address (included in an OVHcloud Web Hosting plan)
- an Exchange service with at least one unconfigured account (which will appear as “@configureme.me”).
- no redirections set on the MX Plan email address you want to migrate
OVHcloud Control Panel Access
MX Plan:
- Direct link: MX Plan
- Navigation path:
Web Cloud>MX Plan> Select your MX Plan service
Exchange:
- Direct link: Exchange
- Navigation path:
Web Cloud>Exchange> Select your platform
Instructions
Step 1: Defining your project
With an Exchange address, you can use collaborative features, such as calendars and contact synchronisation. Please consult the product page for a detailed list of features.
If you need to migrate multiple accounts, we recommend that you set up a migration plan.
Step 2: Ordering your Exchange accounts
This step is optional if you already have an Exchange service to which you are migrating.
Log in to your OVHcloud Control Panel, then order the Exchange service you want. Follow the steps, then wait until the service is actually installed. An email will be sent to you as soon as it is complete.
Once an account has been delivered, it is essential to keep it in the “@configureme.me” state. It will be renamed during the migration.
Step 3: Carrying out the migration
Before starting your migration, you will need to identify the version of the MX Plan you are migrating from.
- Log in to your OVHcloud Control Panel.
- Open the
Web Cloudsection. - Click
MX Plan. - Select the domain concerned.
If you have just ordered your new email solution, first add the domain name to your email platform, then start your migration.
- For example, to migrate the "myemail@mydomain.ovh" account, you need to add the mydomain.ovh domain name to your platform.
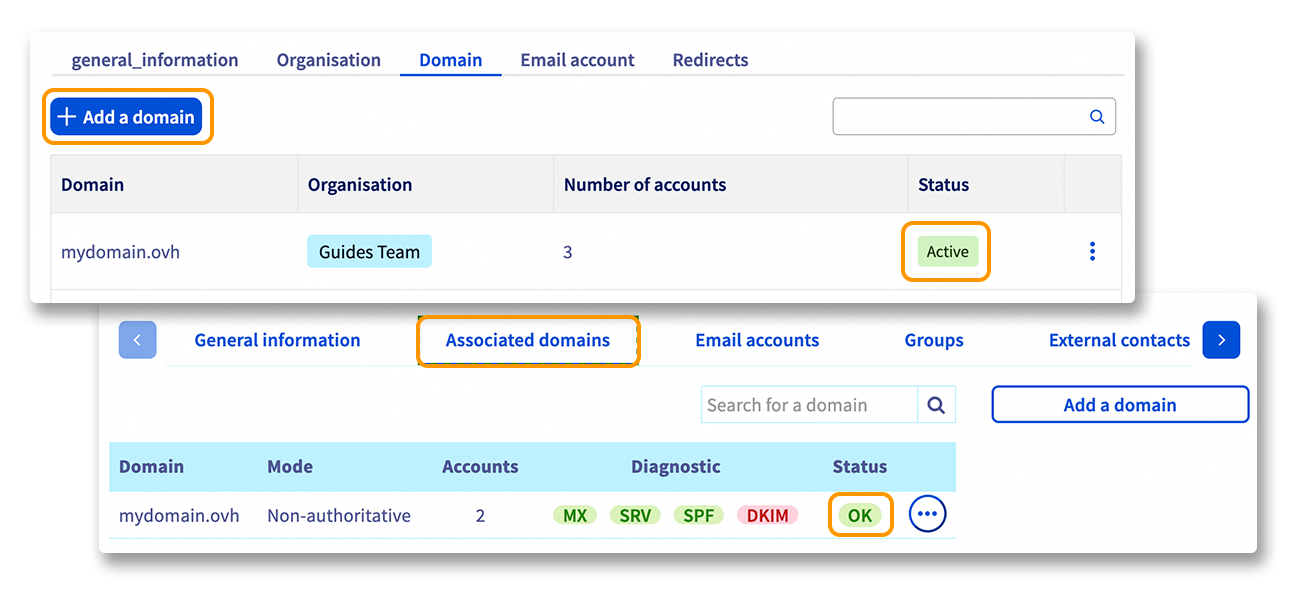
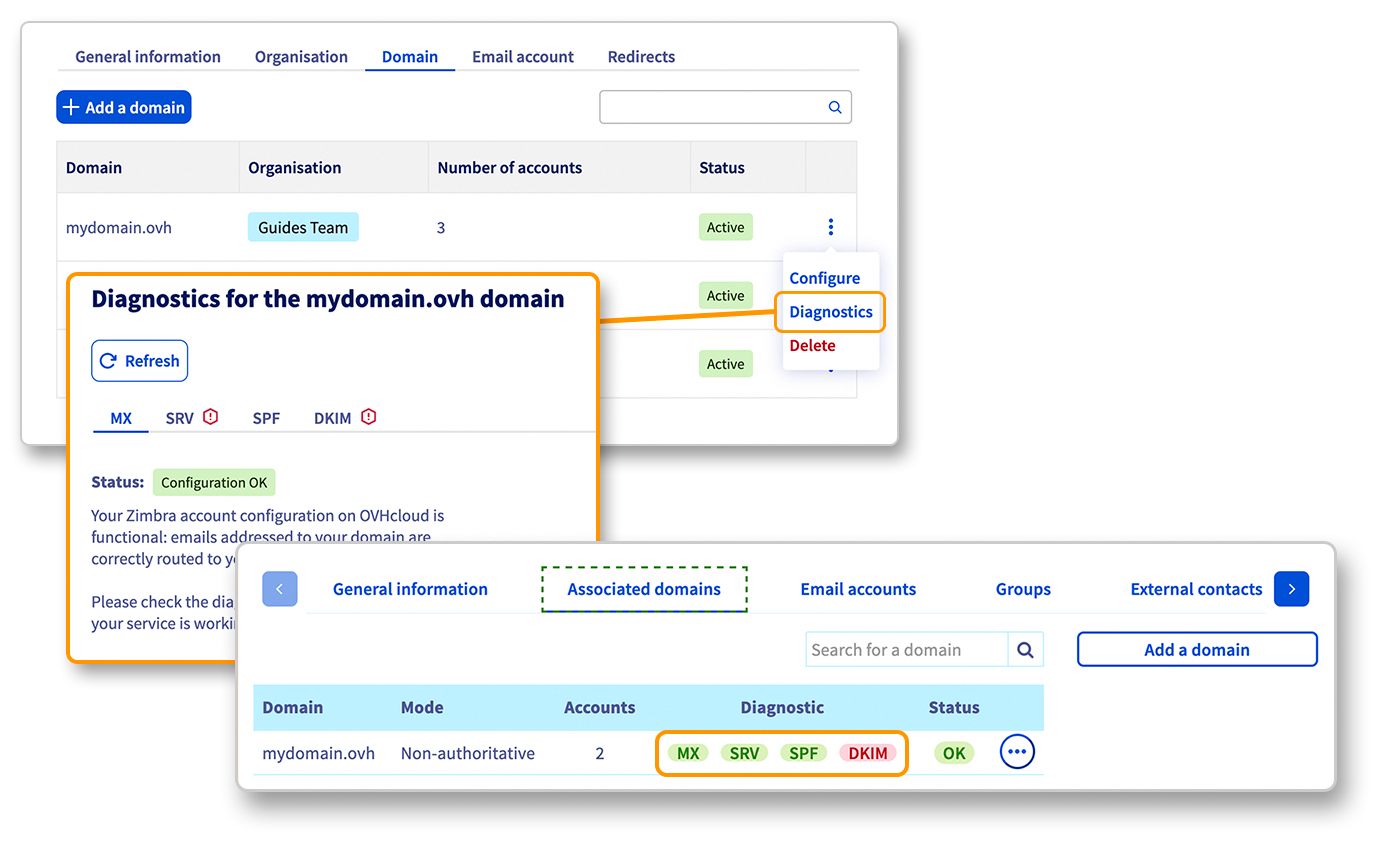
Select the Associated domains tab on your platform, then click Add a domain. Once you have added your domain name, ensure that the word OK is in the Status column.
To find out more about adding a domain name, follow the Exchange guide.
Your MX Plan migration will be done in 3 main steps: Renaming, Creating and Migrating.
1. Rename the MX Plan account to be migrated with a temporary name (example: to migrate the MX plan account john.smith@mydomain.ovh, rename it to john.smith01@mydomain.ovh).
In the Email accounts tab for your MX Plan platform, click the ... button, then Edit.
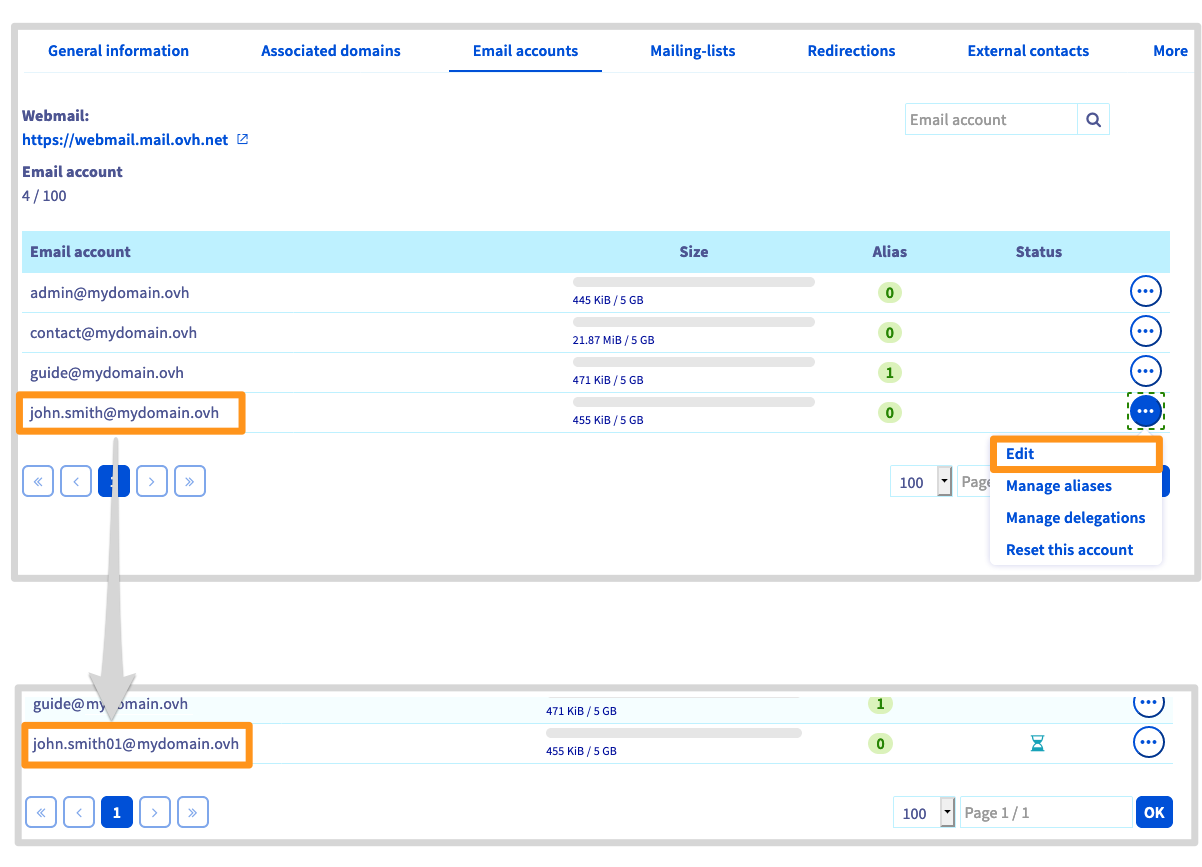
Account modification is not immediate, please wait until the operation is complete before proceeding to the next step.
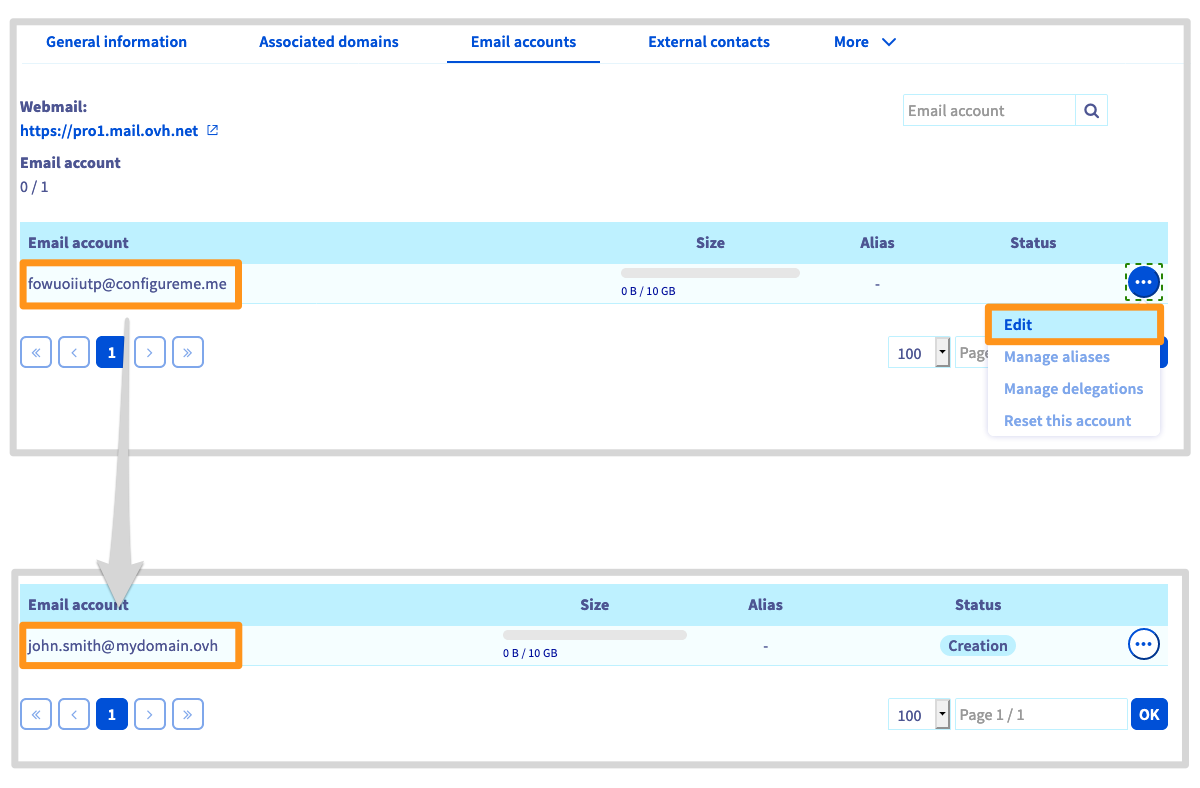
2. Create your email address on the new account on your Exchange platform (using the previous example, you will create john.smith@mydomain.ovh on your new platform).
In the Email accounts tab for your Exchange platform, click the ... button, then Modify.
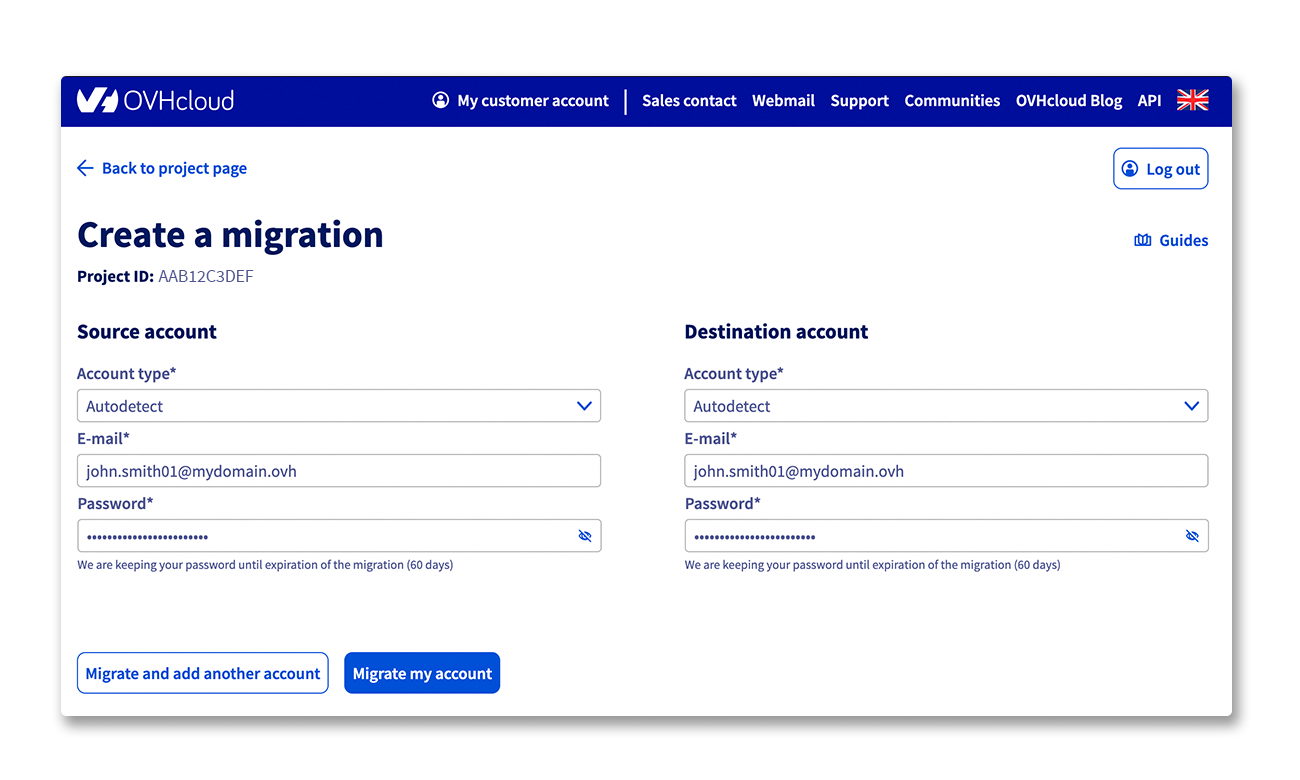
3. Migrate the MX Plan account to your new platform account using our OMM (OVHcloud Mail Migrator) tool.
For more information on OMM, please read our guide on Migrating email accounts via the OVHcloud Mail Migrator.
The migration time depends on the amount of content to migrate to your new account. This may vary from a few minutes to several hours.
Check that you can find your items after the migration, by logging into OVHcloud webmail.
You can keep or delete the original account with the temporary name after this migration.
If you want to delete it, go to the Email accounts tab in your MX Plan, click on the ... button, then Disable account.
Step 4: Verifying your domain configuration
At this stage, your email addresses must already be migrated and functional. For security reasons, please ensure that your domain is correctly configured in your Control Panel.
To do this, select the Exchange service concerned, then go to the Associated domains tab. In the table shown, you can use the "Diagnostic" column to check if the DNS configuration is correct: a red box appears if the configuration needs to be modified.
If you have just migrated or modified a DNS record for your domain, it may take a few hours to be updated in your OVHcloud Control Panel.
To modify the configuration, click on the red box and carry out the requested operation. It can take between 4 and a maximum of 24 hours to propagate fully.
Step 5: Using your migrated email addresses
Now, you can start using your migrated email addresses. To do this, OVHcloud offers an online interface (web app), available here: Webmail. You will need to enter your email credentials.
If you have configured one of the migrated accounts on an email client (such as Outlook), you must set it up again. The login details for the OVHcloud server have changed following the migration. To help you make changes, please read the relevant guides in the Hosted Exchange guide section. Even if you are unable to reconfigure the account immediately, access via the online application is still possible.
Organise the content of your email addresses following a migration content-after-migration>
When you first log in to your new email account, the migrated content may be partially hidden. To view all items, from the webmail, click on the chevron next to the Inbox to reveal the subfolders. The migrated content of your old email account should appear.
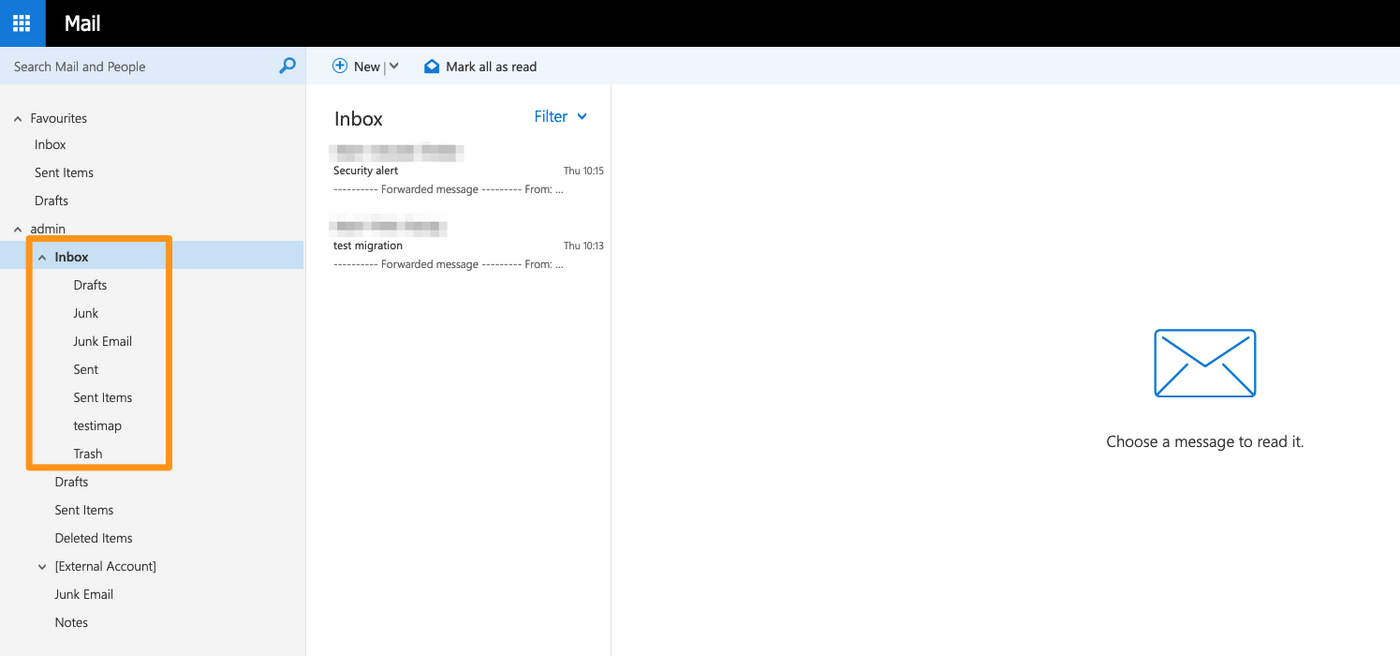
After a migration, please check all of the folders and sub-folders in your account to ensure that all of the elements are present.
Migrating manually
You can also manually migrate your email addresses to your new OVHcloud email solution using only your email software. Please refer to our guide on Migrating your email address manually. However, we recommend that you use this method only when the main methods are not possible.
Go further
Join our community of users.

