How to configure your NIC for OVHcloud Link Aggregation in Debian 9 to 11
2556 Ansichten
Objective
OVHcloud Link Aggregation (OLA) technology is designed by our teams to increase your server’s availability, and boost the efficiency of your network connections. In just a few clicks, you can aggregate your network cards and make your network links redundant. This means that if one link goes down, traffic is automatically redirected to another available link.
This guide explains how to bond your NICs to use them for OLA in Debian (versions 9 to 11)
Requirements
OVHcloud Control Panel Access
- Direct link: Dedicated Servers
- Navigation path:
Bare Metal Cloud>Dedicated servers> Select your server
You will need to download the ifenslave package on the server before enabling OLA in the OVHcloud Control Panel or API. To do so, please use the following command:
apt install ifenslave
This guide provides instructions for configuring network interface bonding specifically using ifupdown, whose configuration file is located at /etc/network/interfaces. It also applies to the rescue system.
If your system's network configuration uses Netplan instead, please refer to this guide.
Instructions
Because you have a private-private configuration for your NICs in OLA, you will be unable to SSH into the server. Thus, you will need to leverage the IPMI tool to access the server.
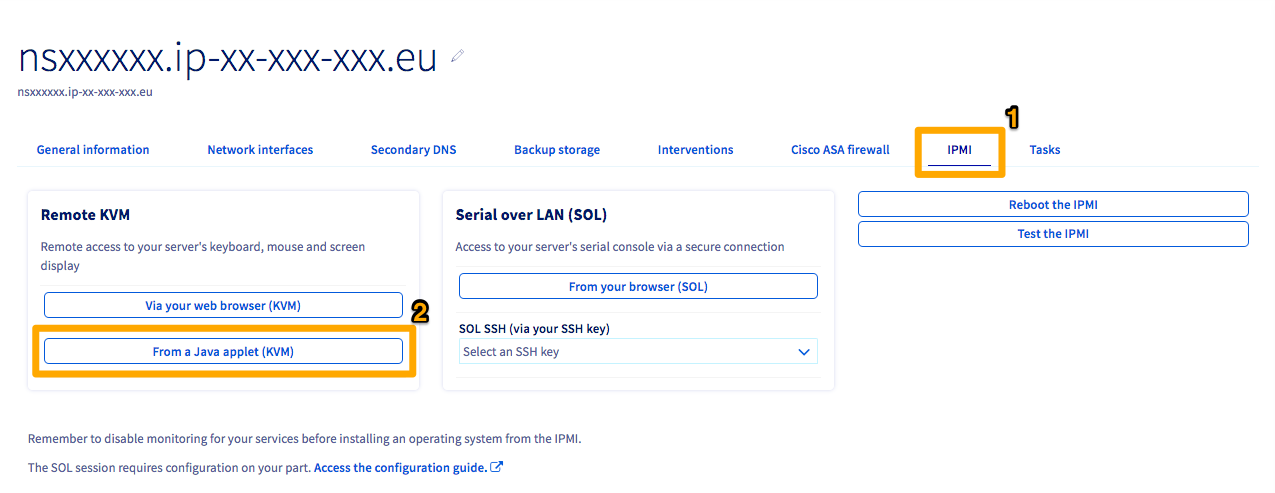
To do so, first log in to your OVHcloud Control Panel. In the Bare Metal Cloud section, select your server from Dedicated Servers and click the IPMI tab (1).
Next, click the From a Java applet (KVM) button (2).
A JNLP program will download. Open the program to enter the IPMI. Log in using valid credentials for the server.
By default, using an OVHcloud template, the NICs will be named either ethX or enoX. If you are not using an OVHcloud template, you can find the names of your interfaces using the following command:
This command will yield numerous "interfaces." If you are having trouble determining which ones are your physical NICs, the first interface will still have the server's public IP address attached to it by default.
Once we have determined the names of our two NICs, we will configure NIC bonding in the OS. Create the interfaces file in a text editor of your choice using the following command:
This will open an empty text file. To configure the bond interface, insert the following at the bottom of the text file:
For the hwaddress parameter, we recommend using the smaller of the two MAC addresses of your NICs, as it belongs to the LACP fallback interface.
You only need to add the last line to this file if you are planning on configuring private networking via IPv6.
Finally, we will restart the networking daemon using the following command:
This restart may take several seconds since it is building the bond interface. To test that our bond is working, ping another server on the same vRack. If it works, you are all set. If it does not, double check your configurations or try rebooting the server.
Go further
Configuring OVHcloud Link Aggregation in the OVHcloud Control Panel.
How to Configure Your NIC for OVHcloud Link Aggregation in Windows Server 2019.
How to Configure Your NIC for OVHcloud Link Aggregation in SLES 15.
Join our community of users.

