Finalise a maintenance intervention on your dedicated server
6489 Views
Objective
Our maintenance interventions are limited to the hardware aspect of your server. Following a maintenance intervention, actions may be required on your server’s software section.
This guide, which is based on feedback received from our teams and use cases, lists the actions that need to be taken, depending on your installation: operating systems, hypervisor, etc.
Its goal is to support you and ensure that there is as little impact as possible in the lifecycle of your environments.
Requirements
- A dedicated server in your OVHcloud account
Instructions
Find out how to identify the names of your network interfaces in this subpart of this guide.
Continue reading this guide by clicking on the link for your installation:
- Operating system
- Virtualisation
If you experience an operating system boot problem that appears to be related to its EFI boot partition, go directly to this section.
Ubuntu/Debian 12+
If you are experiencing network connectivity issues (for example, no ping after a motherboard replacement), perform the following steps:
1. Reboot the server in rescue mode.
2. Mount the partition /:
If the 70-persistent-net.rules file does not exist (refer to the section of this guide on the names of your network interfaces), check the following files in the /etc/systemd/network/ tree:
50-default.network50-public-interface.link
3. Save and edit the files to enter the new value for your MAC address:
4. Unmount the partition / before rebooting the server.
Special cases
In some cases, it is necessary to propagate the new MAC address to the following files:
/mnt/etc/netplan/01-netcfg.yaml/mnt/etc/netplan/50-cloud-init.yaml/mnt/etc/systemd/network/10-eno1.link/mnt/etc/systemd/network/10-eno1.network
CentOS/Alma Linux
If you are experiencing network connectivity issues (for example, no ping after a motherboard replacement), perform the following steps:
1. Reboot the server in rescue mode.
2. Mount the partition /:
3. Check the configuration file /mnt/etc/sysconfig/network-scripts/ifcfg-eth0.
4. Back up the files and edit them to correct the MAC address:
5. Enter the new MAC address in the line HWADDR=xx:xx:xx:xx:xx:xx.
6. Please remember to unmount the partition / before rebooting the server.
SmartOS
If you are experiencing network connectivity issues (for example, no ping after a motherboard replacement), perform the following steps:
1. Reboot the server in rescue mode.
2. Enter the new MAC address in the admin_nic line:
3. Do not forget to unmount the partitions before rebooting the server in netboot mode:
FreeBSD
If you are experiencing network connectivity issues (for example, no ping after a motherboard replacement), perform the following steps:
1. Reboot the server in rescue-bsd mode.
2. Run the ifconfig command from the rescue-bsd prompt.
This way, you can identify the name of your network interface:
3. Run the gpart show command to locate and associate the partitions/names:
4. Mount the partition you are interested in, you can modify the interface via the file /etc/rc.conf:
5. Back up the files and edit them to correct the MAC address.
In this case, we need to modify the 3 instances of em0 by ibg0 from the associated configuration file:
6. Unmount ZFS partitions:
Gentoo
After a motherboard has been replaced, you cannot modify the new MAC addresses through the OS via rescue mode.
1. Reboot the server in rescue mode and locate the partition /:
In our example, the system uses LVM:
2. Mount the / identified partition:
In Gentoo, MAC addresses are present in the following 4 files:
3. Back up files before editing them:
4. Update the files with the new MAC addresses:
5. Unmount the partitions, then reboot:
Special cases
For some versions, only the file /mnt/etc/udev/rules.d/10-f2c-network.rules needs to be modified:
Proxmox/Debian (excluding Debian 12+)
If you are experiencing network connectivity issues (for example, no ping after a motherboard replacement), this may be related to an error during system startup caused by the old MAC address value still present:
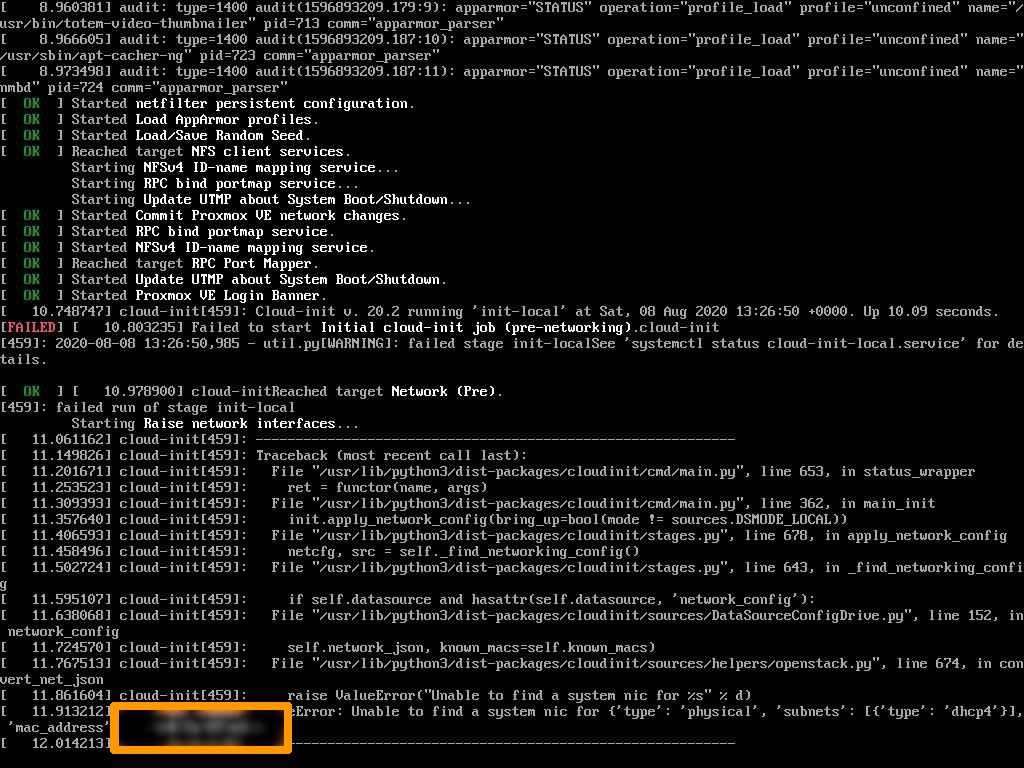
Do the following:
1. Reboot the server in rescue mode.
2. Create the 70-persistent-net.rules file again and add:
- The network interface name found in the
/mnt/etc/network/interfacesfile. - The new MAC address (viewable in the tab
Network interfacesin the OVHcloud Control Panel or in the return of the commandip link).
XenServer
If you are experiencing network connectivity issues (for example, no ping after a motherboard replacement), the MAC address is static configured and must be reset.
Do the following:
1. Restart the server in rescue mode and use the chroot command:
2. Change the current configuration to match the new settings:
3. You will be asked to answer the question with yes, then press Enter:
4. Type "exit" to leave chroot mode, then unmount all partitions:
Special cases
You need to check and adapt the following files:
/mnt/etc/sysconfig/network-scripts/interface-rename-data/static-rules.conf/mnt/etc/sysconfig/network-scripts/interface-rename-data/dynamic-rules.json
ESXi
After a motherboard has been replaced, you cannot modify the new MAC addresses through the esxi.conf file via the tools integrated in rescue mode.
This will require manual intervention.
Version 7.0 or newer
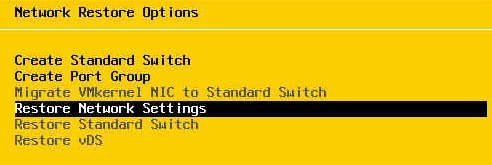
The following procedure applies only to versions 7.0 and later. From this release on, the state.tgz file is encrypted. You will need to reboot the network from the Direct Console menu via your KVM or IPMI.
Please refer to the screenshot below:
Version 6.7 or older
The procedure described below applies only to versions 6.7 and earlier.
1. Restart the server in rescue mode to mount the partition /:
2. Save the state.tgz file
3. Create a working environment:
4. Extract the contents of state.tgz to $WORKINGDIR, and then extract the contents of local.tgz.
5. Edit the resulting esx.conf file:
6. Locate and modify the MAC address for vmkernelnic:
7. Identify on which interface the primary IP address is used:
8. Update the MAC address of the main interface:
Do not change the virtual MAC address.
If there is a vRack interface, remember to also change its MAC address.
9. Perform a backup, then unmount the partition /:
Special cases
Check the order of your vmnicX declarations. Here is a functional example:
Windows (Hyper-V)
After the motherboard is replaced, the server cannot be reached until you manually change the MAC addresses through Device Manager.
There are 2 methods:
Via IPMI/KVM
1. Log in as an administrator from the IPMI/KVM interface.
2. Open the Run utility (Windows logo key + R), and through the run prompt, run the devmgmt.msc command:
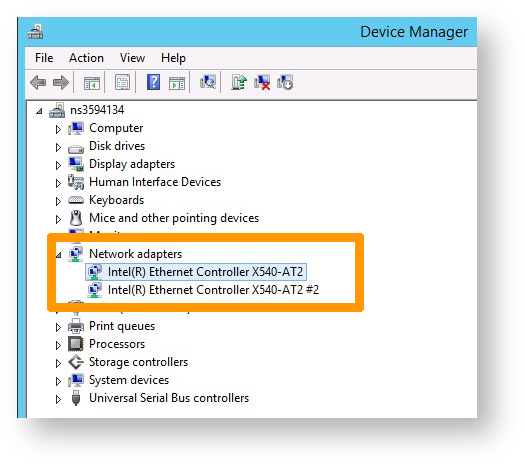
3. Open Network adapters and select the adapter corresponding to eth0.
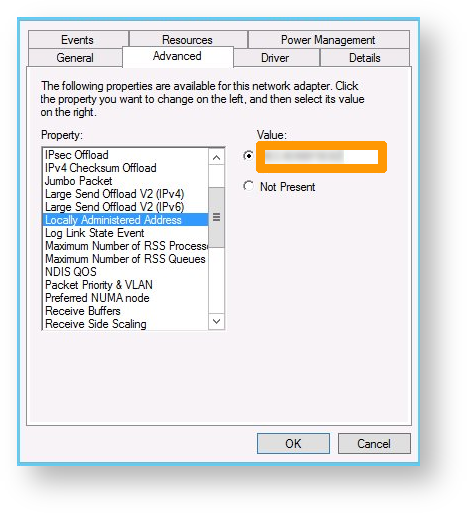
4. Right-click on Properties > Advanced.
5. Locate Locally Administered Address.
6. Enter the new value for the MAC address (numbers only, no spaces).
Via WinPE
1. Restart the server in WinPE mode.
2. Issue the regedit command at the run command prompt.
3. Load the local registry through the one available in WinPE, then click HKEY_LOCAL_MACHINE:
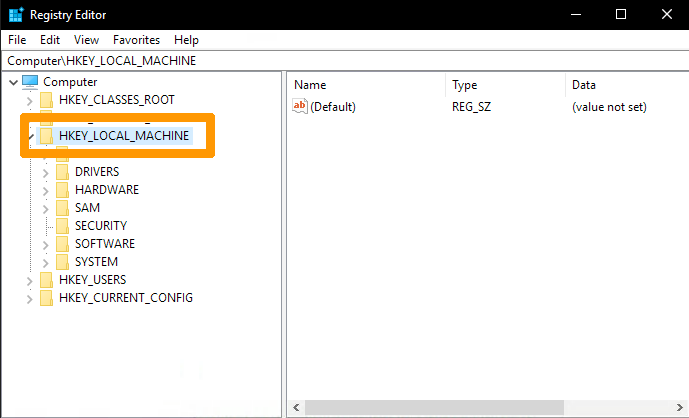
4. Then click Load Hive....

By default, you will be in the WinPE tree.
Don't forget to browse to C:\.
5. Locate the SYSTEM registry.
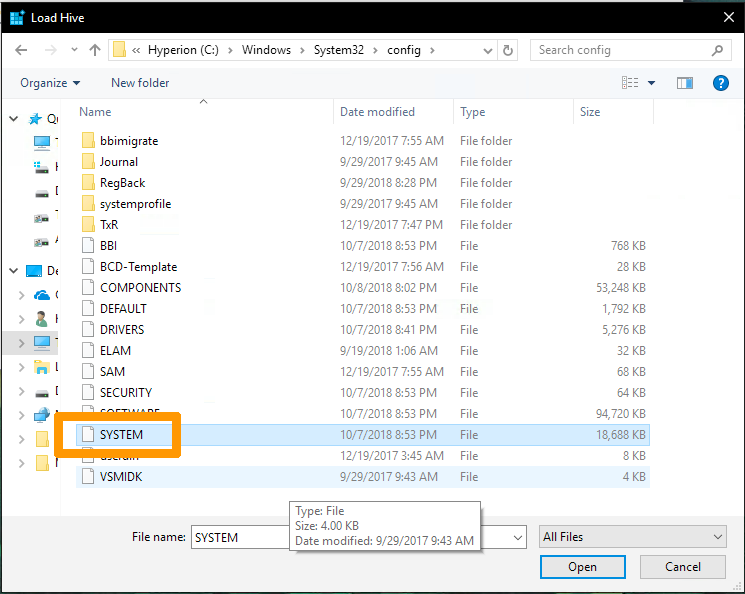
6. You will be asked to enter a name. For example, you can choose OVH_TEST.
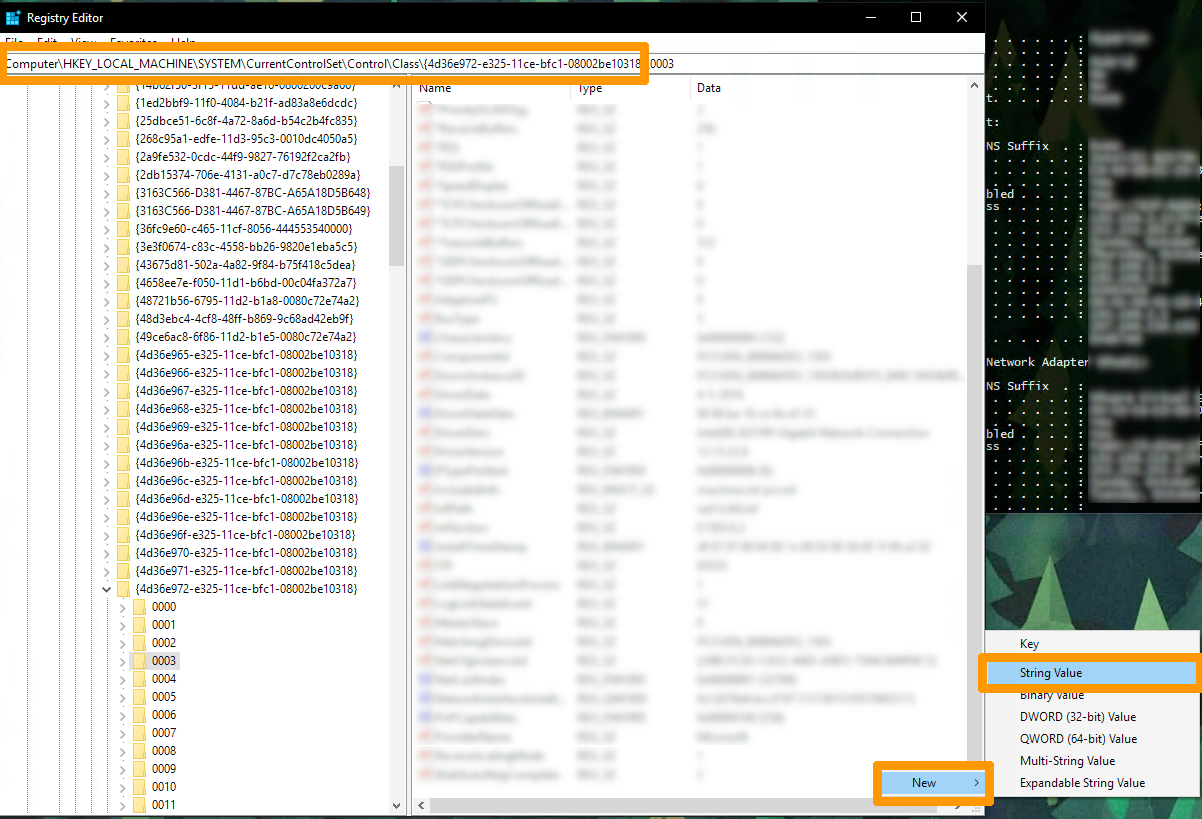
7. Locate the following registry value:
As long as we are on WinPE, the value CurrentControlSet should be equal to CurrentSet001.
You should see several subkeys named like this: 0000, 0001, etc.
8. Click each subkey to check the DriverDesc value that should match your network interface.
You can check the name of your interface from a terminal using the following command:
9. Look in the NetworkAddress registry entries on the right pane and change the value to your new MAC address. If this entry does not exist, right-click in an empty box to create a String with the name NetworkAddress.
10. You will need to unload the registry to apply the recent changes. Click OVH_TEST (created earlier) then click File (in the top left-hand corner) and select Unload hive....
Locate the name of your network interfaces
After the motherboard is replaced, the server cannot be reached because the network interface controller has been renamed by the operating system.
1. Restart the server in rescue mode, mount the partition / and then use the chroot command:
2. Check if the interfaces have been modified. Check the var/log/messages logs or var/log/kern.log if the interface has been renamed:
3. Check your configuration file /mnt/etc/udev/rules.d/70-persistent.-net.rules and replace the new values (MAC addresses) if necessary:
4. Go to the directory /boot/grub/ and create a backup of the file grub.cfg.
5. Edit the /etc/default/grub file and edit the line beginning with GRUB_CMDLINE_LINUX to get this:
6. Run the command:
7. Exit the chroot environment using the exit command and unmount all partitions:
Problems with your EFI partition
The following steps are indicated if you experience a boot problem related to the partitions present on your disks.
There are 2 methods, via rescue mode or via BIOS.
Via rescue mode
- Use case: The installed system (in this case Proxmox) is no longer bootable after the disk has been replaced (no EFI input is visible through the BIOS).
1. Reboot the server in rescue mode.
2. Locate the disk with the original EFI partition:
3. Mount the partition concerned.
4. Use the following command to make this partition functional again:
Via BIOS
- Use case: the installed system (in this case CentOS 6) is no longer bootable after replacing the disk (no EFI input is visible through the BIOS).
1. Reboot the server to enter the BIOS menu.
The first step involves regenerating the files you need to restore your partition to full operation:
- Go to the BIOS
bootmenu:- Select
Add New Boot Option. - Choose the path to your
Path for boot partition optionand select the file system that contains your boot partition. - Select the
EFI\centos6\bootx64.efifile and chooseCreate.
- Select
The image below is a summary of the actions mentioned above:
The second sequence is to make the selected partition active in the previous sequence.
- In the BIOS
bootmenu:- Choose
UEFI Hard Disk BBS Priorities. - Choose
UEFI Boot Order #1then selectCENTOS6to position it as the first start choice in the current list.
- Choose
The image below is a summary of the actions mentioned above:
Go further
Join our community of users.
-
Secure Shell (SSH) : un protocole de réseau sécurisé utilisé pour établir des connexions entre un client et un serveur. Il permet d'exécuter des commandes à distance de manière sécurisée. ↩

