How to use IAM policies using the OVHcloud Control Panel
8014 Views
Objective
This guide will explain how to provide specific access rights to users of an OVHcloud account.
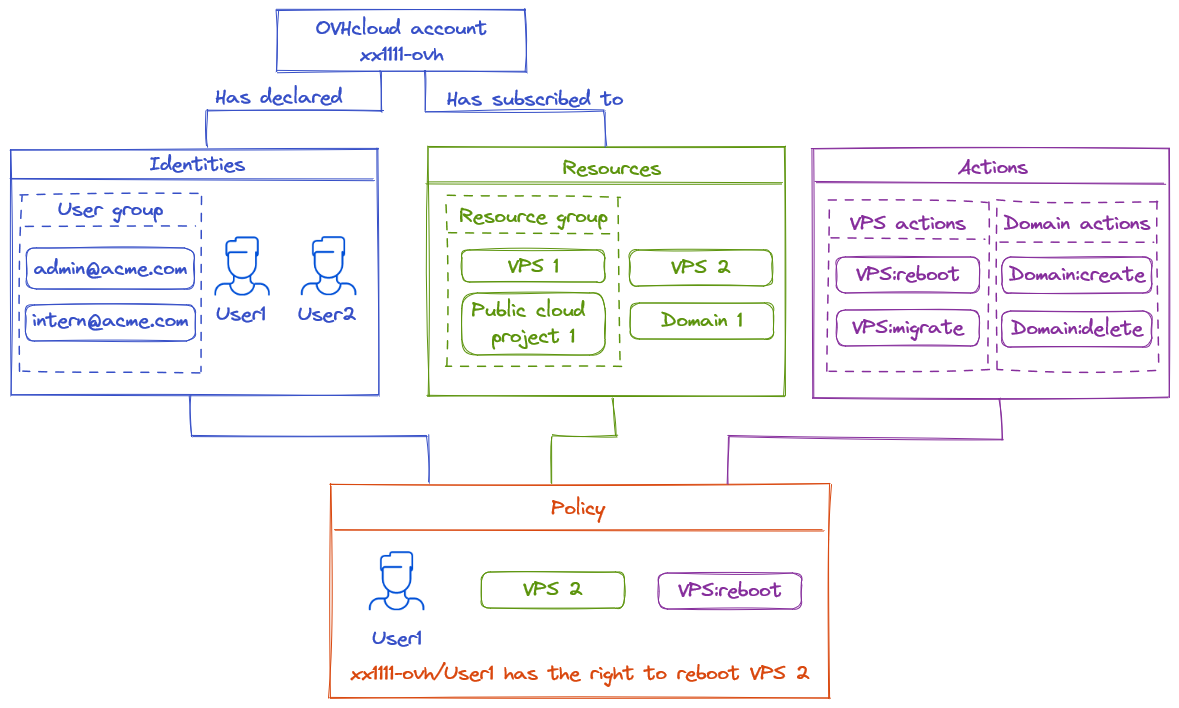
The access management of OVHcloud is based on a policy management system. It is possible to write different policies that give users access to specific features on the products linked to an OVHcloud account.
In detail, a policy contains:
- One or more identities targeted by this policy.
- It can be account IDs, users or user groups (like the ones used in Federation - other SSO guides are available).
- One or more resources impacted by this policy.
- A resource is an OVHcloud product that will be impacted by this policy (a domain name, a Nutanix server, a Load Balancer, etc.).
- One or more actions allowed or excepted by this policy.
- Actions are the specific rights affected by this policy (reboot a server, create an email account, cancel a subscription, etc.)
For example, we can create a policy to give to a user called John, for a VPS, access to the action "reboot".
This guide explains in detail how these policies can be declared using the OVHcloud Control Panel, and how to list the identities, resources and actions available for them.
Requirements
- You have an OVHcloud account.
- You know how to manage account users.
- You have one or more OVHcloud products linked to this OVHcloud account (Load Balancer, domain name, VPS, etc.).
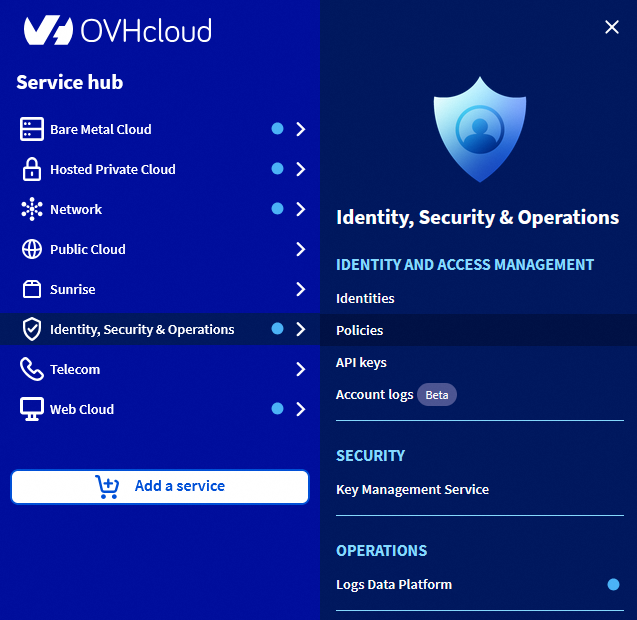
OVHcloud Control Panel Access
- Direct link: IAM Policies
- Navigation path:
Identity, Security & Operations>Policies
Instructions
Accessing the IAM menu
Open the IAM Policies page.
If you are accessing this menu for the first time, the following page appears:
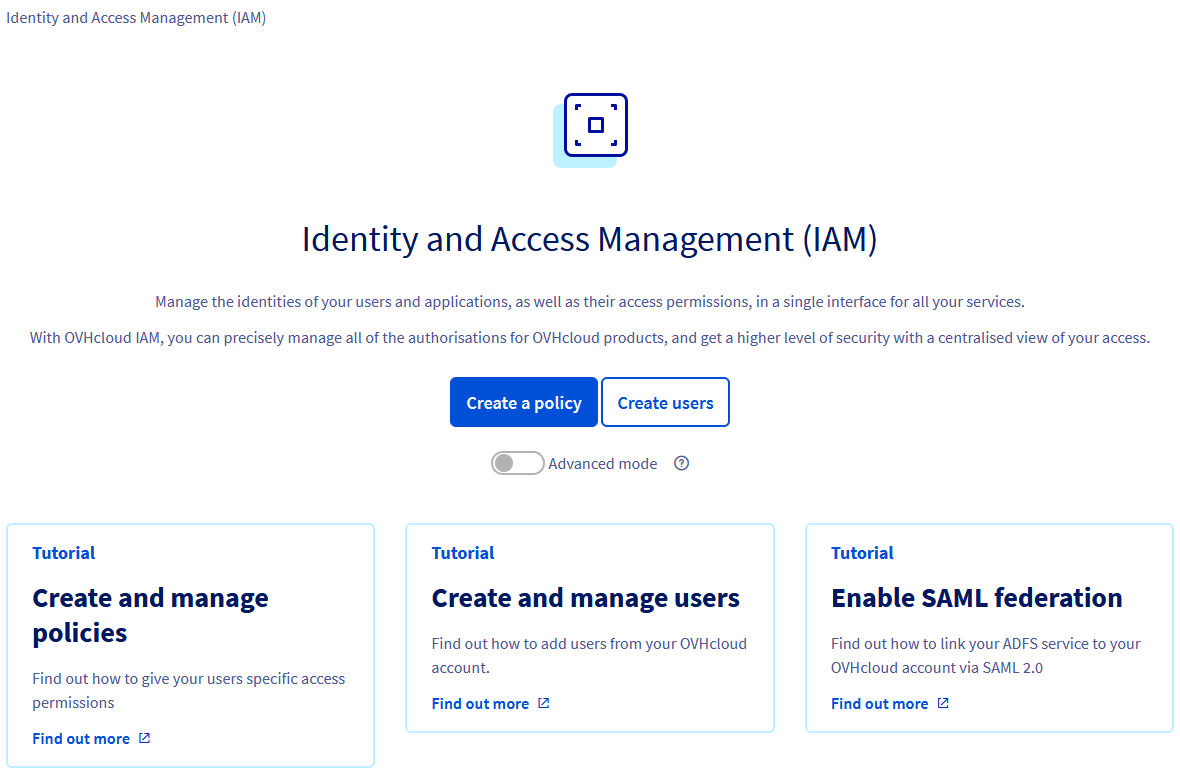
Click Create a policy or Create users directly depending on the action you want to perform.
Clicking the "Advanced mode" button shows the list of all the OVHcloud Managed policies. These policies are automatically created by OVHcloud to convert the preexisting NIC Tech and NIC Admin delegation on the new IAM feature.
Customers are not allowed to edit or delete these policies.
If you have already created policies or users, you will find them in the first tab My policies. The OVHcloud Policies tab groups non-editable policies created automatically by OVHcloud.
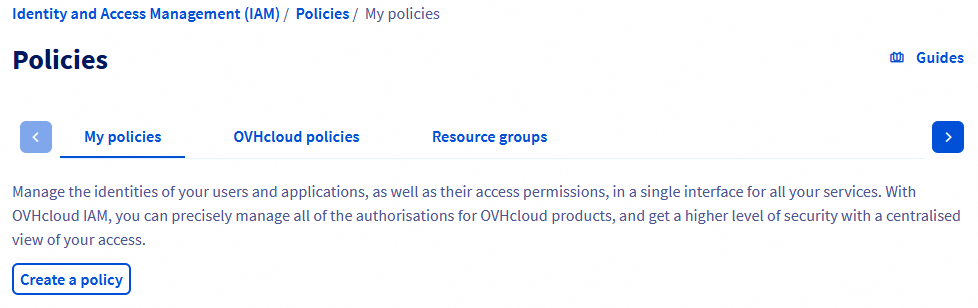
Each policy is displayed with its name, the number of identities linked to it, and the number of actions it contains.
Managing policies
Creating a policy
Click the Create a policy button.
The following form will be displayed:
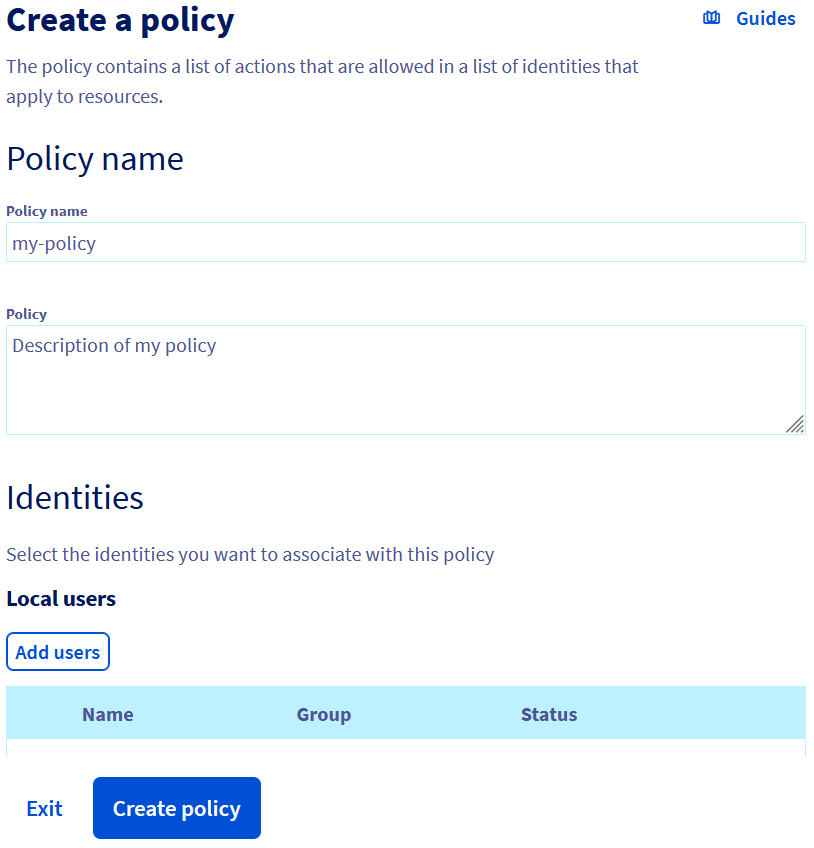
- Policy name (mandatory): This is the name that will appear in the interfaces. The name should be unique and must not contain any spaces.
- Identities: Select the identities affected by this policy. It's possible to target more than one identity type.
- Product types: Select the type of product to define the scope of the policy. One or more product types can be included in the same policy.
- Resources: Add resources or resource groups to be covered by the policy. The resources available are filtered by the product type selected beforehand.
- Actions.
There are 4 different ways to add actions:
1 - Activating the "Authorise all actions" option

When activating this option, you allow all actions related to the selected products. This includes all existing actions as well as actions added in the future for these product types.
2 - Selecting a group of managed permissions
We provide permission groups that are preconfigured and managed by OVHcloud. You can select one or more groups by selecting them from the available list.
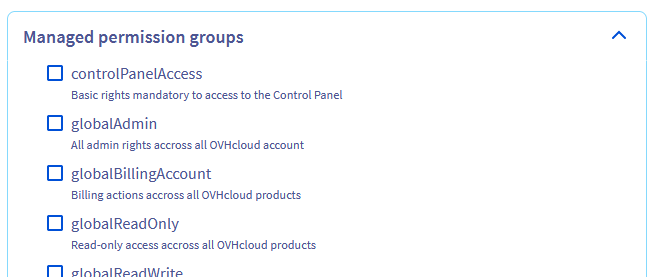
Details of the content of the managed permission groups are available in the associated documentation.
Managed action groups can be used in addition to unit actions.
3 - Adding actions manually
If you know the action name, you can add it manually.
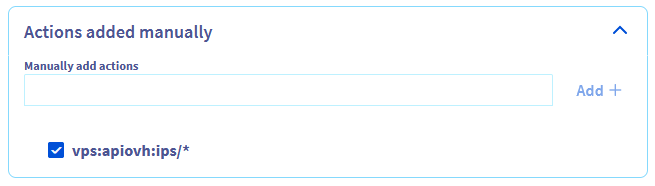
You can use a wildcard at the beginning or at the end of the action name with *.
For example, adding vps:apiovh:ips/* will grant the following rights:
- vps:apiovh:ips/edit
- vps:apiovh:ips/delete
- vps:apiovh:ips/get
4 - Selecting actions from the list
Finally, you can select actions from the list.
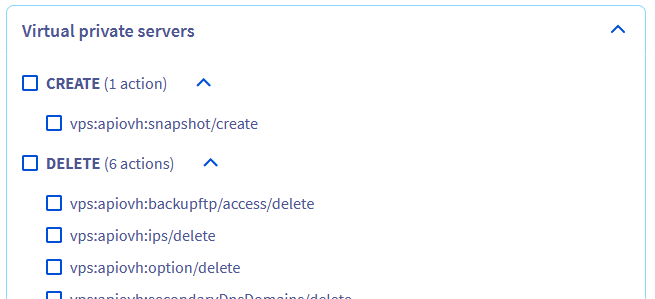
The available actions depend on the resource type and belong to one of five categories:
- Read: List products and show information about a product (ex.: List a VPS IP).
- Create: Action that allows to create something on a product (ex.: Create a support ticket).
- Delete: Action that allows to delete something on a product (ex.: Delete a Public Cloud instance).
- Edit: Action to change something existing on a product (ex.: Edit TCP route of a Load Balancer).
- Operate: Apply changes to the infrastructure related to the product (ex.: Reboot a dedicated server).
A search field is available to help identify a specific action on the list.
Actions related to ordering and billing are not yet available in the OVHcloud IAM.
Conditions on policies
It's possible to add conditions on IAM policies.
A policy with conditions is valid only if all conditions are validated.
It's possible to add conditions on these elements:
- A resource tag
- The resource name
- The product type
- The IP of the request
- The day of the week
- The date
- The time
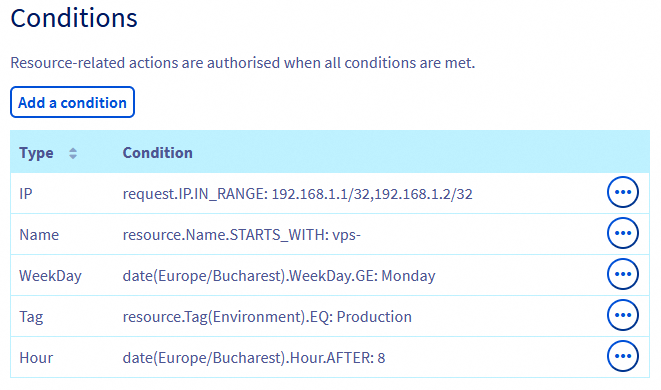
Once added, conditions are displayed with the syntax used on API
Editing a policy
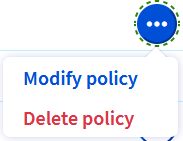
To edit an existing policy, click the ... button to the right of the policy and click Modify policy.
Then you can change the scope of the policy.
Deleting a policy
To delete an existing policy, click the ... button to the right of the policy and click Delete policy.
A popup window will ask you to confirm the deletion.
Policies targeting other OVHcloud customer accounts
Access policies can target other OVHcloud customer accounts.
The targeted account of this policy will be able to manage the rights received that way on its own policies, but will never be able to override the rights set on the access policy.
For example, an account xx1111-ovh gives rights on vps:apiovh:ips/* to account xx2222-ovh:
Account xx2222-ovh will be able to give the right vps:apiovh:ips/delete to its own users, but will never be able to grant the right vps:apiovh:reboot.
Access to the support will still be reserved to the owner of the resource.
Managing identities
To manage the identities available for policies, go to the Identity, Security & Operations menu, then to the Identities section.
Details about user management are available in the dedicated documentation.
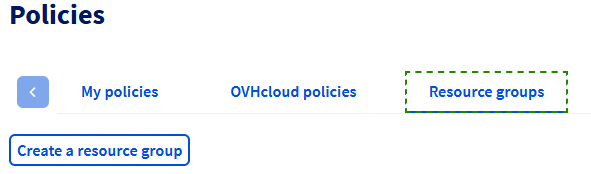
Managing resource groups
Policies can target resource groups instead of resources. These resource groups can assemble resources from different products, for example to set up a test environment.
Creating a resource group
To create a resource group, go to the Policies section, then click the Resource group tab:
Click on Create resource group.
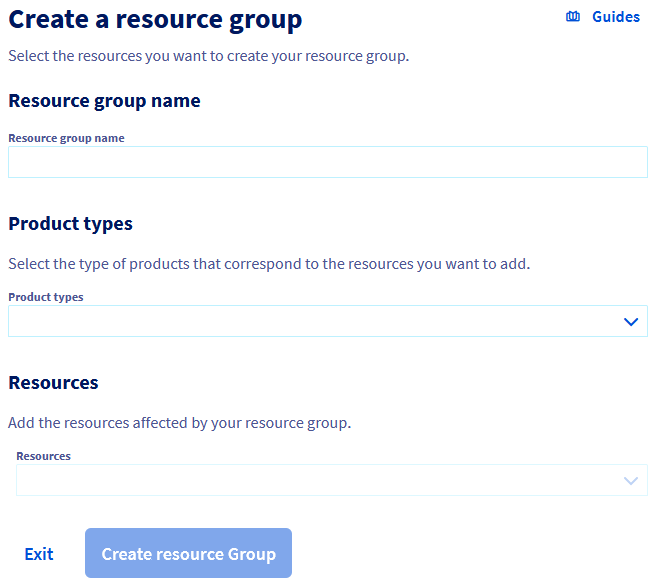
- Name of the resource group: This is the name that will appear in the interfaces. The name should be unique and must not contain any spaces.
- Product types: The list of product types concerned by this resource group.
- Resources: The list of resources the group will contain.
Editing a resource group
To edit a resource group, click on its name in the list.
Deleting a resource group
To delete an existing resource group, click the ... button to the right of the group and click Delete resource group.
A popup window will ask you to confirm the deletion.
Go further
Join our community of users.

