Tutorial - Installing Joomla! manually
295 Views
Objective
This tutorial will help you install Joomla! CMS (Content Management System) manually in just a few steps.
[!warning]
OVHcloud provides services that you are responsible for with regard to their configuration and management. It is therefore your responsibility to ensure that they function properly.
This tutorial is designed to help you with common tasks. Nevertheless, we recommend contacting a specialist provider or the Joomla! support if you encounter any difficulties. We will not be able to assist you. You can find more information in the Go further section of this guide.
To install Joomla! automatically from your OVHcloud Control Panel, please refer to our documentation on installing a 1-click module.
To manually install another CMS (WordPress, Drupal, PrestaShop), please refer to our documentation on installing a CMS manually.
This tutorial explains how to install your Joomla! CMS manually.
Requirements
- An OVHcloud web hosting plan that contains at least one database
- A domain name
Instructions
Step 1: Prepare for the installation
To install the Joomla! CMS on your web hosting plan, you will need to make some preparations.
Follow all steps described in our tutorial on installing a CMS manually before continuing with step 2 below.
Step 2: Finalise the manual installation
Before you continue with the installation, clear your web browser cache to avoid any errors.
2.1 Access your Joomla! website via your browser
Enter your domain name into the address bar of your web browser.
If the Joomla! source files have been correctly placed in your root folder, the Joomla! page for selecting the language appears:
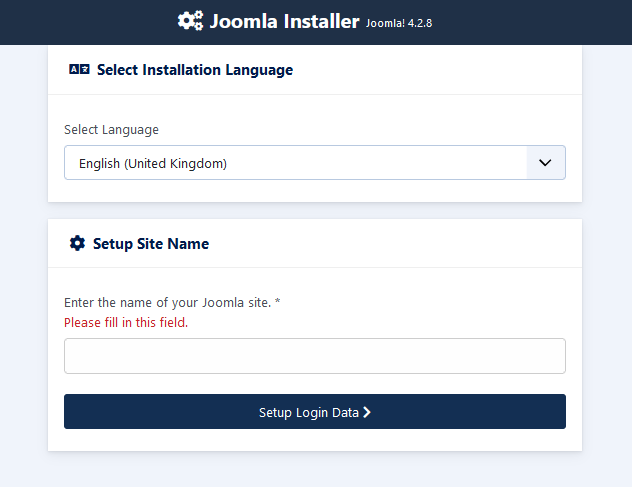
Select the language, enter the name of your website, and click Setup Login Data.
2.2 Configure your Joomla! connection data
Set access to your Joomla! back office:

“Super User” refers to the person who manages the CMS.
- Enter the real name of your Super User: Enter your real name.
- Set the username for your Super User account: Choose a username that will allow you to log in to your Joomla! admin panel.
- Set password for your Super User account: Choose a password with a minimum of 12 characters.
- Enter the email address of the website Super User: Please enter a valid email address. It will be used to receive notifications sent by Joomla!.
Check the information entered, then click on Setup Database Connection.
2.3 Link your database to your Joomla!
Enter the information requested for the database:

Have your database login details ready (if necessary, see Step 1.4 in the manual installation of a CMS tutorial).
-
Select the database type: Select your database type from the types available for Joomla!. If you are using an OVHcloud shared database, you can keep the default MySQLi value.
-
Enter the host name, usually "localhost" or a name provided by your host: Enter the name of your database server, specified in the installation email and displayed in your OVHcloud Control Panel.
-
The server name of a database included with your web hosting plan usually has this format:
NameOfYourDatabase.mysql.db. -
The server name of a Web Cloud Databases database starts with your OVHcloud NIC handle and is in the following format:
OVHID(without-ovh)-XXX.eu.clouddb.ovh.netwhere "XXX" is to be replaced by the reference of your Web Cloud Databases service.
-
Either a username you created or a username provided by your host: It is identical to the database name if you are using a database included with your web hosting plan. For databases created on Web Cloud Databases, please refer to the information in Step 1.4 in the tutorial on manually installing a CMS.
-
Either a password you created or a password provided by your host: You defined it yourself when you created your database. You may have modified it in the meantime.
-
Enter the database name: This name was defined when the database was created in the OVHcloud Control Panel. It is identical to the database username if you are using a database included with your web hosting plan.
-
Enter a table prefix or use the randomly generated one: If you are installing with a brand new database, enter your preferred prefix. If you are using a database that has already been used by another website, please refer to Step 1.4 in the tutorial on manually installing a CMS to avoid entering a table prefix that has already been used in your database.
-
Connection Encryption: Keep the value Default.
Click Install Joomla.
The following message appears:

Since you are using a database that exists outside of a local hosting plan, you will need to delete the token generated randomly when you set up your Joomla!.
This file to be deleted is located in your FTP storage space.
Once you have logged in, go to the installation folder for your Joomla! then delete only the token indicated by the alert message. It is present as a .txt file.
Then go back to your web browser and click again on Install Joomla.
2.4 Complete the installation
Once the installation is complete, the following page appears:
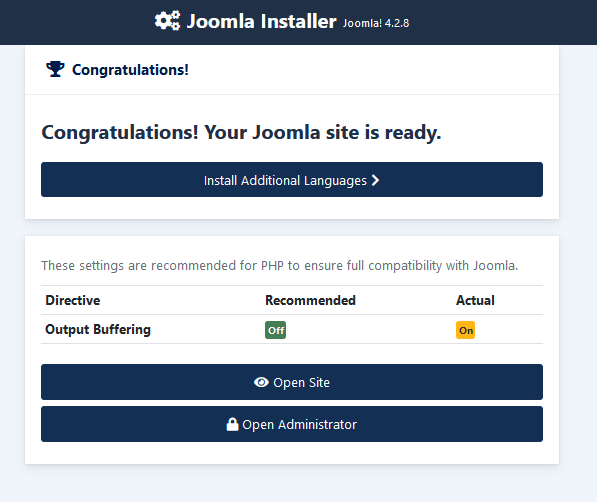
The installation is complete, but you can add additional languages to your CMS if you need to.
Congratulations, your Joomla! is ready for use and administration.
Go further
For specialised services (SEO, development, etc.), contact OVHcloud partners.
If you would like assistance using and configuring your OVHcloud solutions, please refer to our support offers.
Join our community of users.

