Creating an Instance via the Horizon interface
453 Views
Objective
You can create multiple Instances directly in the Horizon interface, and also configure a security group to apply to your Instances.
Find out how to create an Instance via the Horizon interface.
Requirements
- A Public Cloud project in your OVHcloud account
- Access to the Horizon interface
Instructions
Create a private network
As a general rule, we recommend creating a private network before creating an instance. You can later attach this network to your instance.
To begin, log in to the Horizon interface. If you are unsure about how to do this, please refer to our guide.
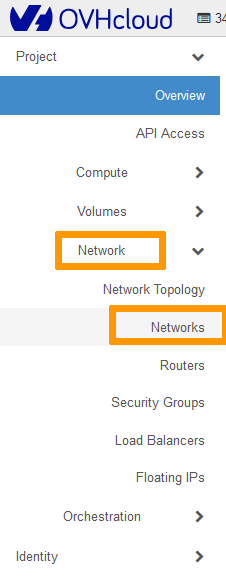
Next, click on Network in the left-hand menu, then Networks.
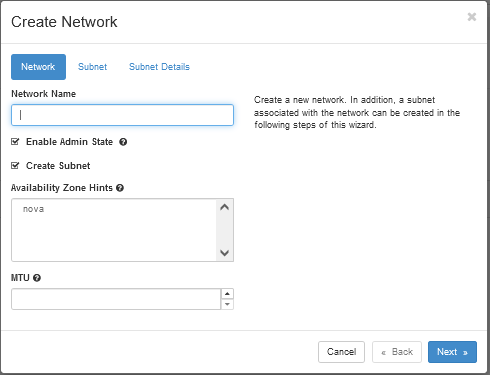
Click on Create Network

Network Name: Enter a name for your network.
Enable Admin State: Leave this option checked to activate the network.
Create Subnet: Leave this option checked to create the subnet.
Availability Zone Hints: Leave the default option.
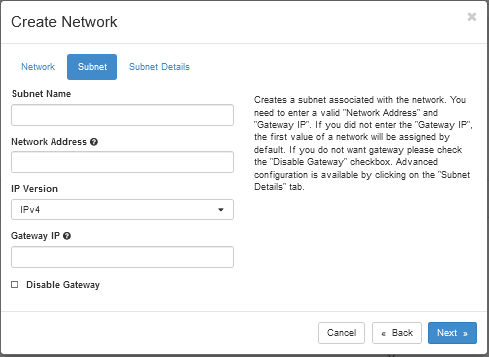
Subnet Name: Enter a name for your subnet.
Network Address: Choose a private network range. For example: 192.168.0.0/24.
IP Version: Leave this value at IPv4.
Gateway IP: This is optional. If it is not defined, a Gateway IP is automatically selected.
Disable Gateway: Leave this unchecked.
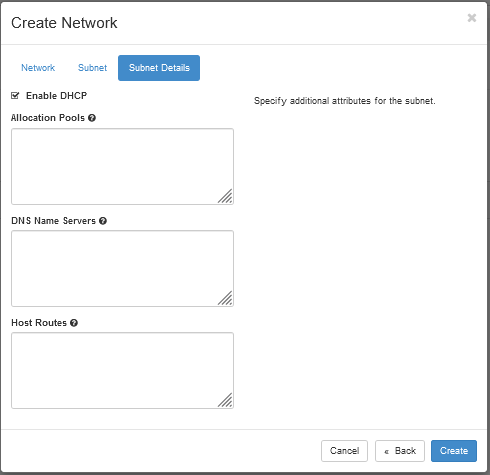
Enable DHCP: Leave this option checked.
Allocation Pools: Optional. You can specify the range from which IPs are selected.
DNS Name Servers: Optional. You can specify any DNS name servers.
Host Routes: Optional. You can specify any host routes.
Create Instance
In the Horizon interface, click on Compute in the left-hand menu, then Instances.
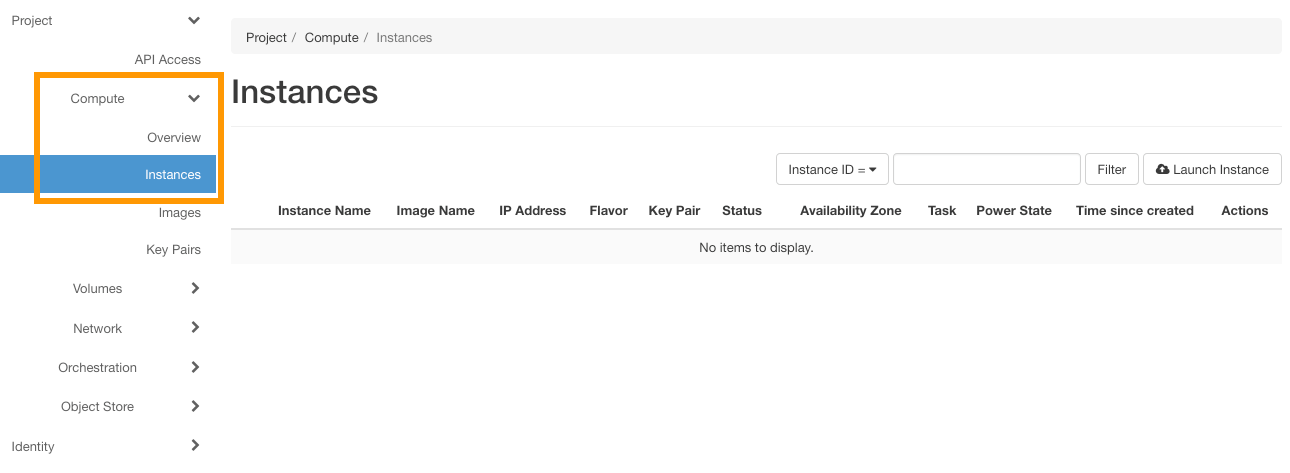
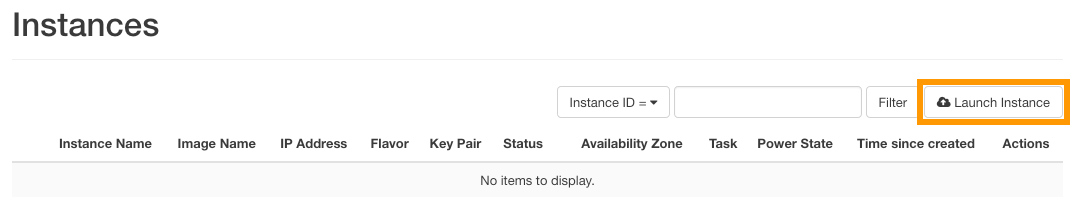
The page that opens can be used to view the Instances that are currently launched. To launch a new one, click the Launch Instance button.
You will then need to fill in the information requested. Please note that this grid is not exhaustive.
Details
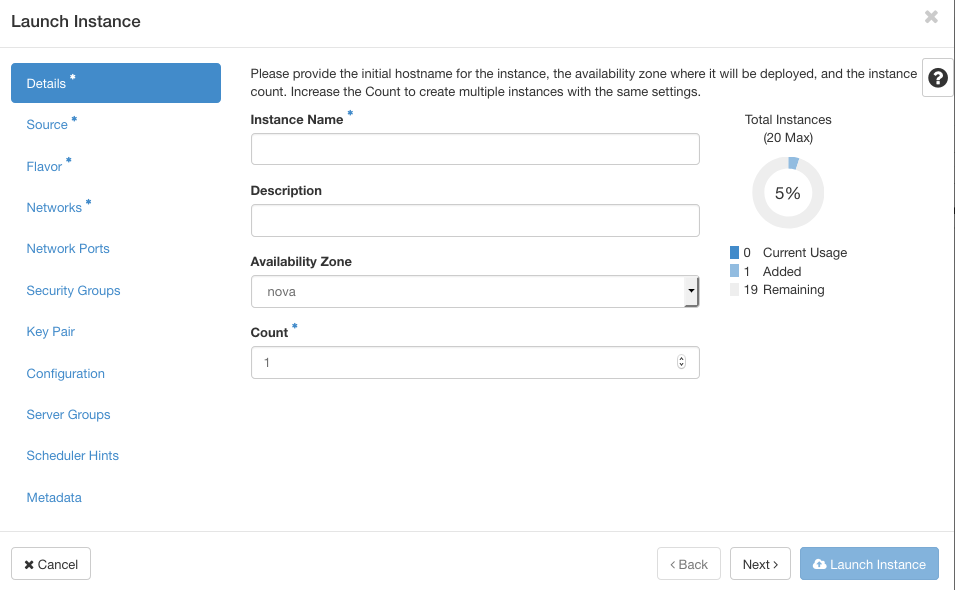
| Information | Details |
|---|---|
| Instance name | Specify the name you want for the Instance that will be launched. |
| Description | This is Optional. Set a description if applicable. |
| Availability zone | Leave "nova" (default choice). |
| Count | Specify the number of Instances to launch. |
Source
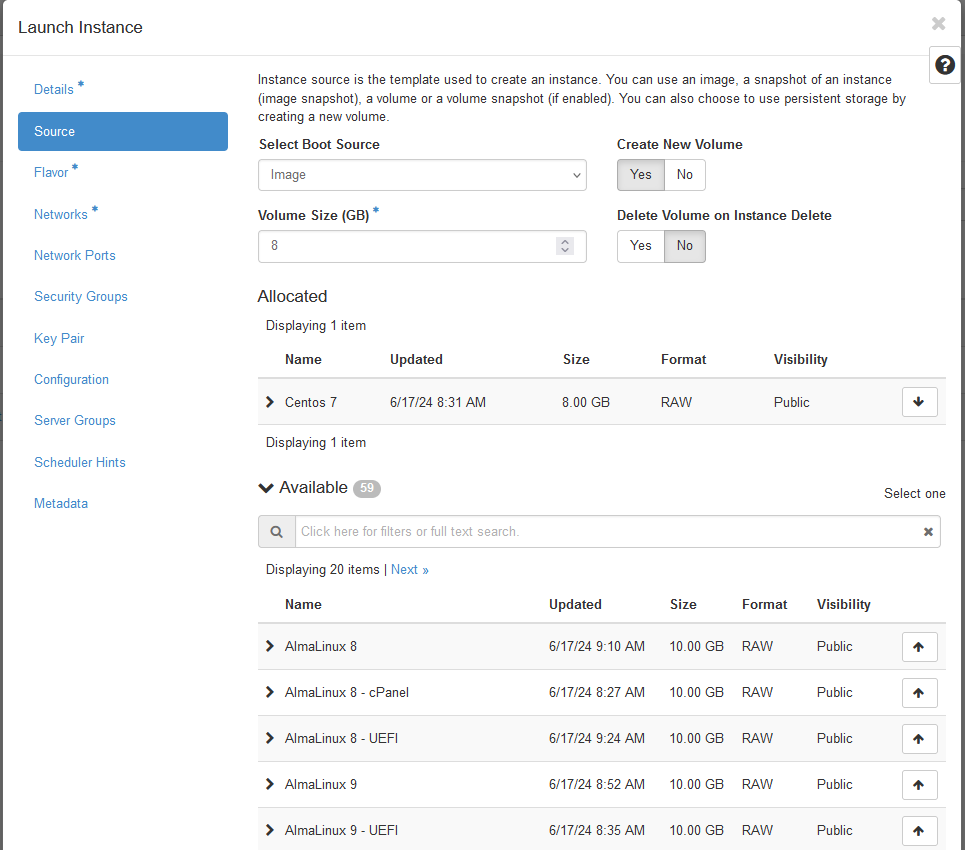
| Information | Details |
|---|---|
| Select Boot Source | Click on the drop-down arrow to select the source for launching an instance (e.g. "Image" or "Instance snapshot"). |
| Create New Volume | You may choose to check this option if you wish to create a volume into which the specified operating system image is copied. |
| Volume size (GB) | If you have chosen to create a volume, allow the system to determine the size for you. |
| Delete Volume on Instance Delete | You can leave the default option No. If Yes is selected, when the instance is deleted, so is the volume. |
| Image name (only when launching from an image) | Select the Instance image by clicking on the upward arrow next to the image of your choice. In our example, we use selected Centos 7. |
| Instance snapshot (only for launching from a snapshot) | Choose an Instance snapshot by clicking on the upward arrow next to the instance snapshot image of your choice. |
Flavor

Pre-built flavors are available for you, select the flavor of your choice underneath the Available tab.
Networks
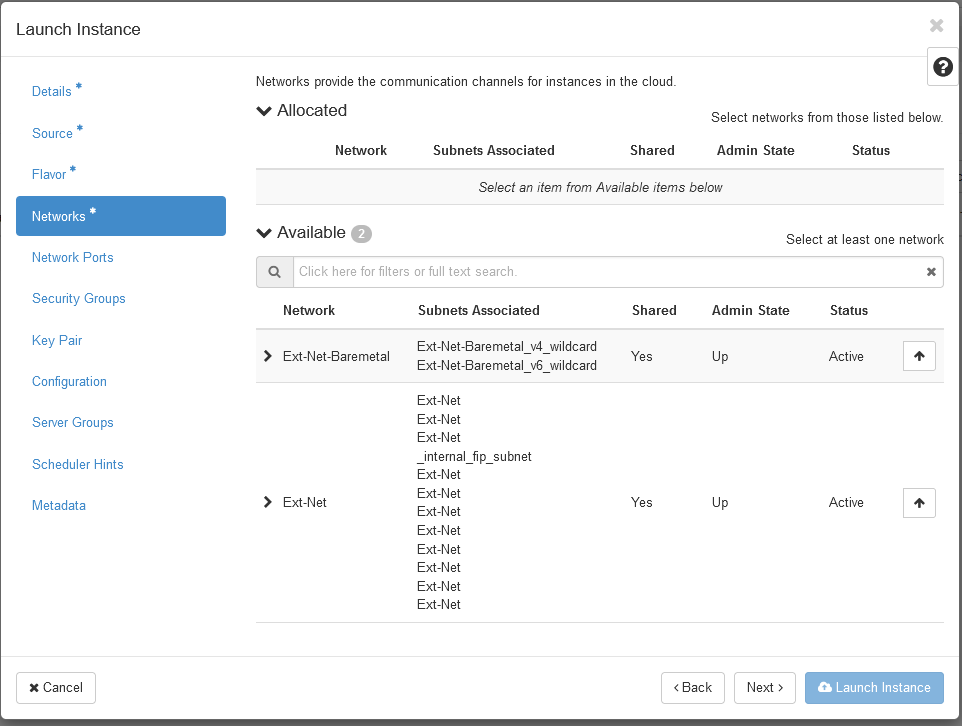
| Information | Details |
|---|---|
| Network | Select the network(s) for the Instance you want to create, from the list of available networks. |
| Ext-Net | Represents the Public Network. |
| Mynewnetwork | Represents the Private network created at the beginning of this guide. |
Security Groups
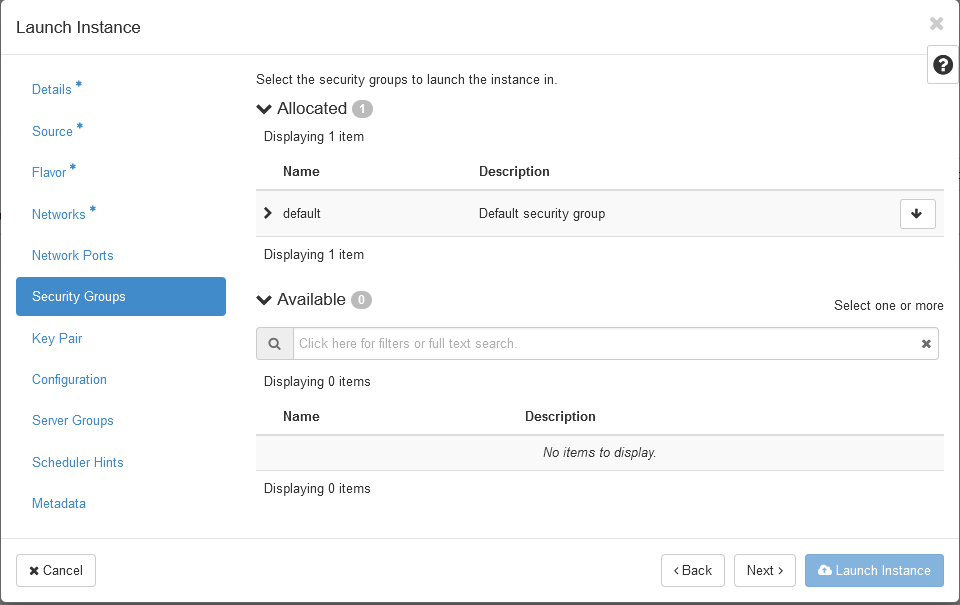
For more information, consult this guide.
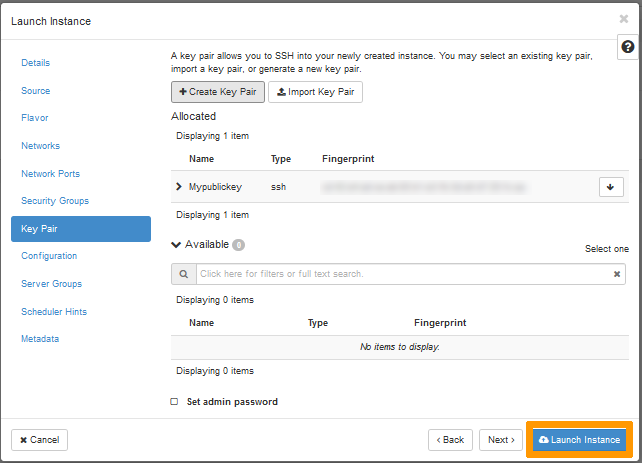
Key Pair
Although the "Key Pair" field is not mandatory in the Horizon interface when creating an instance, registering an SSH key is absolutely necessary to be able to connect to an instance. Without an SSH key, you will be required to reboot the instance in rescue mode to either create a password or add an SSH key to the appropriate file (for more information, please refer to the guide on Replacing your lost SSH key pair).
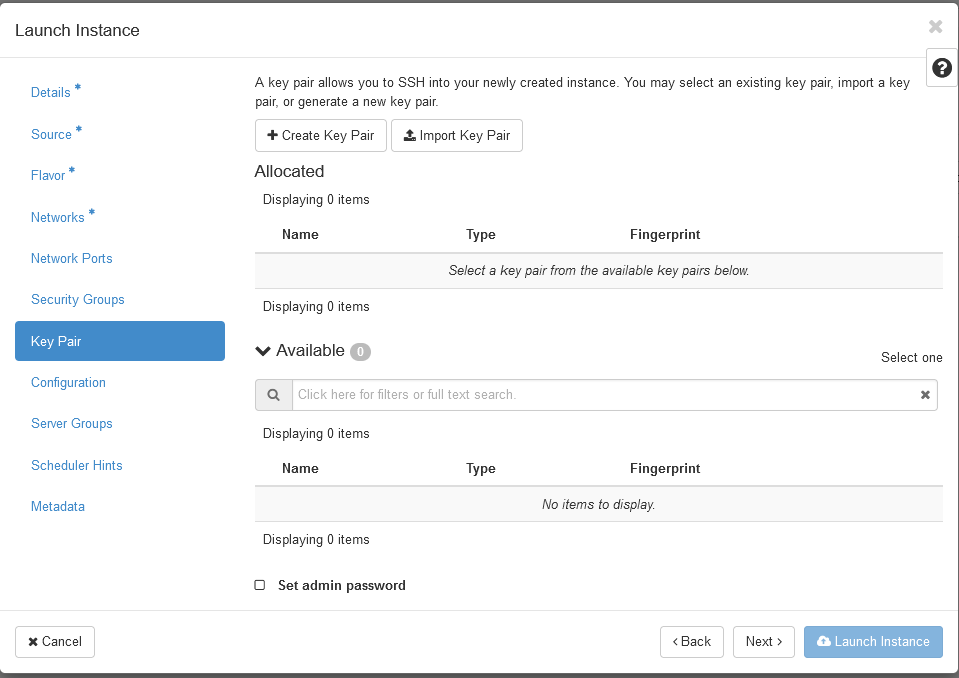
In this section, you have the option to create a keypair, import a keypair or use an existing key pair.
For more information on how to create an SSH key, consult this guide.
To create a Keypair, click on the + Create Key Pair button. Please note that with this option, additional steps have to be made before you are able to connect to the instance, especially if you are using the software PuTTY to connect to your instance. See this section of the corresponding guide.
Key Pair Name: Enter a name for your key.
Key Type:* Click on the drop down arrow and select SSH Key.
Next, click on Create Keypair to begin the creation of the key pair.
Once the Key Pair is created, click on Copy Private Key to Clipboard, then on Done.
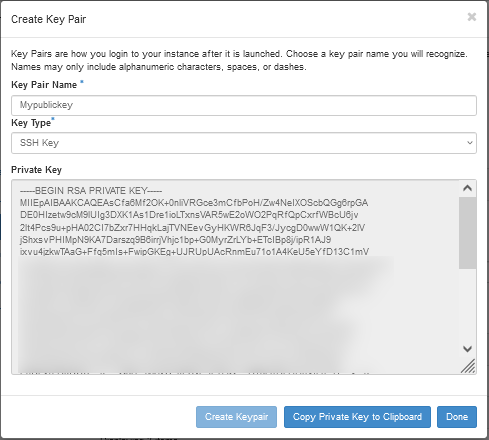
Once done, the newly created key will be automatically selected. Click on Launch Instance to begin the creation of your instance.
If you prefer to import a previously created SSH key, click on the Import Key Pair button.
Key Pair Name: Enter a name for your key.
Key Type: Click on the drop down arrow and select SSH Key.
Load Public Key from a file: Click on Browse to specify the location of the public key on your computer.
Public Key:* Copy and paste your public key here.
Click on Import Key Pair to import the key.
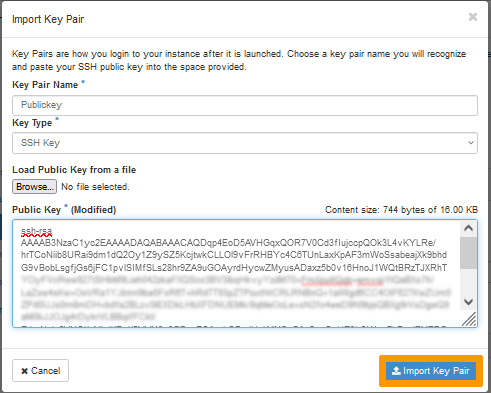
Once done, the imported key will be automatically selected. Click on Launch Instance to begin the creation of your instance.
Other options
Please note that these options are not mandatory for the creation of a basic instance. If you wish to explore these options further, consult the official OpenStack documentation.
| Information | Details |
|---|---|
| Custom script source | Specify the source between a "direct entry" or a "file". |
| Script data | Enter the script code in the input field (16KB maximum). |
| Script file | Click Browse to select the post-installation script. |
| Disk partitioning | Choose between "automatic" or "manual". |
| Configuration disk | Configure OpenStack to write metadata on to a specific configuration disk that will be attached to the Instance when it is launched. |
Go further
Join our community of users.

