AI Training - Tutorial - Build & use custom Docker image
376 Views
Objective
This tutorial covers the process of building your own job image for specific needs.
Requirements
- A Public Cloud project
- A user for AI Training
- Docker installed on your local computer or a virtual machine
- Knowledge about building an image and a Dockerfile
Quick overview
AI Training allows you to train your models easily, with just a few clicks or commands. This solution runs your training job on compute resources such as CPUs or GPUs. As soon as your training job is finished, the billing will be stopped immediately. Thus, you will save time and increase the productivity of your team, while respecting the integrity of your sensitive data (GDPR).
In order to be launched, your AI Training job has to be containerised inside a Docker image. Containers provide isolation but also flexibility. The Docker images that you build can be used locally, with OVHcloud AI Training but also with other cloud providers.
Inside your Docker image, you are free to install almost anything and everything as long as you follow the guidelines below.
AI Training accepts images from public or private repositories. Find more information about using public & private registries in this documentation.
Guidelines to follow
Create a Dockerfile
A Dockerfile is a script that contains instructions for building our Docker image. It specifies the base image to use, any additional packages or libraries that need to be installed, and any configuration settings or commands that should be run when the container image is started.
Before continuing, please make sure you are in the root directory of your project, containing job files (Python files, requirements.txt, ...).
Once you are in it, create a new file and name it Dockerfile by using a text editor (vi, vim, nano, ...).
Here is an example. First, we use cd to move to our project's directory, where all our files are located. Then, we create and edit the Dockerfile:
Choose a base image
Instead of starting from scratch, feel free to start from an existing Docker image, as long as it is compliant with the following guidelines.
The header of our Dockerfile will look like this:
Which image should we use?
There are many official images available on Docker Hub. For example, we could use the basic Python images which come in many versions and flavors (alpine, slim, ...), each designed for a specific use case.
If we want to start from a Python 3.10 image, we would use the following command, since python:3.10 is the name of the image:
Choosing the right base image is important. The objective is to find an image that will meet our use, and that will have the smallest size possible. Indeed, this will allow us to handle it more quickly, and store it easily.
If the chosen image does not contain all the libraries required by our project, this is not a problem, we will see how to install them.
If you want to be able to use GPU hardware in your AI Training jobs, your base image should have cuda drivers installed on.
Here is a potential list of official base images (featuring cuda drivers) that you can use:
- pytorch/pytorch:latest
- tensorflow/tensorflow:latest-gpu
- huggingface/transformers-pytorch-gpu:latest
- mxnet/python
- nvidia/cuda
For example, if we want to start from the base image tensorflow/tensorflow:latest-gpu, we would use:
Define the home directory
Defining a home directory is a best practice when creating Docker images, because it helps keep the file system organized and makes it easier to reference files and directories within the container.
Our home directory will be /workspace. We must indicate in our Dockerfile that we want to create the /worskpace directory and set it as our home directory. This can be done by using the WORKDIR instruction:
Declaring the /workspace directory as the HOME environment variable is necessary to ensure compatibility with AI Training.
Add job's files to the home directory
Once the /workspace directory is set up, we can add our files (Python scripts, requirements.txt, and the Dockerfile) to it thanks to the ADD instruction.
Here is an example to add one specific file, such as a main.py Python file:
If our project is composed of many files, we can also add all our project's directory files by using:
This command could allow you to load your dataset within your Docker image. However, this would increase its size considerably. A best practice is to put data outside, such as Object Storage then link it to the AI Training job during its launch.
Give the OVHcloud user access to the home directory
Images in AI Training are not run as root user, but by an "OVHcloud" user with UID 42420.
It means that if we want to be able to create and write in a specific directory at runtime, we will have to give it specific rights. We can do it with the following instruction:
As mentioned, the home directory for the "OVHcloud" user (with UID 42420) will be /workspace. We can then replace <specific-directory> by /workspace. Though keep in mind that you can change the ownership of any other useful directory.
Depending on the models and frameworks you use, other folders may be created during training at the root of your environment. This can be the case for folders like /runs or /logs. In this case, do not forget to give access rights to these folders as well: RUN chown -R 42420:42420 /runs /logs.
To summarize, this is what our Dockerfile looks like for now:
Install what we need
As explained before, it is possible that the chosen Docker image does not include all the libraries that our project needs to work properly. In this case, we need to install them to ensure that our AI Training job works correctly.
We distinguish two types:
- Linux packages
- Python libraries
These installation instructions begin with the RUN prefix, which is used to execute a command during the image building process.
Install system packages
For example, let's assume that the ffmpeg package (used to process multimedia files) is required by our AI Training job but is missing from our base image. We would then use:
If we need to install several packages, we can write them one after the other as follows:
To improve your Dockerfile by making it shorter, we can also list all our packages in a packages.txt file, and install it with:
Install Python libraries
To install the missing Python libraries, we advise to create a requirements.txt file, in the root directory of your project, where we will write all our needed libraries that are missing from our base image.
A good practice is to specify the version of each library in this file, to ensure that the installed versions are fixed and avoid potential conflicts.
Here is an example of a requirements.txt file. As you can see, we have indicated each required library of our project, and we have specified the version of each of them:
Now, it is time to indicate in our Dockerfile that we want to install the Python libraries from this requirements.txt file, by using a RUN pip install -r instruction:
Specify the main command that runs our job
The CMD instruction is typically used to specify the main command that runs our AI Training job, such as a python script or a binary executable. It can only be used once in a Dockerfile.
This is where we will specify which Python file we would like to run. Here is a basic example to run a main.py Python file, located at the root:
If your main.py file has arguments, you can specify them in the CMD command as follows:
Note that it is not mandatory to specify a CMD instruction within the Dockerfile. This is only to simplify the user's experience.
For example, if our main.py file has parameters that we would like to customize, rather than fixing them in our Docker image, we would remove the CMD option from the Dockerfile and we would use the following command when launching the AI Training job:
-- bash -c 'python /workspace/main.py arg1 arg2'
Other useful commands
Instead of adding all the project's files by using ADD . /workspace, you might be interested in using the COPY instruction, which can be better and safer for copying files and directories from our local directory to our Docker image.
For example, if we want to add the file example.py to the home directory of our image:
For more information about Dockerfiles we recommend you to refer to their official documentation
Final Dockerfile overview
To sum up this tutorial, this is what our final Dockerfile looks like:
Build our image
Once the Dockerfile is complete and matches our needs, we have to choose an image name and build the image using one of the following commands (make sure you are still in the root directory of your project, where the Dockerfile is located):
-
The first command builds the image using your system’s default architecture. This may work if your machine already uses the
linux/amd64architecture, which is required to run containers with our AI products. However, on systems with a different architecture (e.g.ARM64onApple Silicon), the resulting image will not be compatible and cannot be deployed. -
The second command explicitly targets the
linux/AMD64architecture to ensure compatibility with our AI services. This requiresbuildx, which is not installed by default. If you haven’t usedbuildxbefore, you can install it by running:docker buildx install
The dot . argument indicates that your build context (place of the Dockerfile and other needed files) is the current directory.
The -t argument allows you to choose the identifier to give to your image. Usually image identifiers are composed of a name and a version tag <name>:<version>.
Try to find a name that is easily identifiable. This will allow you to manage your Docker images more easily, especially when you have multiple images and versions.
For example, we could use:
Test the image locally (Optional)
If we want to verify that our built image is working properly, we can run the following command:
Don't forget the --user=42420:42420 argument if you want to simulate the exact same behavior that will occur on AI Training jobs. It executes the docker container as the specific OVHcloud user (user 42420:42420).
Push the image in the registry of our choice
Pushing our image to a registry is needed in order for AI Training to pull it.
AI Training provides, for each Public Cloud project, a default registry called shared registry where all users of a same Public Cloud project are able to push their custom images.
This shared registry can help you perform your tests, but should not be used in production, as we reserve the right to delete its content if deemed necessary. The images pushed to this registry are for AI Tools workloads only, and will not be accessible for external uses. This is why it can be interesting to add other registries. Learn how to do it by following this documentation.
Here are the basic commands to push a Docker image to a registry:
For example, if we want to push a first version of our built image named cnn_image_segmentation_project inside a registry registry.gra.ai.cloud.ovh.net, we would use:
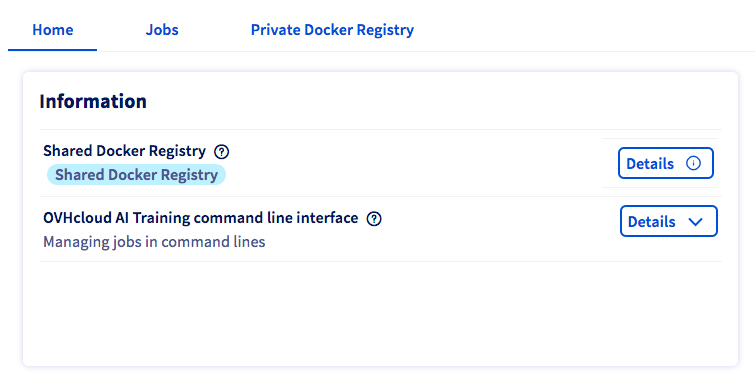
If you want to know the exact commands to push on your shared registry, please consult the Details button of the Shared Docker Registry section, in the Home panel of AI Training.
Dockerfile examples
If you want more concrete examples, feel free to look at the different Dockerfiles available on our ai-training-examples GitHub repository.
Go further
- Check the best practices for writing Dockerfiles official documentation.
- Discover how to build a custom Docker image to deploy a Streamlit app.
- You can imagine deploying a Docker image for data processing and training tasks. Refer to this tutorial.
If you need training or technical assistance to implement our solutions, contact your sales representative or click on this link to get a quote and ask our Professional Services experts for a custom analysis of your project.
Feedback
Please send us your questions, feedback and suggestions to improve the service:
- On the OVHcloud Discord server

