Retrieving your Nutanix installation status information
338 Views
Objective
In order to optimise the handling of support tickets for Nutanix on OVHcloud, it is essential to provide OVHcloud teams with a set of information on the status of your Nutanix installation.
This guide explains how to retrieve essential information on the status of your Nutanix cluster.
Requirements
- A Nutanix cluster in your OVHcloud account
- Login credentials and URL for Prism Central, received via email after the installation
Instructions
We recommend that you retrieve all of the information detailed in this guide before contacting the OVHcloud support.
Information on the AOS
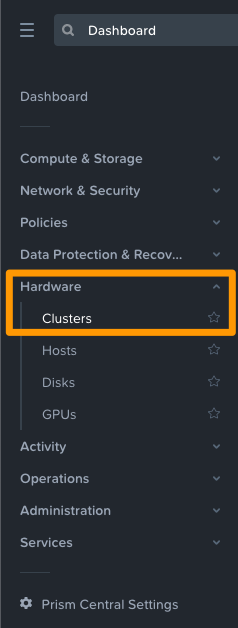
Log in to Prism Central, open the main menu in the top left-hand corner and click on Hardware, then Clusters.
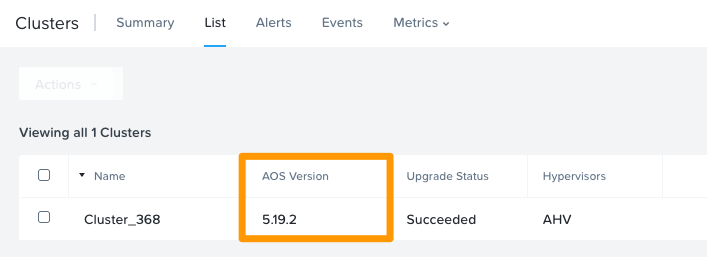
Click the List tab and note down the AOS version for the cluster concerned.
Hypervisor information
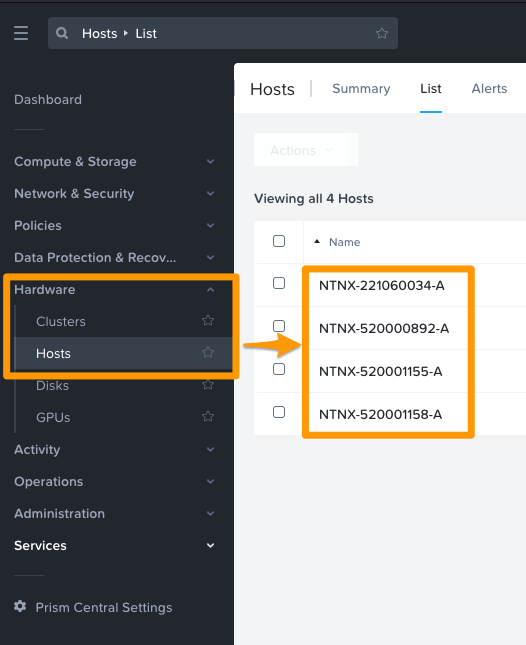
Now open the main menu again and click on Hardware then Hosts.
Select a host from the list of hosts in your cluster.
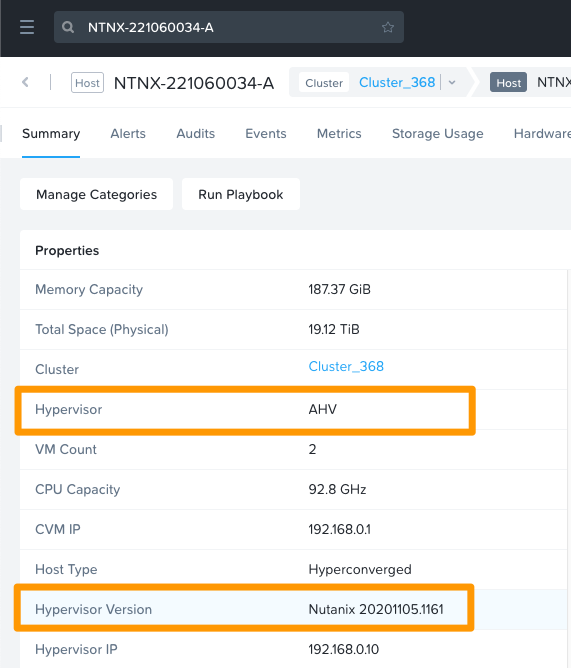
Note the type of Hypervisor and the Hypervisor Version.
In the example below, the hypervisor type is AHV and the hypervisor version is 20201105.1161.
Node Serial Number
From the same host summary tab, note the Node Serial number.

Nutanix Cluster Check (NCC) Health Report
The Nutanix Cluster Check (NCC) health report is a comprehensive report on the current state of the cluster, including many hardware and software control points.
This NCC report can help OVHcloud and Nutanix support carry out investigations on any faults found on your cluster.
To get this report, log into Prism Central, open the menu in the top left-hand corner and click Hardware, then Clusters.
Select the cluster concerned to access its details.
From the Summary tab, click Launch Prism Element.

The management interface for your cluster, Prism Element, will then open.
Generating NCC checks
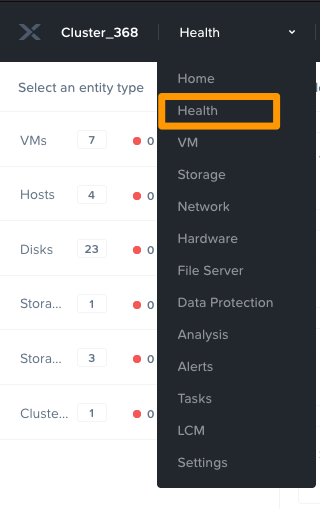
From the Prism Element interface, open the drop-down menu in the top left-hand corner, then click Health.
To the right of the window, click on Actions, then Run NCC checks.

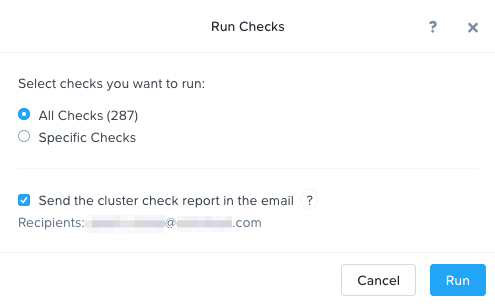
In the window that appears, tick the boxes “All Checks” and “Send the cluster check report in the email” (only if you would like to receive the report by email), then click Run.
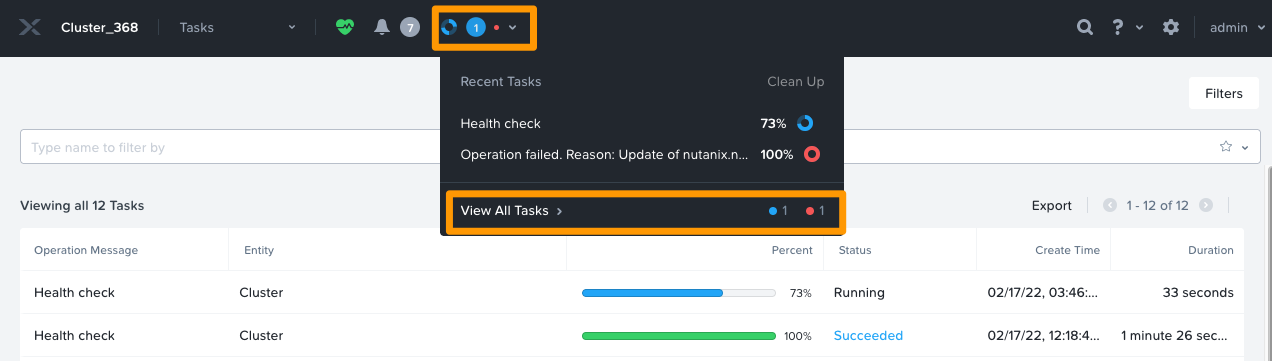
You can track the execution of the NCC verification tasks by clicking Tasks from the Prism Element interface drop-down menu, or by clicking the blue icon for the current tasks and then clicking View all tasks.
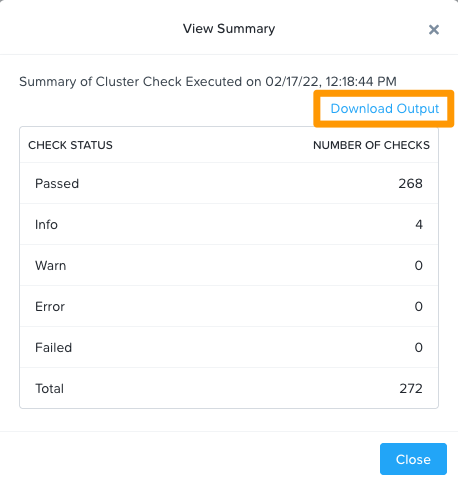
Once the verification is complete, click Succeeded in the "Status" column.

You can then download the NCC report in .txt format by clicking Download output.
Once the report has been downloaded, you can then send it to our teams along with any elements already retrieved:
Use the Plik tool to upload your report and send it to us as a download link. You can find more information on using the Plik tool in this guide.
Receiving NCC report by email
In order to receive the NCC report by email, it is necessary to have pre-populated an SMTP server and at least one email address for notification of alerts and activity reports.
Adding an SMTP server
In the Prism Element interface, open the drop-down menu in the top left-hand corner and click Settings.
Scroll to the "Alerts and Notifications" submenu on the left and click SMTP Server.
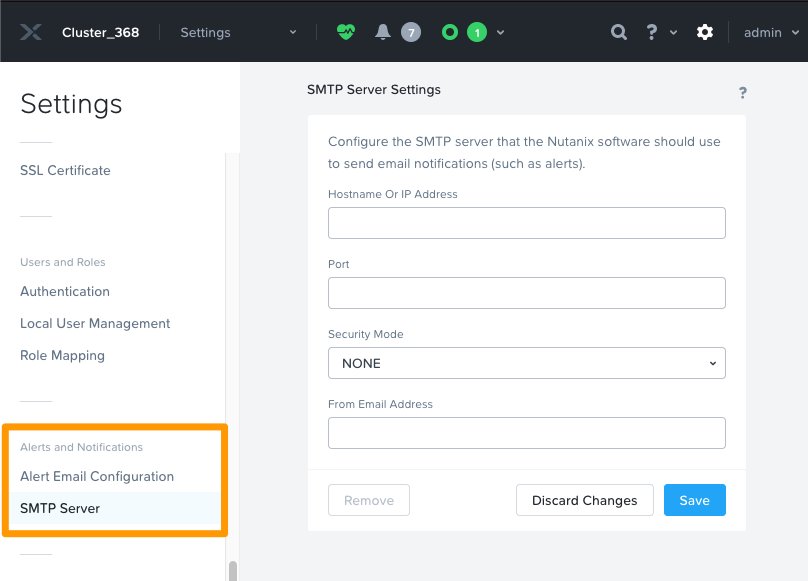
Enter the configuration details for your SMTP server, then click Save.
Adding an email address
In the Prism Element interface, open the drop-down menu in the top left-hand corner and click Settings.
Scroll to the "Alerts and Notifications" submenu on the left and click Alert Email Configuration.
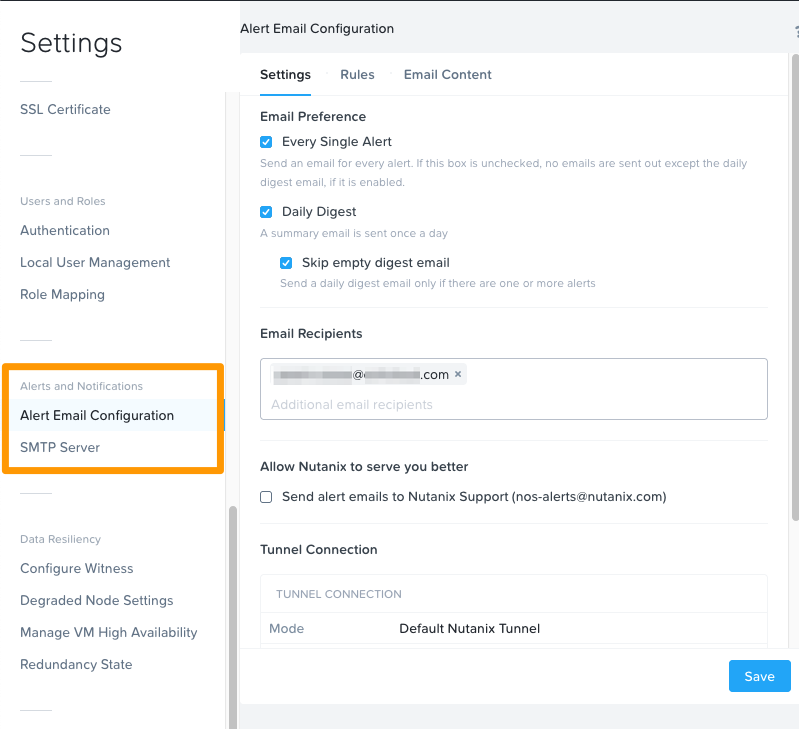
Check at least the "Every Single Alert" box to receive the NCC report. Enter a valid email address in the field, then click Save.
Collect all cluster logs
For more accurate analysis, it may be necessary to retrieve logs from nodes and Prism Central.
It is possible to collect logs from Prism Element but we recommend using the command line on the cluster or on Prism Central.
The log recovery tool (Logbay) is available on each CVM of a node and on Prism Central.
You can generate the logs and retrieve them via SSH.
For more information about Logbay and Putty, see the Go further section of this guide.
Collect logs about Prism Central
Connect to the IP address of Prism Central via SSH with the ssh command on Linux, or with the Putty tool on Windows.
For example on Linux:
bash nutanix@prismcentralipaddress
Collect logs:
Display the name of the generated file:
Then retrieve the logs collected in a .zip file.
To do this, make a copy of the files from a computer on Linux via the scp command, or on Windows with pscp:
Collect all node logs from Prism Element IP
Log in on the cluster’s IP address via SSH with the ssh command on Linux, or with the Putty tool on Windows.
For example on Linux:
bash nutanix@prismelementipaddress
Collect all node logs:
Display the names of all generated files:
Then retrieve the logs collected in .zip files.
To do this, copy each generated file onto each node:
Use the Plik tool tool to upload your .zip files and send them to us as download links. You can find more information on using the Plik tool in this guide.
Go further
If you need training or technical assistance to implement our solutions, contact your sales representative or click on this link to get a quote and ask our Professional Services experts for assisting you on your specific use case of your project.
Join our community of users on https://community.ovh.com/en/.

