Getting started with the MX Plan solution
2900 Views
Objective
If you have just purchased an MX Plan solution, this means you have email addresses that you can use to send and receive messages from a device of your choice.
Find out how to get started with an MX Plan solution.
Requirements
- An MX plan solution, available with a web hosting plan.
OVHcloud Control Panel Access
- Direct link: MX Plan
- Navigation path:
Web Cloud>MX Plan> Select your MX Plan service
Instructions
Contents
Create an email address
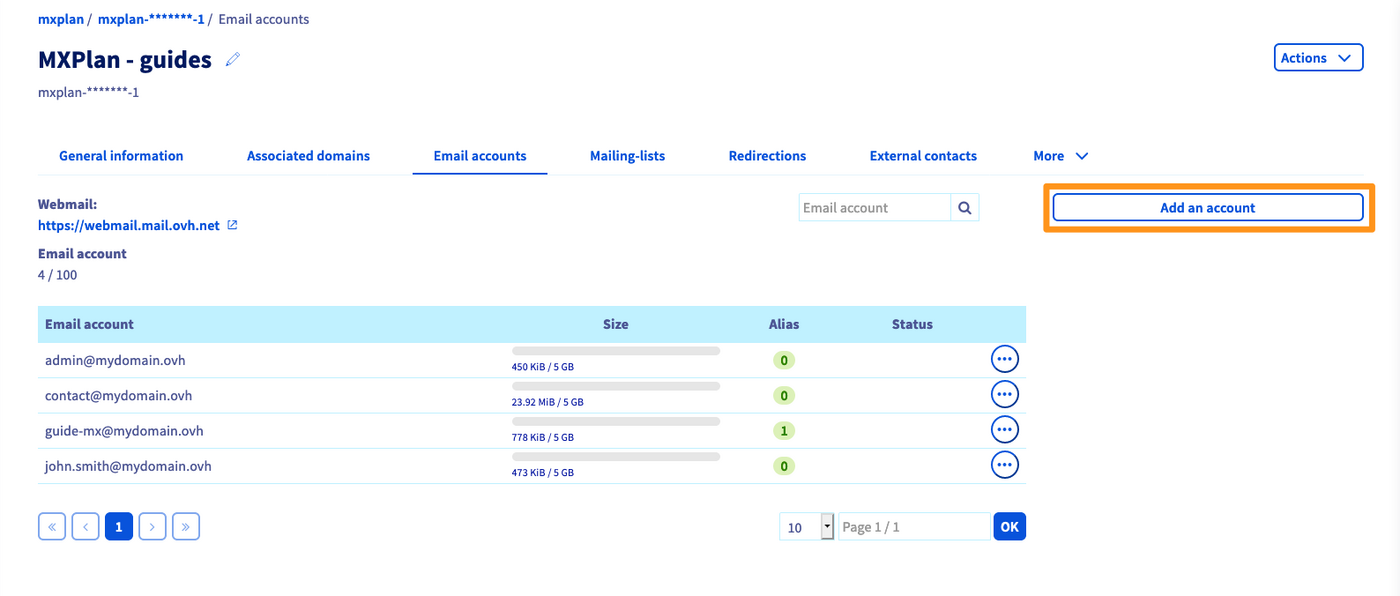
To create an email address, go to the Email accounts tab. The window that opens will list the accounts that are already available, as well as those that you can still create. To add a new email account, click the Add an account button.
In the window that pops up, enter the following information:
- Email account: A temporary name is already pre-filled in the text box: delete it and enter your new email address (e.g. your first name.surname). The domain name that makes up the email address is already pre-selected in the list.
- First name: Enter a first name.
- Name: Enter a name.
- Display name: Enter the name that will be displayed as a sender when emails are sent from this address.
- Password: Enter a password and confirm it. For security reasons, we recommend not using the same password twice, choosing one that does not contain any personal information (e.g. your surname, first name and date of birth), and renewing it regularly.
- Quota: Determine the size you would like to assign to the email account.
Once you have filled in the fields, click Next , then check the information that appears in the summary. If the information is correct, click Confirm. Repeat this step as necessary, depending on the number of accounts you have.

Use your email addresses
Once you have created your email addresses, you can start using them. There are two ways of doing this: using webmail from a browser, or using an email client.
Use Webmail
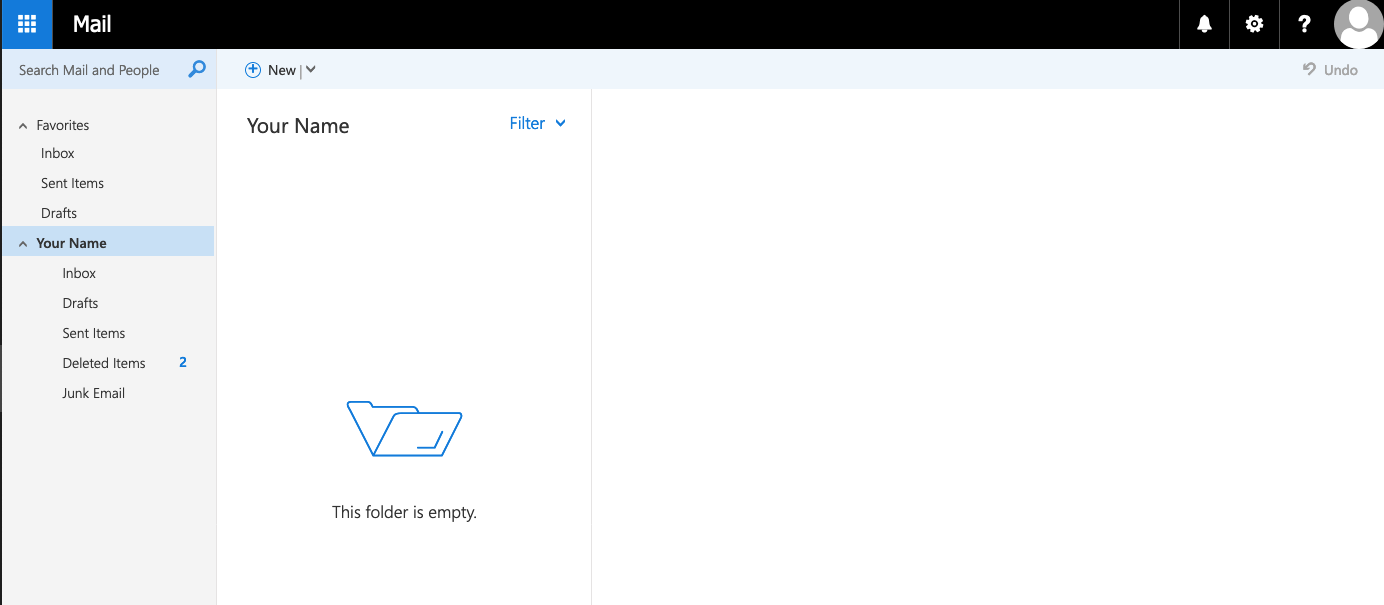
Go to the Webmail login page, then enter the email address and password. Then click the Login button.
When you log in to webmail for the first time, you are prompted to set the interface language and the time zone you are in. Your inbox will then appear.
To find out how to use your email address via OWA webmail, please refer to our guide on Using your email address via Outlook Web App (OWA) webmail.
Use an email client
You can configure your email account on an email client such as Outlook, Thunderbird, Mac Mail, etc.
Below are the links to the configuration guides depending on your device type:
If you only need the connection parameters to configure an email account on an email client, you can find these settings below.
IMAP and POP Receive Settings
When you choose your account type, we recommend using IMAP to receive emails. However, you can select POP as well.
Please only enter the values corresponding to your location (EUROPE or AMERICA/ASIA-PACIFIC).
Select the tab corresponding to your configuration type:
- Username: Enter the full email address.
- Password: Enter the password for the email account.
- EUROPE server (incoming): imap.mail.ovh.net or ssl0.ovh.net.
- AMERICA/ASIA-PACIFIC server (incoming): imap.mail.ovh.ca.
- Port: 993.
- Security type: SSL/TLS.
- Username: Enter the full email address.
- Password: Enter the password for the email account.
- EUROPE server (incoming): pop.mail.ovh.net or ssl0.ovh.net.
- AMERICA/ASIA-PACIFIC server (incoming): pop.mail.ovh.ca.
- Port: 995.
- Security type: SSL/TLS.
SMTP Send Settings
Below are the SMTP settings to use when sending emails:
SMTP configuration
- Username: Enter the full email address.
- Password: Enter the password for the email account.
- EUROPE server (outgoing): smtp.mail.ovh.net or ssl0.ovh.net.
- AMERICA/ASIA-PACIFIC server (outgoing): smtp.mail.ovh.ca.
- Port: 465.
- Security type: SSL/TLS.
Redirections and Aliases
Do you want to redirect your emails to another recipient, create an alias or systematically copy another email address?
You can do this in two ways:
-
Create your redirection via webmail: Via inbox rules or filters. These rules, which are applied when an email is received, allow an email to be forwarded or redirected. To do this, please follow our guide on Inbox rules via the OWA interface.
-
Create your redirection and alias via the OVHcloud Control Panel: To add a redirection or alias, click on the
Redirectionstab. The table of redirections that are already active is displayed. On the right, clickAdd a redirection. -
From address: Enter the email address you would like to redirect. To address: Enter the address you would like to redirect to here. This can be one of your OVHcloud email addresses, or an external email address.Choose a copy method: Define whether you want to keep a copy of the email received at the targeted email address (From address) or directly redirect to the redirection address (To address) without saving a copy.
To understand how to use redirections and aliases on your MX Plan service, please read our full guide: “Use email redirections”.
Automatic reply
It is important to be able to set up an automatic response in case you cannot view or process your emails.
You can set up an automatic reply directly by logging in to your email account via Webmail. For further details, please refer to the section “Adding automatic replies” in our guide on Using an email address via the Outlook Web App (OWA).
Go further
Use Outlook Web App (OWA) webmail
For specialised services (SEO, development, etc.), contact OVHcloud partners.
If you would like assistance using and configuring your OVHcloud solutions, please refer to our support offers.
Join our community of users.

