Creating an email address with an MX Plan solution
1312 Views
Objective
You have just purchased an MX Plan email solution. It allows you to benefit from email addresses associated with a domain name.
Find out how to create an email address with an MX Plan solution.
Requirements
- An MX Plan solution, available as part of our Web Hosting plans
Special cases
- For Web Hosting plans, you will need to activate your MX Plan package before continuing to follow this guide. To do this, please refer to our guide on Activating the email addresses included in your web hosting plan.
OVHcloud Control Panel Access
- Direct link: MX Plan
- Navigation path:
Web Cloud>MX Plan> Select your MX Plan service
Instructions
Depending on the date your service was activated and whether it was recently migrated, you are using either the legacy version or the new version of the MX Plan solution. Before you proceed with this guide, you need to check which version you are using.
Continue with the next steps, depending on which version you own.
| MX Plan legacy version | MX Plan new version |
|---|---|
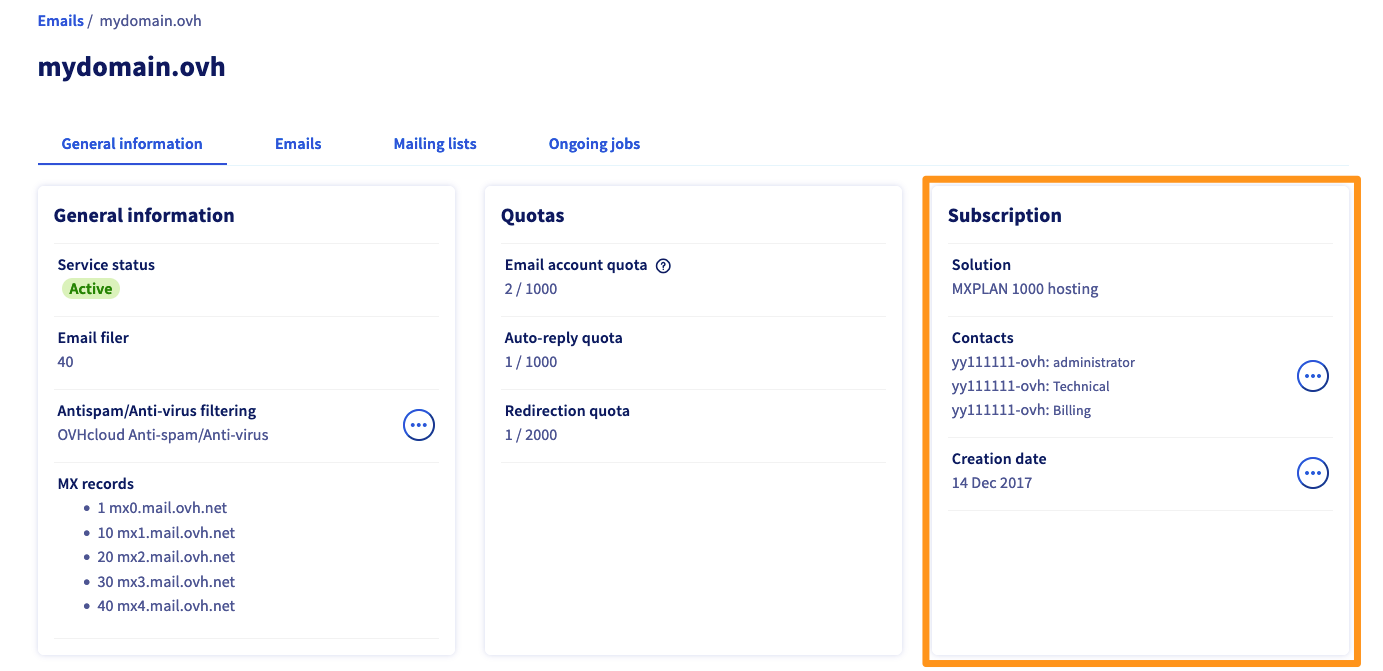 Find the solution in the "Subscription" box | 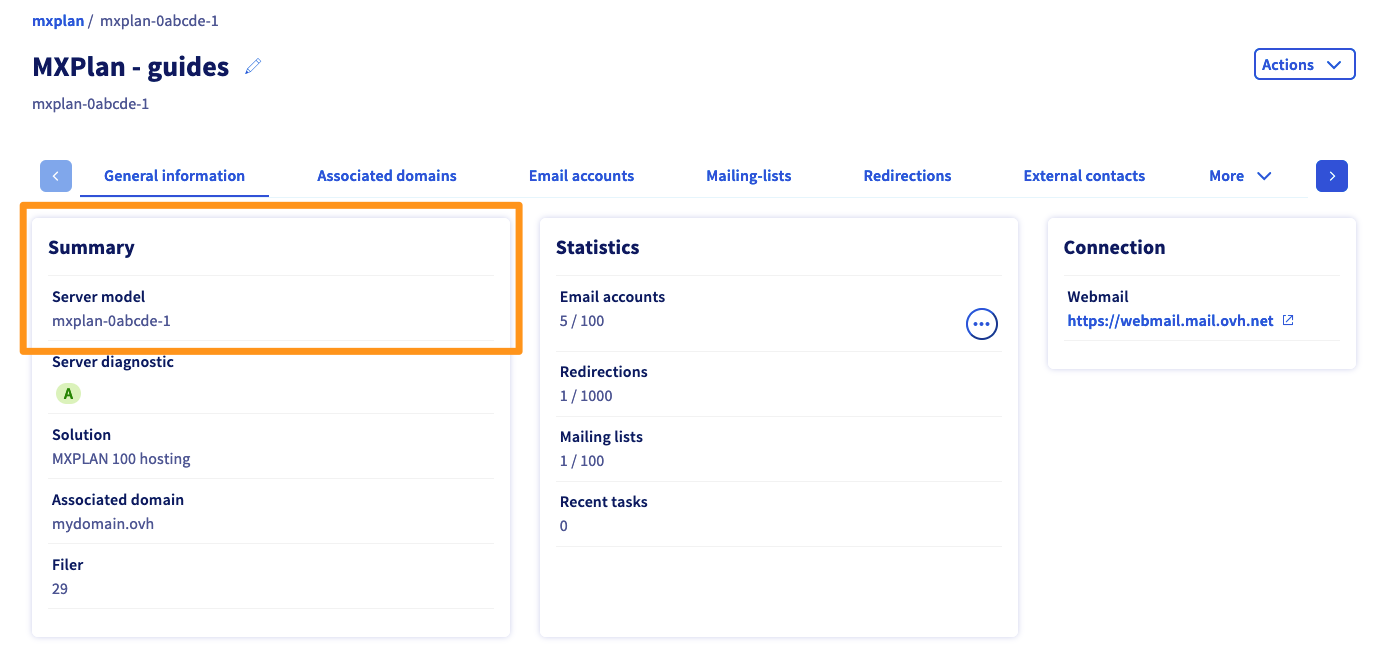 Locate the Server model in the "Summary" box |
| Go to MX Plan legacy version | Go to MX Plan new version |
MX Plan new version
Access the email service management
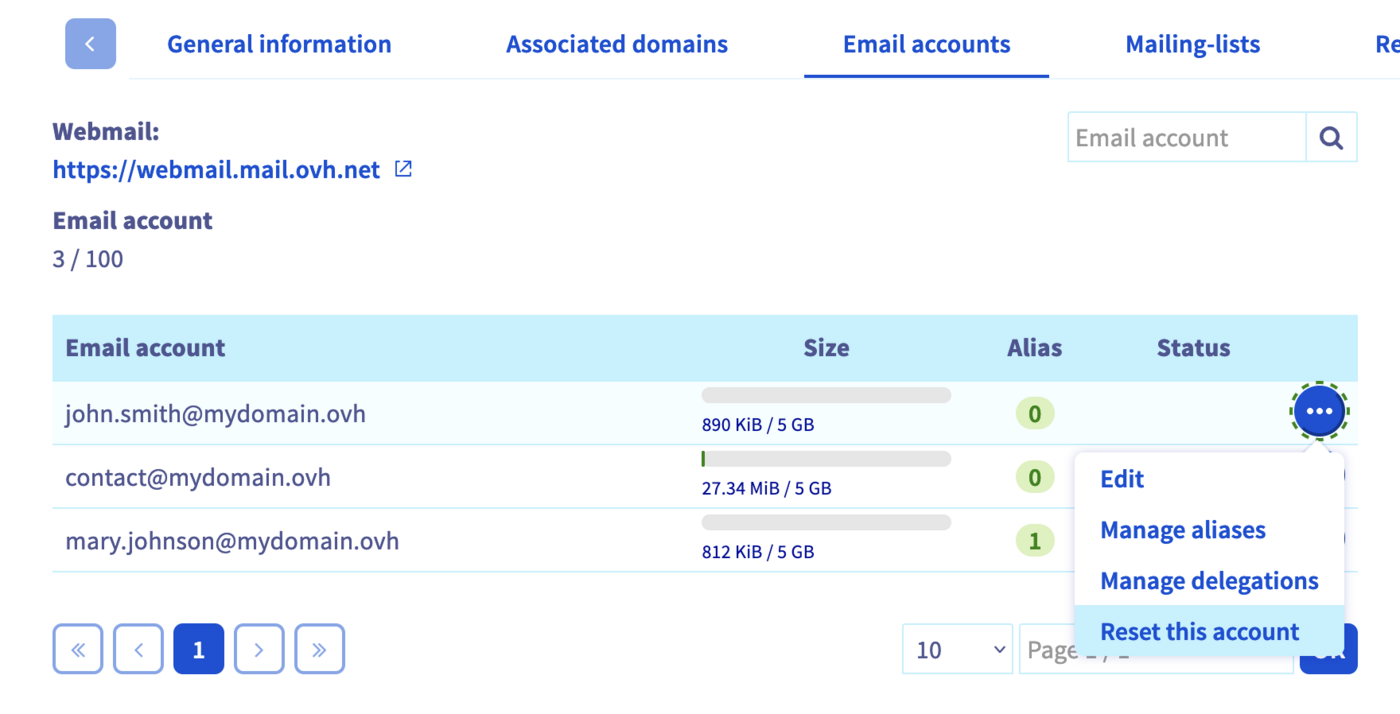
If you are using the new version of the MX Plan solution, your display should correspond to the following image. If this section looks different for you, please double-check that you are following the right set of instructions by referring to the information above.
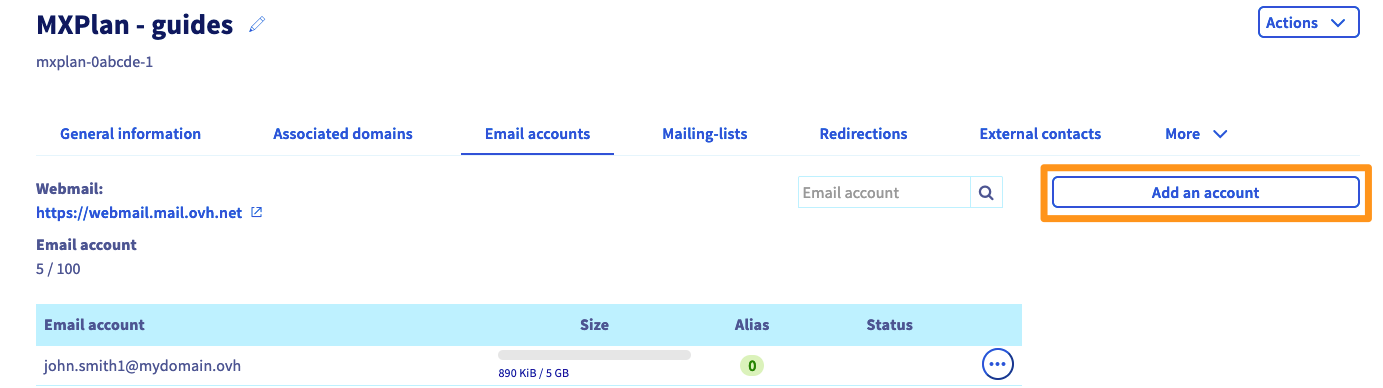
Create an email account
To set up a new email account, go to the Email accounts tab. The window that opens will display the email accounts that are already available, as well as those you can still create. Next, click the Add Account button.
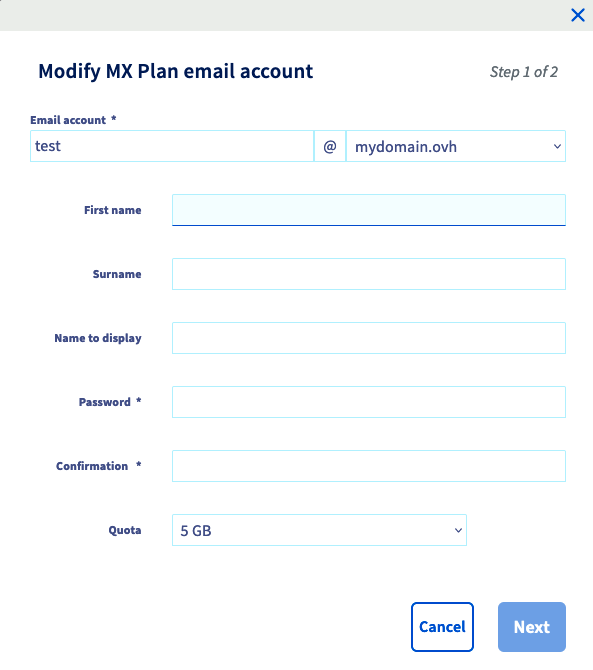
In the popup window, enter the following information:
- Email account: A temporary name is already prefilled in the text box. Replace it with the name you would like for your email address (firstname.lastname, for example). The domain name for the email address is already pre-selected in the list.
- First name: Enter a first name.
- Name: Enter a surname.
- Name to display: Enter the name you want to be displayed as a sender when you send emails from this address.
- Password: Type in a password and confirm it. For security reasons, we recommend not using the same password twice and choosing one that does not contain any personal information (e.g. your surname, first name and date of birth). We also recommend renewing it regularly.
Once you have filled in all of the required fields, click Next.
Next, check that all the information displayed in the summary is correct. If it is, click Confirm. The account you have just added will now appear in the table. You will need to wait a few minutes for the account to become available.
Repeat this step as necessary according to the number of accounts to create.
View emails
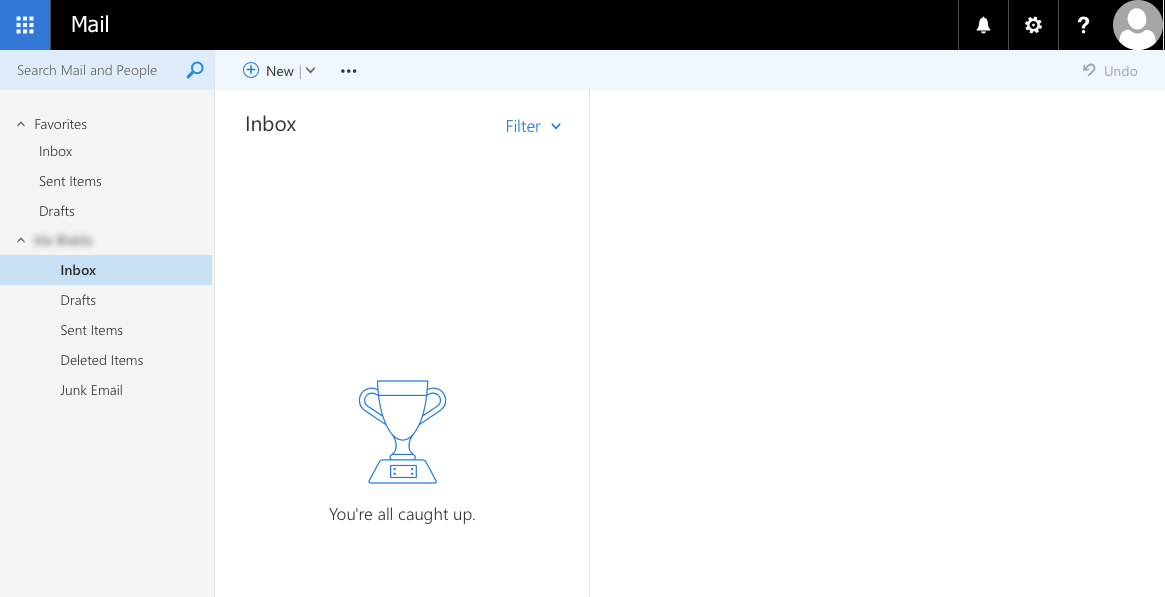
On the Webmail login page, enter your email address and password. Then click the Login button.
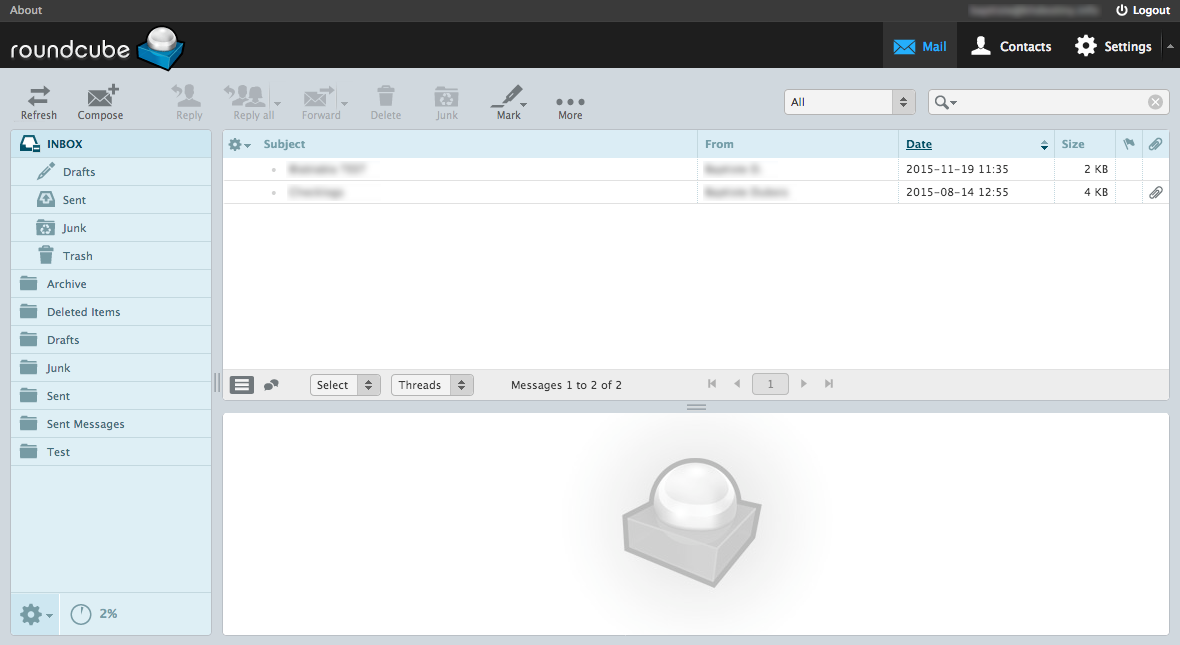
When you first log in to the webmail interface, you are prompted to set the interface language and your time zone. Your inbox will then appear. To find out how to use your email address via Outlook Web App (OWA) webmail, use our guide "Using the Outlook Web App with an email account".
To view your emails using an email client, please refer to the section "View an email account from a device".
Delete an email account
With a new MX Plan service, deleting an account is referred to as resetting an account.
Before deleting email accounts, make sure they are not used. You may need to back up these accounts. If required, please refer to our guide on Migrating your email address manually, which explains how to export account data from your Control Panel or email software.
In the Email accounts tab, click the ... button to the right of the account you want to delete, then click Reset this account.
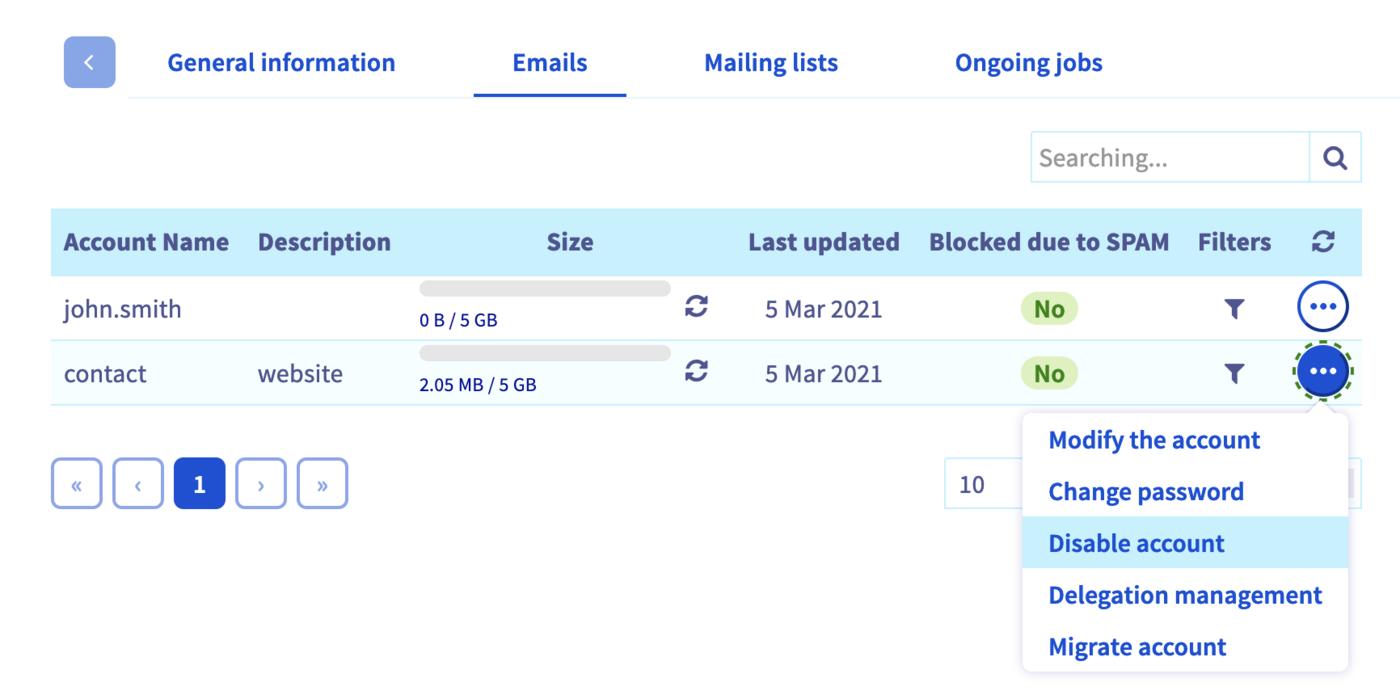
MX Plan legacy version
Access the email service management
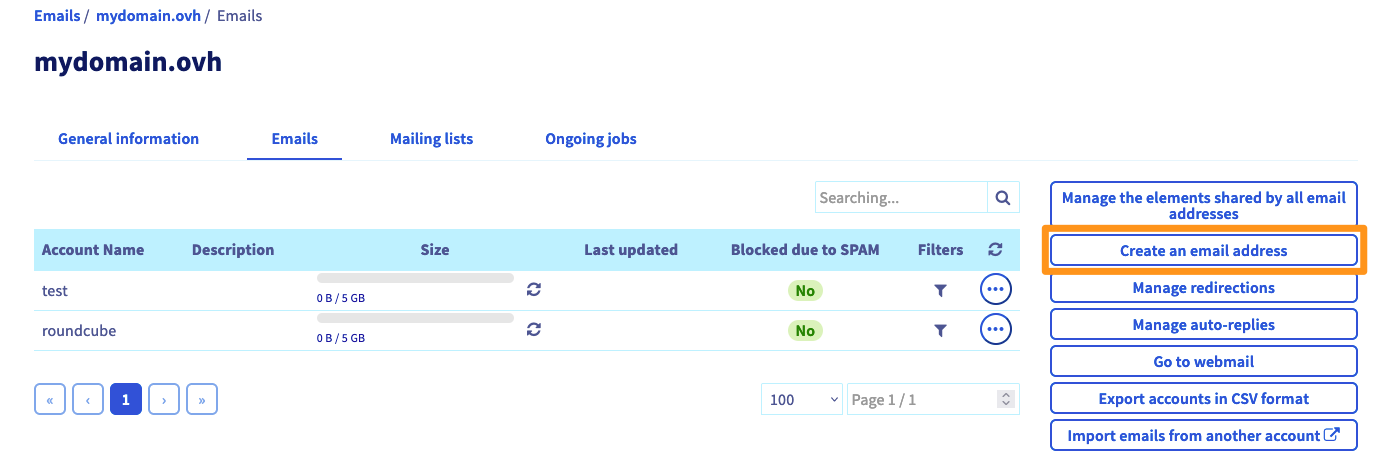
If you are using the legacy version of the MX plan solution, your display should correspond to the following image. If this section looks different for you, please double-check that you are following the right set of instructions by referring to the information above.
Create an email account
To create a new email address, go to the Emails tab. The table displayed will contain all of the email accounts created as part of your MX Plan solution. Then click the Create an email address button.
In the pop-up window, enter the following information:
- Account name: Enter the name you want for your email address (firstname.lastname, for example). The domain name concerned is already entered by default.
- Account description: Enter a short description that will distinguish this account from any other accounts added in the OVHcloud Control Panel.
- Account size: Select the size of account you want. This is the available space for the account to store messages.
- Password: Type in a password, and confirm it. For security reasons, we recommend not using the same password twice, and choosing one that does not contain any personal information (e.g. your surname, first name and date of birth). We also recommend renewing your password regularly.
Once you have filled in all of the required fields, click Next.

Check that all the information displayed in the summary is correct; if it is, click on Next again. Finally, click Confirm to launch the creation of the email account. You will need to wait a few minutes for it to become available.
Repeat this step as necessary according to the number of accounts to create.
View emails
On the Webmail login page, enter your email address and password. Then click the Login button.
Your inbox will then appear. You can find more information in our guide on Using your email account via the Outlook Web App (OWA) webmail.
To view your emails using an email client, please refer to the section "View an email account using a device".
Delete an email account
Before deleting email accounts, make sure they are not used. You may need to back up these accounts. If required, please refer to our guide on Migrating your email address manually, which explains how to export account data from your Control Panel or email software.
In the Emails tab, click the ... button to the right of the account you want to delete, then click Disable account.
View an email account from a device
You will need to configure your email address on the device you want to use (e.g. a smartphone or tablet). To do this, you can use our configuration guides:
If you just need the information required to configure your email address, the settings to use are listed below:
Check that the flag visible in the top right-hand corner of this documentation page corresponds to your country/region. The settings below vary depending on your country/region.
| Information | Description |
|---|---|
| Username | Enter the full email address |
| Password | Enter the password for the email account |
| Server (incoming) | imap.mail.ovh.ca |
| Port | 993 |
| Security type | SSL/TLS |
| Information | Description |
|---|---|
| Username | Enter the full email address |
| Password | Enter the password for the email account |
| Server (incoming) | pop.mail.ovh.ca |
| Port | 995 |
| Security type | SSL/TLS |
| Information | Description |
|---|---|
| Username | Enter the full email address |
| Password | Enter the password for the email account |
| Server (outgoing) | smtp.mail.ovh.ca |
| Port | 465 |
| Security type | SSL/TLS |
If you have any problems configuring your email address on your device, we recommend using our configuration guides or contacting the publisher of the application you are using, because you may need to make a change that is specific to the application.
Go further
Join our community of users.

