Migrating your email addresses from one OVHcloud email platform to another
568 Views
Objective
You want to migrate your email addresses on an Exchange platform to another Exchange or MX Plan platform. In this guide, a two-phase migration process is described:
- Configure the destination platform.
- Migrate email accounts from your current platform to the new one.
To migrate an MX Plan solution to an Exchange platform, please follow our guide on Migrating an MX Plan email address to an Exchange account .
This guide explains how to migrate email addresses from one Exchange platform to another Exchange platform or MX Plan.
Requirements
- a "source" platform with configured Exchange accounts
- a "destination" platform with Exchange or MX Plan accounts (via the MX Plan solution or included in OVHcloud Web Hosting plans). This platform must have unconfigured accounts or be available to host the email accounts that need to be migrated.
OVHcloud Control Panel Access
MX Plan:
- Direct link: MX Plan
- Navigation path:
Web Cloud>MX Plan> Select your MX Plan service
Exchange:
- Direct link: Exchange
- Navigation path:
Web Cloud>Exchange> Select your platform
Instructions
Configuring the destination platform
Before starting your migration, if you have just ordered your new email offer, first add the domain name to your email platform. If you are migrating to an MX Plan platform, the attached domain name being "fixed", you can directly proceed to the next step.
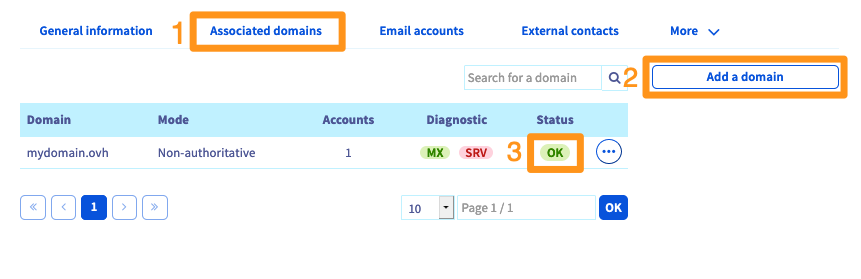
Select the Associated domains or Domain tab on your platform, then click on Add a domain. Once the domain name is added, make sure the OK or Active mention is present in the Status column.
For more details on adding a domain name, follow the Exchange guide.
Migrate email accounts
Your email accounts will be migrated in 3 main steps: Rename the original email account, create the new email account and migrate from the original platform to the new one.
Special cases:
- If you need to migrate an Exchange account to an MX Plan account, you must ensure that your email account does not exceed 5 GB. Collaborative features, calendar and contact synchronisation are not present on MX Plan and cannot be migrated.
Step 1: Rename
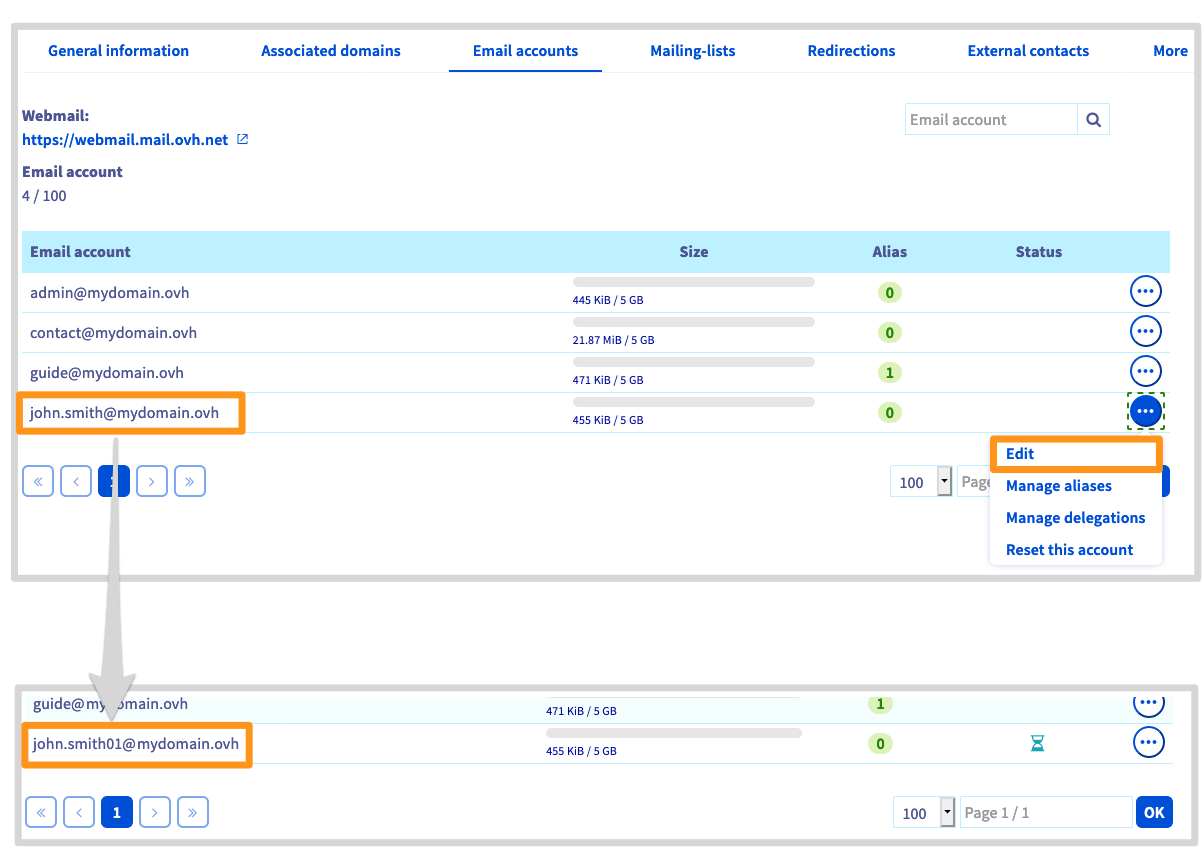
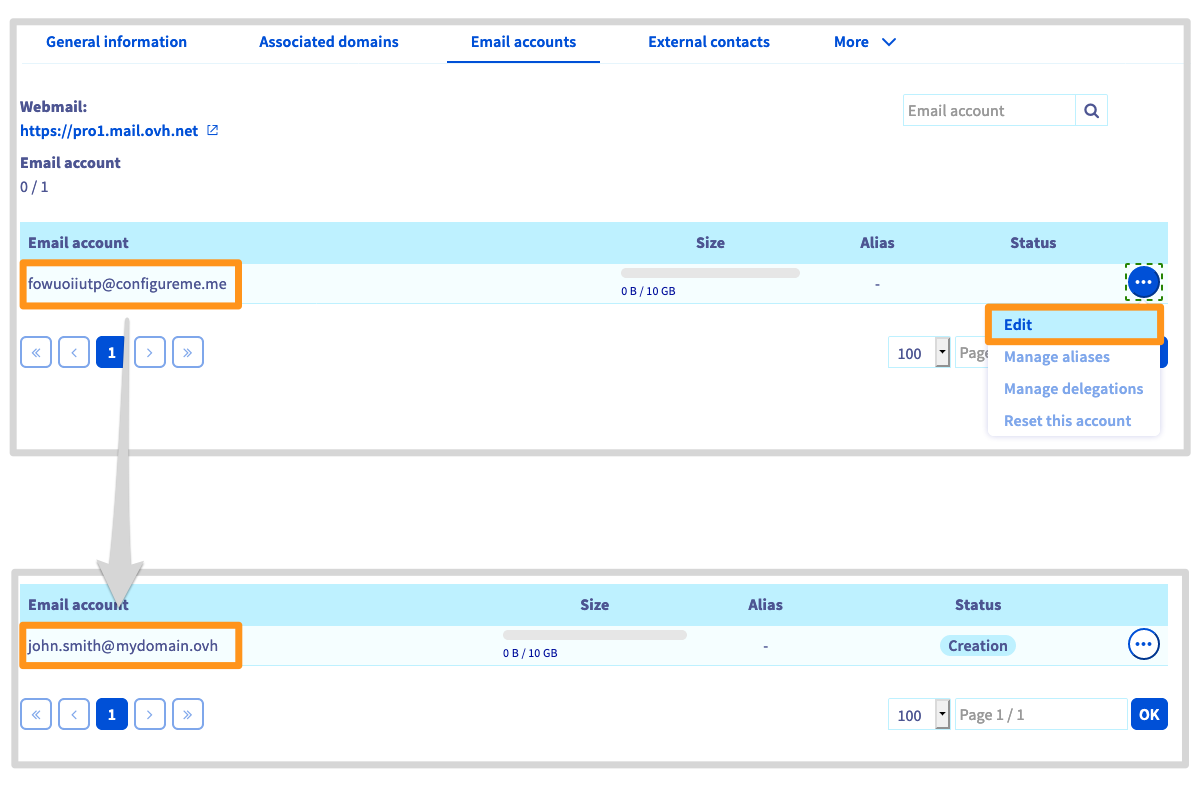
Rename the email account to be migrated with a provisional name (example: to migrate the email account john.smith@mydomain.ovh, rename it to john.smith01@mydomain.ovh).
In the Email accounts tab for your email platform, click on the ... button, then Edit.
Step 2: Create
Re-create your email address on the new account for your Exchange or MX Plan platform. (Using the previous example, you will create john.smith@mydomain.ovh on your new platform.)
In the Email accounts tab for your platform, click on the ... button, to the right of the target email account, then Edit.
Step 3: Migrate
Only the data of your email accounts will be migrated (emails, contacts, calendars, inbox rules, etc.). The features linked to your platform will need to be recreated on the new platform:
- Alias
- Delegated rights
- Groups
- External contacts
- Footer
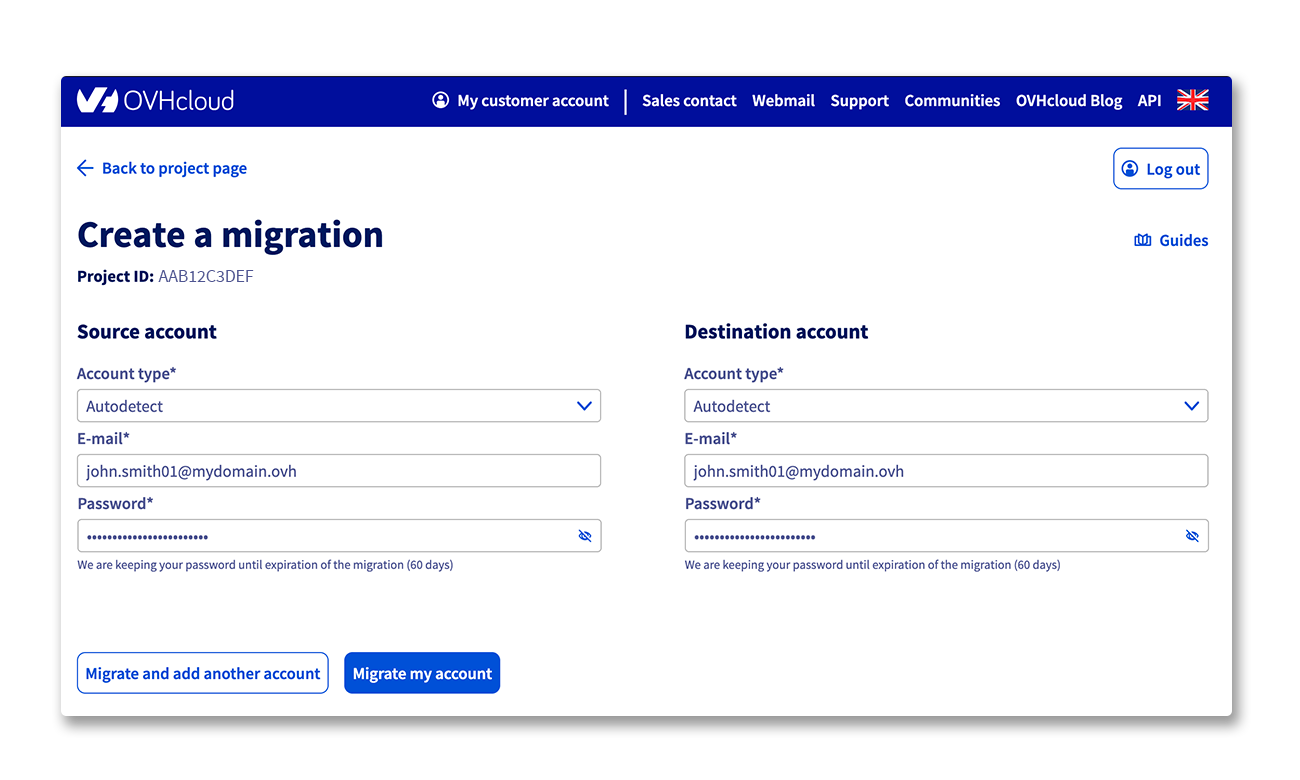
Migrate the source email account to your new platform account using our OMM tool (OVHcloud Mail Migrator).
For more information on OMM, please read our guide on Migrating email accounts via the OVHcloud Mail Migrator.
The migration time depends on the amount of data to migrate to your new account. This may vary from a few minutes to several hours.
After the migration, verify that all of your elements are present by logging into webmail at Webmail.
Once the migration is complete, you can keep or delete the original account with the temporary name.
If you would like to delete it, go to the Email accounts tab on your original email platform, click on the ... button, then Reset this account.
Check or modify your domain configuration
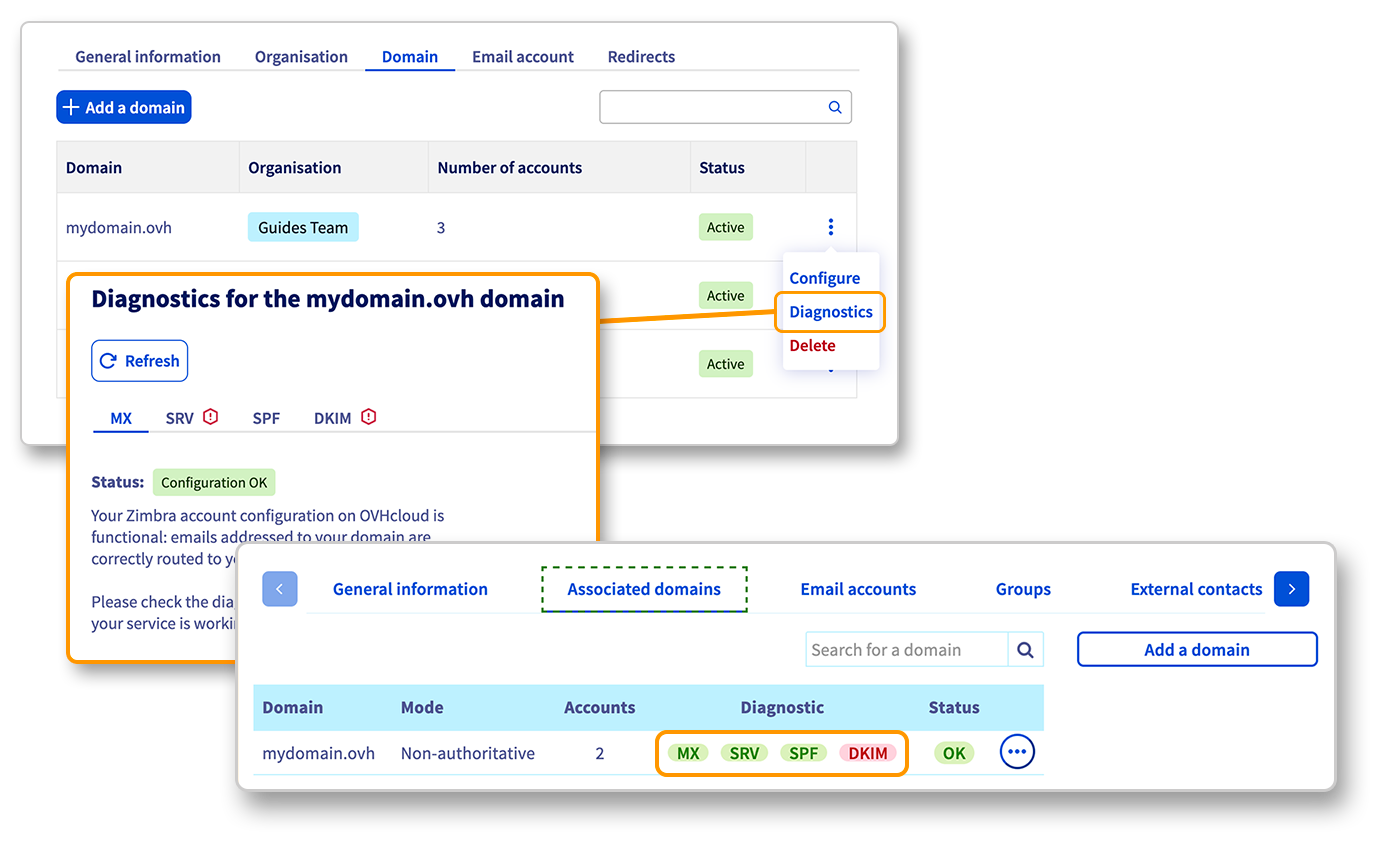
At this stage, your email addresses should already be migrated and functional. For security reasons, please ensure that your domain is correctly configured in your Control Panel.
To do this, select the Exchange service concerned, then go to the Associated domains tab. In the table shown, you can use the Diagnostic column to check if the DNS configuration is correct: a red box appears if the configuration needs to be modified.
If you have just migrated or modified a DNS record for your domain, it may take a few hours to be updated when you go to the OVHcloud Control Panel.
To modify the configuration, click on the red box and carry out the requested operation. It can take between 4 and a maximum of 24 hours for DNS changes to propagate fully.
Use your migrated email addresses
Now, you can start using your migrated email addresses. To do this, OVHcloud offers a web client (web app), available here Webmail. You will need to enter your email credentials.
If you have configured one of the migrated accounts on a local email client (e.g. Outlook, Thunderbird), you will need to configure it again. The login details for the OVHcloud server have changed following the migration.
To help you with these modifications, please refer to the respective guide via the Hosted Exchange guide sections. If you are unable to reconfigure the account immediately, you can always use the web application to access your emails.
You can also manually migrate external email addresses to OVHcloud by using our OVHcloud Mail Migrator tool (OMM). To do this, you must have the login details (user, password, servers) of the source email and the destination email.
Go further
Managing contacts for your services
Join our community of users.

