Create Multiple vLANs in a vRack on a Dedicated Server
1287 Views
Objective
The standard vRack configuration enables you to create only one VLAN. This means that you can only use each IP address once. However, with the vRack version 2.0 configuration, you can create up to 4,000 VLANs within a single vRack. This means that you can use each IP address up to 4,000 times.
This guide will show you how to create multiple vLANs within the vRack.
Requirements
- An active vRack service in your account
- Two or more vRack-compatible servers
- Administrative (sudo) access to your server via SSH (Linux) or RDP (Windows)
- Your chosen private IP address range
- You must have completed the vRack configuration guide
This feature might be unavailable or limited on servers of the Eco product line.
Please visit our comparison page for more information.
Instructions
Linux
As an example, we'll use eno2 as the network interface, 10 and 11 as the VLAN tags, and 192.168.0.0/16 and 10.0.0.0/16 as the private IP address ranges.
All commands must be adapted to the distribution used. Please refer to the official documentation for your distribution if you have any doubts.
First, establish an SSH connection to your server and run the following commands from the command line to install the VLAN package on your server:
Next, load the 8021q kernel module:
To verify that the module is loaded:
Run the following command to ensure the modules are permanently loaded at boot:
Next, retrieve your interface names and identify the private interface:
Next, create a VLAN tag. The tag serves as an identifier, allowing you to differentiate between multiple VLANs:
In this example:
Use the same command for each VLAN tag you wish to add.
Next, declare the private IP address range within the vRack and tag it with the identifier using the following command:
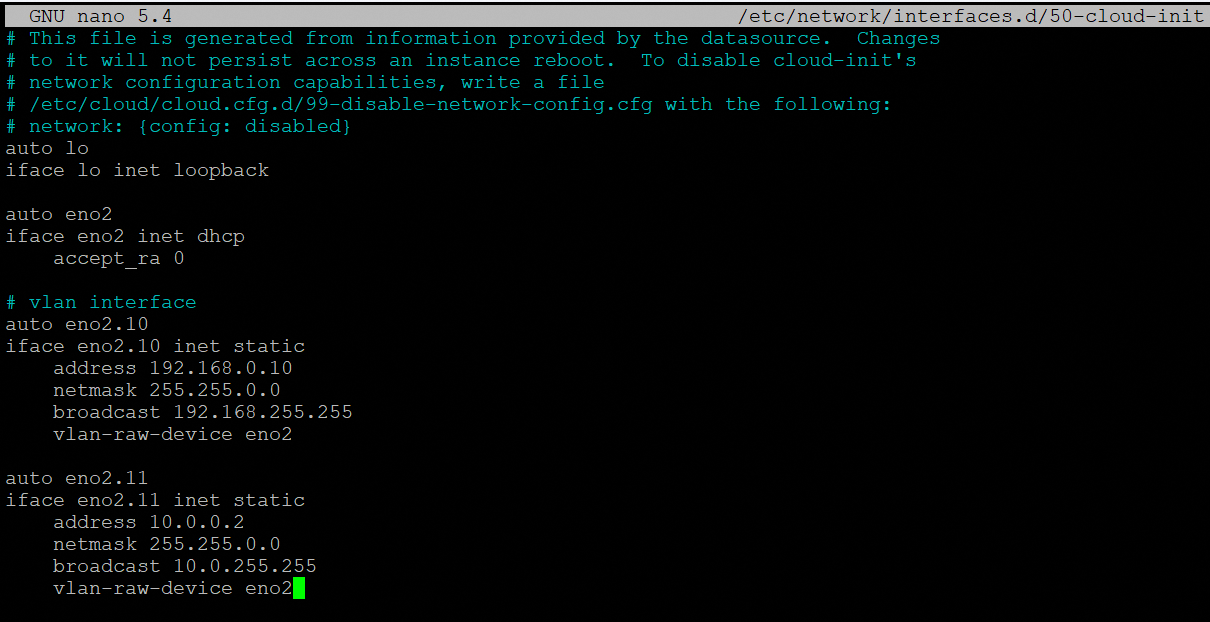
Amend the configuration of your network interface to incorporate the VLAN tag. Open your network interface configuration file and add the following entries:
For multiple configured VLANs, your network configuration should look like this:
These commands were executed under Ubuntu 24.04 (Noble Numbat).
First, establish an SSH connection to your server and run the following commands from the command line to install the VLAN package on your server:
Next, load the 8021q kernel module:
To verify that the module is loaded:
Run the following command to ensure the modules are permanently loaded at boot:
Create or edit the cloud.cfg configuration file to prevent automatic changes to your network configuration:
Add the following line:
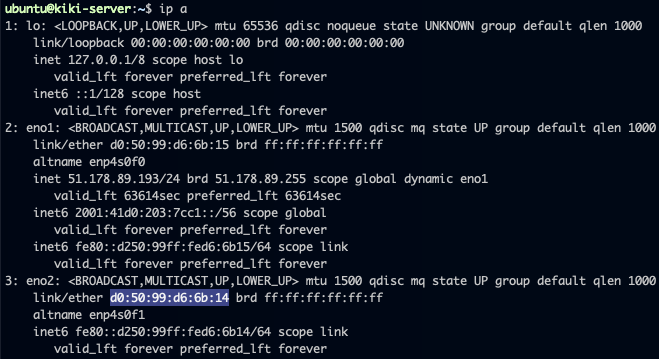
Retrieve the network interface name and its MAC address:
Here the interface that we want to configure is eno2 with MAC address: d0:50:99:d6:6b:14.
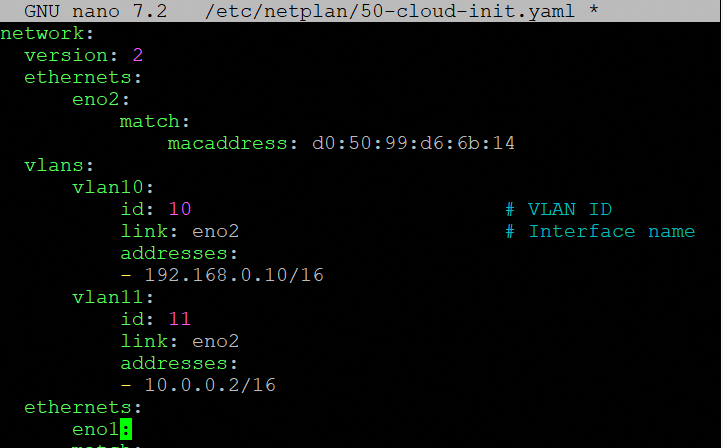
Add the network configuration for this network interface and the VLAN information in the following file, ensuring it is placed directly beneath the version: 2 line. Replace the values with your own:
For multiple configured VLANs, your network configuration should look like this:
Save and close the file, then run the following command:
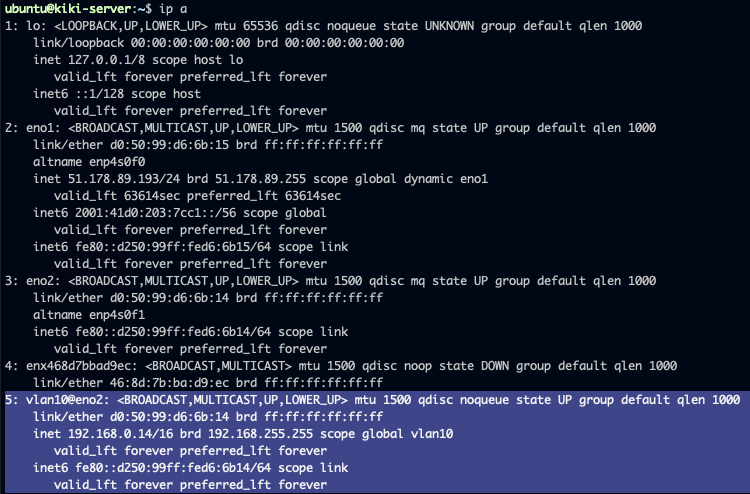
Use the following command to ensure the configuration has been applied correctly:
Before you begin, establish an SSH connection to your server and run the following command to load the 8021q kernel module:
To verify that the module is loaded:
Next, run the following command to ensure the modules are permanently loaded at boot:
Retrieve the interface names and identify the private interface:
Next, create a subinterface configuration file for the VLAN in the main network configuration file.
In this example, the file is named ifcfg-eno2.10, where eno2 refers to the private network interface and 10 the VLAN ID.
Add the following entries to the configuration file, ensuring you replace the values with your own:
Save and exit the file.
To have multiple configured VLANs, you should have a new file created for each VLAN identifier:

Restart the network interface:
The configuration below is based on Fedora 43.
Before you begin, establish an SSH connection to your server and run the following command to load the 8021q kernel module:
To verify that the module is loaded:
Run the following command to ensure the modules are permanently loaded at boot:
To obtain the name of the private network interface:
In this example, the interface is called eno2. We will need to create a VLAN subinterface before assigning a private IP address to it.
Use the following command to create the VLAN interface:
Replace vlan-name with the name of the VLAN subinterface, parent-interface with the name of the private interface and vlan-id with the VLAN ID.
In this example:
Assign a private IP address to the VLAN subinterface:
In this example:
Next, bring the up the VLAN subinterface:
In this example:
Use the same commands for each VLAN interface you wish to add.
Once done, a configuration file for the VLAN interface is created. This file is located at /etc/NetworkManager/system-connections/ and follows the naming format vlan-name.nmconnection.
For multiple VLANs, multiple configuration files will be created:
- Overview:


Windows
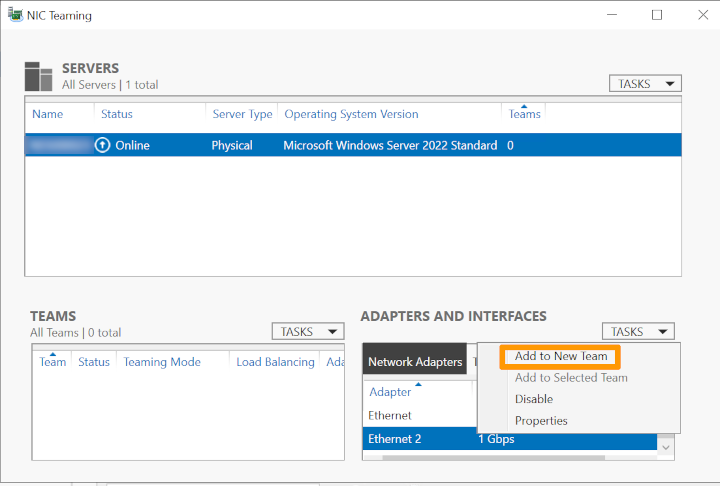
Log on to your server via a remote desktop connection, and open the Server Manager app. Then select Local Server. Now click the Disabled link next to NIC Teaming:

Next, right-click on the network interface and select Add to New Team.
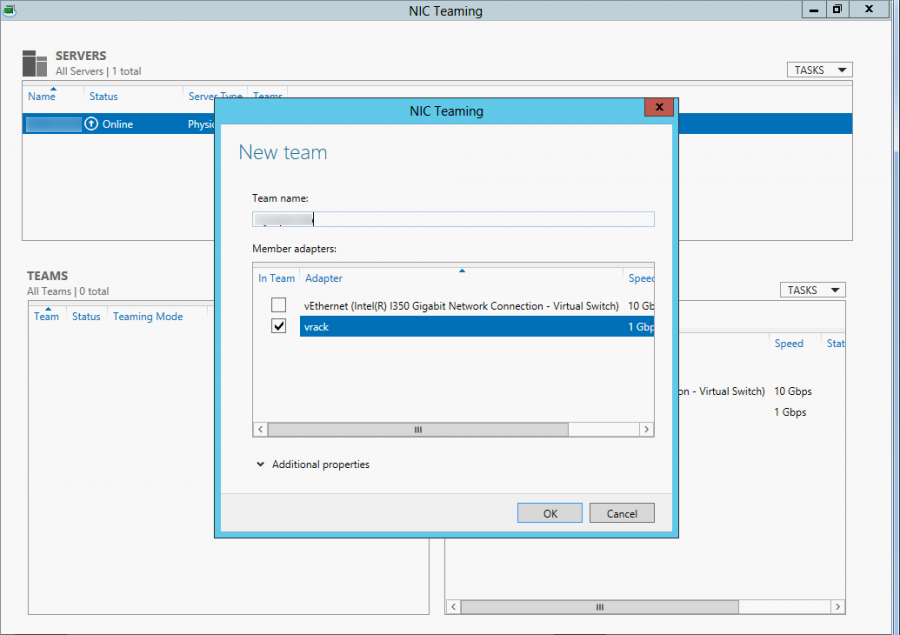
In the popup window, create a new team by typing a team name into the Team name field. When you have finished, click OK.
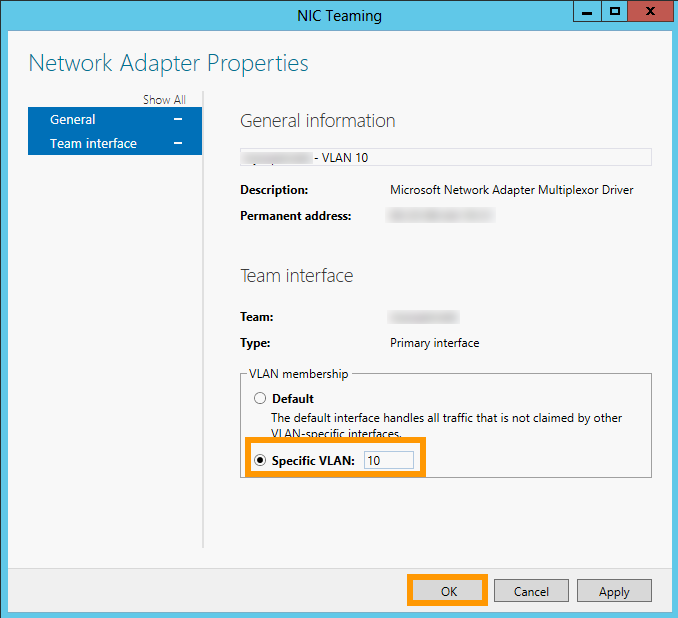
Next, we need to define the vLAN tag. In the ADAPTERS AND INTERFACES pane of the NIC Teaming screen, go to the Team Interfaces tab and right-click the interface you have just added to the new team, then click Properties. Now click Specific VLAN, and define the tag:
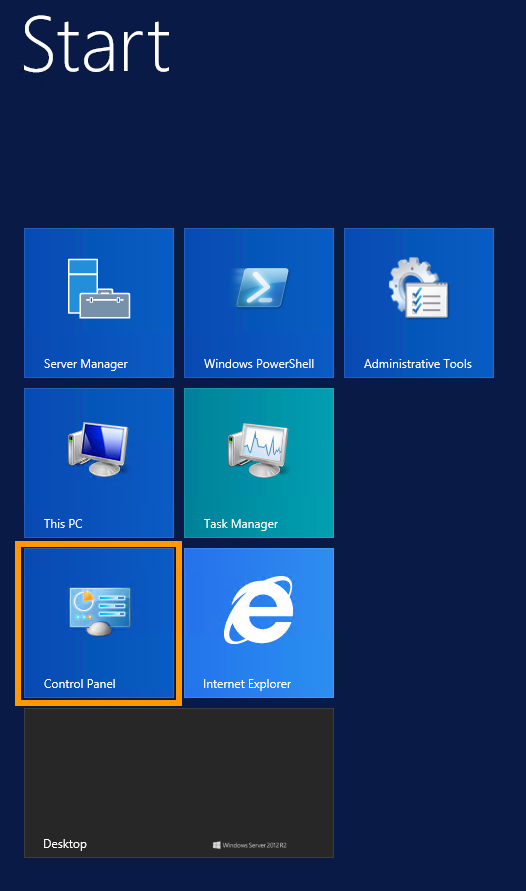
Next, we need to configure the IP address of the vLAN. Click the Start button on your keyboard, then click Control Panel:
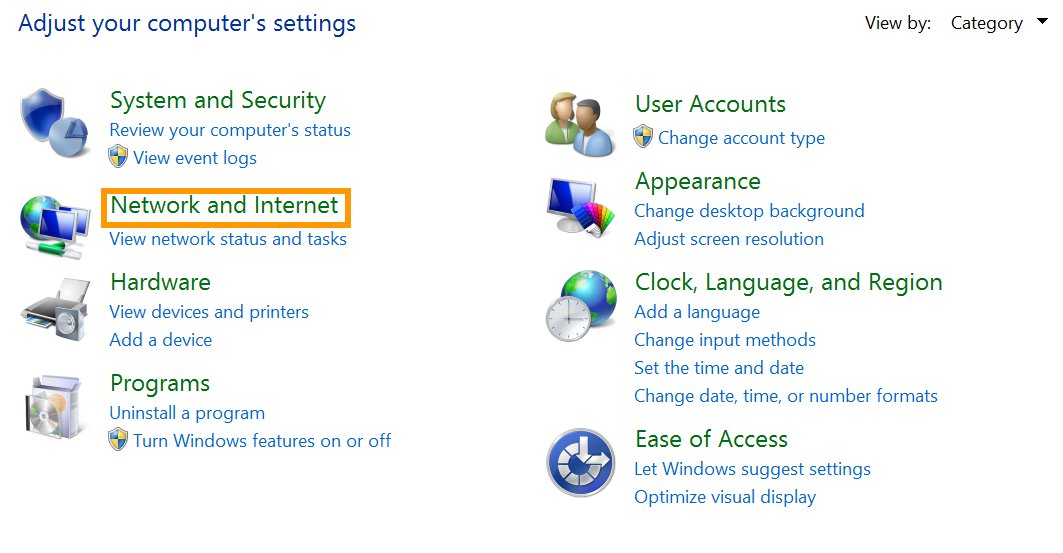
Next, click Network and Internet:
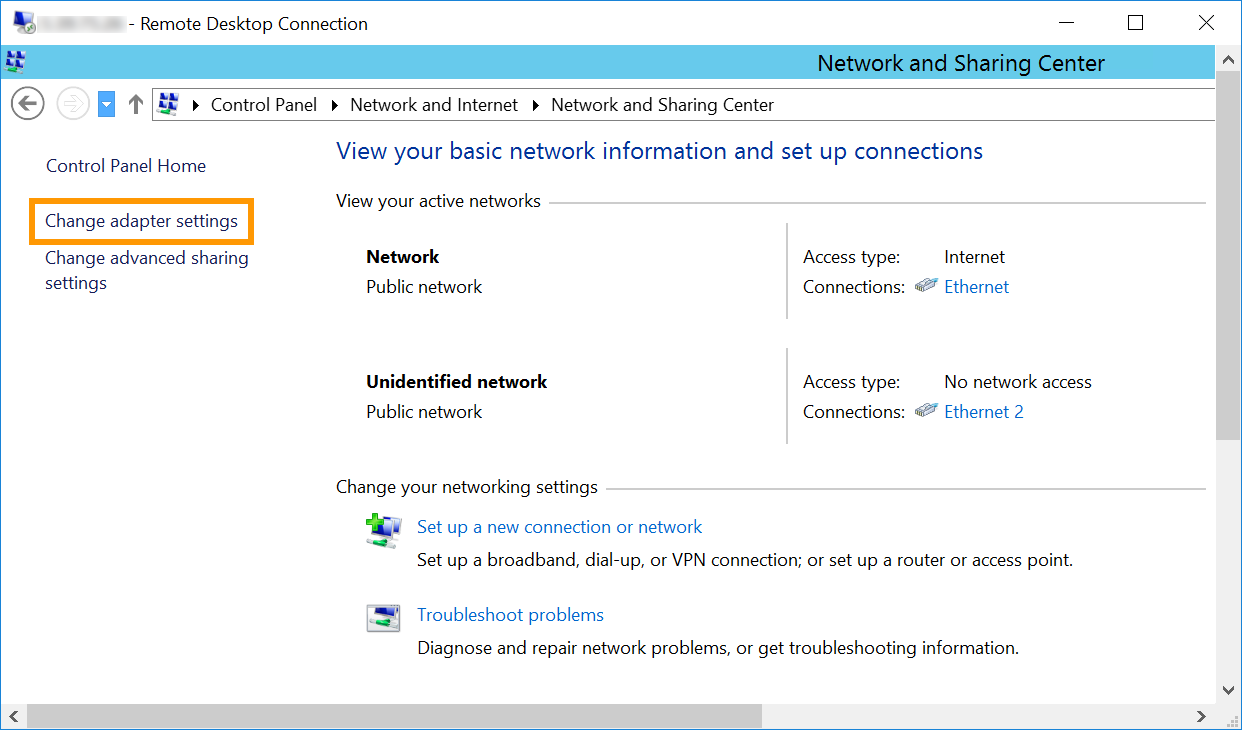
Then Network and Sharing Center:

Then click Change adapter settings:
Next, right-click the vLAN interface, and click Properties:
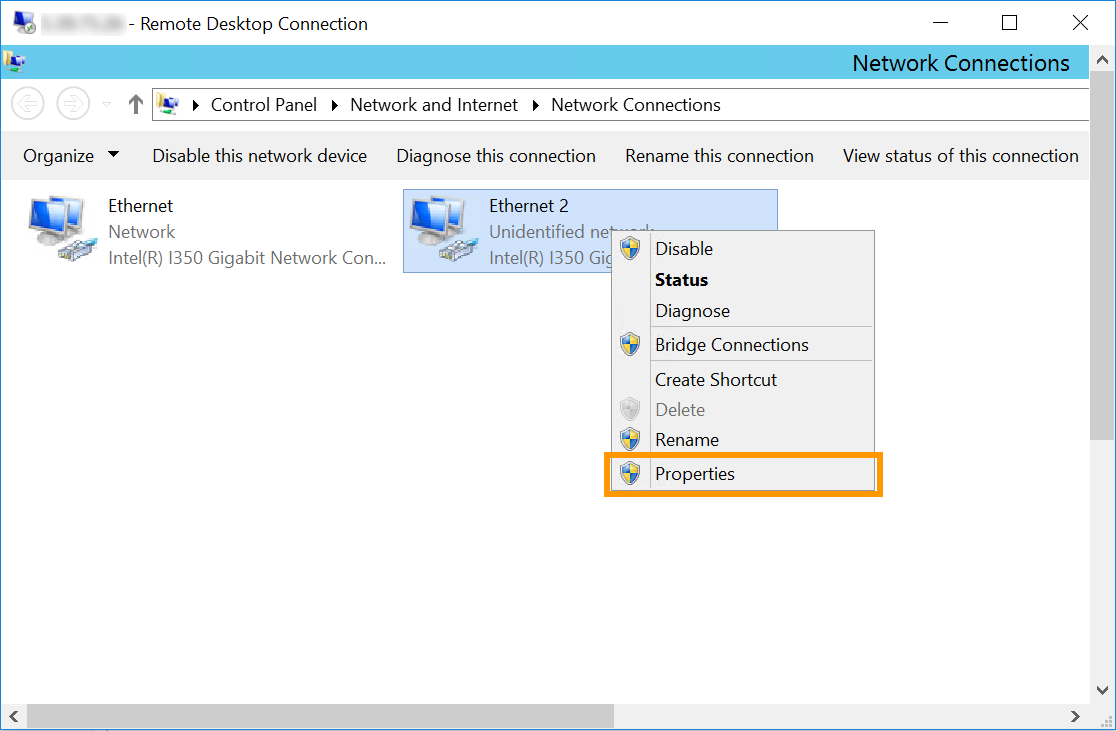
Note that in our example Ethernet 2 is the interface used for the vRack. However, it is possible that the vRack NIC is a different interface in your configuration. The correct one to select will be the interface that does not have the server's main IP address or has a self-assigned IP.
Then double-click Internet Protocol Version 4 (TCP/IPv4):
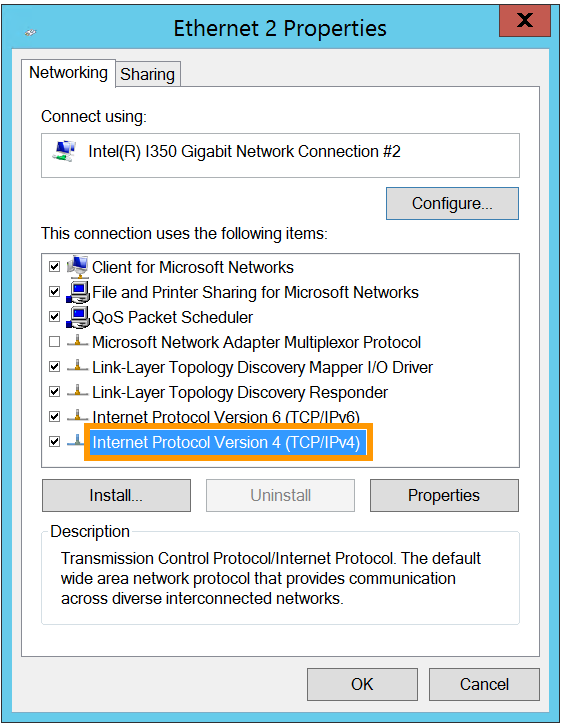
Next, click Use the following IP address. For IP address, type in an IP from your internal range. For Subnet mask, type in 255.255.0.0.
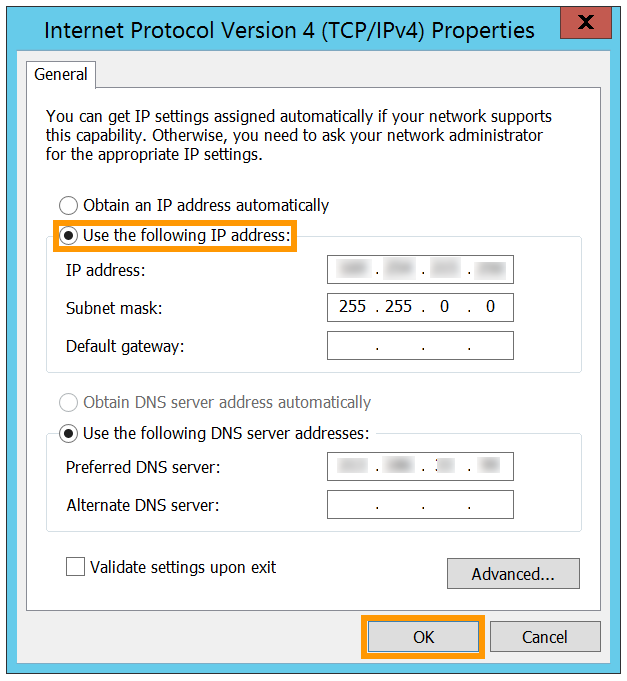
Finally, click the OK button to save the changes, then reboot your server.
Go further
Configuring the vRack on your Dedicated Servers
Configuring vRack Between Public Cloud and Dedicated Server
Join our community of users.

