Creating databases and users on your database server
286 Views
Objective
A database (DB) is used to store what are known as dynamic elements, such as comments or articles. These databases are used in virtually all modern content management systems (CMS), such as WordPress or Joomla!.
This guide explains how to create a database on your database server and give access to users.
Requirements
- A Web Cloud Databases instance (included in a Performance web hosting plan).
OVHcloud Control Panel Access
- Direct link: Web Cloud Databases
- Navigation path:
Web Cloud>Web Cloud Databases> Select your database service
Instructions
Creating a database
Click on the tabs below to view each of the 4 steps.
Go to the Web Cloud Databases page, then select the solution concerned.
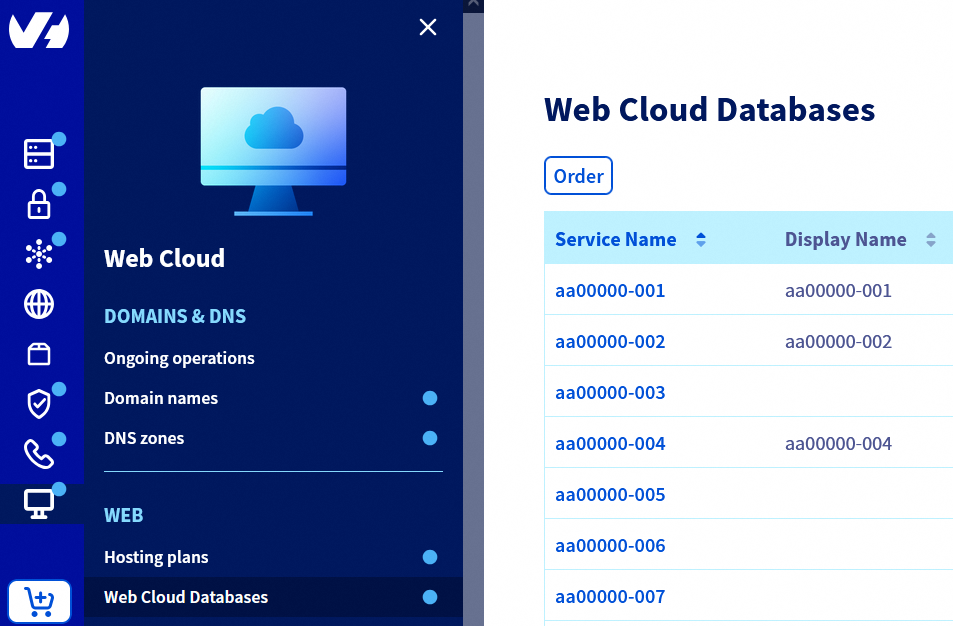
Click on the Databases tab.
Click Add a database.

PostgreSQL schema creation is currently unavailable on Web Cloud Databases servers.
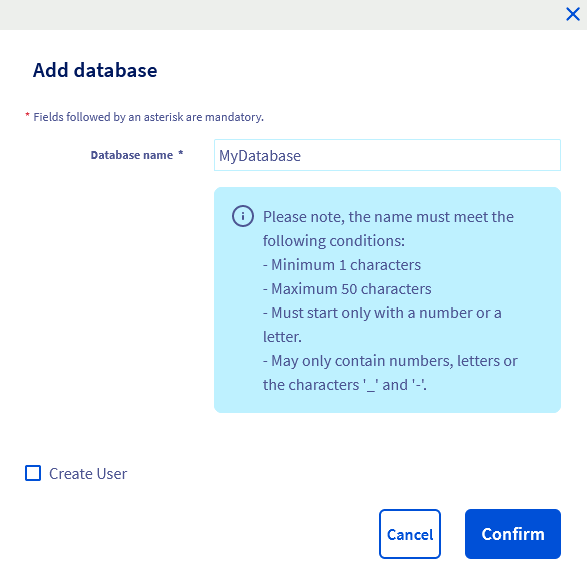
Fill in the fields following the criteria listed. You can create a user directly by ticking the Create a user box:
- Database name (required): this will be the name of your future database.
- Username (only if the
Create a userbox is ticked): the user who will be able to log in to your database and perform queries. - Rights (only if the
Create a userbox is ticked): the permissions associated with the user on the database. For standard usage, selectAdministrator. The permissions can be modified afterwards. - Password/Confirm password (only if the
Create a userbox is ticked): select a password, then confirm it.
Click Confirm.
Creating a user
To use an OVHcloud database server, create users with specific rights to connect to a database.
Click on the tabs below to view each of the 4 steps.
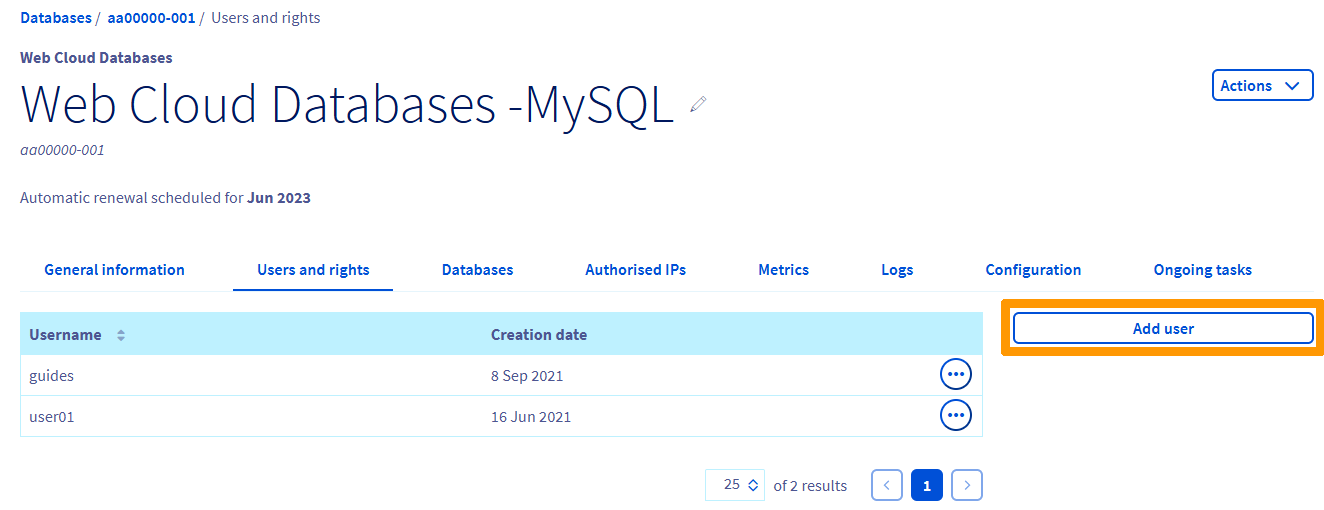
Go to the Web Cloud Databases page, then select the solution concerned.
Click on the Users and Rights tab.
Click Add a user.
Enter a "username" and a "password", then click Confirm.
Managing user rights
To allow a user to perform actions on a database, it is necessary to assign permissions to the user.
Click on the tabs below to view each of the 4 steps.
Go to the Web Cloud Databases page, then select the solution concerned.
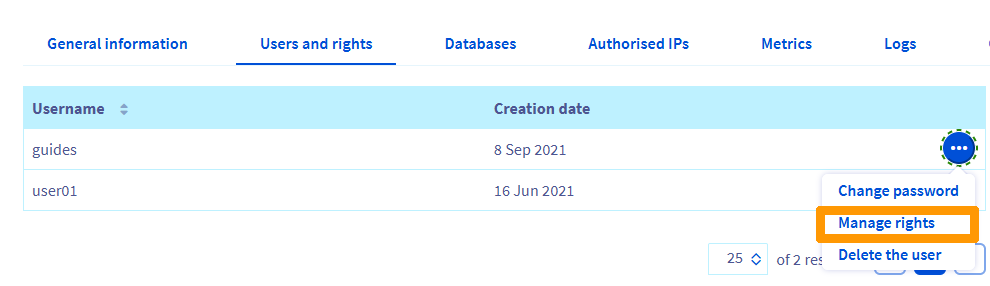
Click on the Users and Rights tab.
Click the ... button to the right of the user concerned, then on Manage rights.
In the left-hand column Database, you will see a list of the databases on your database server.
3 types of rights are available:
Administrator: authorisation for Select / Insert / Update / Delete / Create / Alter / Drop queries.Read / Write: authorisation for Select / Insert / Update / Delete queries.Read: authorisation for Select queries.None: no database rights.
The distribution of rights mentioned above is specific to OVHcloud. A user with Administrator rights can use DDL (Data Definition Language) and DML (Data Manipulation Language), while a user with Read / Write rights can only use DML (Data Manipulation Language).

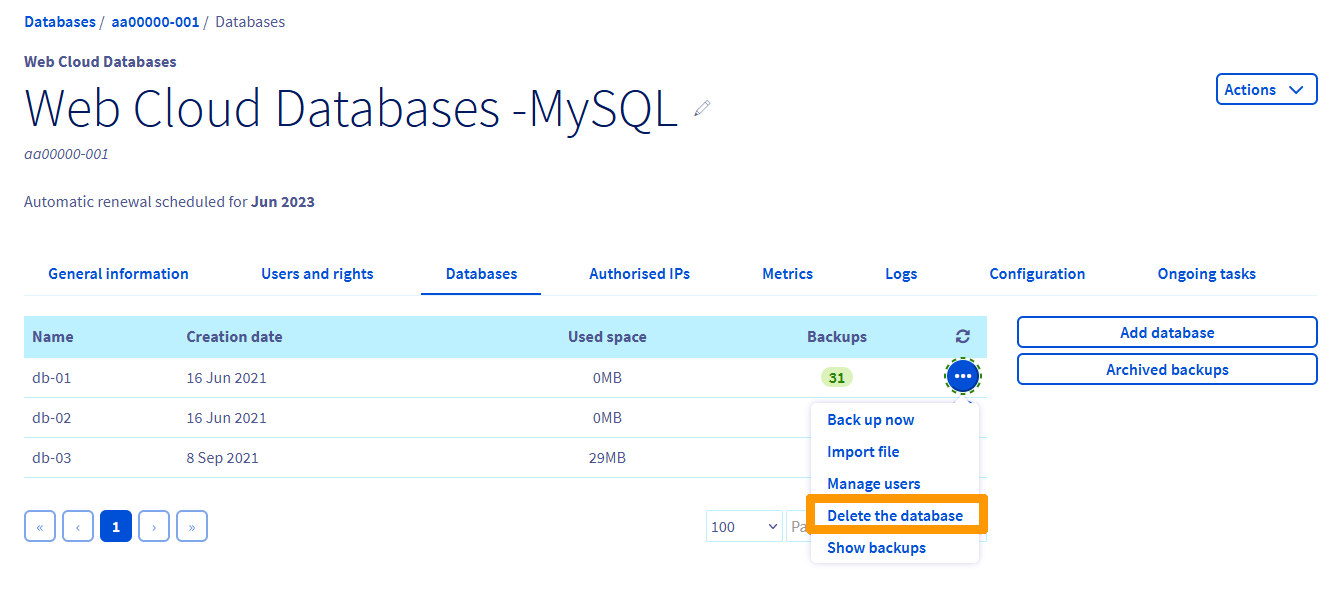
Deleting a database
Before deleting a database on a database server, there is no verification of the database contents. It will be deleted even if data is still stored in it. It is therefore recommended to create a backup and download it before any deletion.
Click on the tabs below to view each of the 3 steps.
Go to the Web Cloud Databases page, then select the solution concerned.
Click on the Databases tab.
Click the ... button to the right of the database concerned, then on Delete the database.
Go further
For specialised services (SEO, development, etc.), contact OVHcloud partners.
If you would like assistance using and configuring your OVHcloud solutions, please refer to our support offers.
Join our community of users.

