Managing Enterprise File Storage from the OVHcloud Control Panel
291 Views
Objective
Enterprise File Storage services can be managed via the OVHcloud API or in the OVHcloud Control Panel.
This guide explains how to manage Enterprise File Storage volumes and snapshots in the OVHcloud Control Panel.
Requirements
- An Enterprise File Storage service in your OVHcloud account. The service can be ordered from the product page or from the OVHcloud Control Panel.
OVHcloud Control Panel Access
- Direct link: Enterprise File Storage
- Navigation path:
Bare Metal Cloud>Enterprise File Storage
Instructions
Select your service from the list.
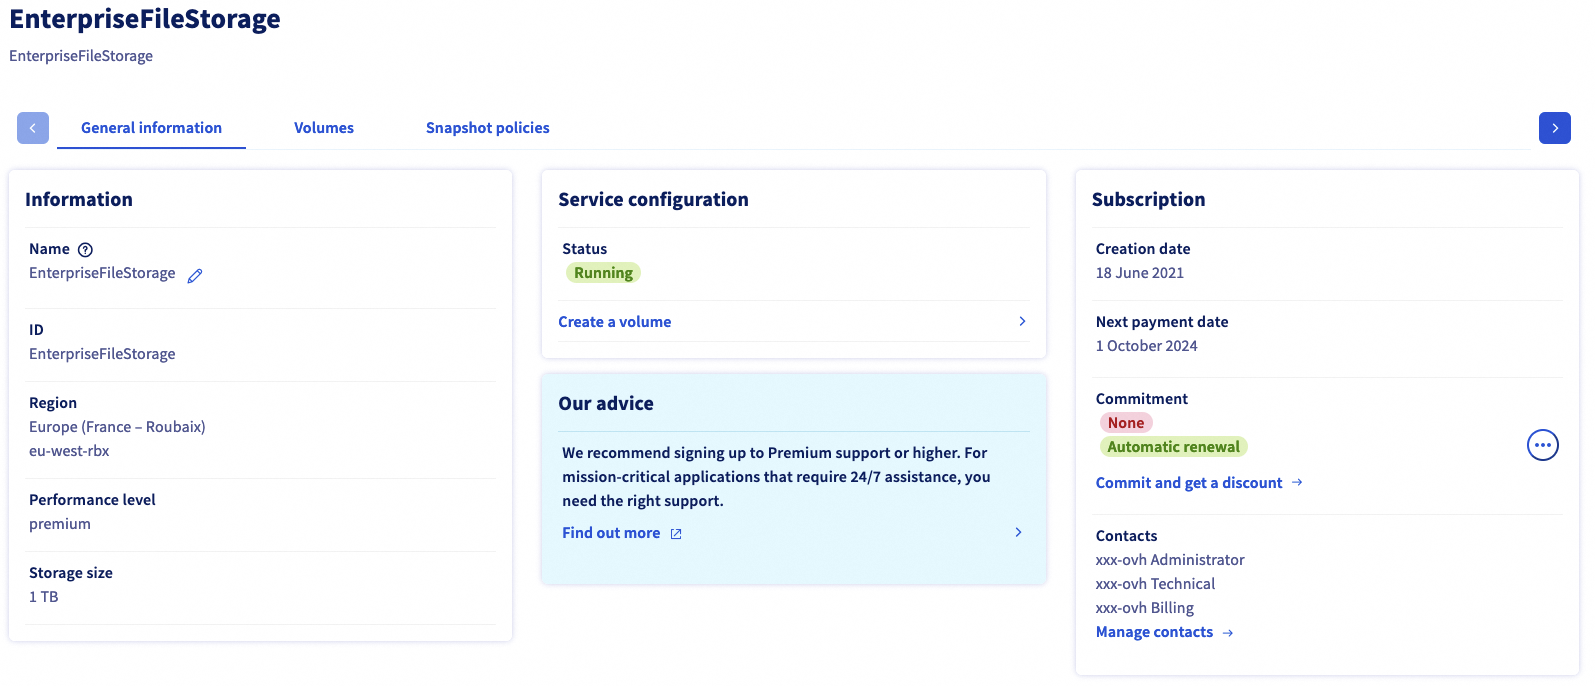
The General information tab displays some technical information, general subscription details and a shortcut to create a volume.
Please visit the concepts page for detailed information on the technical properties of Enterprise File Storage.
Managing volumes
Switch to the Volumes tab. The table lists all volumes you have created for the selected service. Click on a volume ID to open its management page.
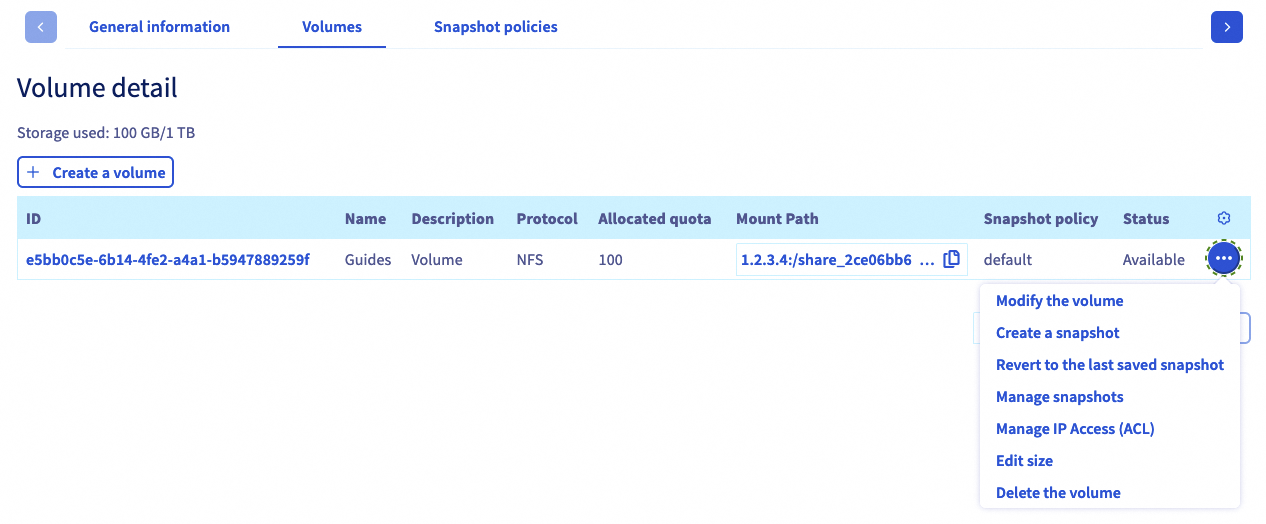
You can perform actions by clicking on the ... button in each row of the table.
- Modify the volume: Opens the "General information" section of the volume.
- Create a snapshot: Opens the "Snapshots" section and a popup window to take a manual snapshot.
- Revert to the last saved snapshot: Opens the "Snapshots" section and a popup window to restore the volume.
- Manage snapshots: Opens the "Snapshots" section of the volume.
- Manage IP access (ACL): Opens the "Access control list (ACL)" section where you can manage access control for the volume.
- Edit size: Opens a popup window to modify volume size.
- Delete the volume: Delete this volume after confirming the action in the popup window.
Creating a volume
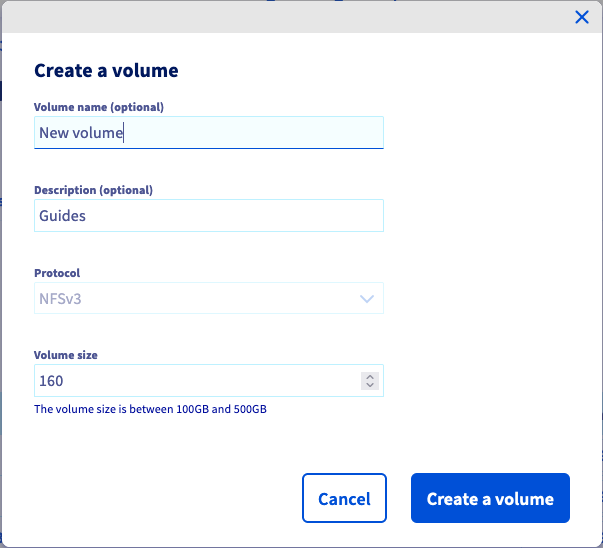
Click on the button Create a volume. In the new window, enter a name and description for the volume. Determine the size in GB and click on Create a volume to confirm.
Modifying a volume
Click on a volume ID in the table to open the management page of this volume.
The General information tab displays your volume’s details and step-by-step instructions for connecting to it, including the individual parameters.
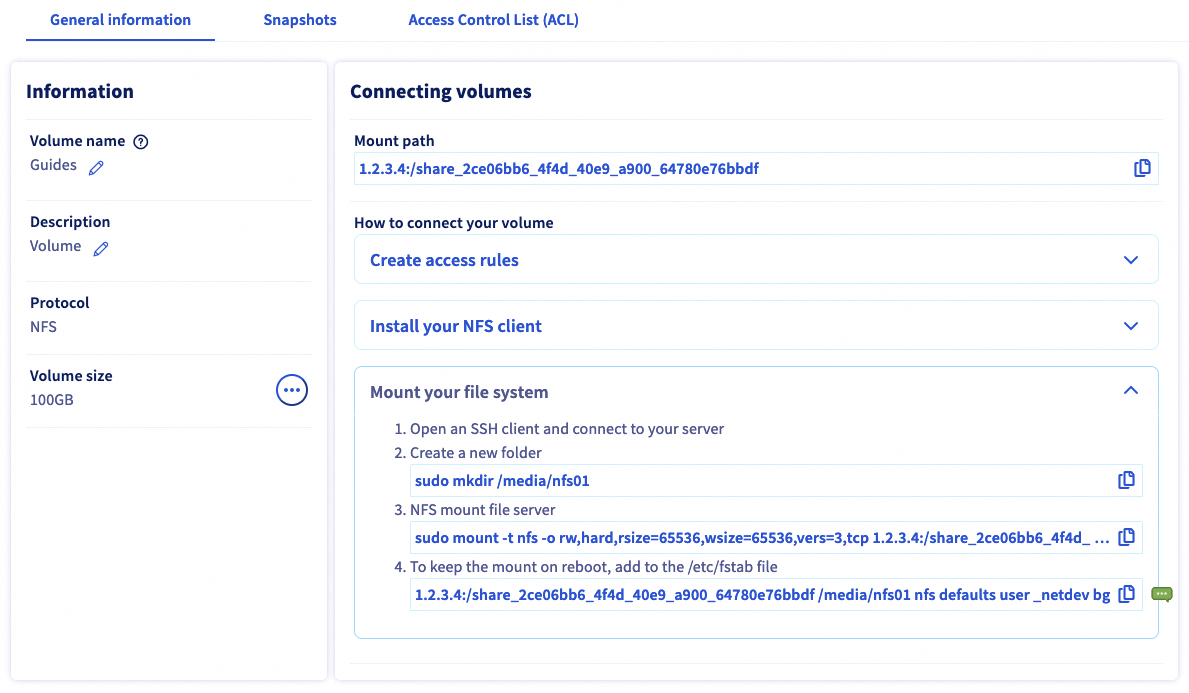
You can also change the volume's name and description on this tab.
Deleting a volume
You can delete a volume by clicking the ... button in its row within the Volumes tab, then selecting Delete the volume.
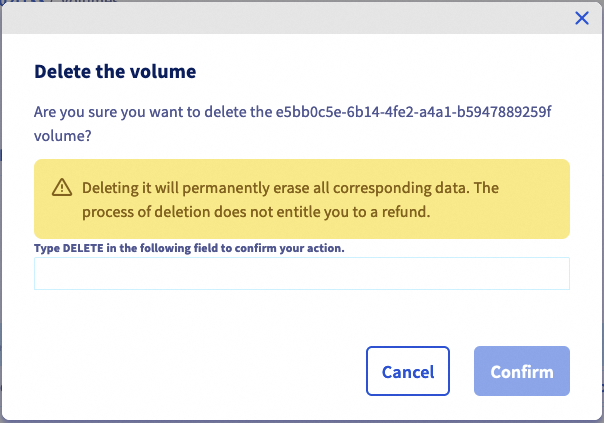
Confirm deletion operation by typing DELETE inside the confirmation field and then clicking the Confirm button.
Managing volume snapshots
Volume snapshots use storage capacity from your Enterprise File Storage offer. By default, 5% of a volume storage capacity is reserved for snapshots.
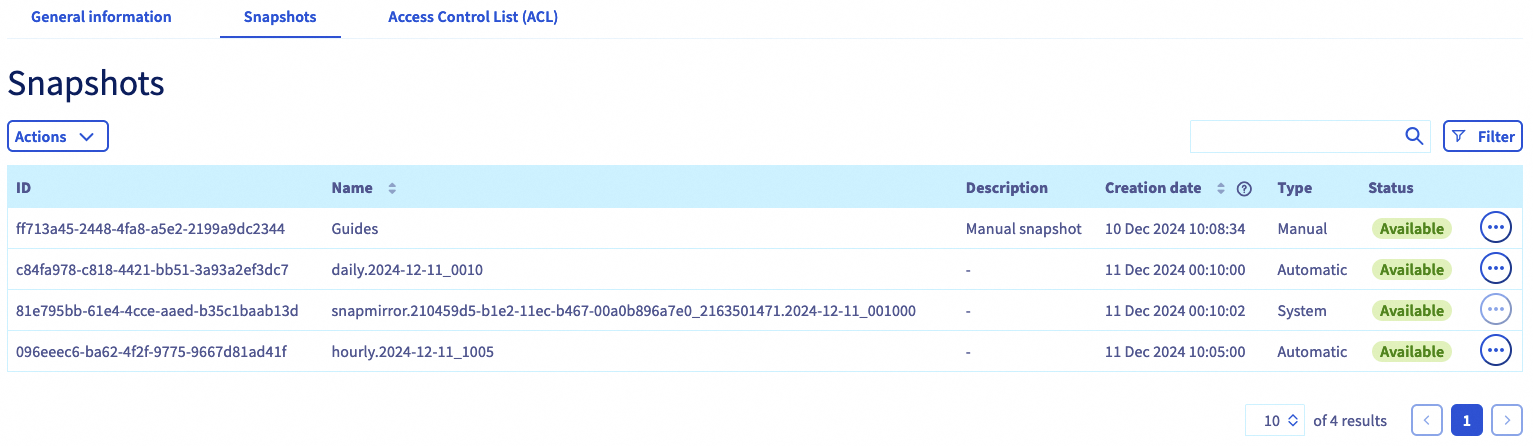
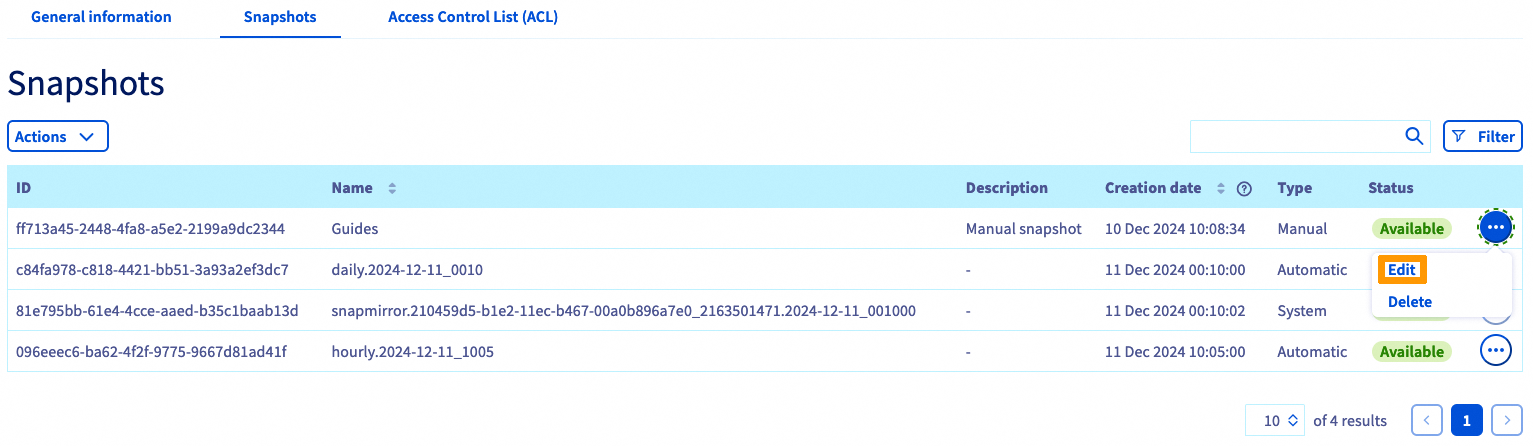
The Snapshots tab lists all the snapshots that have been created for the selected volume.
You can also access snapshot from your mount point using the commands provided in the NetApp documentation.
On this tab you can also view all the Snapshot Policies created for the service and apply them to this volume.
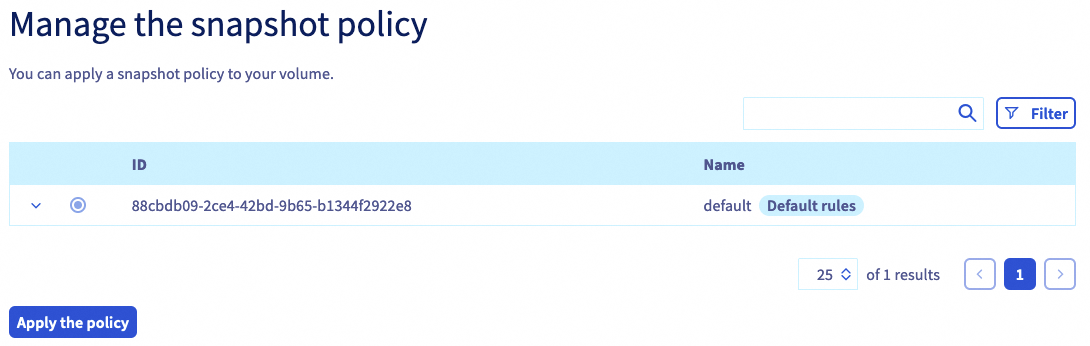
Click on the policy row to review the snapshot schedules details. Select a policy using the circular selector button, and then click the Apply the policy button below the table.
In order to configure your Snapshot Policies, navigate back to the volume management section of your service and open the tab Snapshot policies.
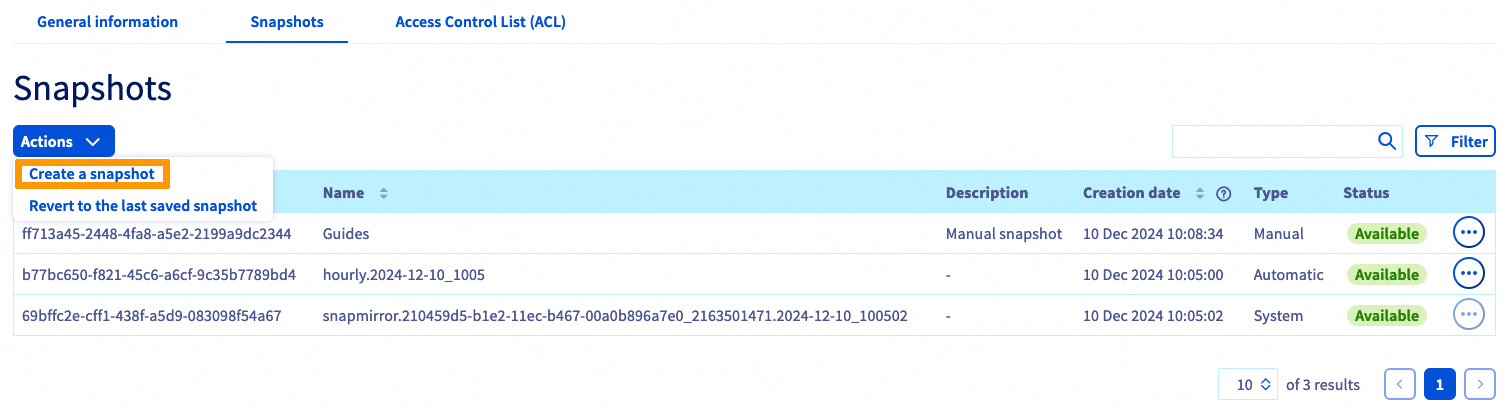
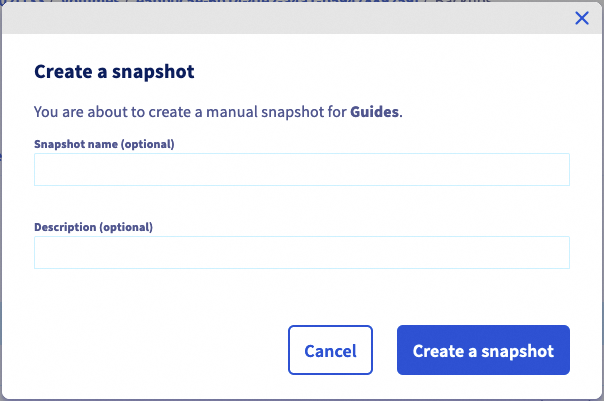
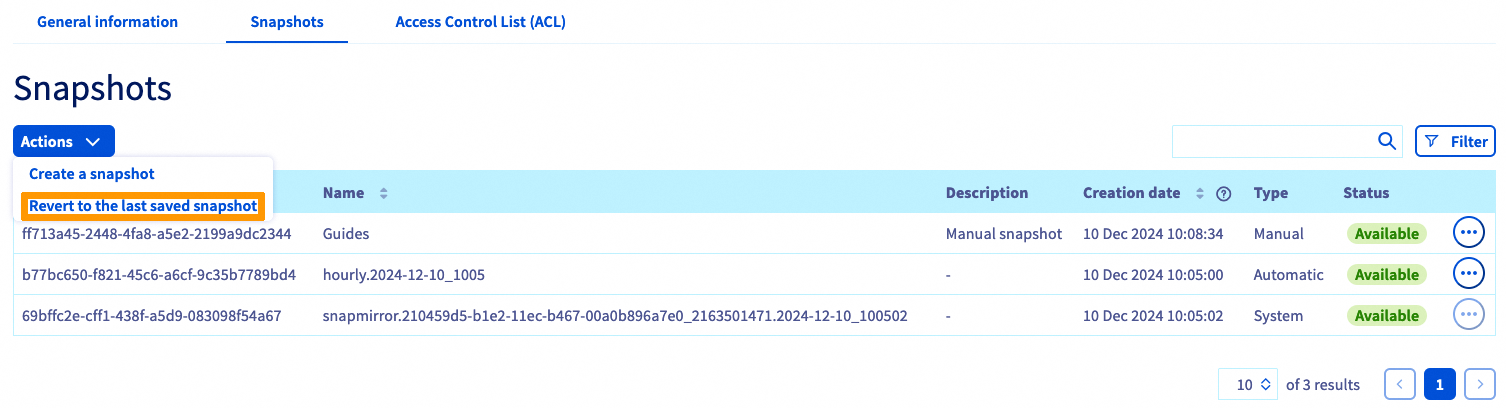
Creating a snapshot
To create a new manual snapshot of the volume's current state, click the Actions button and select Create a snapshot.
Inside the popup window that will open, you can enter a name and a description for the snapshot. Click the Create a snapshot button to start snapshot creation.
Modifying a snapshot
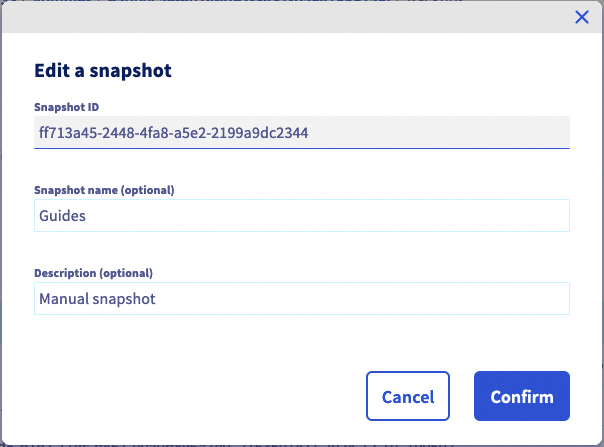
To change the name or description of the snapshot, click on the .. button in its row, then click on Edit. Inside the popup window that opens you can choose a new name and/or description.
Click the Confirm button to apply your modifications.
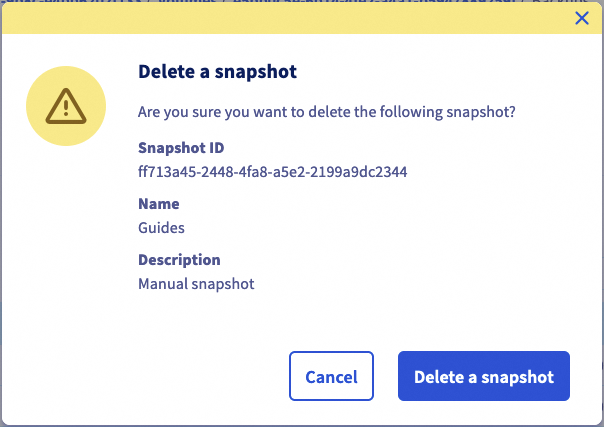
Deleting a snapshot
System snapshots can not be deleted.
Snapshots with type system are essential for the proper function of your Enterprise File Storage service.
A snapshot can be deleted by clicking the ... button on its row inside the Snapshot tab, then selecting Delete.
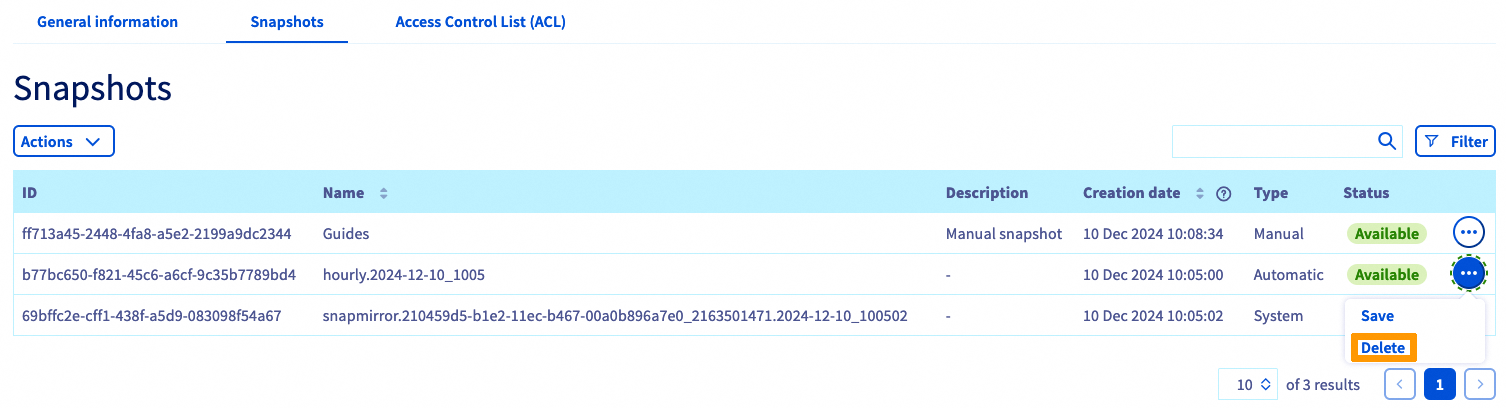
Inside the popup window that will open, click on Delete a snapshot to start the snapshot deletion operation.
Restore a volume using one of its snapshots
Please note that once a volume is restored using a snapshot copy, any subsequent files or snapshots will be lost. When a volume is restored, all data in the volume is replaced with the snapshot’s data. The action is irreversible.
You can restore a volume using its latest manual snapshot by clicking on the Actions button and then on Revert to the last saved snapshot.
To restore a volume using a snapshot from before the latest snapshot, you must delete snapshots until the desired snapshot becomes the latest one.
Holding automatic snapshots
An Automatic snapshot, created by a Snapshot Policy can be held by clicking the ... button on its row in the Snapshots tab and then selecting Save.

After the holding operation is complete, the snapshot type will change to manual and it will no longer be rotated by a Snapshot Policy.
Managing volume ACLs
Access control to volumes works via IP address restrictions. Since none are configured by default, the first step with new volumes is to define IP addresses or ranges from which access will be authorised.
Click on the button Add a new access.
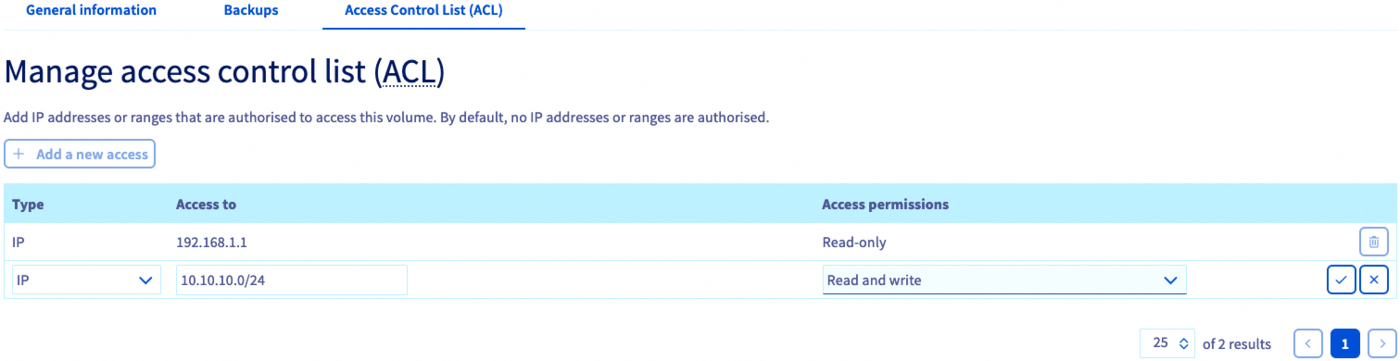
This creates a new row in the table in which you can enter an IP address or an address block (CIDR). Select Read-only or Read and write as the access type in the drop-down menu and click on the check mark button to add this entry to the ACL.
To remove a volume access, click on the respective trash can icon in the table.
Managing snapshot policies
By default, every volume is protected by the default Snapshot Policy which will create Snapshots of the volume at regular intervals.
Adding policies allows you to schedule the creation of snapshots for all of your volumes.
Switch to the tab Snapshot policies. The table lists all policies created for the selected service.
A default policy is already in place which cannot be altered. To add your own, click on the button Create a new snapshot policy.
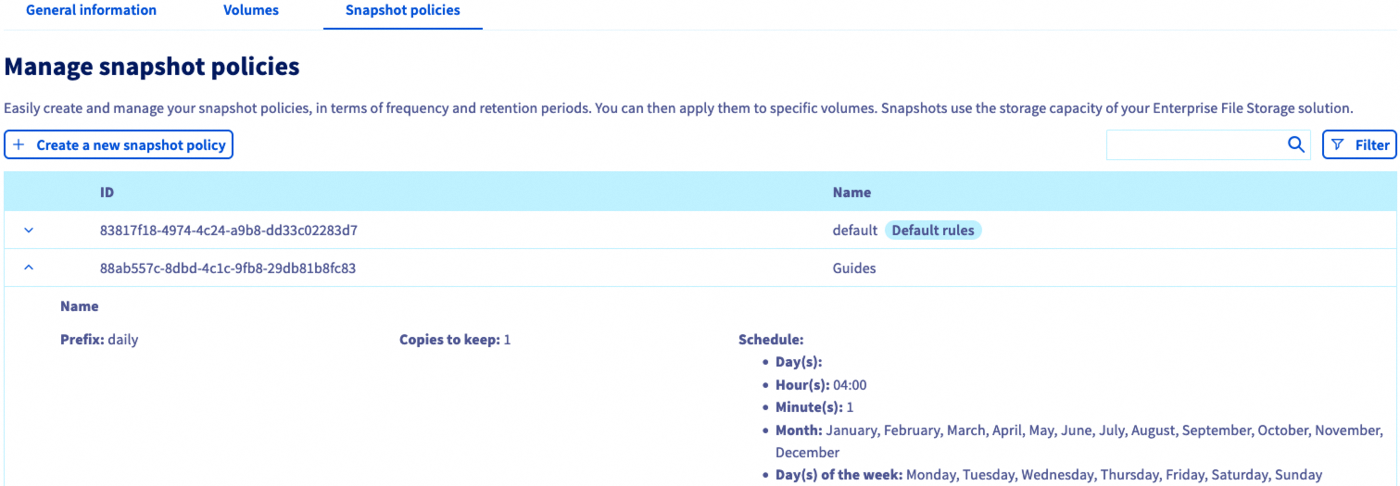
In this view, you can enter a name and a description for the policy. Then use the button Add a new rule to add one or more rules to the policy.
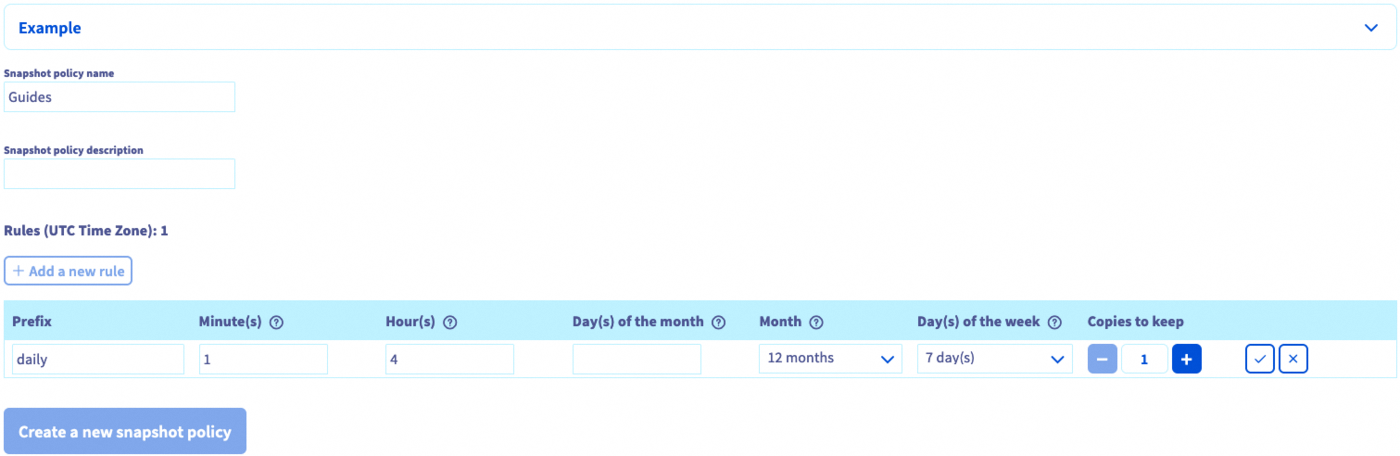
Fill in the fields to specify the time of day, days of a month, week days and months for the snapshot creation. You also have to enter a prefix for the snapshots, needed for naming them.
You can find more detailed information for each value by clicking on the question mark icon. By expanding the Example section you can view two sets of policy rules with an explanation of their outcome.
Click on the check mark button to add the new rule. Once all rules are added, click on Create a new snapshot policy.
Select a volume and go to the Snapshots tab in order to apply your policies.
To remove a policy, click on the respective trash can icon in the table.
First steps
If you are new to using Enterprise File Storage, you can follow this sequence of steps to get started:
- Create a volume
- Configure access control
- Configure snapshot policies (optional)
- Apply snapshot policies to the volume (optional)
- Access snapshots (optional)
- Connect to your volume by following the instructions in the "General information" section
- Learn how to use Enterprise File Storage via API by consulting our guides (optional)
Go further
Managing volume snapshots via API
If you need training or technical assistance to implement our solutions, contact your sales representative or click on this link to get a quote and ask our Professional Services experts for assisting you on your specific use case of your project.
Join our community of users.

