How to create and configure an additional disk on an instance
707 Views
Objective
You can create additional disks for your Public Cloud instances. This can be useful in cases where:
- You want to increase your storage capacity without changing the instance model.
- You want to have a highly available, high-performance storage.
- You want to move your storage as well as your data to another instance.
- You want to prepare the environment if you want to use Terraform.
This guide explains how to create an additional disk and configure it on your instance.
Requirements
- A Public Cloud Instance in your OVHcloud account
- Administrative (sudo) access to your instance via SSH (Linux) or RDP (Windows)
OVHcloud Control Panel Access
- Direct link: Public Cloud Projects
- Navigation path:
Public Cloud> Select your project
This feature is currently not available for Metal instances.
Instructions
The different types of volumes
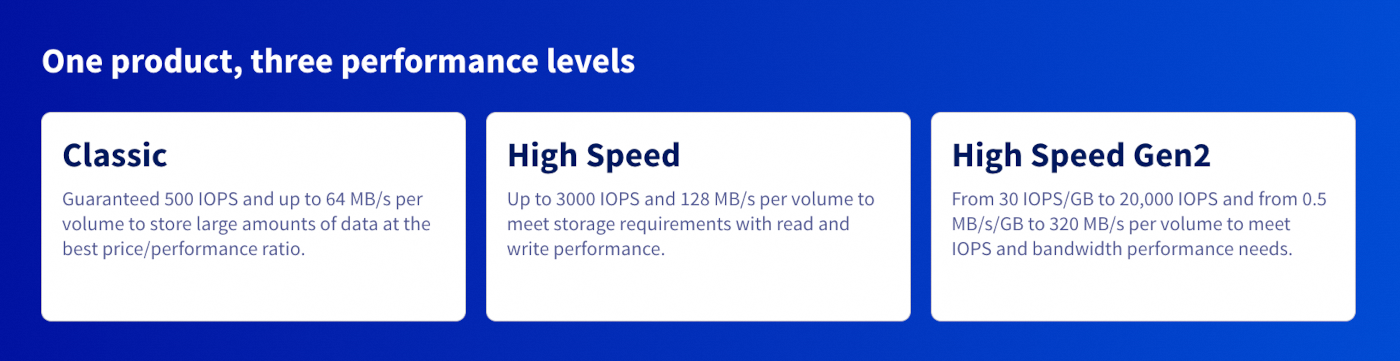
OVHcloud offers three types of Block Storage volumes, each tailored to specific needs in terms of performance, capacity, and cost. These solutions attach persistent storage volumes to your instances with high reliability and availability. If the feature is available, encryption can be enabled when creating a volume, for all volume types except Classic Multi-Attach volumes in 3AZ regions.
Classic – 500 IOPS guaranteed
The Classic volume is a reliable, cost-effective storage solution, ideal for workloads requiring moderate performance. It offers 500 guaranteed IOPS, making it suitable for the following uses:
- Hosting of classic web applications
- Storage of small to medium-sized databases
- Data backup and archiving
In 3AZ regions, Classic Volumes are regional services that use distributed erasure coding across multiple Availability Zones. This ensures data remains available without impact or downtime in the event of an AZ failure, provided the multi-attached resilient architecture conditions are met. See our guide "Proper Usage and Limitations of Classic Multi-Attach Block Storage in 3AZ Regions".
High Speed Gen2 – 30 IOPS/GB and up to 20,000 IOPS
Generation 2 High Speed volumes are optimized for the most demanding workloads. Performance scales with volume size:
- IOPS: 30 IOPS/GB (base 3,000 IOPS for 10–100 GB, up to 20,000 IOPS)
- Throughput: 0.5 MB/s/GB (base 50 MB/s for 10–100 GB, up to 512 MB/s)
- Maximum size: 12 TB
This type of volume is recommended for:
- Big Data and real-time analysis
- Artificial intelligence and machine learning
- Large database processing and high-performance storage
You can no longer order High Speed (Gen1) volumes via the OVHcloud Control Panel. They have been replaced by High Speed Gen2 volumes at the same price, with better performance for volumes above 100 GB. High Speed volumes remain available via the API, Terraform, and OpenStack.
Existing High Speed volumes remain supported. You can also change your Block Storage volume type to migrate them to Gen2.
All volume types are also available in an encrypted version (LUKS). These volumes ensure data confidentiality without impacting performance. They are available through the OVHcloud Control Panel as well as via the tools presented in the next section, by specifying the type <volume_type>-luks.
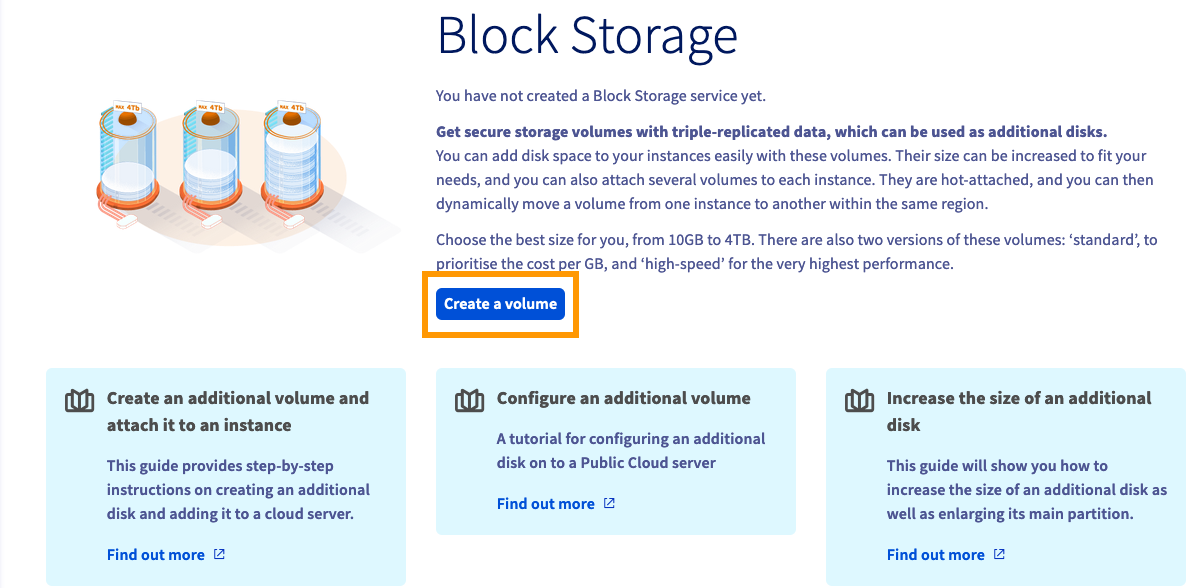
Attaching a new volume
Open Block Storage in the left-hand menu under Storage & backup.
Click Create a volume.
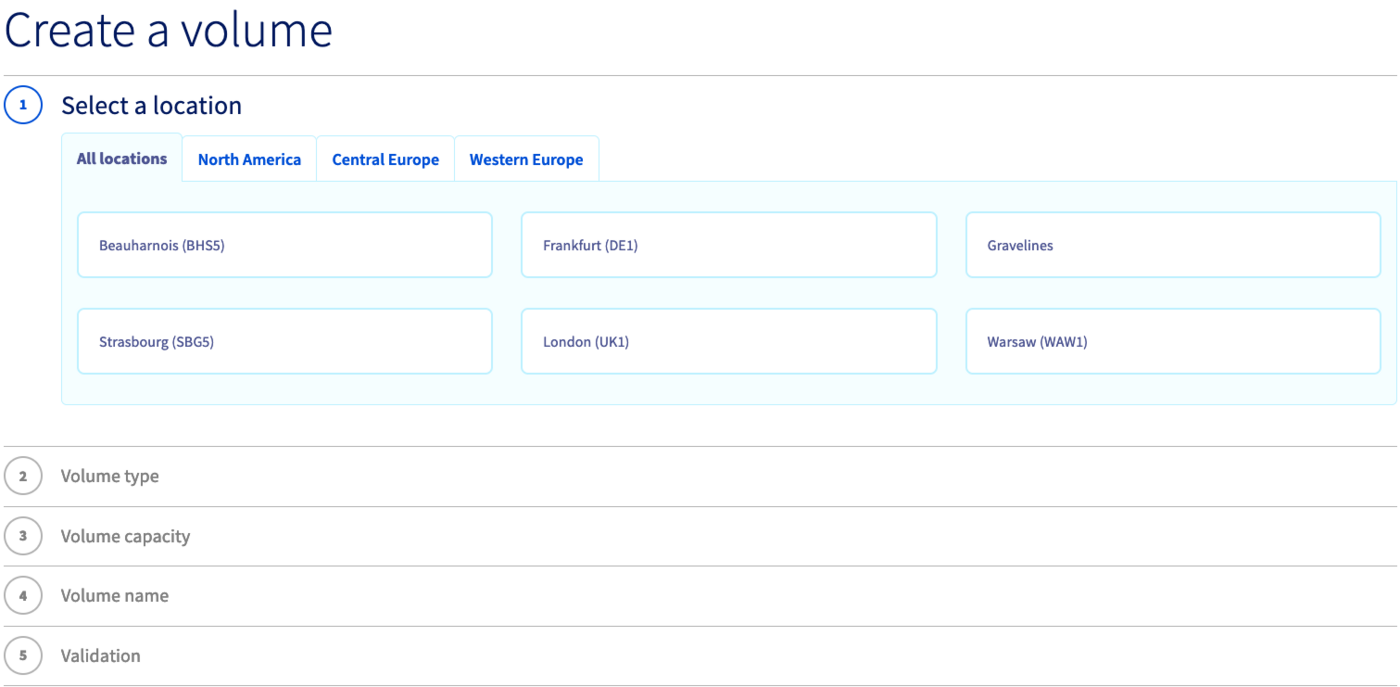
Select the location, type, encryption, capacity, and name. Click Create volume.
Please note: Your volume must be created in the same region as the instance to which you want to attach it. If you create it in another region, you can delete it and recreate it in the correct region.
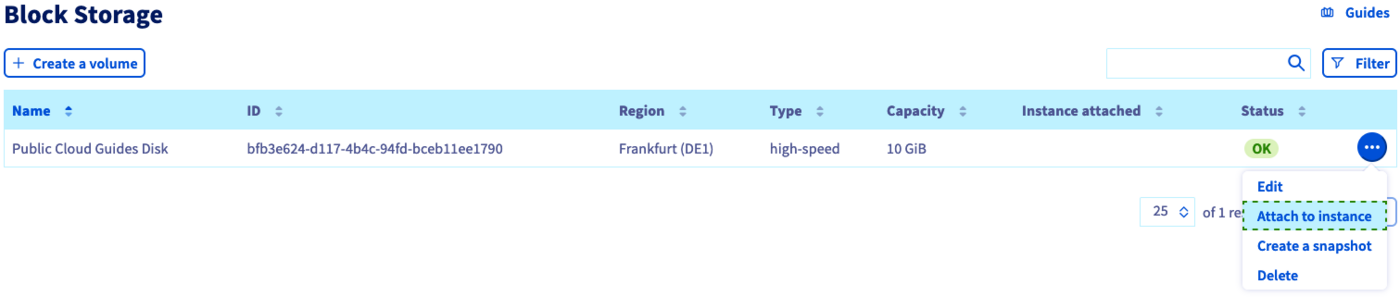
The disk now appears in the Control Panel.
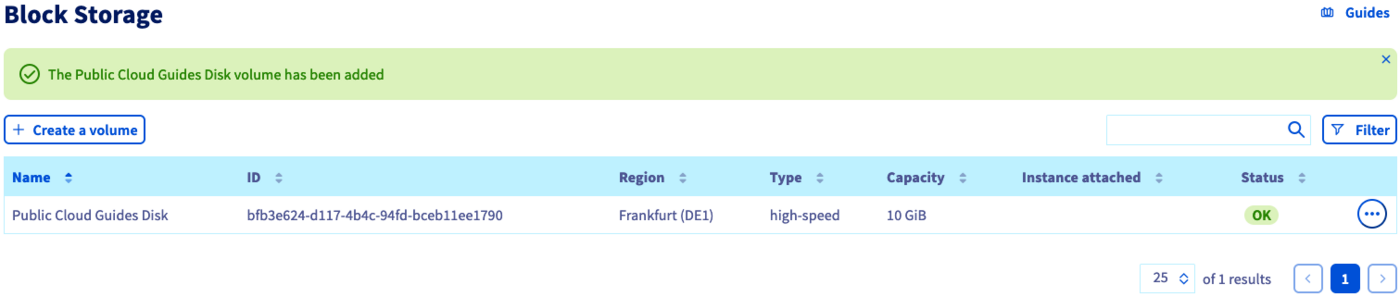
Click the ... button next to the volume, then select Attach to instance.
Select an instance and click Confirm.
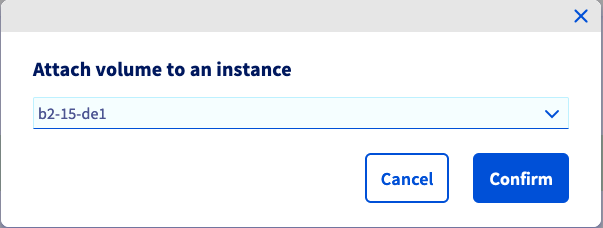
Attachment begins. This may take a few minutes.
Make sure to not leave the current page in your OVHcloud Control Panel while the disk is being attached. This might interrupt the process.
Please note that the high-speed-gen2 or luks volume types may not be available in all regions.
Types of volumes:
- Classic
- High-speed
- High-speed-gen2
- Classic-luks
- High-speed-luks
- High-speed-gen2-luks
The types ending in -luks are encrypted (LUKS).
Creating a -luks volume automatically generates a dedicated key.
Do not modify or delete this key if it is linked to a Block Storage volume. Doing so would make the data on that volume and all its snapshots permanently unrecoverable.
To create a simple block storage volume, you need 3 elements:
- The name of the volume
- The region
- The size of the volume in GB
In our example, we will create a block storage in the GRA11 region with a size of 10 GB. Add the following lines to a file named simple_blockstorage.tf:
Then we will attach it to the target instance.
The instance and the volume must be in the same region.
Add the following lines below the previous ones:
Create and attach the volume by running:
The output should look like this:
Go to Volumes in the dropdown, then click Create Volume.
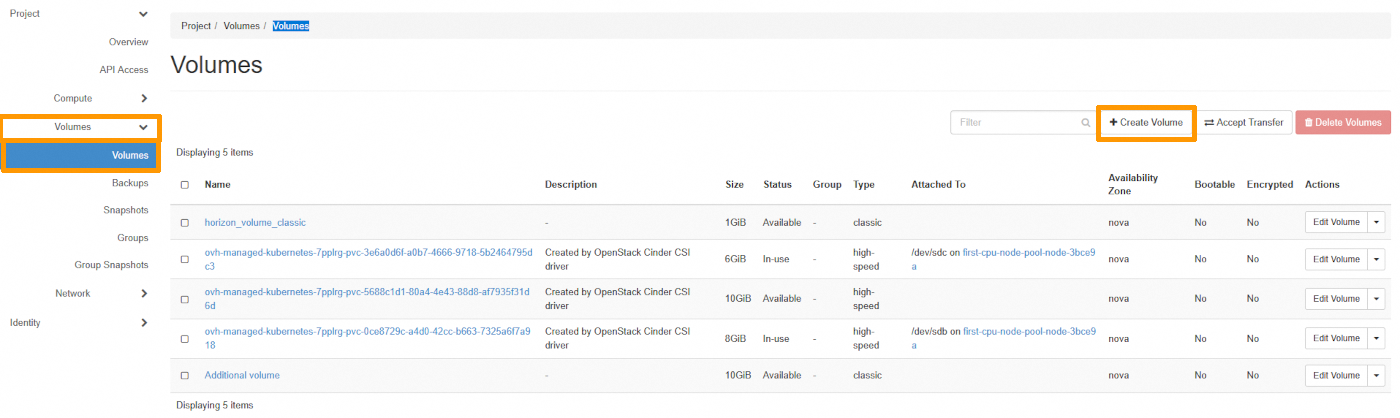
Enter the volume name, select a type, then click Create Volume.
Please note that if the volume type high-speed-gen2 or luks does not appear in the list, this means that it is not available in this region.

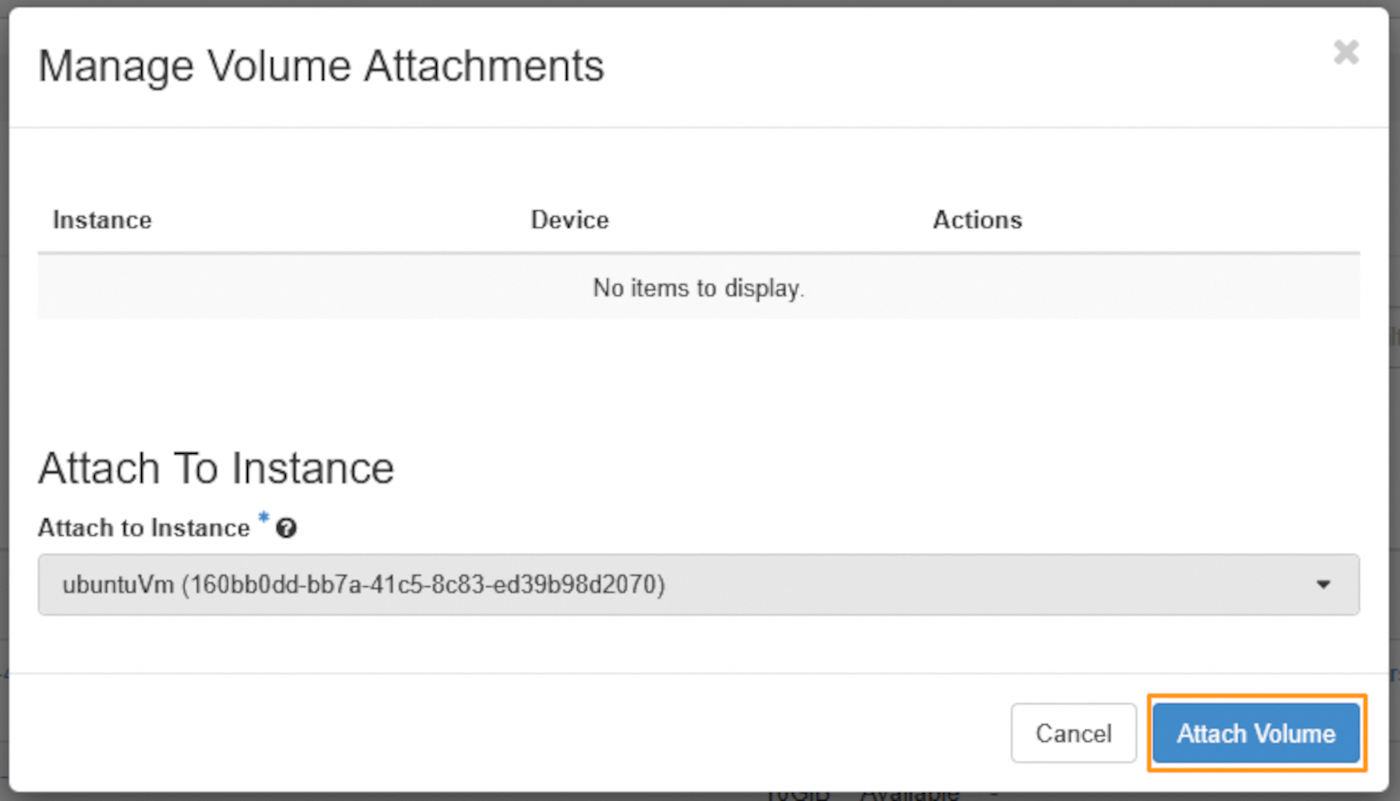
Click the arrow icon at the end of the Edit Volume row, then click Manage Attachments.
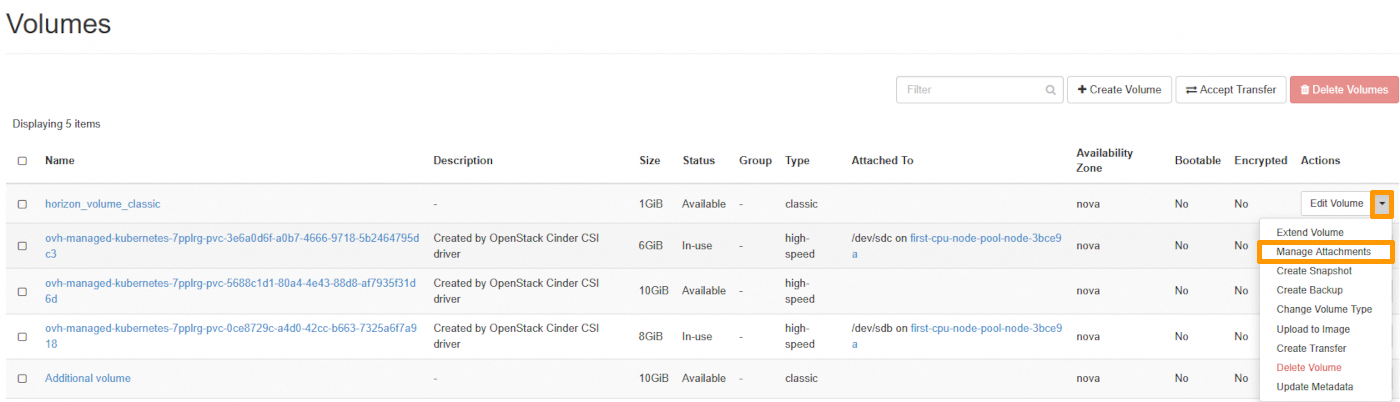
Select the instance and click Attach Volume.
Please note that if the volume type high-speed-gen2 or luks does not appear in the list, this means that it is not available in this region.
Types of volumes:
- Classic
- High-speed
- High-speed-gen2
- Classic-luks
- High-speed-luks
- High-speed-gen2-luks
The types ending in -luks are encrypted (LUKS).
Creating a -luks volume automatically generates a dedicated key.
Do not modify or delete this key if it is linked to a Block Storage volume. Doing so would make the data on that volume and all its snapshots permanently unrecoverable.
List the volume types available in the region:
Create a volume with at least a size (GB) and a type. Optionally add a name.
To attach a volume to an instance available in the region, use the following command:
If the volume type high-speed-gen2 or luks does not appear in the list, it is not available in this region.
| Option | Description |
|---|---|
<region> | Region where the volume will be created (e.g. GRA11) |
--name | Volume name |
--size | Volume size in GB |
--type | Volume type: classic, high-speed, high-speed-gen2, or equivalent -luks variant |
--wait | Wait for creation to complete before exiting |
Create a volume by specifying the region, a name, the size in GB, and a type:
Once the volume is created, attach it to an instance:
| Parameter | Description |
|---|---|
<volume_id> | ID of the volume to attach |
<instance_id> | ID of the instance to attach the volume to |
Configuring the new disk
These examples assume you are logged in with elevated permissions.
Using Linux
Establish an SSH connection to your instance, then use the command below to list the attached disks.
vda in this example refers to the default disk of the instance. The additional disk will then be labelled vdb.
Create a partition on the additional disk:
If your additional disk is less than 2TB:
If your additional disk is larger than 2TB:
Format partition vdb1:
Mount the partition:
Verify the mount point:
The mount is not persistent after reboot. To automate mounting, edit the fstab file.
Retrieve the UUID of the new volume:
Open /etc/fstab:
Add this line, replacing the UUID with your own:
Save and exit. The disk mounts automatically after each reboot.
Using Windows
Establish a remote desktop (RDP) connection to your Windows instance.
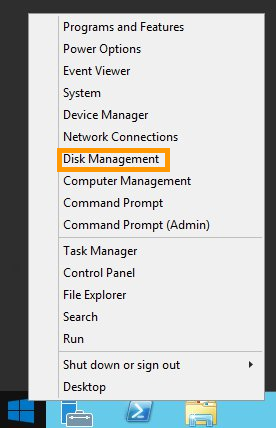
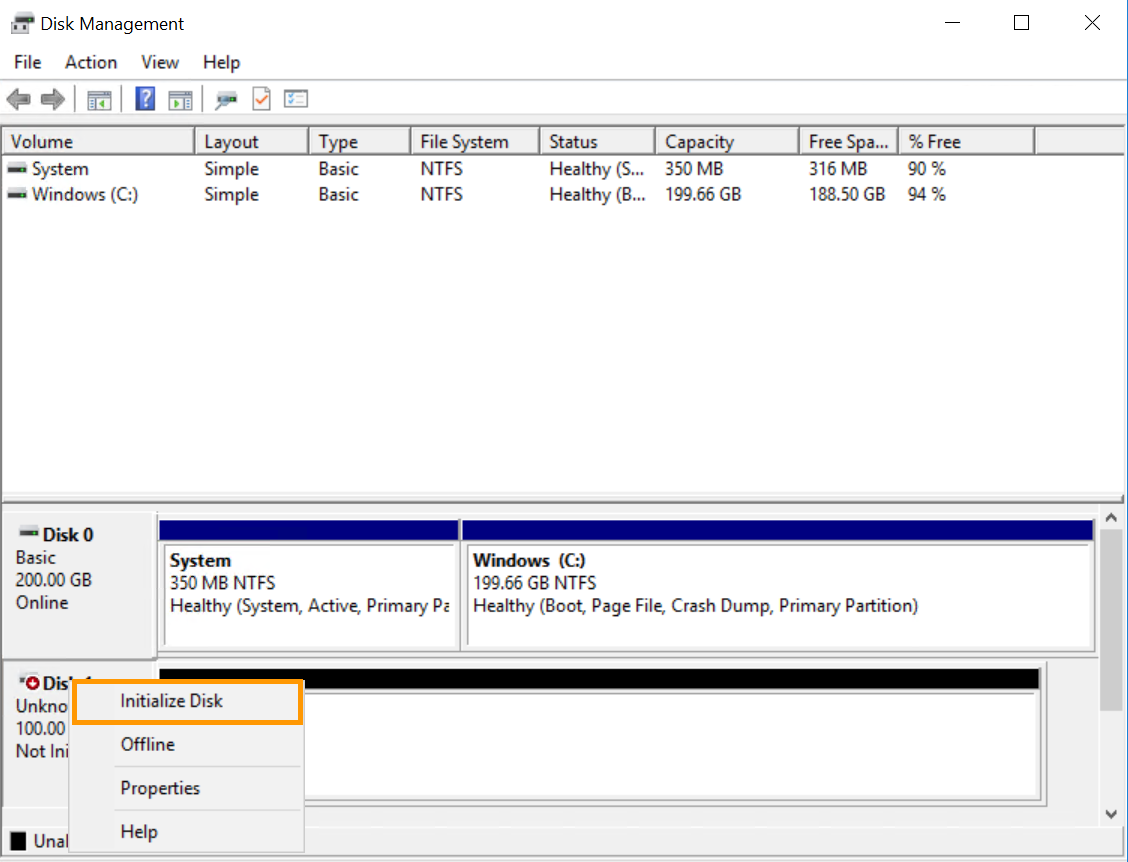
Right-click the Start Menu and open Disk Management.
The disk appears as an unknown volume with unallocated space.
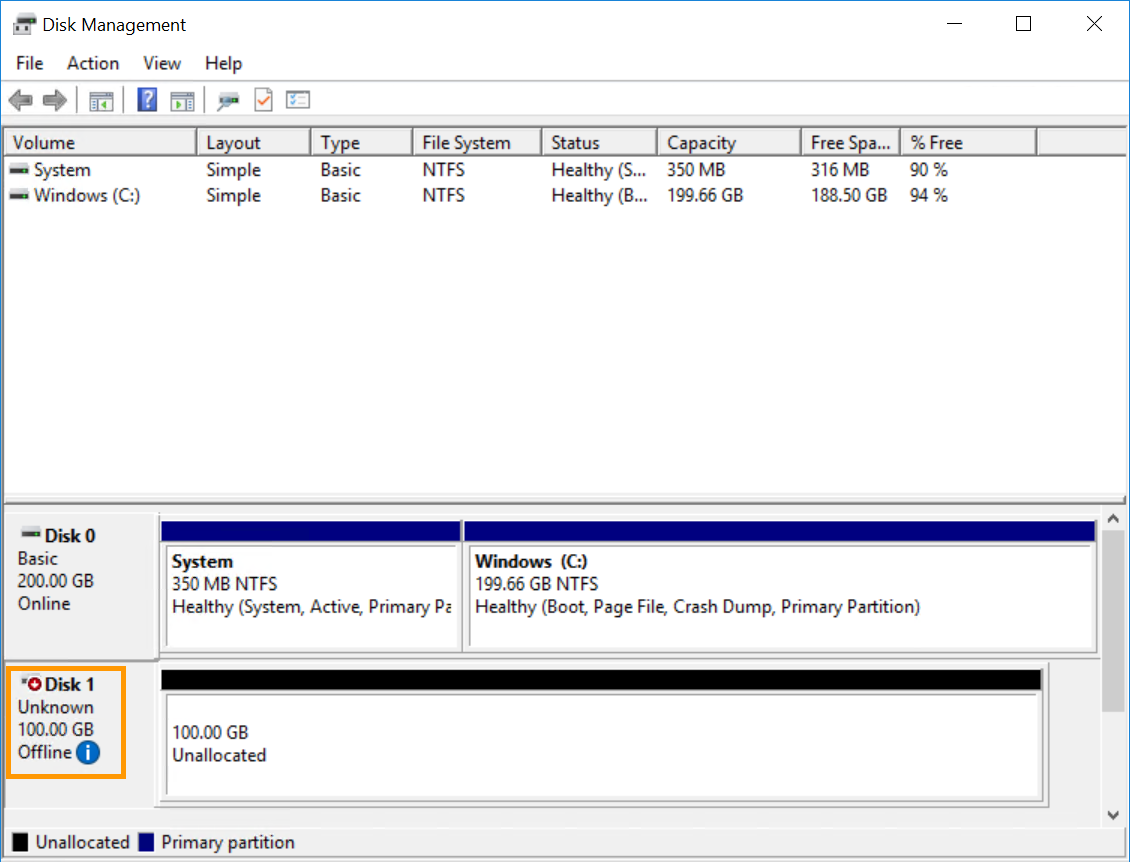
If offline, initialise it via Windows GUI or DISKPART. Otherwise, proceed to formatting.
Initialising the disk in Disk Management
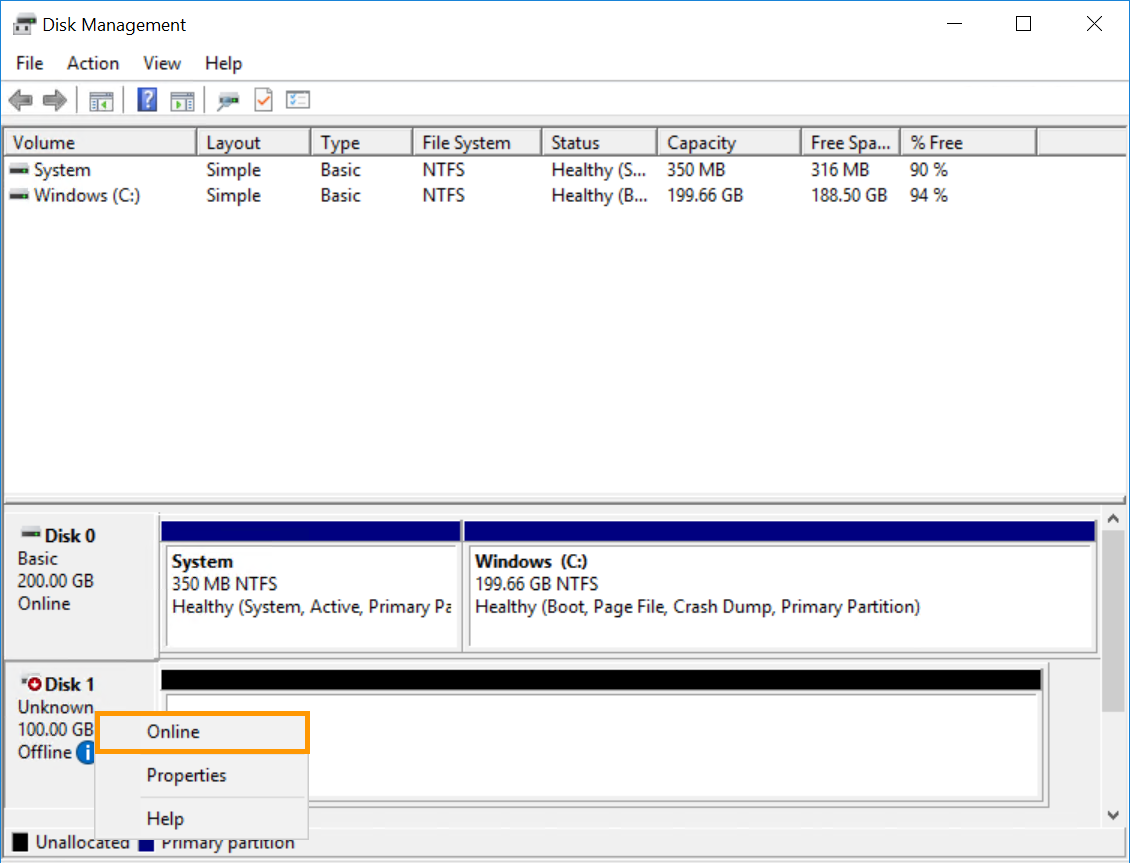
Right-click on the disk and select Online.
If offline, right-click the disk and select Online.
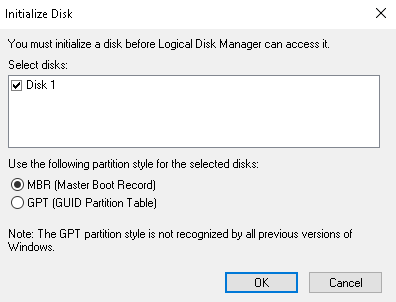
Right-click again and select Initialise Disk.
Next, select MBR if your additional disk is less than 2TB, or GPT if it is more than 2TB, then click OK.
Initialising the disk with DISKPART
Right-click the Start Menu and open Run.
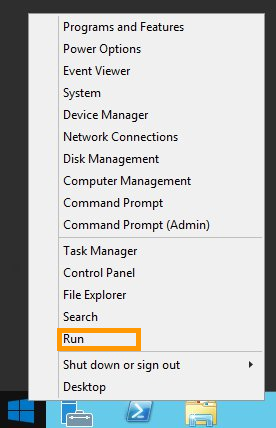
Type cmd and click OK.
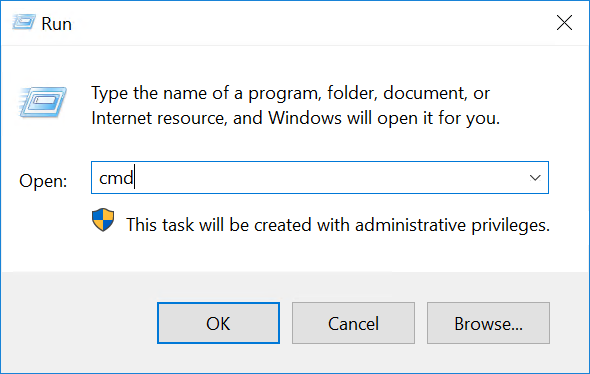
At the command prompt, open DISKPART:
Run these DISKPART commands to bring the disk online:
Formatting the disk
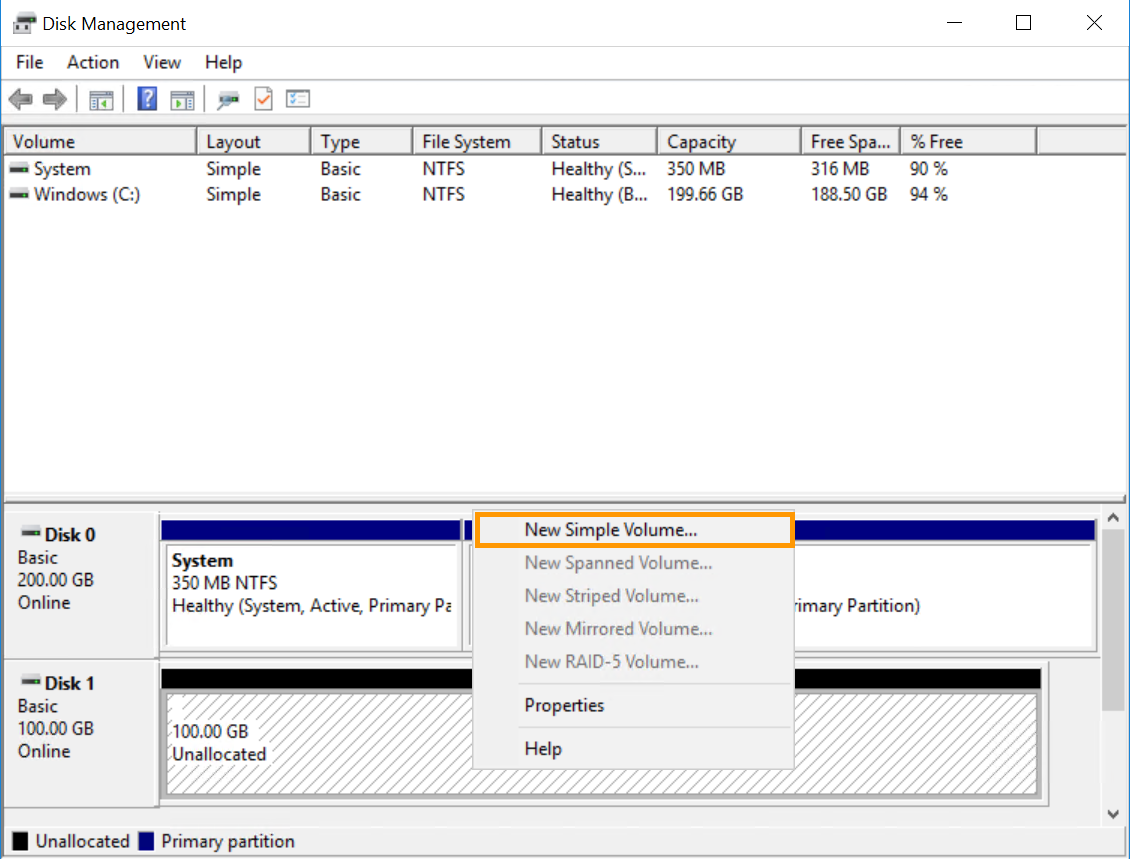
In Disk Management, right-click the disk and select New Simple Volume....
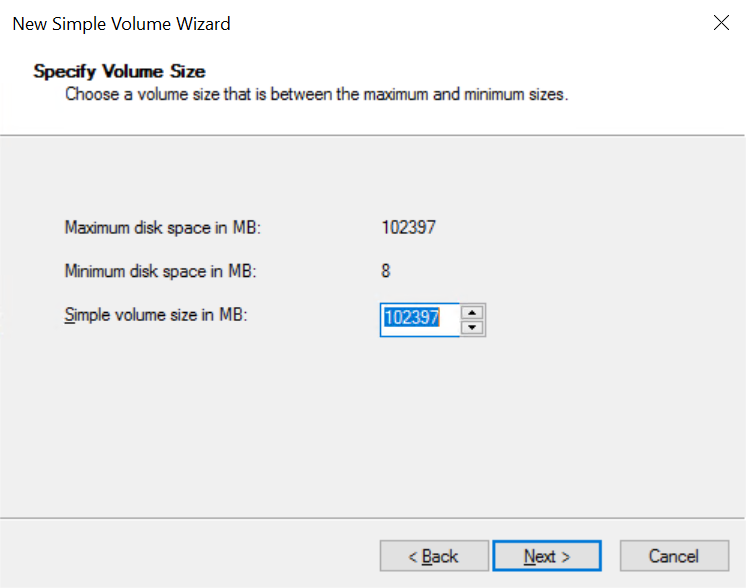
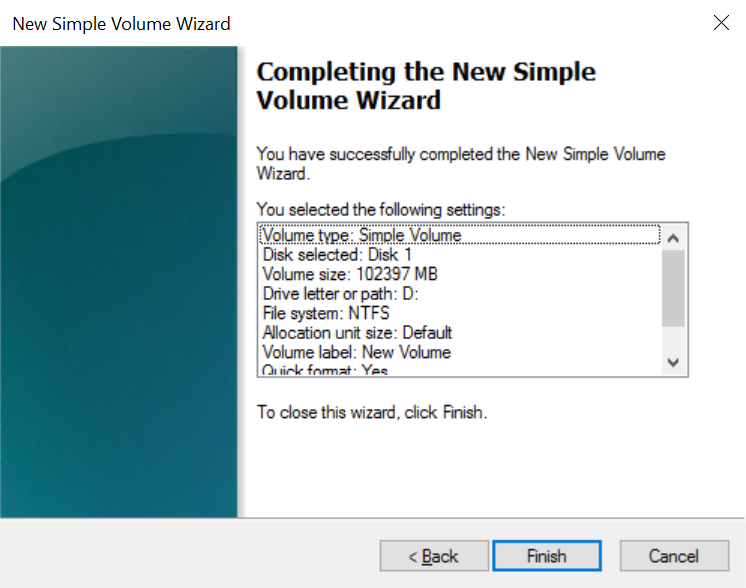
In the wizard, click Next to confirm the volume size (maximum by default), then Next again.
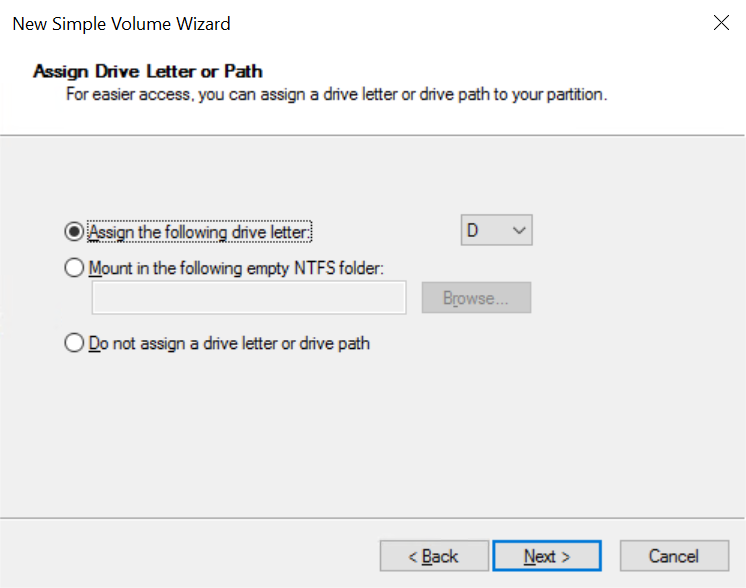
Accept the drive letter or select another, then click Next.
Label the volume (optional) and click Next.
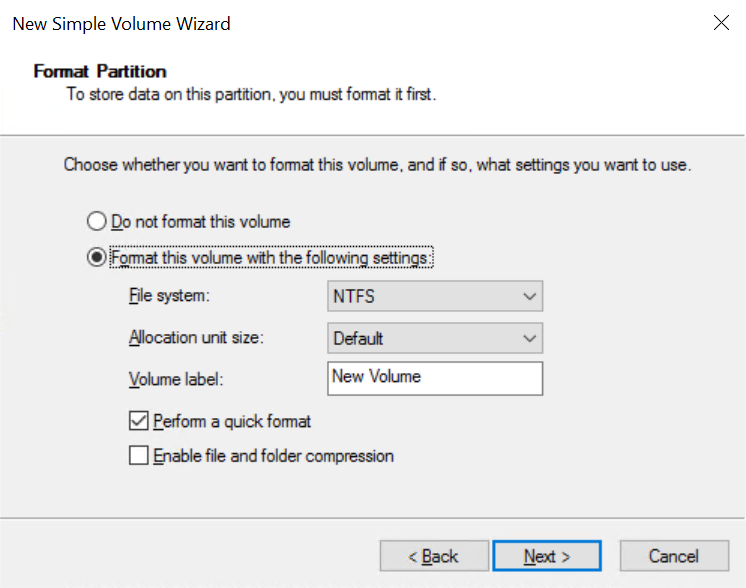
Click Finish to format the disk.
The disk appears in File Explorer as a drive.
Detach a volume
Before detaching a volume, unmount it in the operating system.
An error message may appear if you have software or processes running on the additional disk. In this case, it is recommended to stop all processes before continuing.
Here's how to unmount the volume from the operating system before detaching it from the instance:
Connect via SSH, then list the attached disks:
Unmount the partition:
Remove the device ID from the fstab; otherwise the partition remounts after reboot.
Save and exit the editor.
Establish a remote desktop (RDP) connection to your Windows instance.
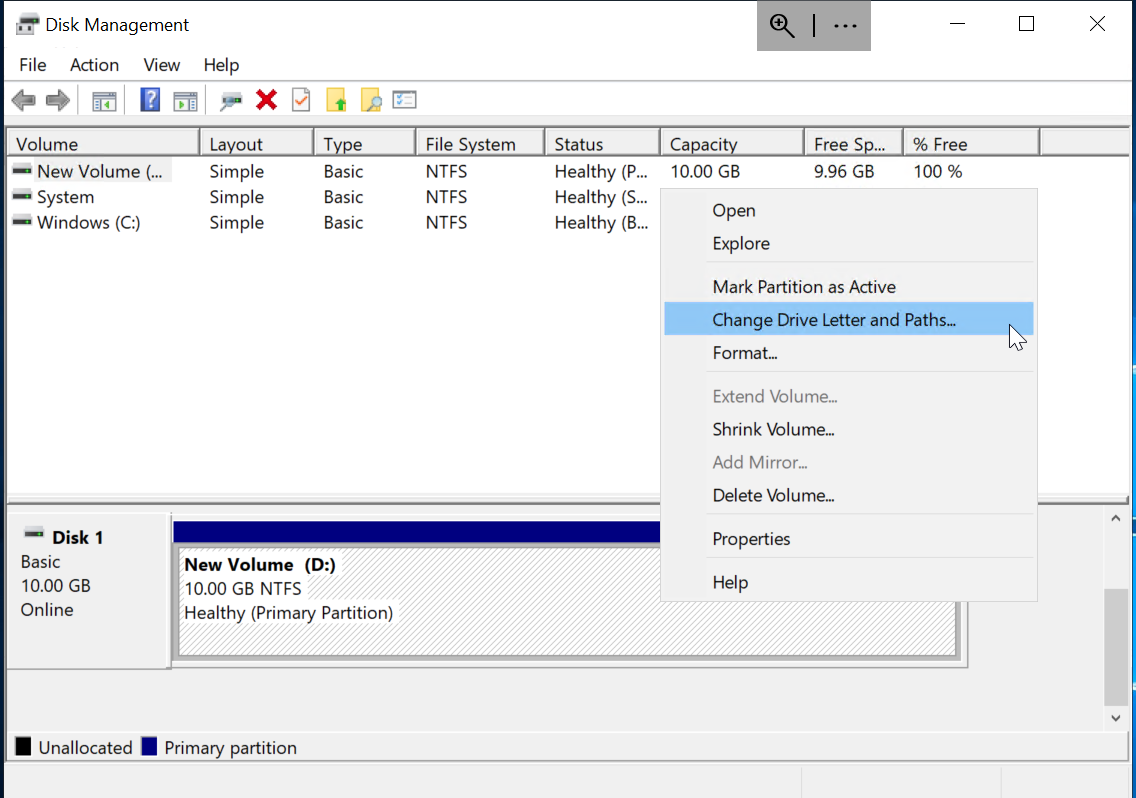
Right-click the Start Menu and open Disk Management.
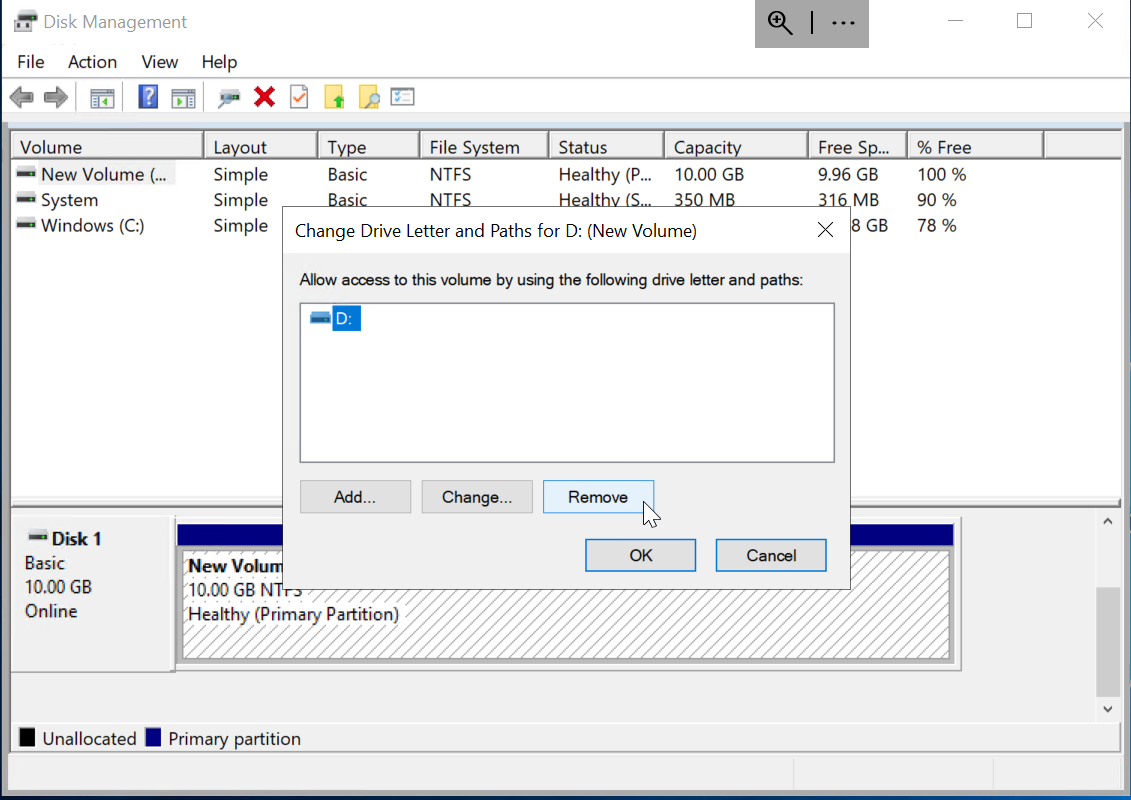
Right-click the volume and select Change Drive Letter and Paths....
Click Remove.
Click Yes to confirm.
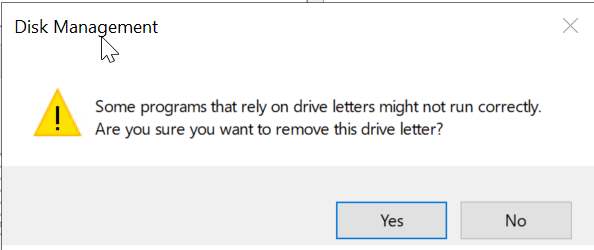
When finished, you can close the Disk Management window.
Finally, we will detach the volume from the instance:
Open Block Storage in the left-hand menu under Storage & backup.
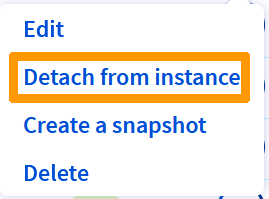
Click the ... button next to the corresponding volume and select Detach from instance.
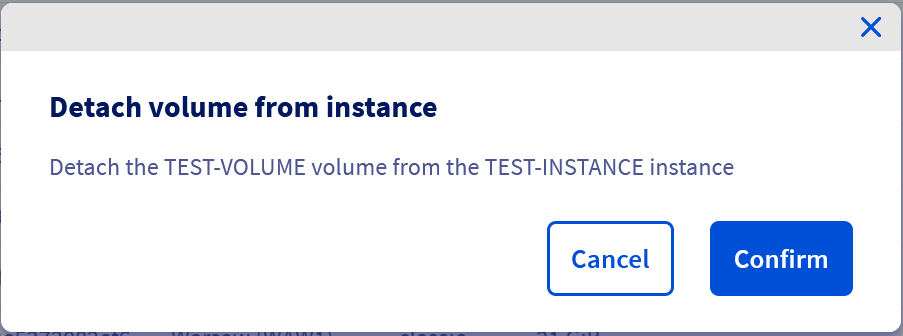
Click Confirm.
Delete these lines from your Terraform file:
Run this command to verify the planned deletion:
The output should look like this:
Apply the changes:
The output should look like this:
| Parameter | Description |
|---|---|
<volume_id> | ID of the volume to detach |
<instance_id> | ID of the instance to detach the volume from |
Go further
Increasing the size of an additional disk
Join our community of users.

