How to start a Public Cloud instance on a bootable volume
312 Views
Objective
Public Cloud instances come with an original disk that is copied from a system image (Debian 12, Windows Server, etc.). It is also possible to use additional volumes, these are persistent disks that will allow data to be stored.
You can also deploy an operating system to and from a volume. The Public Cloud instance will then start on this volume instead of the original disk.
This guide provides you with instructions on how to start an instance on an attached volume.
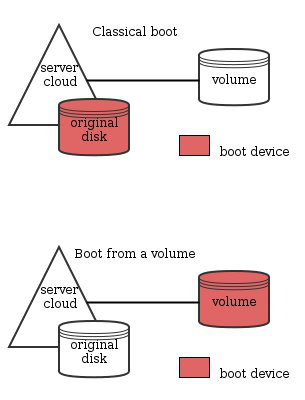
OpenStack natively allows you to boot from a volume. It involves making the volume bootable and starting the instance from this volume. The changes will cause the original disk to disappear as the new volume is taking over. The functionality described in this guide eliminates the need to access the original disk and therefore takes advantage of the volume.
With the current version of OpenStack, rescue-pro mode is not available on an instance booted via a bootable volume.
Requirements
Instructions
Creating a bootable volume from an image.
Log in to the Horizon interface.
Select the appropriate region from the drop down menu at the top left.
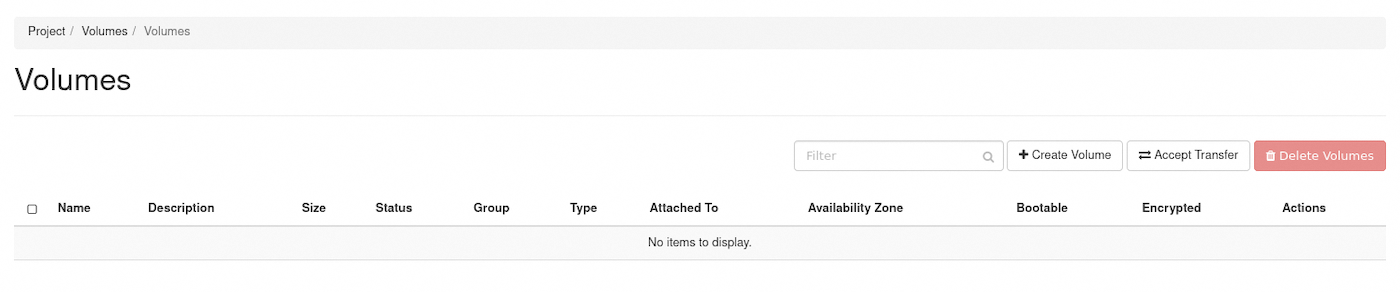
On the Project tab, open the Volumes tab and click the Volumes category.
Click on Create Volume.
In the dialog box that opens, enter or select the following values:
| Information | Description |
|---|---|
| Volume Name | Specify a name for the volume |
| Description | Optional, provide a brief description for the volume |
| Volume Source | Choose the option Image.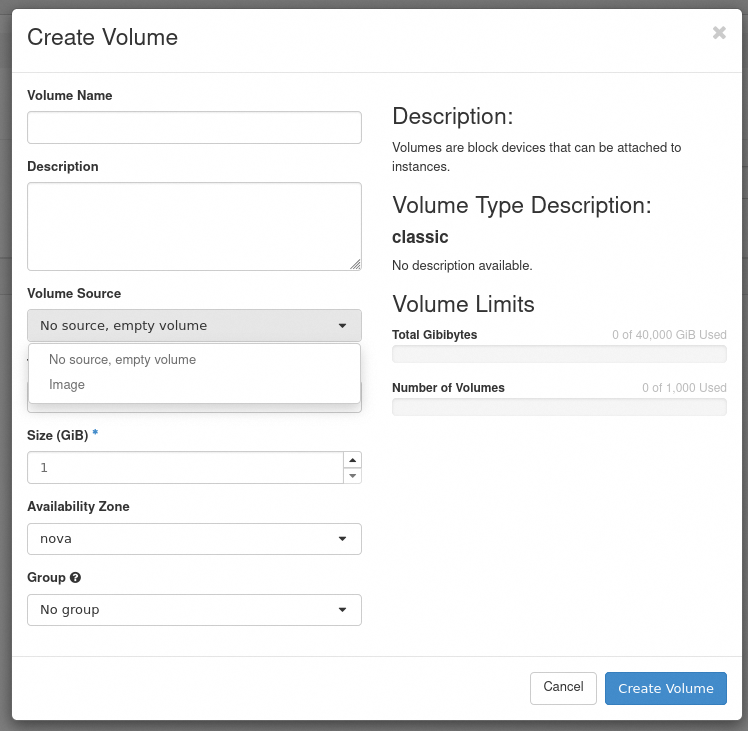 |
| Use image as a source | You can select the image from the list.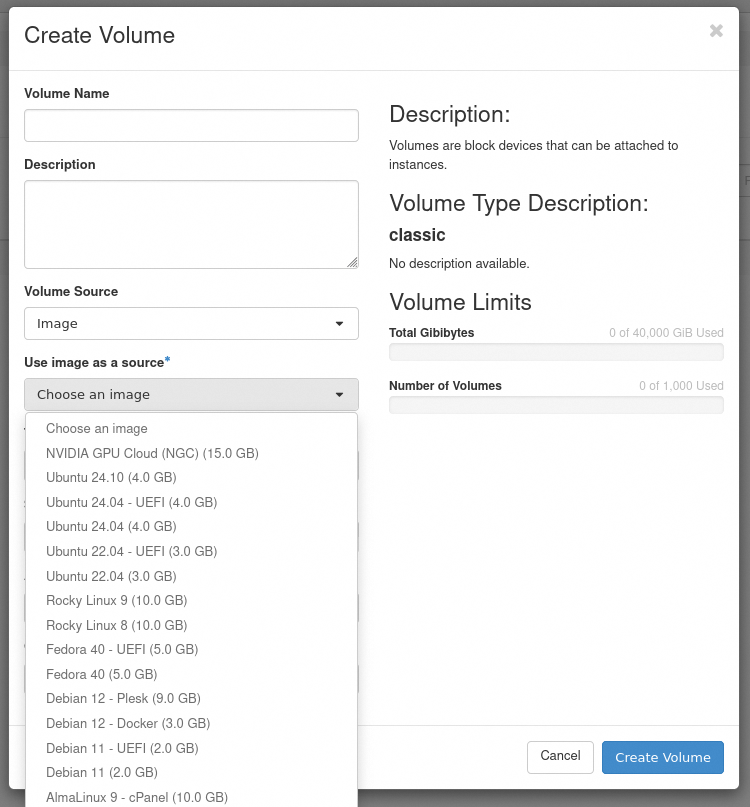 |
| Type | Depends on the volume type you want to use |
| Size (GB) | The size of the volume in gibibytes (GiB) |
| Availability Zone | nova 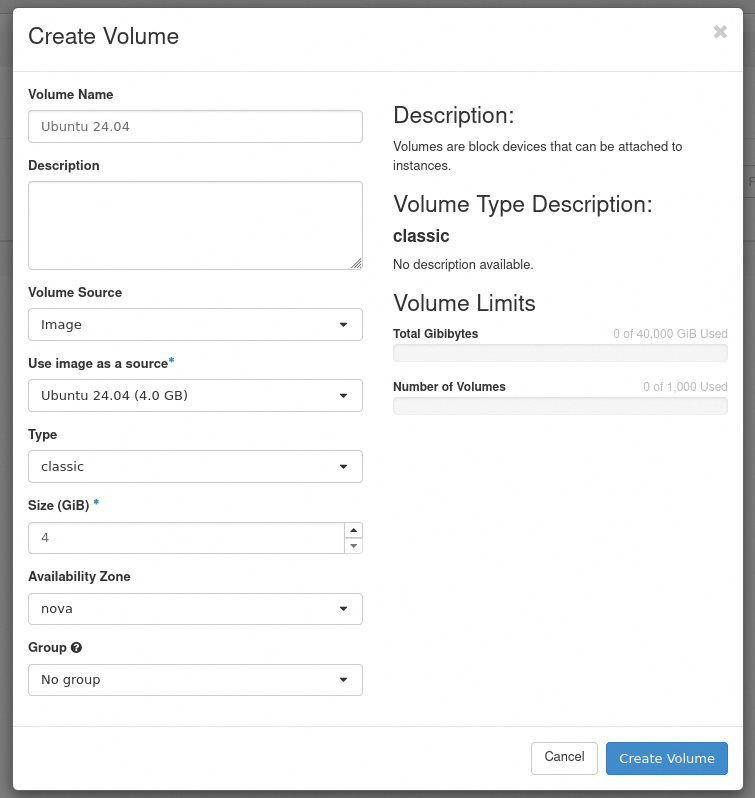 |
Click on Create Volume.
The volume will be in a creating state then a downloading state before being available.
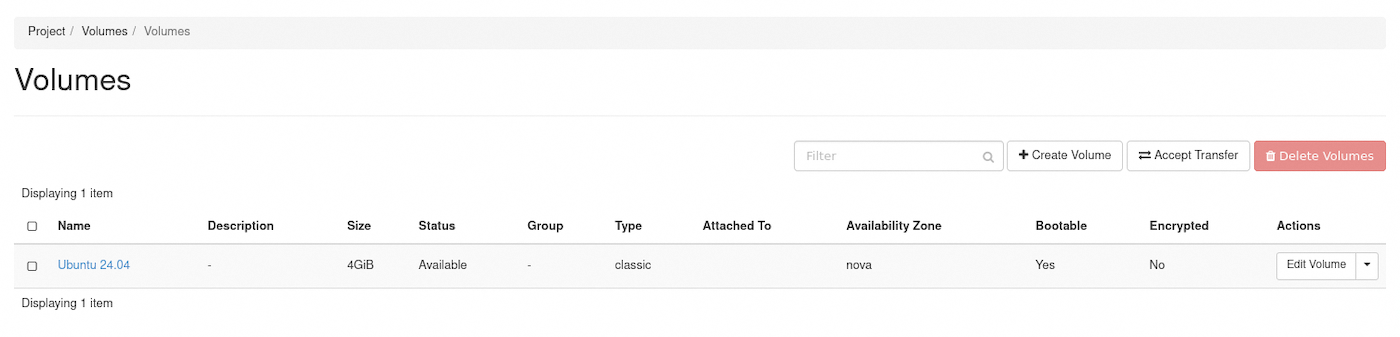
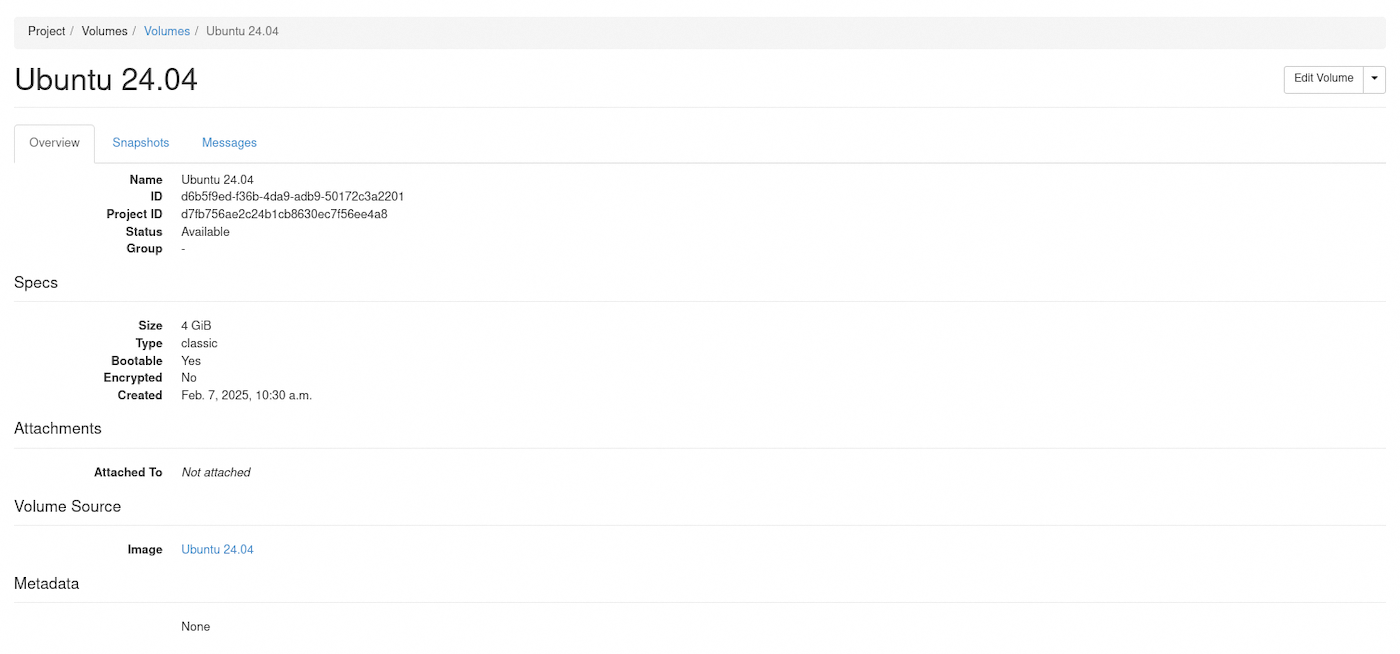
As you can see on the image below or if you click the volume name, it is set as bootable.
You can create a bootable volume from an existing image, volume, or volume snapshot. This procedure shows you how to create a volume from an image and use the volume to boot an instance.
Note the ID or the name of the image that you wish to use.
Create a bootable 10GB high-speed volume named volume_ubuntu from an Ubuntu 24.04 image:
You can install an image on a volume using the --image argument:
In this command, 2c2e28dc-9124-49c3-b92d-7f00bd83ac86 is the Ubuntu 24.04 image ID.
Cinder makes a volume bootable when the --image parameter is passed.
Starting an instance using a bootable volume
Log in to the Horizon interface.
Select the appropriate region from the drop down menu at the top left.
On the Project tab, open the Compute tab and click Instances category.
Click on Launch Instance.

In the Launch Instance dialog box, enter the information requested. Refer to the guide Create an instance from the Horizon interface for more details.
In the Source tab, choose "Volume" in the Select Boot Source field.
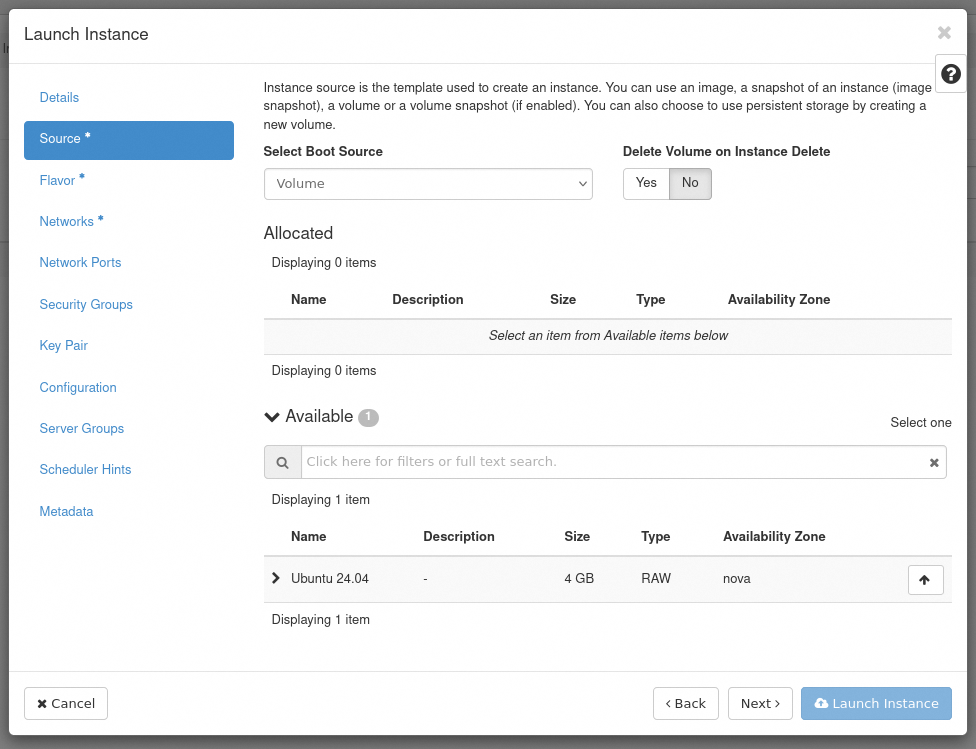
A new field for volume selection appears. You can select the previously created volume from the list.
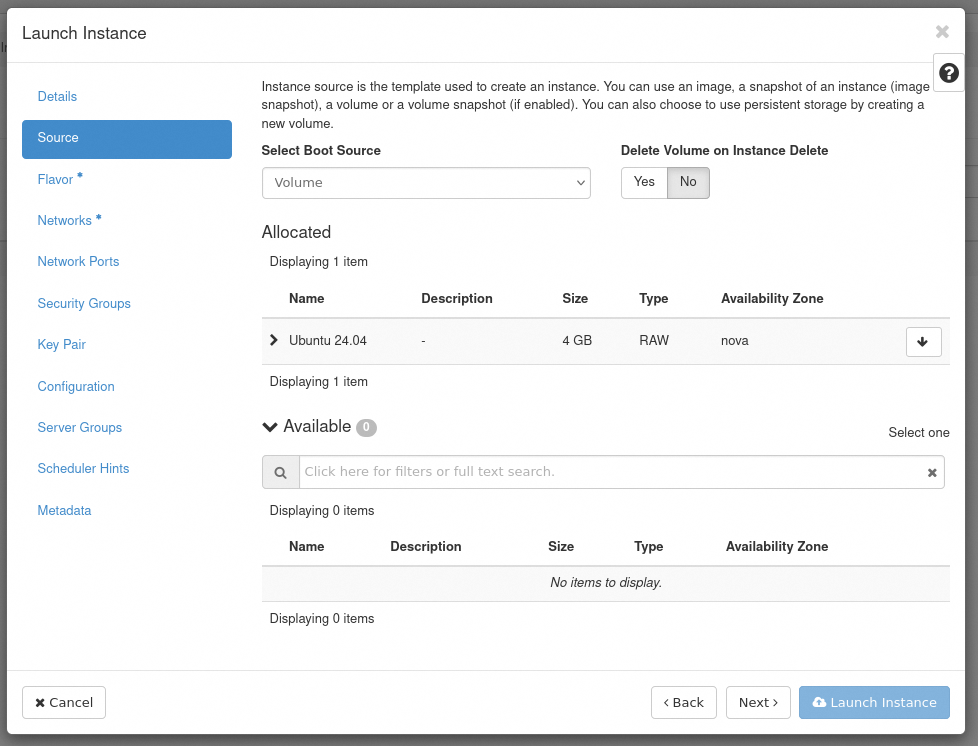
Click on Launch Instance.
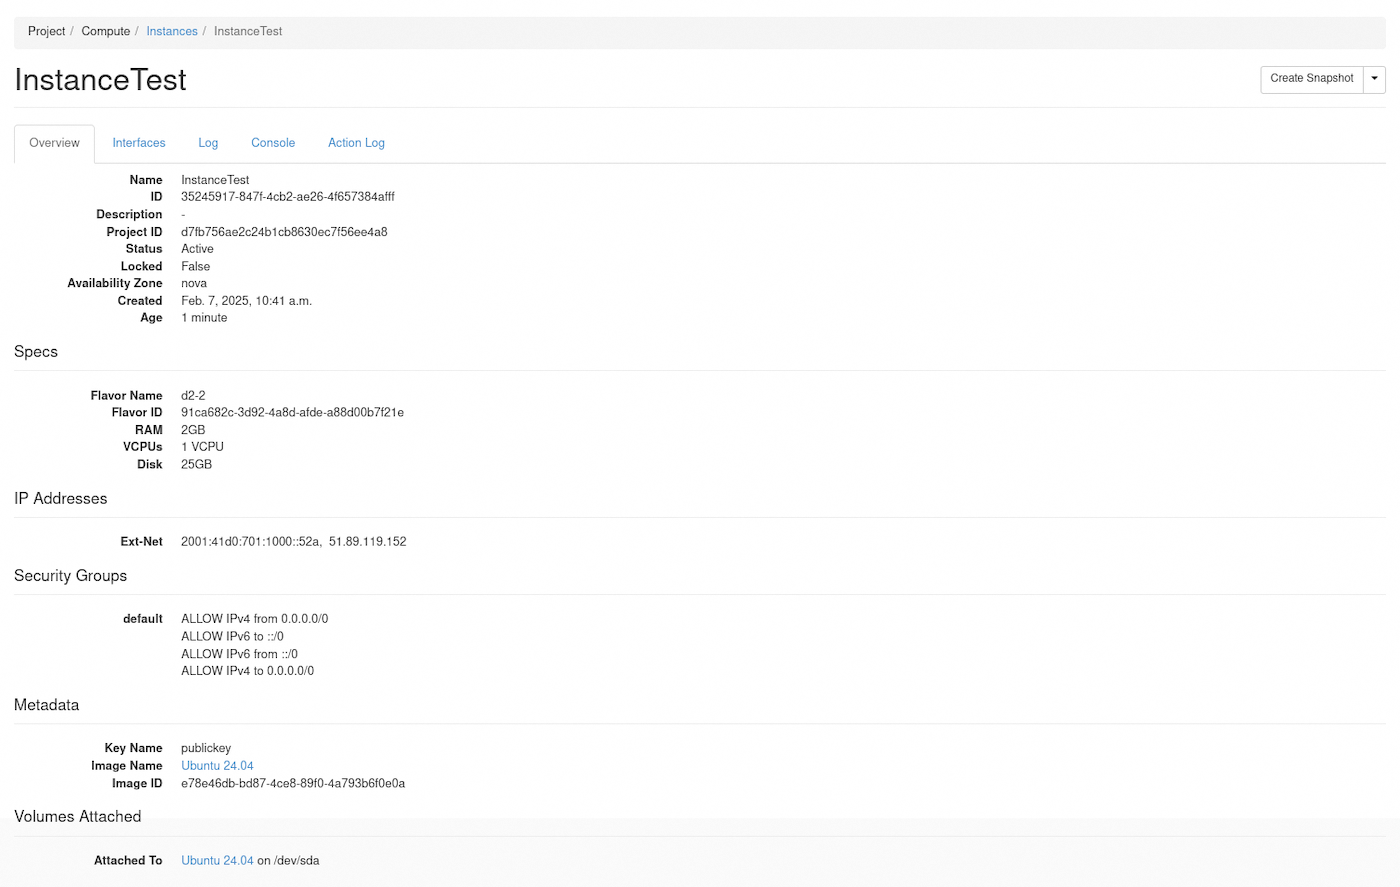
The instance will be in a build state then Block Device Mapping state before being available.
The instance will eventually have the volume attached.
Create an instance, specifying the bootable volume volume_ubuntu as the boot device.
List the volumes to ensure the status has changed to in-use and the volume is correctly reporting the attachment:
List the volumes attached to the InstanceTest Instance:
You can also create an instance, using the chosen image and requesting "boot from volume" behavior.
In the command above, b680f0aa-8eb8-4ac8-b008-2a90bb71af4f is the Debian 12 image ID.
- List the volumes:
List the volumes to ensure the status has changed to in-use and the volume is correctly reporting the attachment.
List the volume on the server to make sure it's properly attached.
Go further
Join our community of users.

