Configuration of an OVHcloud Load Balancer service - HTTP headers
330 Views
Objective
The OVHcloud Load Balancer service acts as a proxy. Like a human proxy, it serves as an intermediary: the client addresses the proxy, which in turn contacts the service provider on behalf of the client. In this configuration, only the proxy has information about the real client (the visitor of your web service) and the real service provider (one of your servers).
For the visitor, this configuration does not raise any issues. They do not need to know the specific server handling their request; it is an implementation detail. However, for legal and statistical reasons, it is essential that the final server knows the client's real IP address. By default, it only identifies the proxy, which is your OVHcloud Load Balancer service. To overcome this issue, your OVHcloud Load Balancer service adds by default the standard HTTP headers that allow you to retrieve this information in the case of an HTTP connection. For a TCP connection, other solutions such as the ProxyProtocol exist, but they are beyond the scope of this guide.
This guide presents the default headers, their function, how to use them on the most common servers, and how to customize them according to the requirements of your infrastructure.
This guide is specifically for you if you only find private IP addresses in your access logs (access_log).
Requirements
- Have an OVHcloud Load Balancer offer in your OVHcloud account.
- Have a Web service installed and configured on your servers.
- Have an Nginx service installed and configured on your servers.
OVHcloud Control Panel Access
- Direct link: Load Balancer
- Navigation path:
Network>Load Balancer> Select your service
Instructions
Legal obligations
You may be required to keep logs and certain data related to traffic in accordance with the laws and regulations applicable to you. It is your responsibility to comply with these obligations.
As an example:
- Article L34-1 of the Code of Posts and Electronic Communications and Decree No. 2006-358 of 24 March 2006 on the retention of electronic communication data require any natural or legal person providing a public electronic communications service to retain user identification data for the services provided, etc. ;
- Law No. 2004-575 of 21 June 2004 on trust in the digital economy and Decree No. 2011-219 of 25 February 2011 require, among other things, that persons whose activity consists of providing access to online public communication services retain, for each connection, data relating to the connection identifier, the start and end dates and times of the connection, etc.
Default headers
By default, your OVHcloud Load Balancer service adds five standard HTTP headers to each request, allowing you to identify the visitor's IP address and port as well as the initial connection protocol of the visitor to your site.
| Header | Description |
|---|---|
| X-Forwarded-For and X-Remote-Ip | IP address of the client, as seen by your OVHcloud Load Balancer. |
| X-Forwarded-Port and X-Remote-Port | Source port of the client, as seen by your OVHcloud Load Balancer. |
| X-Forwarded-Proto | Client protocol (HTTP or HTTPS), as seen by your OVHcloud Load Balancer. |
The X-Forwarded-* fields can be manipulated by a malicious client, so they should only be considered if they come from a trusted source.
It is therefore essential to restrict their use to trusted IP addresses, which are the output IP addresses of your OVHcloud Load Balancer service. Major web servers such as Nginx and Apache have modules that can handle this aspect of security and reliability.
The list of your output IP addresses is available via the OVHcloud Control Panel and the OVHcloud API.
From the OVHcloud Control Panel
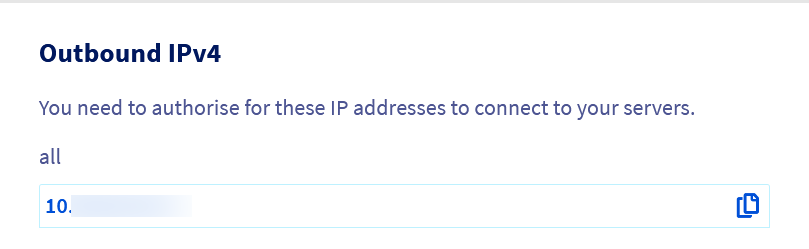
The list of IPv4 output addresses that may be used by your OVHcloud Load Balancer service is available on the homepage of your Load Balancer service under the heading "IPv4 output".
From the OVHcloud API
- Retrieving the list of IP addresses used by your OVHcloud Load Balancer service:
Correcting the source IP in the logs
By default, Apache, Nginx and other web servers record the source IP address in their logs. When you use an OVHcloud Load Balancer in front of your website, the logs then only contain IP addresses of the form "10.108.a.b". These are the internal IP addresses used by the OVHcloud Load Balancer to contact you.
When a request goes through your OVHcloud Load Balancer service, it records the visitor's IP address in the X-Forwarded-For and X-Remote-Ip headers. These two fields carry the same information, their names differ only for compatibility with most servers.
To correct the IP addresses in the logs, one solution would be to modify the log format directive on your server to use one of these headers instead of the Load Balancer's IP address. Unfortunately, this approach is insufficient, as anyone can fill in this header, even without going through your OVHcloud Load Balancer. This manipulation would allow the visitor to impersonate someone else. Apart from the ethical aspect, this practice has legal, security and statistical implications that make its prevention essential.
This is why the main web servers include specialized modules that allow you to precisely control the level of trust given to these headers based on:
- The source IP address (must be exclusively that of your OVHcloud Load Balancer service!)
- The depth of the IP in the field. Indeed, each proxy (proxy, load balancer) adds the client's IP address to this field.
The rest of this guide provides recommended configuration practices for the main web servers.
Apache
- Create the file
/etc/apache2/conf-available/remoteip.conf. - Insert the following configuration:
- Then replace the variables
%hwith%ain theLogFormatdirectives of the Apache configuration. - Finally, enable the new configuration with:
Nginx
For Nginx, the approach is slightly simpler, but the principle remains the same as for Apache: only take into account the X-Forwarded-For field if it comes from your OVHcloud Load Balancer service.
This configuration can be applied:
- To all sites, by inserting the configuration in the
http {}section; - To a specific site, by inserting the configuration in the corresponding
server {}section; - To a specific URL, by inserting the configuration in the corresponding
location {}section. - Insert the configuration in the desired section(s) (
http {}for a global configuration):
- Then enable the new configuration with:
Redirecting HTTP visitors to HTTPS
To enhance security, some content such as login pages, can be restricted to the HTTPS protocol. Some sites even choose to systematically redirect all visits to the HTTPS version. By default, the HTTP and HTTPS protocols use different ports (80 and 443 respectively), so the classic solution is to place the redirection rules directly in the vhost dedicated to HTTP.
When a request goes through a service like the OVHcloud Load Balancer, it handles the reception of HTTP traffic, the decryption of HTTPS traffic and forwards both types of traffic to your servers. Depending on your server configuration, all traffic will be propagated in HTTP or HTTPS, without distinction of the incoming protocol on the Load Balancer. Your server can no longer differentiate the two, as both arrive at the same point. This process is called SSL Termination.
This is why the OVHcloud Load Balancer service automatically adds a header X-Forwarded-Proto which indicates the name of the original protocol, either "http" or "https".
Like X-Forwarded-For, this header can be forged by a malicious visitor to make an insecure request appear to come from your OVHcloud Load Balancer service, in HTTPS. It is crucial to trust this header only if it is proven to come from your OVHcloud Load Balancer service.
Apache
- Insert the following configuration in your site's
.htaccessfile:
- Then enable the new configuration with:
Nginx
- Insert the following configuration in the
server {section of your site:
- Then enable the new configuration with:
Passing headers to PHP
PHP uses the REMOTE_ADDR header to determine the address of the visitors. This header is automatically configured as soon as the configuration detailed in the section "Correcting the source IP in the logs" is applied.
Adding custom headers
Whether your application requires a specific header format to identify the visitor's IP, port or protocol, or you want to know which frontend a request arrived through (or for any other reason), you can add custom headers on your HTTP frontend.
Custom headers must follow the format "X-Header Header Value". The header name and its value are separated by a space. It is possible to specify several headers on the same frontend.
If an existing header is present in the request, it will be overwritten and replaced by the new value, making it impossible for the visitor passing through this frontend to forge it. It is not possible to redefine headers reserved for proxies, such as those described in this document, as they are automatically managed by your OVHcloud Load Balancer service.
When specifying a non-standard header name, it is customary to prefix it with "X-".
The use of variables in the header values is supported:
%ciwill be replaced by the visitor's IP address.%cpwill be replaced by the visitor's source port.
Custom headers can be configured via the OVHcloud Control Panel and the API, whether on a new frontend or an existing frontend.
From the OVHcloud Control Panel
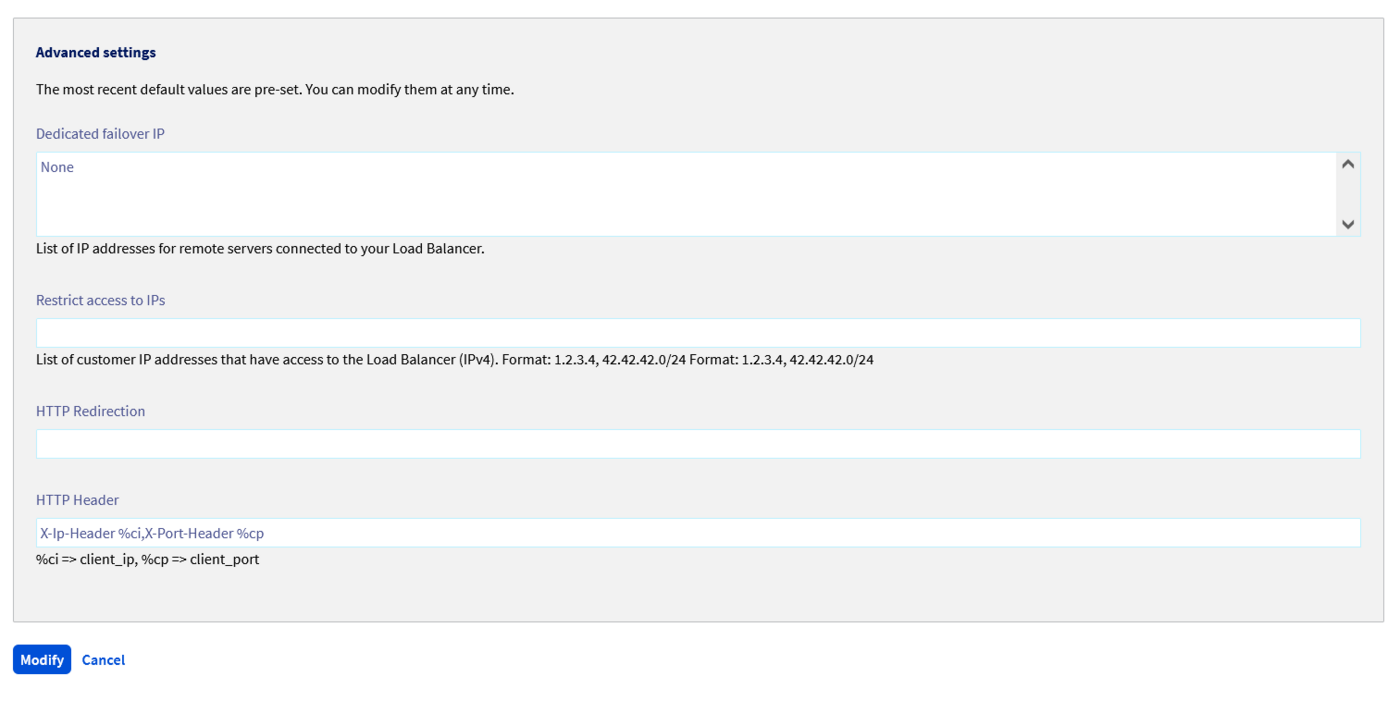
Go to the Frontends tab in the dashboard of your OVHcloud Load Balancer service and select the frontend to edit or click on the Add a frontend button to create a new one. An editing window will appear, displaying an HTTP Header field in the Advanced Settings section.
If you want to configure multiple headers, they must be separated by commas, without spaces. For example, you can define the following headers: X-Ip-Header %ci,X-Port-Header %cp.
Click on the Update button after configuring the headers, then on Deploy zone: YOUR ZONE to apply the changes in the concerned zone.
From the OVHcloud API
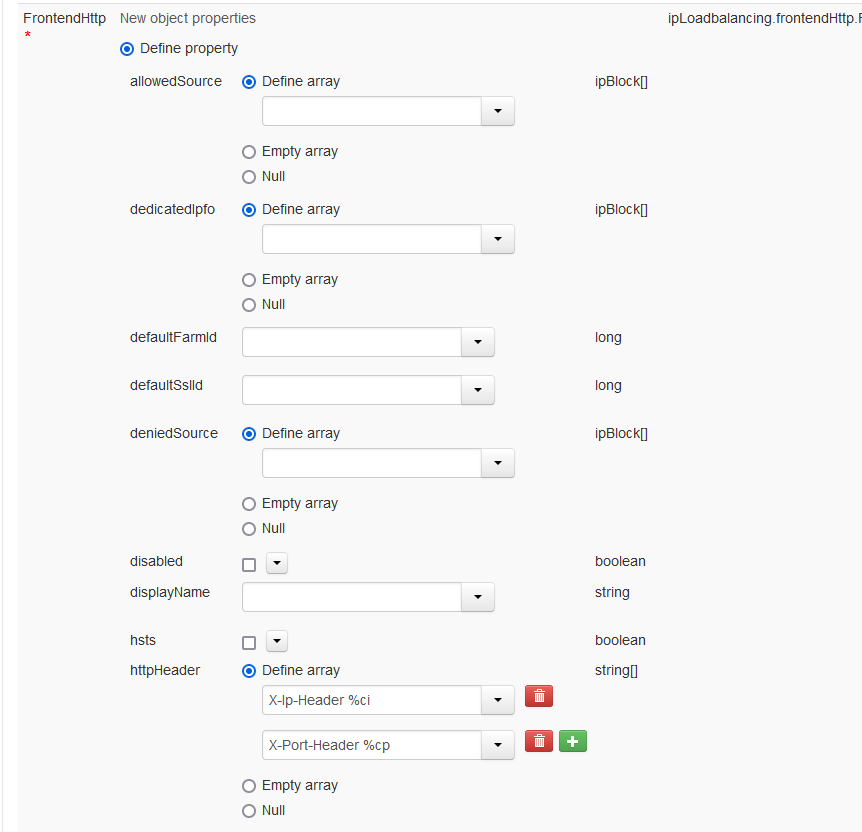
In the API, the headers are specified within an httpHeader list. Unlike the OVHcloud Control Panel, each header must be its own entry in the list.
In the OVHcloud API console, a + button is available as soon as you start to specify a value, allowing you to add a new field to the list.
If you integrate the API into your code, this corresponds to a JSON list of the type:
- Modification of an existing
Frontend:
| Parameter | Meaning |
|---|---|
| serviceName | Name of the Load Balancer service concerned |
| frontendId | Identifier of the frontend where to configure the HTTP headers |
| httpHeader | List of headers to configure |
- Applying the changes:
| Parameter | Meaning |
|---|---|
| serviceName | Name of the Load Balancer service concerned |
| zone | Name of the zone in which to deploy the configuration |
Go further
Join our community of users.

