How to connect an OVHcloud domain name to a Google Site
107 Views
Objective
You are the holder of a domain name with OVHcloud and want to connect it to a Google Site. This guide explains how to prepare and configure your OVHcloud DNS zone for your Google Site.
Find out how to connect your OVHcloud domain name to a Google Site.
- Google Site support does not have access to your OVHcloud domain name settings and therefore cannot advise you on the information you will need to provide.
- OVHcloud provides services for which you are responsible with regard to their configuration and management. It is therefore up to you to ensure that they function correctly.
We have provided you with this guide in order to help you with common tasks. However, we recommend contacting a specialist provider and/or the service's publisher if you encounter any difficulties. We will not be able to assist you ourselves. You can find more information in the Go further section of this guide.
Requirements
- A domain name registered with OVHcloud.
- The necessary permissions to manage the domain name.
- A Google Site and be its owner.
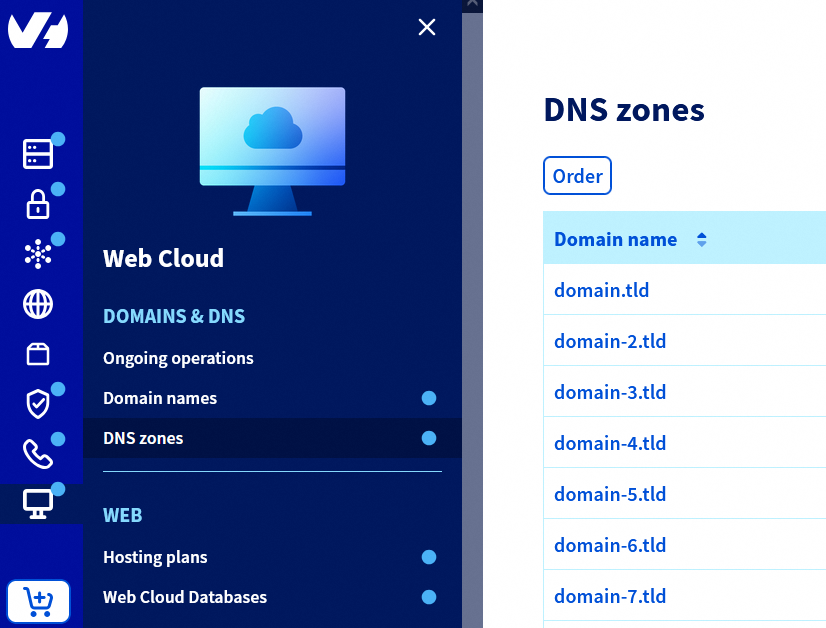
OVHcloud Control Panel Access
- Direct link: DNS zones
- Navigation path:
Web Cloud>DNS zones> Select your domain name
Instructions
Before following the steps in this guide, we recommend reading our guide on Editing an OVHcloud DNS zone.
Your DNS zone is potentially already preconfigured or linked to a hosting plan. We will look at how to identify each DNS record required to connect to your Google Site. Some records will need to be deleted to avoid conflicts with DNS records required in this configuration. Others will simply need to be modified or created. For a better understanding, we will use the domain name "mydomain.ovh" as an example. Replace it with your domain name during configuration.
1. Configure your Google Site
Only the owner of a Google Site can connect it to a domain name. If necessary, find out how to change the owner of the Google site.
First, prepare your Google Site by following the instructions in the Configure a custom domain section from this page of Google support.
2. Configure your DNS records on your OVHcloud account
Click the tabs below to view each of the 5 steps in sequence.
Go to the DNS zones page, then choose the domain name concerned.
The table that appears lists all of the DNS records for the selected domain name.
Configuring the A records
1 - Identification: Filter the DNS records by selecting type A in the filter menu at the top right of the table.

Identify any existing "A" records for your domain name alone (e.g. mydomain.ovh.) and for the "www" subdomain (e.g. www.mydomain.ovh.).
2 - Deletion: Delete all existing "A" records for the "www" subdomain. If more than 4 "A" records exist for the domain name alone, delete the excess records to keep only 4. For each record to delete, click the ... button to the right of the corresponding row, then click Delete record.
3 - Modification: Modify each remaining "A" record for the domain name alone by clicking the ... button, then clicking Modify record. Replace the target with one of the 4 Google Site IPv4 addresses (a different address per record):
216.239.32.21216.239.34.21216.239.36.21216.239.38.21
Click Next and confirm.
4 - Addition: If fewer than 4 "A" records existed, create the missing records. Click Add an entry at the top right, select the A pointer record, leave the Subdomain field blank and enter in the Target field each IPv4 address not yet assigned. Click Next and confirm.
As the values of these IP addresses may change, check the official documentation for the value of A records.
Then proceed to step 3.
Deleting AAAA records
1 - Identification: Filter the DNS records by selecting type AAAA in the filter menu at the top right of the table.

Identify any existing "AAAA" records for your domain name alone (e.g. mydomain.ovh.) and for the "www" subdomain (e.g. www.mydomain.ovh.).
2 - Deletion: Delete all "AAAA" records identified (domain name alone and "www" subdomain) to avoid conflicts with the new DNS records. For each record, click the ... button to the right of the corresponding row, then click Delete record.
If no "AAAA" records exist, proceed to step 4.
Configuring the TXT record
1 - Identification: Filter the DNS records by selecting type TXT in the filter menu at the top right of the table.

Identify any existing "TXT" records for your domain name alone (e.g. mydomain.ovh.) and for the "www" subdomain (e.g. www.mydomain.ovh.).
2 - Deletion: Delete all "TXT" records identified (domain name alone and "www" subdomain) to avoid conflicts with the new DNS records. For each record, click the ... button to the right of the corresponding row, then click Delete record.
3 - Addition: Create a TXT verification record. Click Add an entry at the top right, select the TXT pointer record. Fill in the Subdomain and Target fields with the information from the "TXT record values" page of the official documentation. Typically, the Subdomain field is blank and the Target field is of type google-site-verification=XXXXXXXXXXXX. Click Next and confirm.
Then proceed to step 5.
Configuring the CNAME record
1 - Identification: Filter the DNS records by selecting type CNAME in the filter menu at the top right of the table.
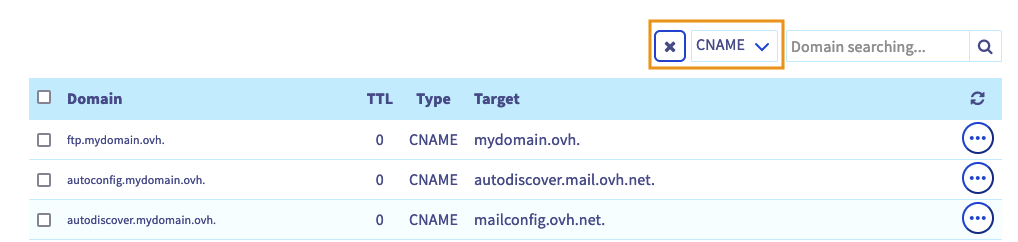
Identify any existing "CNAME" records for the "www" subdomain (e.g. www.mydomain.ovh.).
2 - Deletion: If multiple "CNAME" records exist for the "www" subdomain, delete all but one. For each record to delete, click the ... button to the right of the corresponding row, then click Delete record.
3 - Modification: If a "CNAME" record exists for the "www" subdomain, click the ... button, then click Modify record. Replace only the Target with ghs.googlehosted.com.. Click Next and confirm.
If no "CNAME" record exists for the "www" subdomain, click Add an entry at the top right, select the CNAME pointer record, enter www in the Subdomain field and ghs.googlehosted.com. in the Target field. Click Next and confirm.
As these values may change, check them on the "CNAME record values" page of the official documentation.
The DNS zone is now configured to point to your Google Site.
It may take up to 48 hours to verify your domain name.
If you are using an OVHcloud email solution, or planning to subscribe to one of our email solutions, you will also need to prepare your DNS zone accordingly. Read our guide on configuring an MX record.
Go further
Modifying an OVHcloud domain name's DNS servers
Creating an OVHcloud DNS zone for a domain name
To delegate the management of your domain name to another OVHcloud customer account, follow the guide on Managing contacts for OVHcloud services.
For specialised services (SEO, development, etc.), contact OVHcloud partners.
If you would like assistance using and configuring your OVHcloud solutions, please refer to our support offers.
Join our community of users.

