How to reset the Windows Administrator password with the Windows customer rescue system
438 Views
Objective
This guide will help you to reset your Administrator account password with the Windows customer rescue system.
Requirements
- Microsoft Windows Server 2016 or greater installed on your dedicated server
- At least 16 GB of RAM installed on the server
OVHcloud Control Panel Access
- Direct link: Dedicated Servers
- Navigation path:
Bare Metal Cloud>Dedicated servers> Select your server
This guide is not applicable to the legacy Windows rescue system (WinPE rescue mode) (see the rescue mode guide for details).
If your Windows Server version is out of support, you might not be able to activate the current rescue system for Windows. In this case, please refer to our guide page on how to reset the Windows Administrator password with the legacy Windows rescue system instead.
The same guide explains an alternative method for resetting the Administrator password using the OVHcloud customer rescue system based on Debian.
Instructions
Step 1 - Reboot the server into rescue mode
The system has to be started into the Windows customer rescue system before the admin password can be changed.
For detailed instructions, please refer to the Windows rescue mode guide.
Step 2 - Clear the current password
Connect to your server in Remote Desktop using the credentials provided by email.
Please note that the user name for the rescue mode is Administrator.
- If your server uses software RAID on your Windows disk, you have to import your Windows local disk to be able to access it: Follow the instructions of the section A below.
- If your server does not use software RAID on your Windows disk, you should be able to directly access the local Windows disk as explained in the section B of this guide.
A - Importing your local Windows disk
1. Access disk management
Right-click the Start menu and select Disk Management.
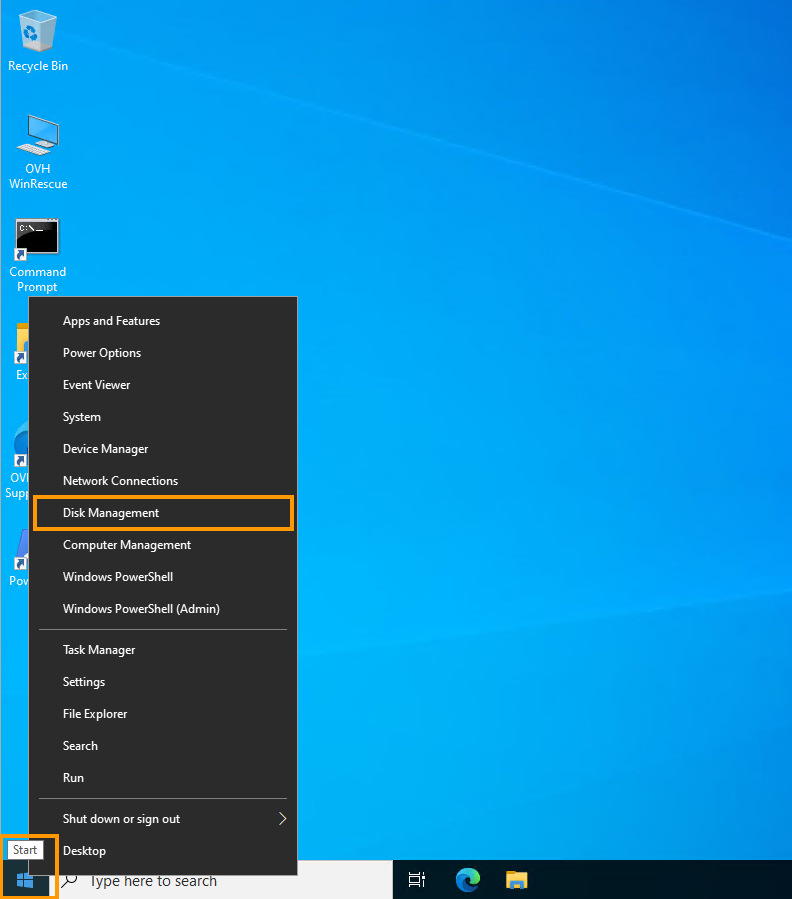
You can then see the disks and volumes of the server.
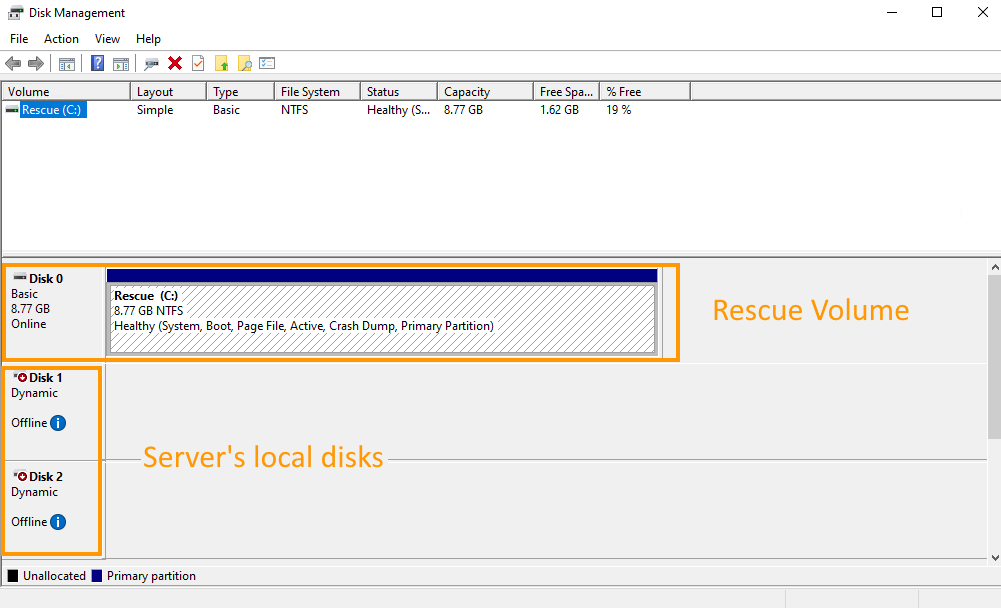
Your server's Windows disk is probably Disk 1. You must import it to be able to access it.
Please note that if you have several disk groups, the number of the Windows disk may vary. You may have to import several disks to get the Windows one.
You also have to import the second disk to properly import your software RAID volume.
2. Import local disks
Right-click Disk 1 and select Online.
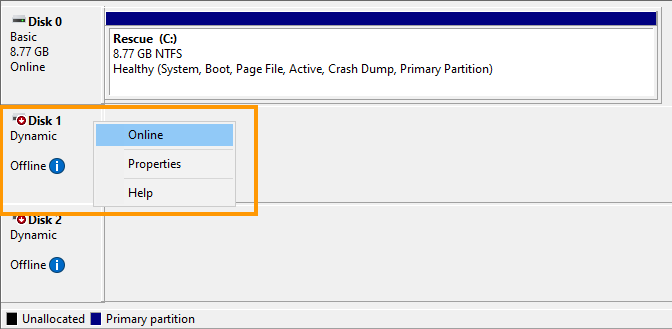
Do the same thing for the second disk (Disk 2) to properly import your software RAID volume.
Right-click Disk 2 and select Online.
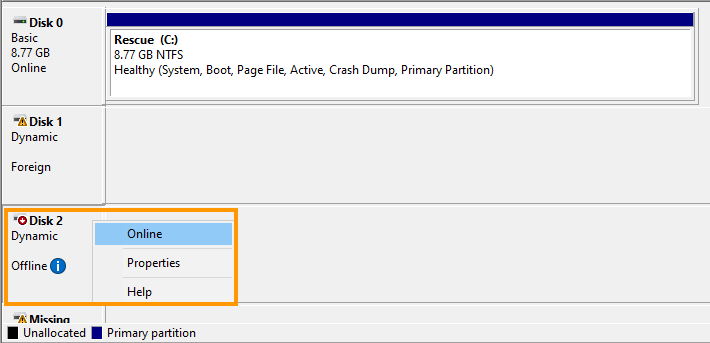
Disks are now seen as "Dynamic" and "Foreign".
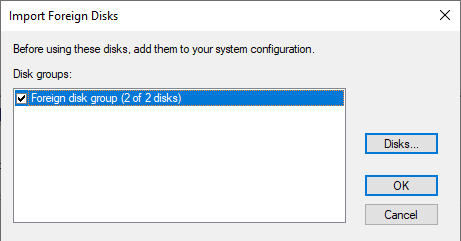
Right-click Disk 1 again and select Import Foreign Disks.
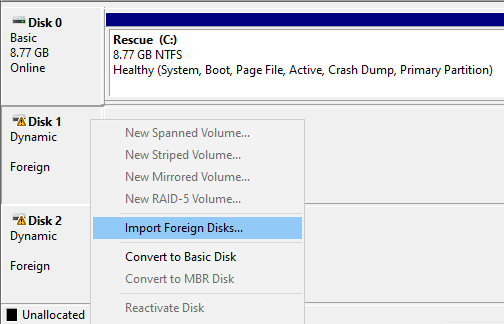
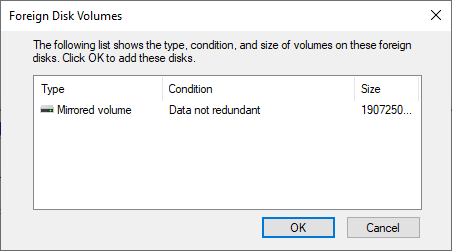
Click OK twice.
You can see that the local disk is now accessible and that the Windows disk is drive (E:) (spreading on two software RAID disks with Mirrored volume type).
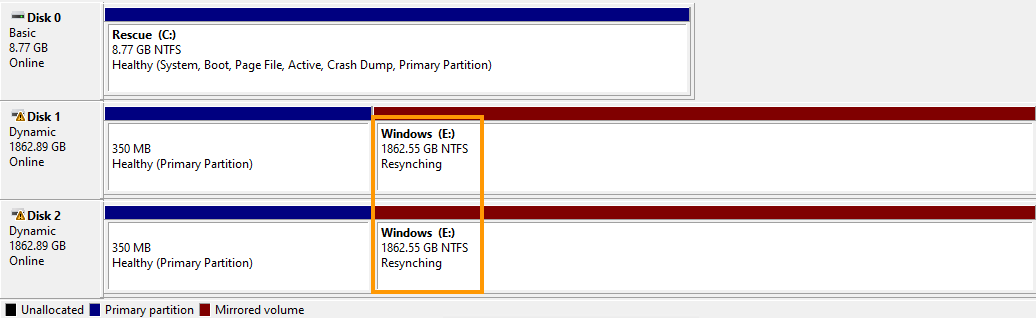
In this example, the volume status is "Resynching" because the server was hard-rebooted into rescue mode. This is an expected status and it is not caused by the rescue mode itself.
This will not affect data on the volume and resynchronisation will continue once the server is rebooted into its installed OS.
You must then use the path of your local Windows directory (here it is E:\Windows) when browsing to find the "SAM" configuration file below.
You can now reset the password by following the instructions below.
B - Reset the password
To reset passwords, the tool NTPWEdit is required.
Once you are connected via Remote Desktop, open the browser and download it from its official website.
Navigate to the folder where the downloaded ZIP file is located and extract its content.
Next, open the ntpwedit64 executable to start the application.
In this interface, you can manipulate the SAM file in order to clear the admin user's password.
You must browse the local Windows drive to find your system's SAM file.
Click the three dots button (...) to browse the drive containing your server's local Windows folder.
It usually is the Windows (E:\) drive.
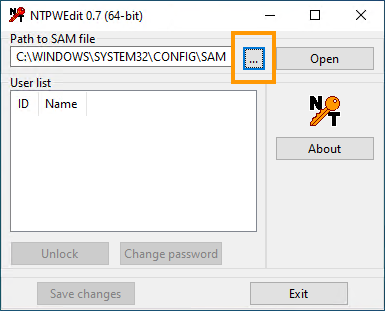
Browse to E:\WINDOWS\SYSTEM32\CONFIG\.
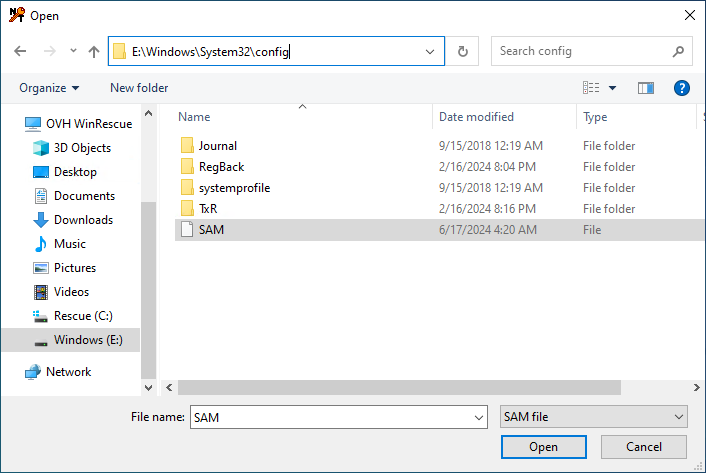
Select and open the SAM file to display the user accounts by clicking Open.
Select the user account "admin" and click on Change password.
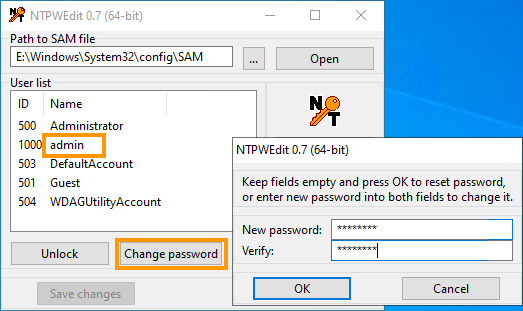
In the popup window, enter your new password in both fields and click OK.
The new password will be accepted regardless of any password complexity.
Keep in mind that this password will allow remote connection to the server once rebooted on its operating system.
Finish by clicking Save changes and Exit.
After this, the server needs to be rebooted on the normal operating system.
Step 3 - Reboot the server
First, change the netboot back to "Boot from the hard disk" in your OVHcloud Control Panel (see step 1).
Then restart the server from the Control Panel.
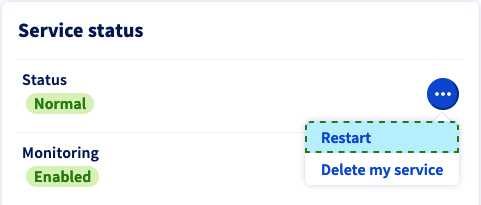
Click the ... button near "Status" in the "Service Status" section and click Restart.
Go further
Join our community of users.

