Getting started with your CloudStore
126 Views
Objective
This guide shows you how to log in to your CloudStore management interface, understand its key concepts, and perform initial operations such as creating accounts and deploying services.
The CloudStore is a high-level infrastructure framework deployed on top of On-Premise Cloud Platform (OPCP). It provides core services to help cloud providers deploy and manage cloud-native solutions for their customers through a marketplace-based platform.
Requirements
- The URL of your CloudStore management interface, provided during service delivery.
- Login credentials (username and password) provided during service delivery. These credentials are managed through Keycloak, the identity and access management solution used by the platform.
Instructions
Logging in to CloudStore
Navigate to the URL provided for your CloudStore instance. You will be presented with a login page.
Click the login button to be redirected to the Keycloak authentication page. You have two options to authenticate:
- Enter your credentials directly in the Keycloak login form.
- Use the
OPCP-SSObutton to authenticate through the federated OPCP Core Keycloak. This option allows users already registered in OPCP Core to log in without managing a separate set of credentials.
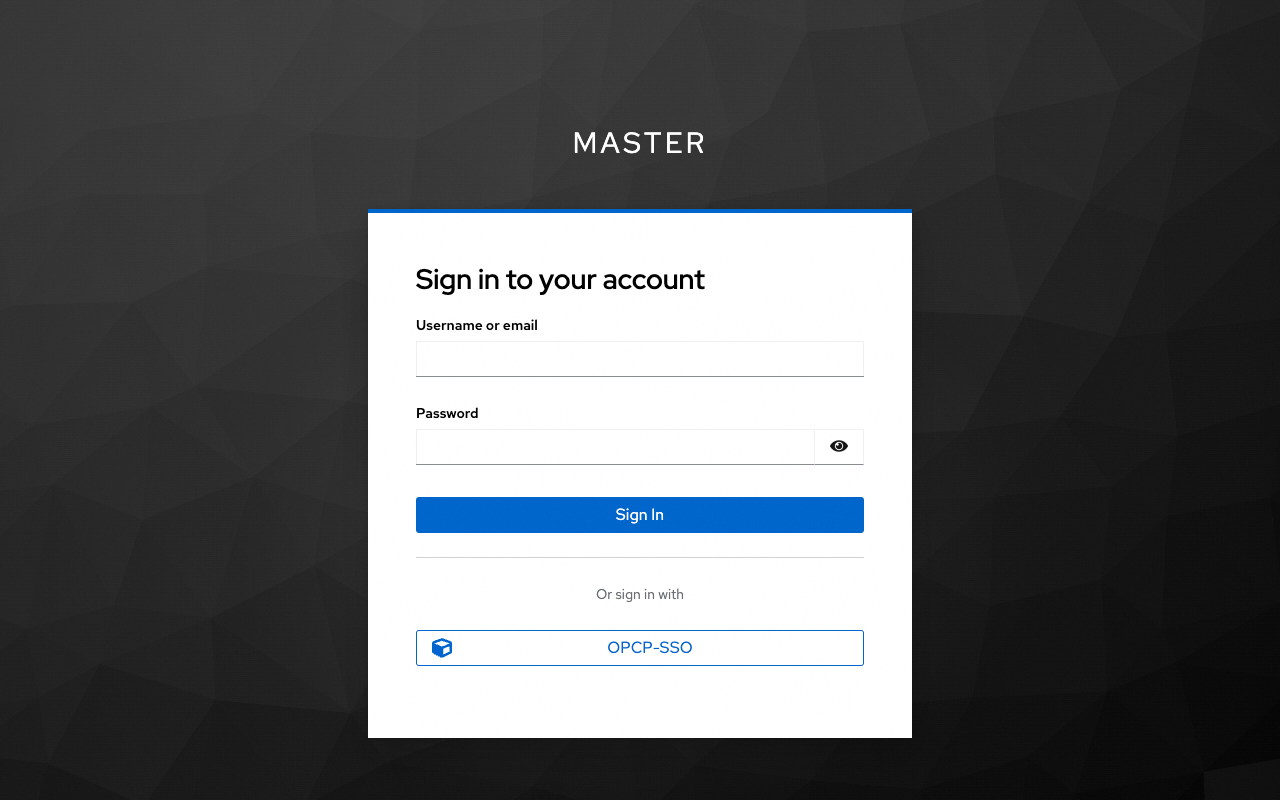
Once authenticated, the interface obtains an OIDC access token that is used for all subsequent operations.
CloudStore dashboard
After logging in, you will be redirected to the CloudStore dashboard.

From the dashboard, you can access the following key areas:
- Service catalog: Browse and activate available services (e.g., VCF).
- Accounts: Create and manage tenant accounts for your customers or internal teams.
- Controllers and Apps: Deploy and manage the infrastructure components of each service.
- IAM management: Configure users and permissions within Keycloak.
Key concepts
Before using the CloudStore, it is important to understand its main concepts.
Personas
The CloudStore distinguishes between two audiences:
- Cloud providers (IT admins, Service admins): OVHcloud customers who operate the platform. They provision infrastructure, deploy services, and manage accounts.
- Cloud users (End users): Customers of cloud providers who consume the services deployed for them through the Landing Zone.
| Persona | Responsibilities |
|---|---|
| IT admin | Create accounts, activate services, deploy apps |
| Service admin | Manage a specific service, deploy its controller and apps |
| Account admin | Manage the configuration of their account |
| End user | Access apps through the Landing Zone |
The controller/app pattern
Each service in CloudStore follows a controller/app architecture:
- The controller (controlplane) is deployed first. It manages the lifecycle of apps and handles cross-tenant orchestration. A single controller can manage multiple apps across different accounts.
- Apps (dataplane) are workloads deployed for a specific account. Each app is isolated to one account and cannot be shared between accounts.
This pattern allows cloud providers to offer the same service to multiple customers, each getting their own isolated app instance while sharing the same controller infrastructure.
Creating an account
An account represents a company or a department. Each account gets its own Keycloak realm, providing complete IAM isolation. Accounts must be created before deploying apps, as apps are always scoped to an account.
To create an account:
- From the CloudStore dashboard, navigate to the
Accountssection. - Click on
Create an account. -
Fill in the required fields: account name, admin full name, and admin email address.
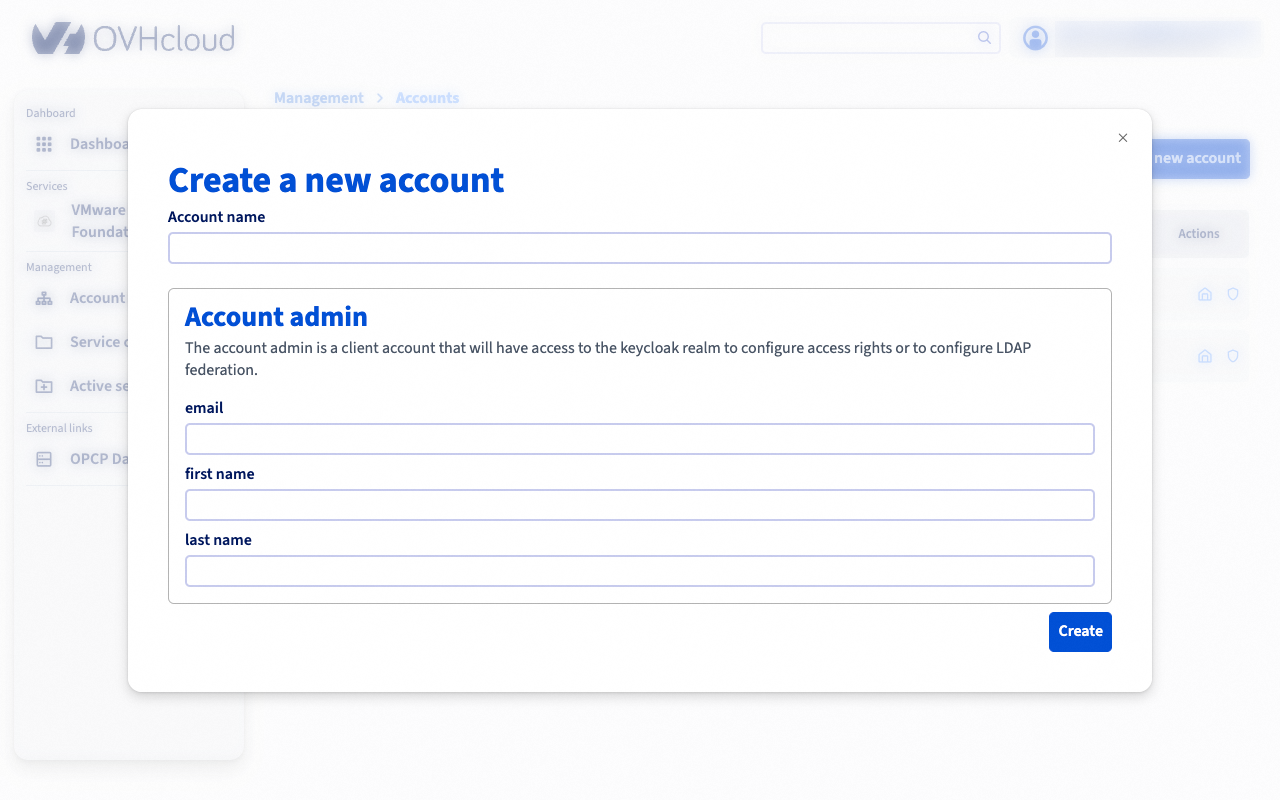
-
Submit the form.
The platform automatically:
- Create a dedicated Keycloak realm named
account-{name}. - Create an admin user with the
account-adminrole. - Set up a temporary password (the account admin will be prompted to change it on first login).
- Configure a
landing-zoneclient for end-user access.
Deploying a service
Deploying a service is a two-step process: first deploy the controller, then deploy one or more apps for specific accounts.
Step 1 — Deploy a controller
-
Navigate to the
Service catalogfrom the dashboard.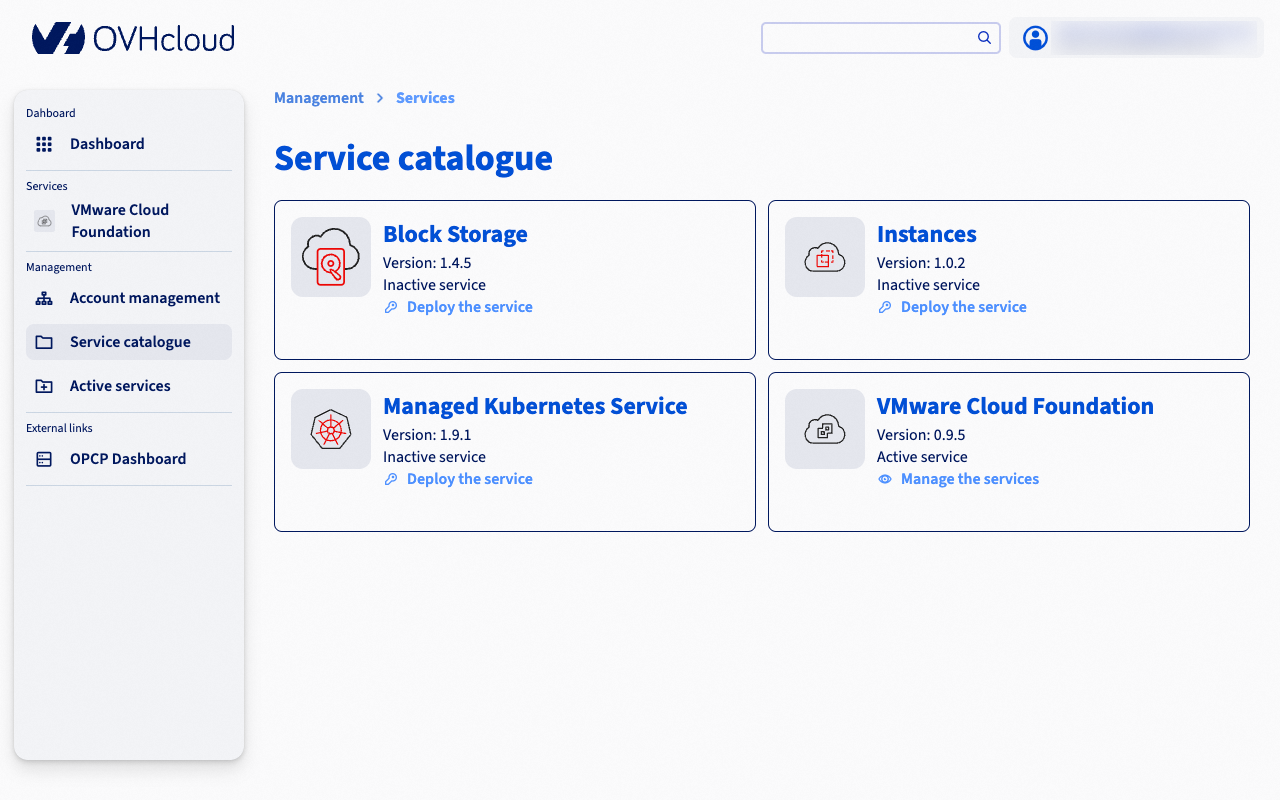
-
Select the service you want to activate.
- Click
Activate the service. - Choose the version and configure the required properties.
- Select the hosts on which the controller will be deployed.
- Submit the form.
Controller deployment is asynchronous. The interface will confirm that the deployment has started, but provisioning happens in the background through Kubernetes and Terraform. You can monitor the deployment status from the controllers page.
Step 2 — Deploy an app
Once the controller is active and at least one account exists:
- Navigate to the controller page.
- Click
Deploy an app. - Select the target account.
- Choose the version and configure the required properties.
- Select the hosts for the app deployment.
- Submit the form.
During app deployment, the platform automatically creates the necessary Keycloak resources (client-id, roles, and groups) in the target account’s realm, ensuring that only authorised users of that account can access the app.
Like controller deployment, app deployment is asynchronous. The actual infrastructure provisioning is handled by Kubernetes and Terraform in the background.
Scaling capacity
You can add or remove hosts from a deployed controller or app to adjust capacity.
- Navigate to the controller or app page.
- Click
Expand capacity. - Select the hosts to add.
- Submit the form.
The scaling operation is asynchronous. Kubernetes reconciles the configuration and provisions resources on the updated hosts.
Authentication and access levels
CloudStore uses a layered Keycloak federation model that mirrors the platform architecture:
| Level | Keycloak instance | Users | Purpose |
|---|---|---|---|
| L1 | OPCP Core Keycloak | DC operators, Super admins | Infrastructure-level identity |
| L2 | CloudStore Keycloak | IT admins, Service admins | Platform management |
| L3 | Per-account Keycloak realms | End users | Application access |
- Keycloak L2 is federated with L1 (OPCP Core). This means rights granted on OpenStack projects at L1 are carried through to L2.
- Keycloak L3 is an independent instance managed by the CloudStore API. Each account gets its own isolated realm.
Managing IAM on CloudStore Keycloak (L2)
To be able to manage users, roles, and groups on the CloudStore Keycloak (L2), first assign the cloudstore-admins role to your user in the OPCP Core Keycloak (L1).
- Log in to the OPCP Core Keycloak administration console (L1).
- Navigate to the user you want to grant IAM management rights to.
- In the
Role mappingstab, assign thecloudstore-adminsclient role.
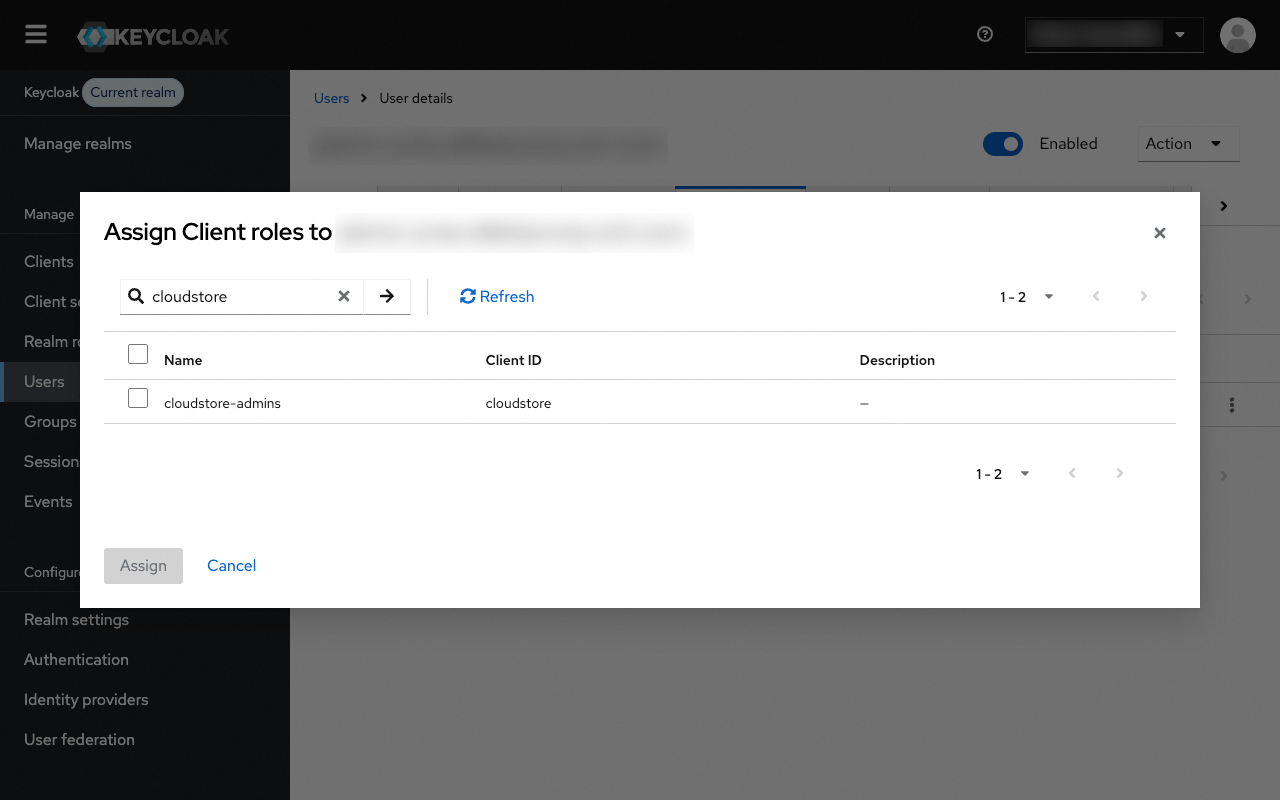
Once this role is assigned, the user will have the necessary permissions to administer the CloudStore Keycloak (L2), including managing realms, clients, users, and roles.
The Landing Zone
The Landing Zone is the interface for end users (cloud users). It provides a simplified view of the apps deployed for their account.
End users authenticate through their account-specific Keycloak realm (L3) and can only access apps deployed for their account. The Landing Zone retrieves the list of accessible apps and filters them based on user permissions.
Go further
If you need training or technical assistance for the implementation of our solutions, contact your sales representative or click this link to request a quote and have your project analyzed by our Professional Services team experts.
Join our community of users.

