vRack Services - Exposing a Managed Service on your vRack
1456 Ansichten
Objective
The vRack Services product allows you to benefit from network services on the vRack private network. By creating a Service Endpoint, you can expose an OVHcloud managed service with a private IP address on your vRack. This ensures that all communications with your managed service remain private and secure as they never leave your private network, which is isolated from other customers and the public network.
It's also quick and easy to configure, either via the API or the OVHcloud Control Panel. The first managed service to support Service Endpoint is Enterprise File Storage. Other OVHcloud managed services will support Service Endpoint in the future.
For more information on the vRack Private Network, please visit this page.
This article explains how to expose your managed service on the vRack using the vRack Services product and the Service Endpoint feature.
Overview
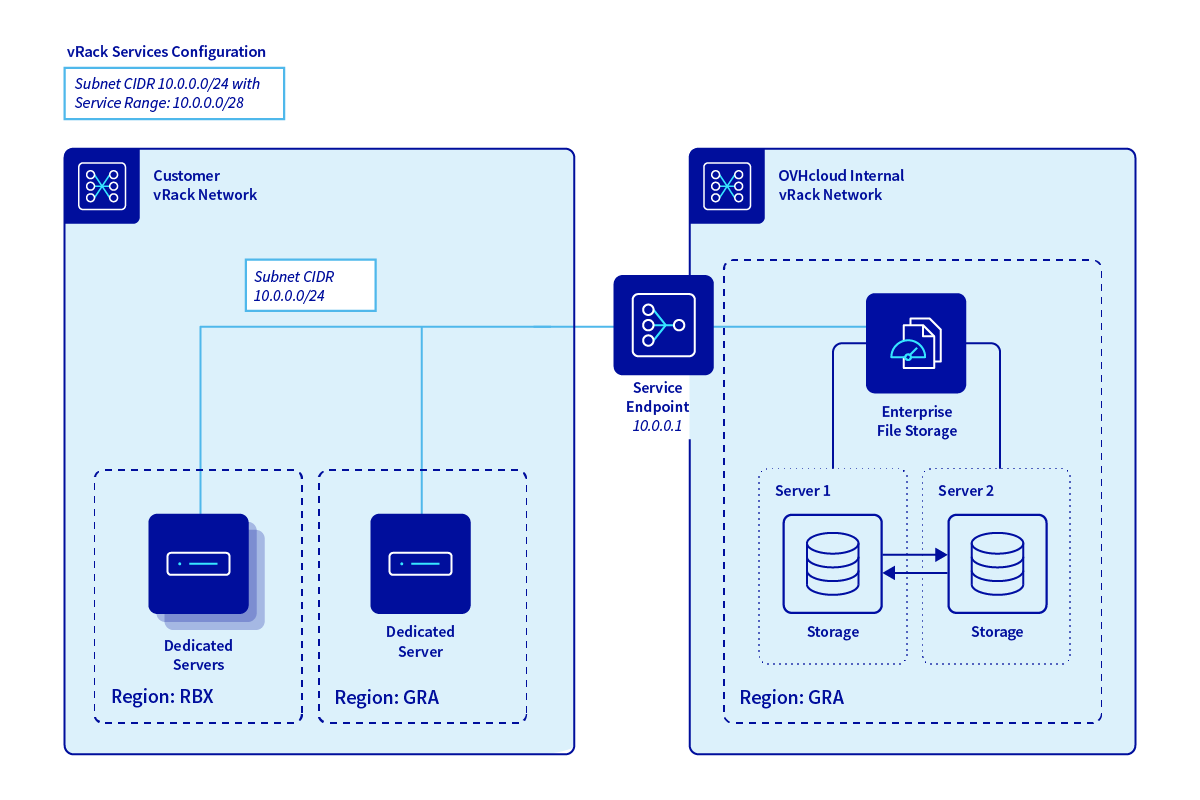
There are 3 main components to setting up this configuration:
- vRack Service The vRack Services product is the main component of your configuration and must be activated in a selected region and associated with a vRack. The selected region must match the location of your managed service. The managed service will be available from the selected region and will be accessible to all servers connected to the vRack, regardless of the region.
- Subnet The vRack Services product uses the concept of a subnet to define a range of private IP addresses that can be used to communicate with managed services. Generally speaking, subnets divide a larger network into segments, each with a specific range of IP addresses. This logical division allows for efficient management of resources and traffic flow within your network.
- Service Endpoint The Service Endpoint is your access point to the managed service. It is associated with a subnet and has one or more automatically assigned private IP addresses.
OVHcloud Control Panel Access
- Direct link: vRack Services
- Navigation path:
Network>vRack Services
Instructions
There are 3 steps to configure a Service Endpoint:
- Activating and configuring vRack services
- Creating a subnet and address range for the managed services
- Creating the Service Endpoint
These 3 steps can be performed via either the OVHcloud API or the OVHcloud Control Panel and are described in details below.
Via the OVHcloud Control Panel
Activating and configuring vRack Services
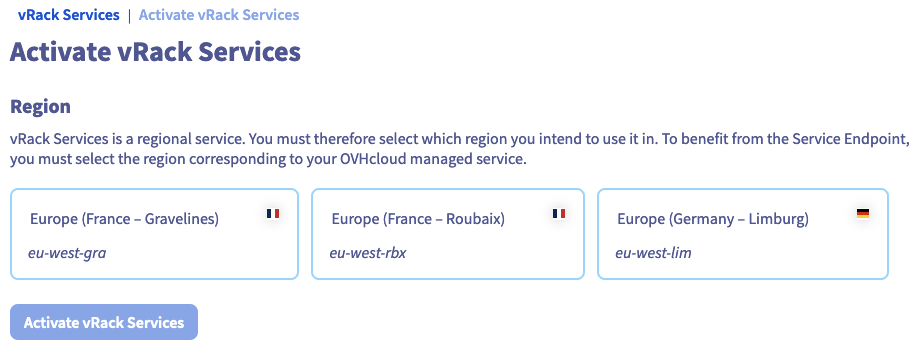
vRack Services is activated and configured by assigning it a name and a region.
It is a regional service. You must therefore select the region in which you intend to use it. To benefit from the Service Endpoint, you must select the region corresponding to your OVHcloud managed service.
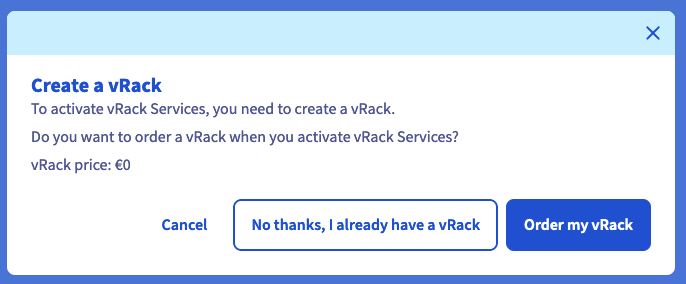
You must have a vRack to activate vRack Services. If you do not have one at this stage, you can order one uding the Order button in the Control Panel.
You are under no obligation to order one at this stage, you can do so later and return to the vRack Services creation process.
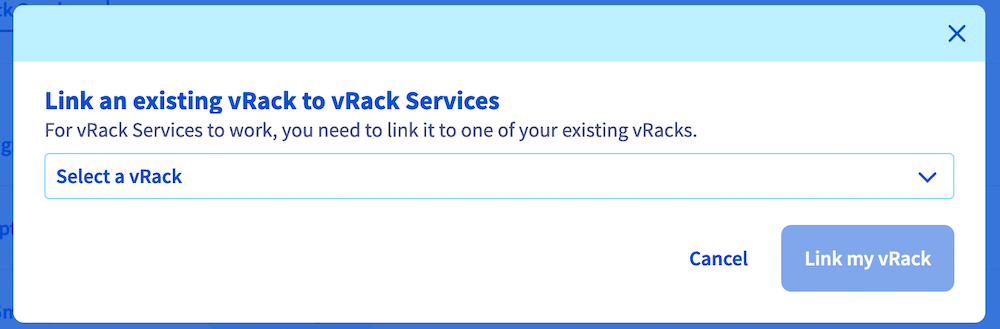
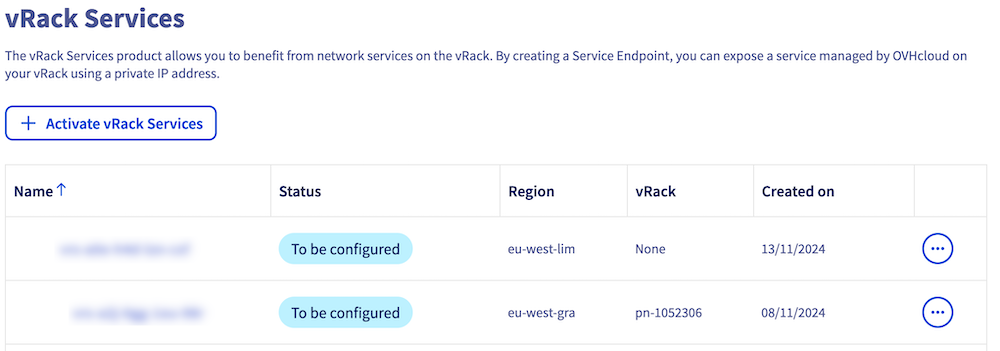
Once the vRack Services activation request has been made, you will be taken to the list of vRack Services. You can associate a vRack with a vRack Services directly from this page.
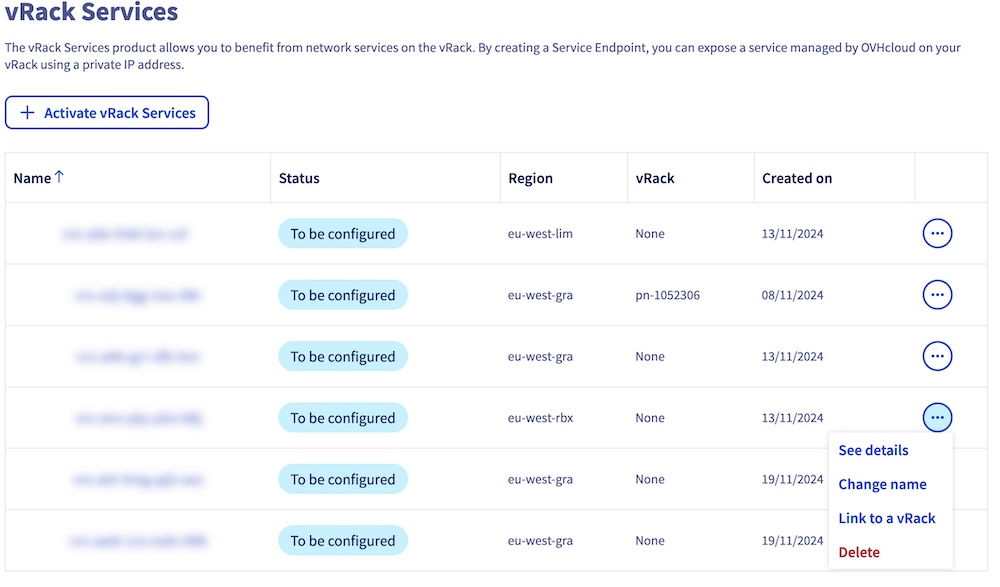
Connecting to a vRack is simple, just select the vRack you want from the list here.
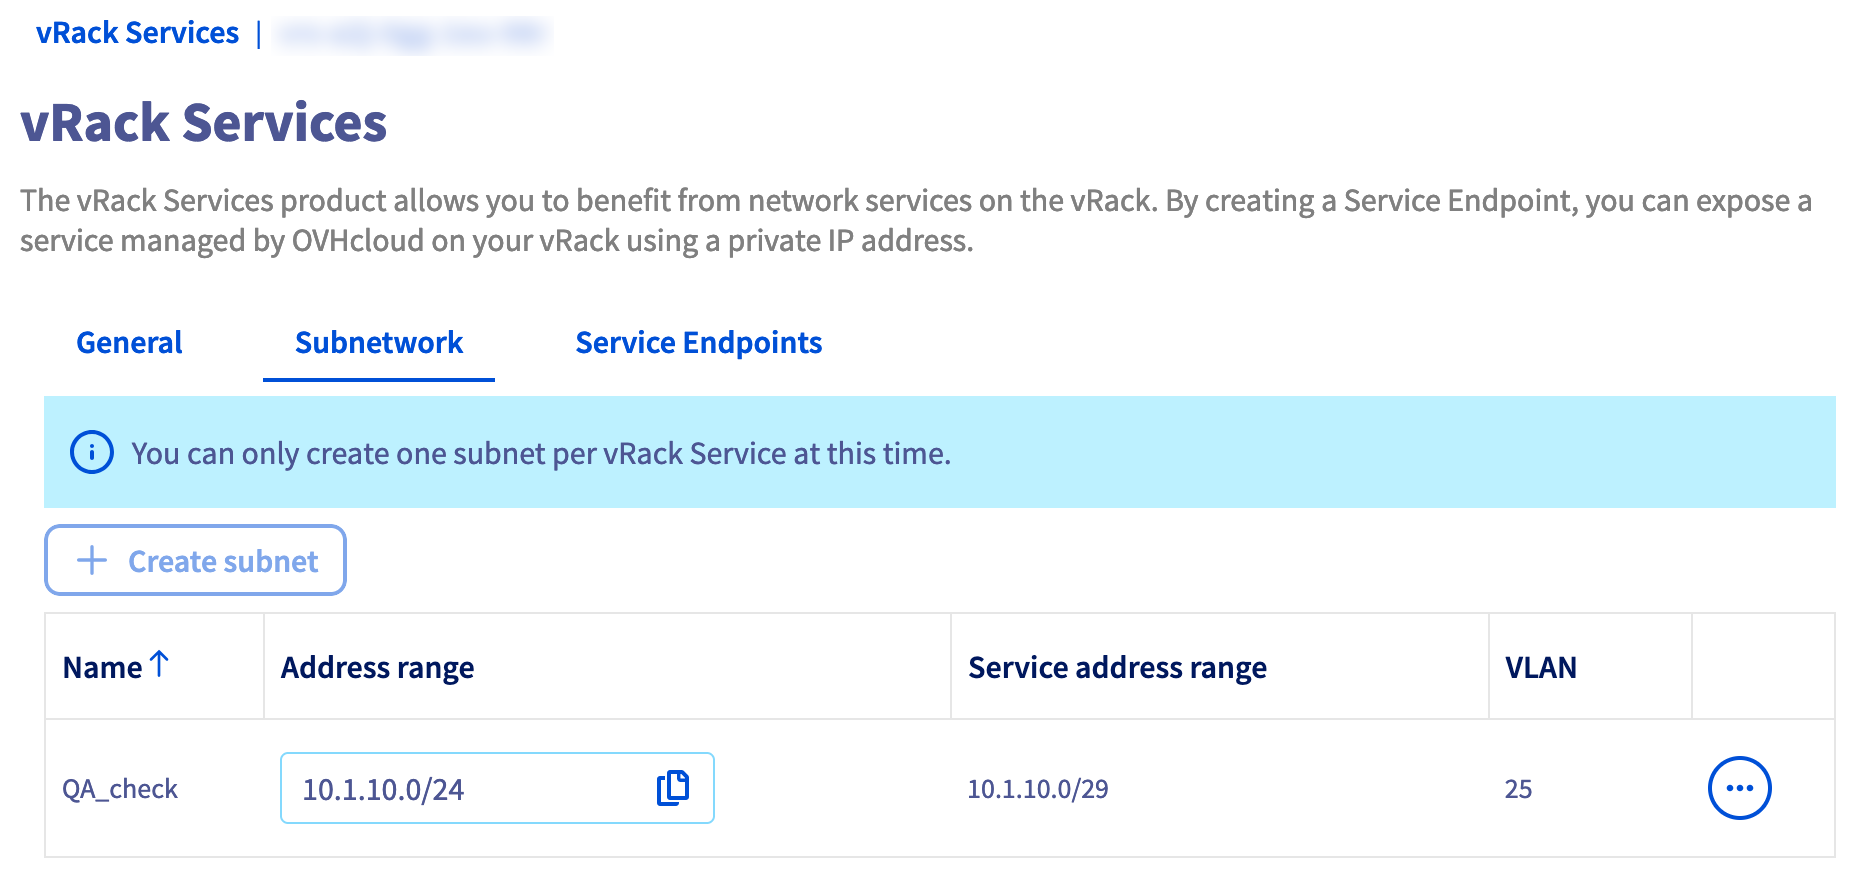
Creating a subnet
To create a subnet, you need to enter 4 pieces of information:
- Its name.
- Its address range.
- The service range : the address range reserved for managed services.
- This range must be a subset of the subnet address range and its size must be between /27 and /29.
- Addresses in this range must not be used by other nodes connected to the vRack.
- A VLAN on which you can expose this subnet. You can choose not to have a VLAN.

If not, you will be prompted to enter the VLAN number.
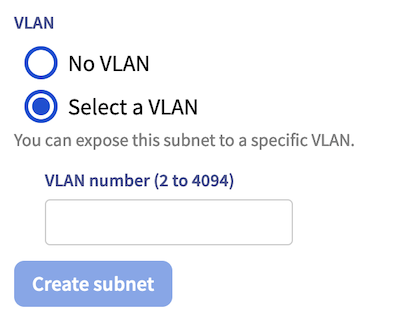
After a short setup time, you will be able to view and, most importantly, manage this subnet by going to this tab.
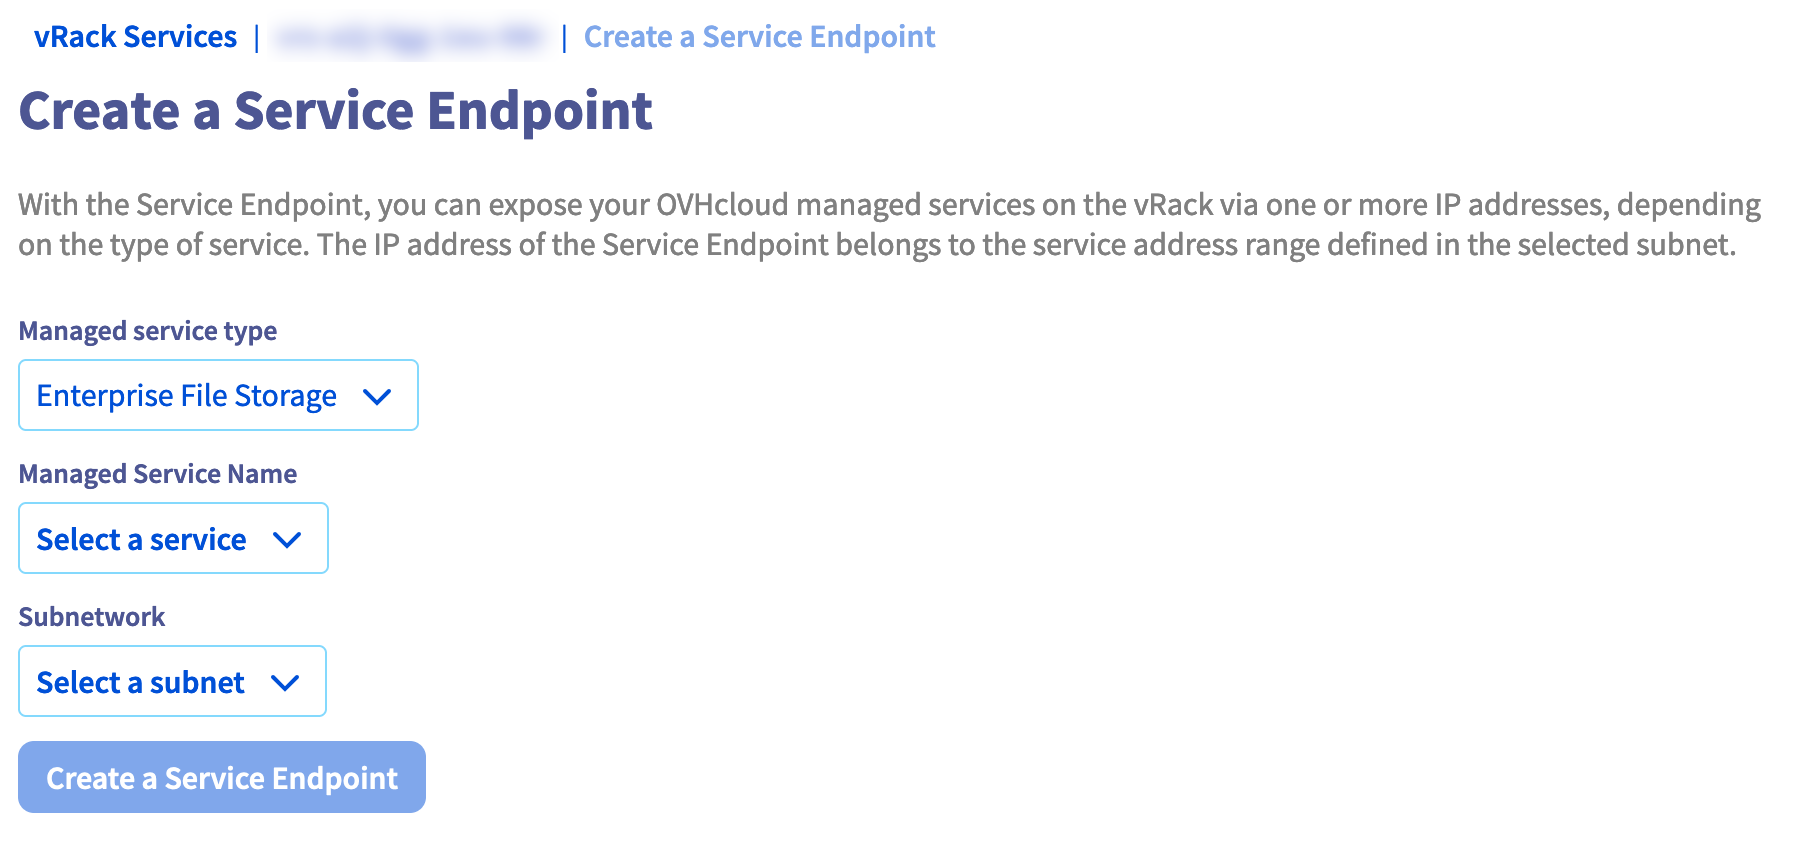
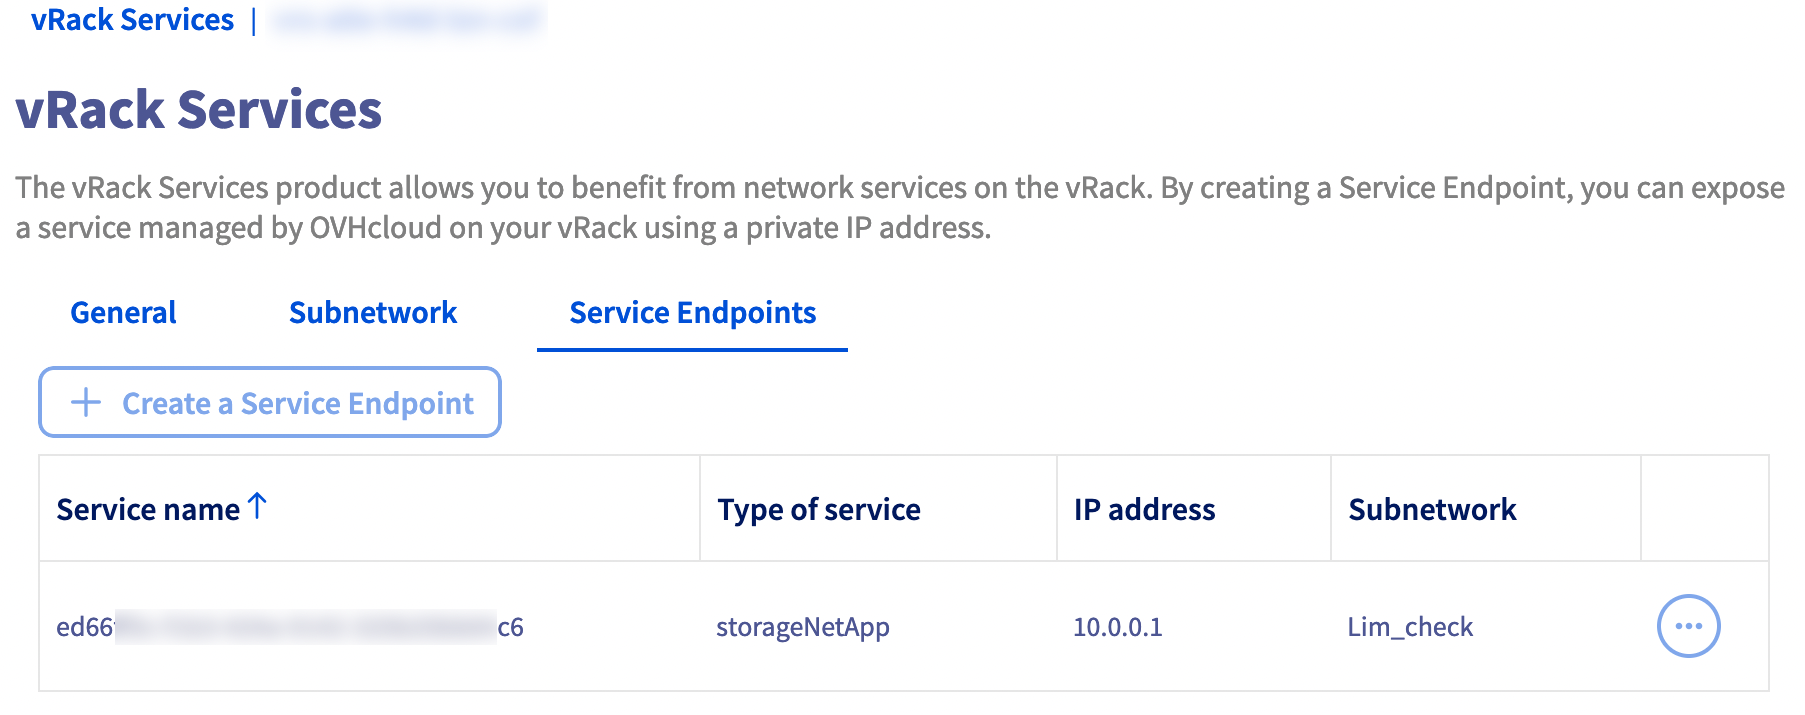
Creating a Service Endpoint
The actions to be taken are very simple. All you need to do is enter 3 pieces of information:
- The type of service to be managed.
- The name of the managed service.
- The desired subnet.
Once you have requested the creation of the Service Endpoint, the list of Service Endpoints will be presented to you. A banner will display the creation status of your Service Endpoint.
Within a few moments, your new Service Endpoint will be configured and available.
List of your vRack Services
This page lists the various vRack Services that have been declared:
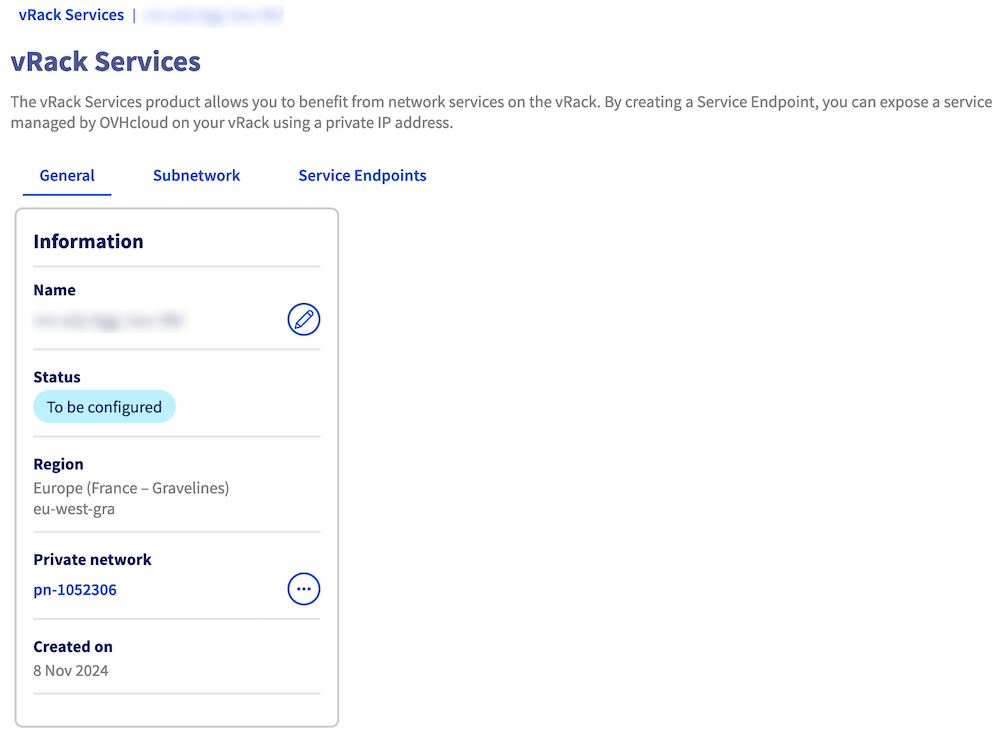
Overview
- This first tab contains all the general information related to the selected vRack Services.
-
The
Subnettab, which contains no information when a Services vRack is being created, lists the subnets created and available for the selected vRack Services. -
The
Service Endpointstab (which does not contain any information when a Services vRack is being created) contains the list of Services Endpoints created and available for the selected vRack Services.
Note that in order to create a Service Endpoint, you must first go through the subnet creation phase.
Via the OVHcloud API
This section covers the actions that can be performed using the OVHcloud API. This includes creating subnets and Service Endpoints, associating vRack Services with a vRack, and managing these services with detailed instructions. These actions highlight the operational capabilities of vRack Services and how they can be used to enhance and secure your network infrastructure.
You must first authenticate via this page.
Actions:
1. Listing vRack Services
First, you need to list your vRack Services to get the ID of the vRack Services on which you want to perform your actions.
Here is the command line :
The ID used in our example is vrs-a8y-v9a-x5m-f4u
2. Listing all managed services that are eligible for the vRack Services in question
Here is the command line :
The IDs of the managed services used in our example below are as follows:
urn:v1:eu:resource:storageNetApp:examples-26ca-4fa4-a53e-79c2d0948z45urn:v1:eu:resource:storageNetApp:examples-9f3b-43a9-8908-c7ab1ac7e58f
3. Requesting vRack Services configuration updates
This is the only route that manages any updates to the vRack Services configuration. It works as follows :
- You define a new target specification in the body of the request.
- If this specification is validated, you get the resource back with the updated
targetSpecandchecksumvalues. - The request is processed by one or more asynchronous tasks aimed at reconciling the current state with the
targetSpec.
The checksum is useful in two cases:
- Preventing conflicts during updates: When you want to update a resource, it is a good idea to follow two steps. First, make a
GETrequest to retrieve the currentchecksumof the resource. Next, you can apply the changes you want to thetargetSpec. When you submit yourPUTrequest, the initialchecksumis also sent. If the resource has been modified in the meantime, your request will be denied. This step is crucial because it avoids overwriting changes that have been made since you last viewed. This ensures data integrity and consistency. - Monitoring the status of requests: Once your
PUTrequest has been accepted, we recommend monitoring regularly the status of the resource withGETrequests to check theresourceStatus. This practice allows you to confirm that your request has been processed and is considered complete when theresourceStatusindicatesREADYor thechecksumis different from the one returned by your initialPUTrequest. If thechecksumdiffers, this means not only that your request has been processed successfully, but also that another request has been accepted and processed just after yours for the same resource.
Configuration without interruption*
The request can combine any of the following actions without interruption (i.e. the service will not be interrupted during the update):
- Update the display name of the vRack service
- Create a subnet
- Delete a subnet with no Service Endpoints
- Update a subnet:
- Update the display name
- Create one or more Service endpoints
Note that a Subnet with multiple Service Endpoints can be created in the same request body.
Note that deleting a Subnet will also delete the embedded Service Endpoints.
Non-transparent configuration actions
Modifying the Subnet characteristics listed below will cause a service interruption while the update is being processed. This is because they are interpreted as deleting the existing subnet and creating a new subnet with the characteristics provided.
The IPs assigned to the managed services will be re-elected and may therefore change:
- changes to the Subnet ServiceRange
- changes to the Subnet Vlan
- changes to the Subnet CIDR
- delete a Subnet with Service Endpoints
- delete one or more Service Endpoints
The Endpoint Services of the integrated services will also be deleted and recreated, which implies fluctuating accessibility in the vRack for all the managed services concerned.
The vrackId is a read-only attribute because the vRack/vRackServices association is managed by the vRack API.
4. Complete example, for a given vRack Services, of modifying its displayName and attaching an Endpoint Service to it
For this section, please read the Actions section above.
Step 1 - Get the checksum and targetSpec of the given vRack Services:
Action formulated with a GET :
Output:
Step 2 - Change the displayName and attach an Endpoint Service to it:
Action formulated with the PUT - Update in progress:
Output:
Notable points:
targetSpecupdated with the request and we also have a newchecksum.resourceStatuschanged toUPDATING.currentTasks: asynchronous processing in progress
Step 3 - A final GET to check that the asynchronous actions have been completed:
Expected result: a vRack Services with resourceStatus set to READY. If this is not the case, repeat the GET call a few moments later.
Action formulated with GET:
Output:
Notable points:
currentStateis completely aligned with thetargetSpecsoresourceStatuschanges toREADY.- The
productStatusis set toACTIVEbecause the current vRack Services configuration allows the Endpoint Service to be accessed from the vRack. - The IP allocated to the Managed Service is
10.120.0.1. - There are still 2 assignable IPs in the ServiceRange.
Constraints and limitations
Please note that creating vRack Services, Subnets, or Service Endpoints on a production vRack does not cause any service interruption.
vRack Services
- A vRack Services is attached to a single region.
- Within a vRack, it is not possible to create several vRack Services in the same region.
- A maximum of 20 vRack Services can be created per user account.
- Several vRack Services can be associated with the same vRack. This way, a customer can make the managed services accessible from different regions.
- The managed service to be exposed must be part of the same region as the vRack Services.
Note : Bandwidth capacity between the managed service and the hosts consuming the service is not guaranteed directly by the vRack Services product. Contractual bandwidth guarantees are provided by OVHcloud services such as managed services (e.g. Enterprise File Storage) or services consuming the managed service (e.g. bare metal servers, Hosted Private Cloud clusters, Public Cloud instances).
Subnet
- The subnet address range must conform to RFC 1918.
- The length of the subnet address range is fixed size /24.
- Modifying the subnet range will cause an interruption of the associated service endpoints (during the reconfiguration period).
- The valid VLAN ID range is from 2 to 4094. The value
nullis allowed (no VLAN / untagged). - Each subnet address range must be unique for a given vRack Services. Overlaps are detected and discarded when the subnet is created.
- Modifying the VLAN ID will cause an interruption of the associated service endpoints (during the reconfiguration period).
- Each VLAN ID must be unique for a given vRack Services.
- The first and last IP addresses of the subnet cannot be used and therefore must not be configured on any of the servers connected to the vRack associated with the vRack Services.
Service Range
- The range must be a subset of the subnet range.
- The range size is between /27 and /29.
- It is not possible to change the address range of the managed service once it has been created.
Service Endpoint
- To ensure subnet consistency, the Service Endpoint creation request will be rejected if the pool of remaining IPs on the subnet does not match the number of IP addresses required by the managed service.
- Service Range IP addresses are allocated to one managed service at a time.
Go further
If you need training or technical assistance to implement our solutions, contact your sales representative or click on this link to get a quote and ask our Professional Services experts for assisting you on your specific use case of your project.
Join our community of users.

