How to deploy and verify an OpenNebula Hosted Cloud on Bare Metal servers
37 Ansichten
Introduction
OpenNebula is a powerful, open-source Cloud Management Platform (CMP) designed to manage and provision virtualized infrastructure.
Acting as an orchestrator, it turns a physical infrastructure into a managed Infrastructure as a Service (IaaS) cloud, accessible via a unified control interface. It supports major hypervisors and allows for hybrid deployments by integrating with Public Cloud providers, such as OVHcloud.
The deployment of OpenNebula on OVHcloud infrastructure is validated as part of the OpenNebula Cloud-Ready Certification Program.
To streamline this process, OpenNebula provides a set of Ansible playbooks called Hosted Cloud OVHcloud for automated deployment and verification. You will use these playbooks throughout this guide.
Objective
This guide details the complete process of creating an OpenNebula Hosted Cloud on OVHcloud, including the custom architecture and hardware specifications.
Following this guide, you will be able to:
- Request necessary resources using your OVHcloud account,
- Prepare the Ansible deployment project with all required configuration,
- Perform OpenNebula deployment over these resources,
- Check the operation with an automated verification procedure.
Requirements
- Two dedicated servers from the Scale or High Grade ranges.
- An active vRack service.
- A public block of Additional IP addresses, sized according to your needs.
OVHcloud Control Panel Access
- Direct link: Dedicated Servers
- Navigation path:
Bare Metal Cloud>Dedicated servers> Select your server
The reference OpenNebula deployment uses the following configuration:
| Hardware specifications | |
|---|---|
| Processor | AMD EPYC GENOA 9124 - 16 cores / 32 threads - 3GHz/3.6GHz |
| Memory | 128GB DDR5 ECC 4800MHz |
| Storage | 2x SSD NVMe 960GB Datacenter Class Soft RAID |
| Public bandwidth | 2 adapters, 5Gbit/s unmetered and guaranteed |
| Private bandwidth | 2 adapters, 50Gbit/s unmetered and guaranteed |
| Software specifications | |
|---|---|
| OpenNebula version | 7.0 |
| Frontend node count | 1 |
| Frontend node configuration | Ubuntu 24.04 LTS |
| Virtualization node count | 2 (First node co-hosts frontend application) |
| Virtualisation node configuration | Ubuntu 24.04 LTS - KVM Hypervisor |
Servers from the Scale range are suitable for small to medium cloud environments.
Servers from the High Grade range are more appropriate for heavier production workloads.
For more information about scaling, please consult the OpenNebula guide for Scalability Testing and Tuning.
Instructions
Step 1 - Setting up your OVHcloud infrastructure
First, you need to install Ubuntu 24.04 LTS on both of your dedicated servers, by following the instructions in this guide.
Subsequently, add both servers to your vRack service by following step 2 of this vRack configuration guide.
Finally, from the OVHcloud Control Panel, open the Network section, then select Public IP Addresses under Public Network. Once you have reached the IP management interface, click on the Order IPs button near the top of the page. Choose the IP version, then select the vRack your servers are attached to, and the region where those servers are hosted.
Important: To ensure functionality, please make sure that the IP block you ordered is routed to the vRack attached to the servers, and not used as a classic failover configuration.
If you are unsure or need more information, please consult the following guide: Configuring an Additional IP block in a vRack.
Step 2 - Collecting the Bare Metal & Network settings
Before starting the OpenNebula deployment, gather all parameters required for the automation process. Update the inventory values in the Hosted Cloud OVHcloud repository with these settings to match the provisioned infrastructure.
For further details on the automated deployment procedure, refer to the following section: Configure and deploy the Hosted Cloud OVHcloud repository.
Each server is equipped with two network adapters dedicated to public connectivity and two adapters for private connectivity. The two interfaces within each segment will be bonded using the default LACP parameters for Scale and High Grade servers.
The Public network bond is exclusively for OpenNebula service management, including cluster deployment, administration via the Sunstone Web UI or OpenNebula CLI, and connectivity between the Front-end and Virtualization hosts.
The Private network bond provides network to virtual servers, leveraging the OVHcloud vRack. This bond supports private networking, which is segmented using 802.1Q VLANs, and enables public IP addressing for virtual servers. To assign public addresses to virtual servers, a dedicated IP range must be purchased and routed via the vRack. This setup ensures cluster management traffic is isolated from virtual machine networking.
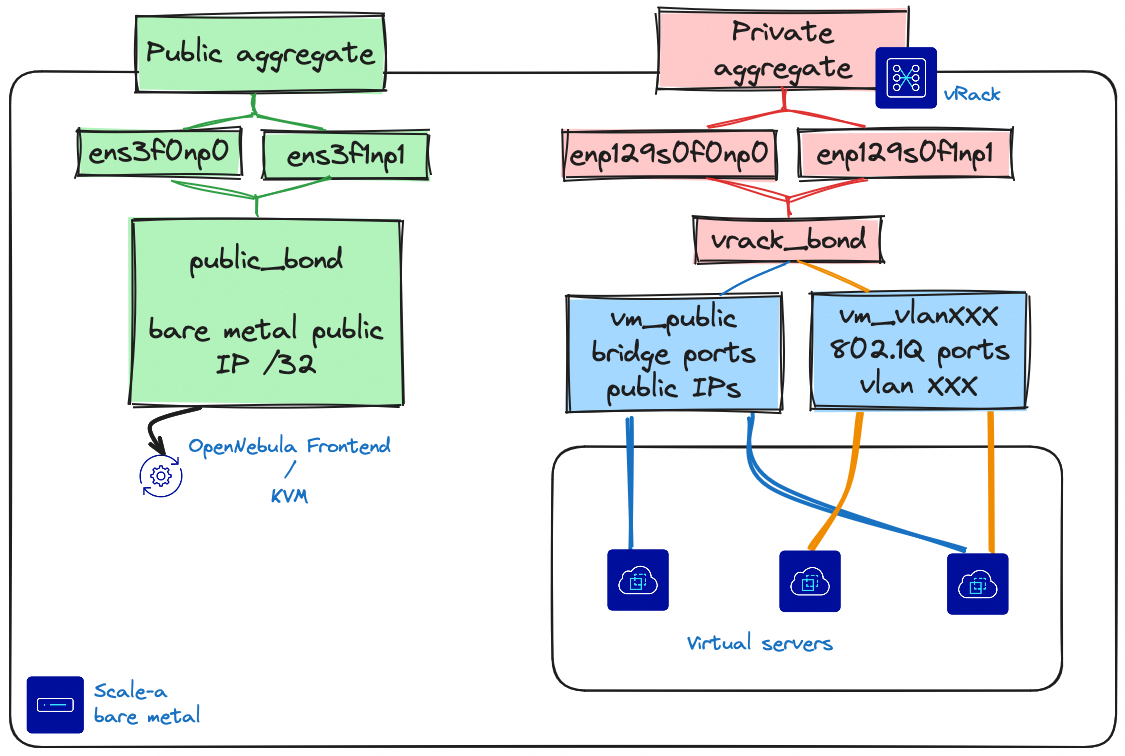
This guide assumes the default bonding setup. If you change the network mode (e.g. OLA), please double check that your interface names and bonds are correct before running the playbooks.
For more information about the link aggregation settings, please consult the following guide : Improving Network Resilience on Bare Metal servers.
Bare Metal network settings
Open both management pages for your dedicated servers, and collect the highlighted parameters :
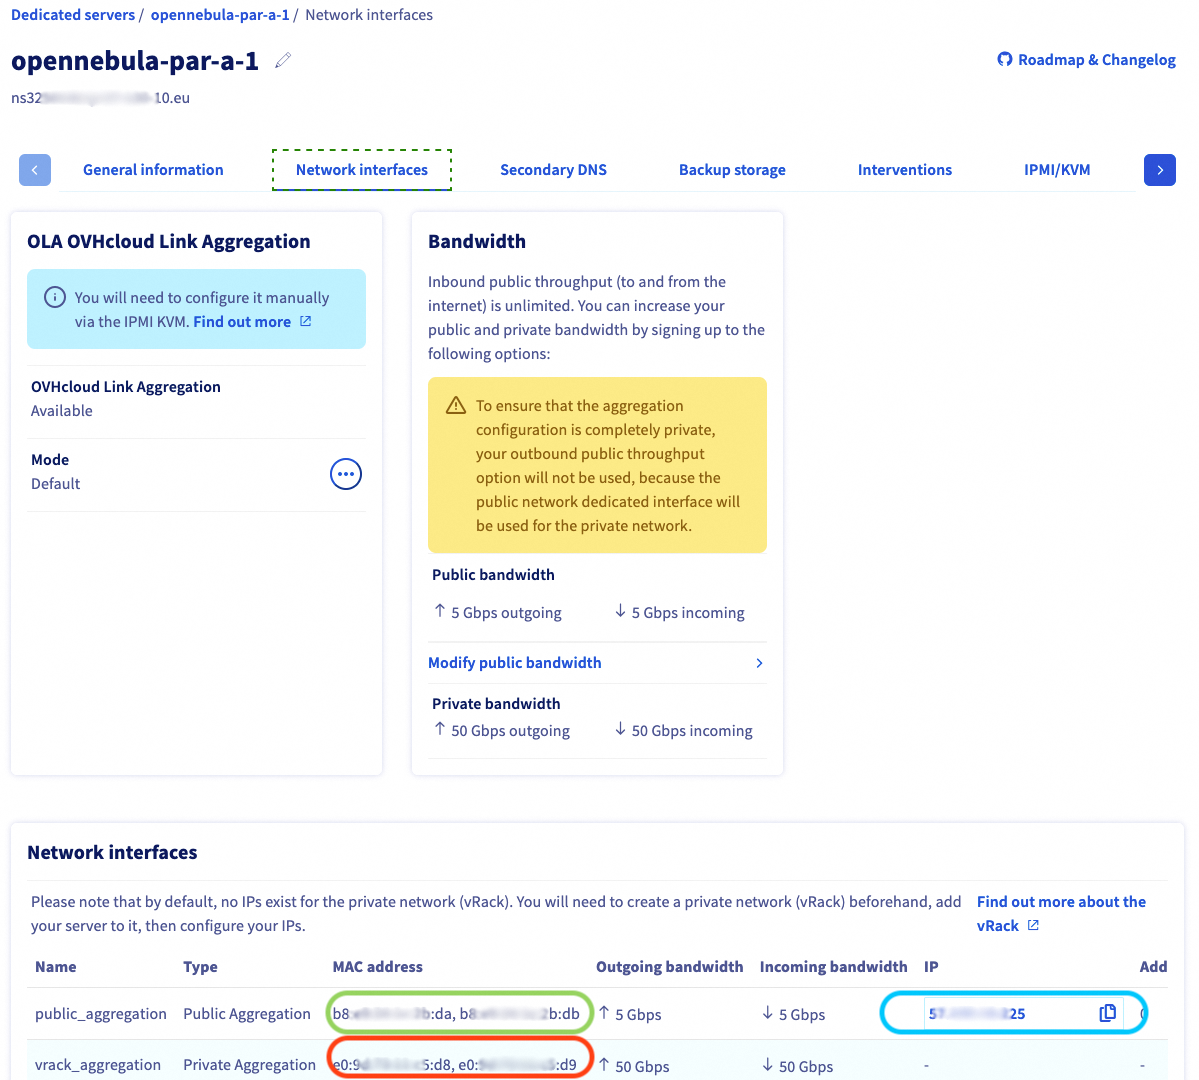
| Description | Variable Names | Comment |
|---|---|---|
| Frontend/KVM Host IP | ansible_host | public_aggregation IP address |
| Frontend/KVM Host public NICs mac addresses | public_nics.macaddress | public_aggregation MAC addresses |
| Frontend/KVM Host private NICs mac addresses | private_nics.macaddress | private_aggregation MAC addresses |
To collect the network adapter names, connect to your dedicated server and execute the ip address command :
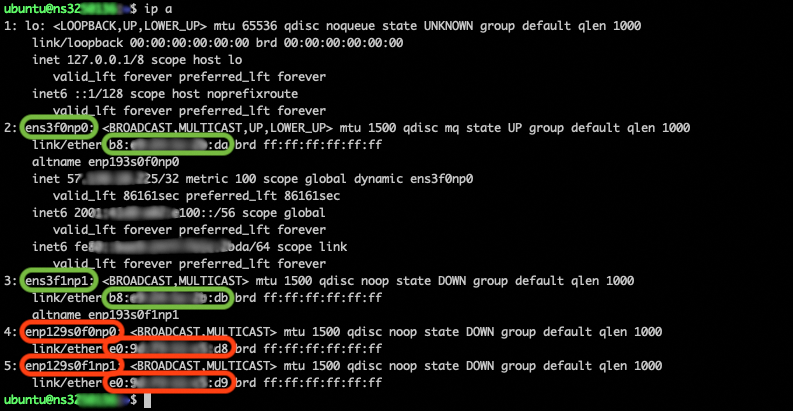
| Description | Variable Names | Comment |
|---|---|---|
| Frontend/KVM Host public NICs name | public_nics.name | public_aggregation network adapter names |
| Frontend/KVM Host private NICs name | private_nics.name | private_aggregation network adapter names |
vRack network settings
Public IP addresses
The public IP block ordered in the previous steps allows to attach direct public connectivity to virtual servers. For a public IP range deployed on vRack, the first, penultimate, and last addresses in any given IP block are always reserved for the network address, network gateway, and network broadcast respectively.
This means that the first usable address is the second address in the block, as shown below:
Declare a bridge network for public IP addresses using all usable addresses of your IP range:
| Description | Variable Names | Files/Location |
|---|---|---|
| VMs Public IP Range, first IP | vn.vm_public.template.AR.IP | Second IP address in the range: 46.105.135.97 in the example |
| VMs Public IP Range, number of usable addresses | vn.vm_public.template.AR.SIZE | Number of usable addresses, range size minus three addresses: 13 in the example |
| VMs Public DNS | vn.vm_public.template.DNS | 213.186.33.99: OVHcloud DNS |
| VMs Public NETWORK MASK | vn.vm_public.template.NETWORK_MASK | IP range netmask: 255.255.255.240 for example for a /28 network |
| VMs Public GATEWAY | vn.vm_public.template.GATEWAY | Penultimate IP address in the range, Network gateway: 46.105.135.110 in the example |
Private IP addresses
On the private network bond, deploy one 802.1Q virtual network per private network. For each virtual network, create a section in the Ansible inventory file, and declare the VLAN ID, IP range and netmask.
| Description | Variable Names | Files/Location |
|---|---|---|
| VMs Private VLAN_ID | vn.vm_vlan*.template.VLAN_ID | VLAN id, between 1 and 4096 |
| VMs Private IP Range, first IP | vn.vm_vlan*.template.AR.IP | First IP address, for example 10.1.10.100 |
| VMs Private IP Range, number of usable addresses | vn.vm_vlan*.template.AR.SIZE | Number of usable addresses, for example 50 fo IP range 10.1.10.100-10.1.10.149 |
| VMs Private NETWORK MASK | vn.vm_vlan*.template.NETWORK_MASK | IP range netmask: 255.255.255.0 for example for a /24 network |
Step 3 - Configure and deploy the Hosted Cloud OVHcloud repository
The deployment uses the OpenNebula Hosted Cloud OVHcloud repository.
The high-level deployment steps are:
- Clone the deployment repository,
- Install the dependencies listed in the Requirements section,
- Update the inventory parameters in the repository with the configuration gathered above,
- Launch deployment commands:
make pre-tasks-ovhcloud: Patch Ubuntu kernel and perform networking setup.make deployment: Deploy OpenNebula.make validation: Validate the automated deployment.
Step 4 - Adding dedicated servers to an active OpenNebula infrastructure
To extend the cloud with new servers:
- Provision the new host as detailed in the Setting up your OVHcloud infrastructure section.
- Collect the necessary configuration parameters, especially the bare-metal network settings.
- Re-execute the deployment and verification commands from the Configure and deploy the Hosted Cloud OVHcloud repository section.
Step 5 - Operate your cloud infrastructure
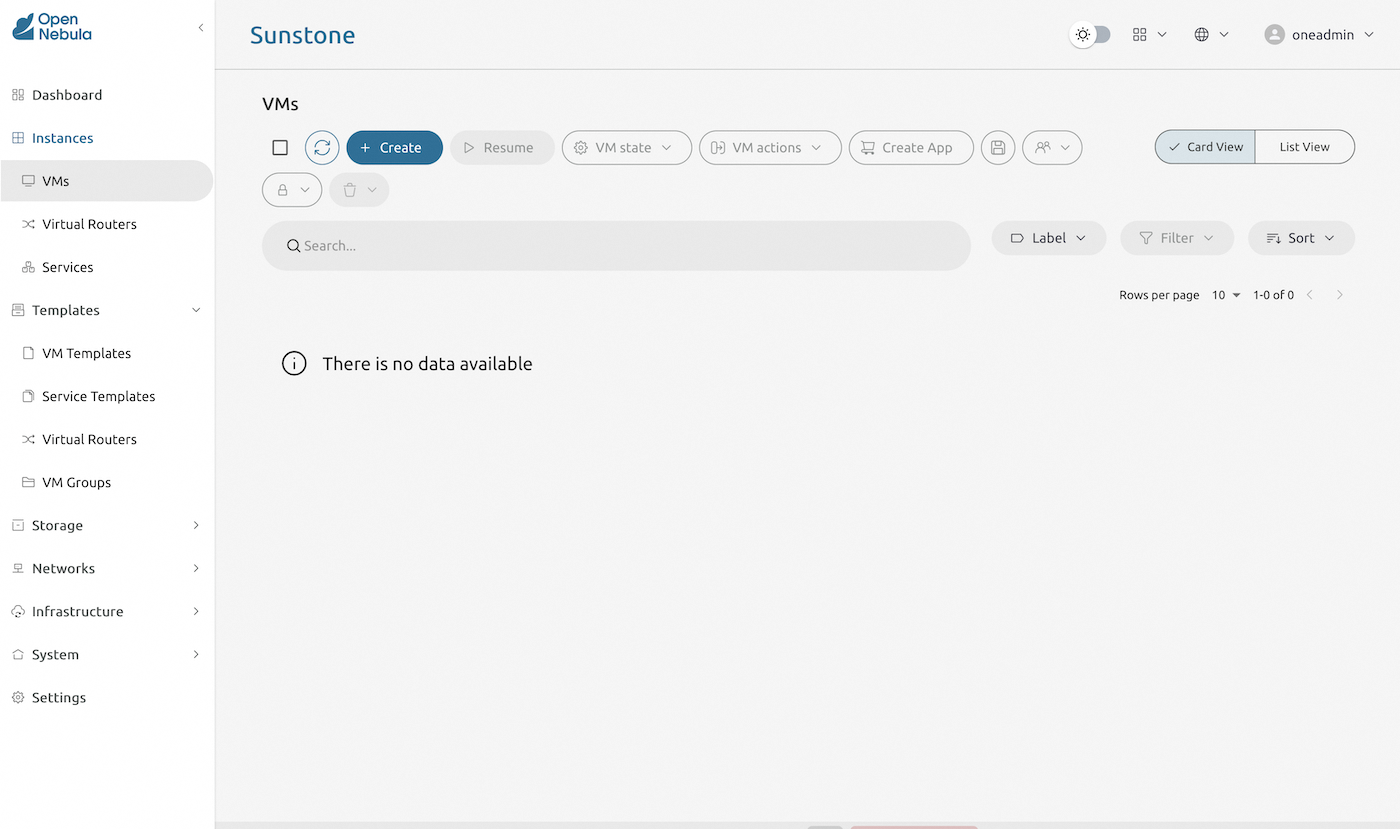
The following section explains how to access a Hosted OpenNebula Cloud Deployment via the web UI, and instantiate and access a virtual machine.
This guide provides the basic steps. If you need a more detailed guide, please refer to OpenNebula public documentation.
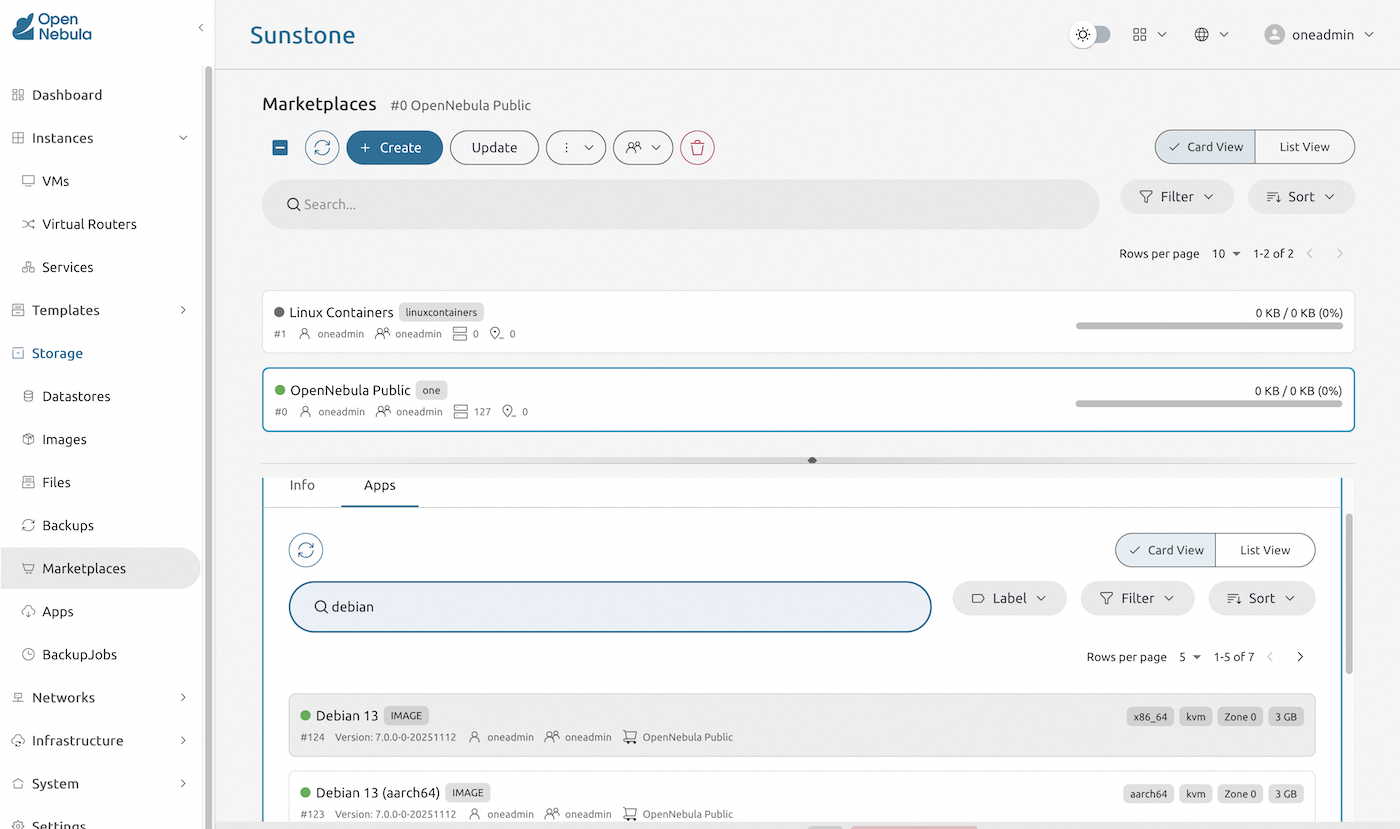
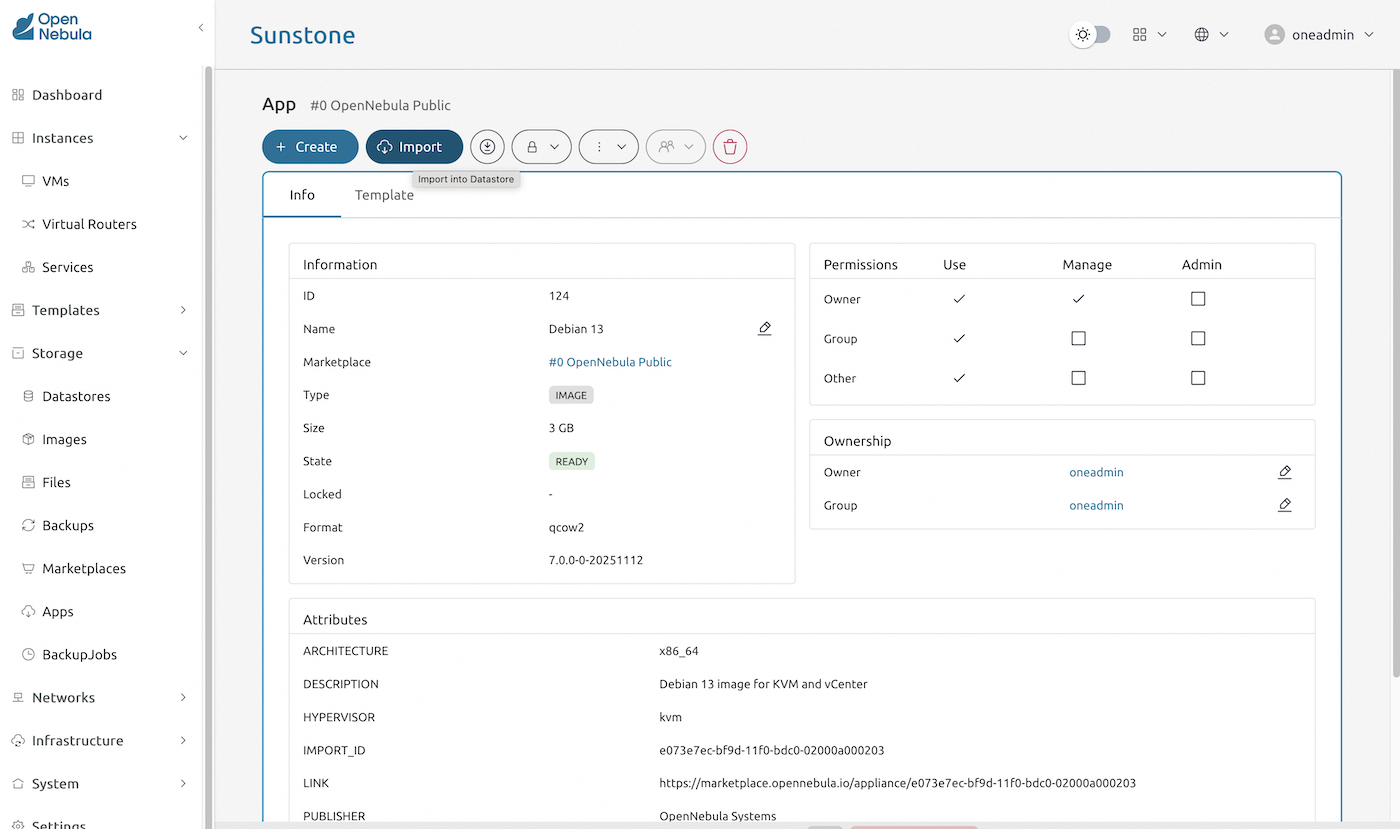
Create a template from OpenNebula Public marketplace
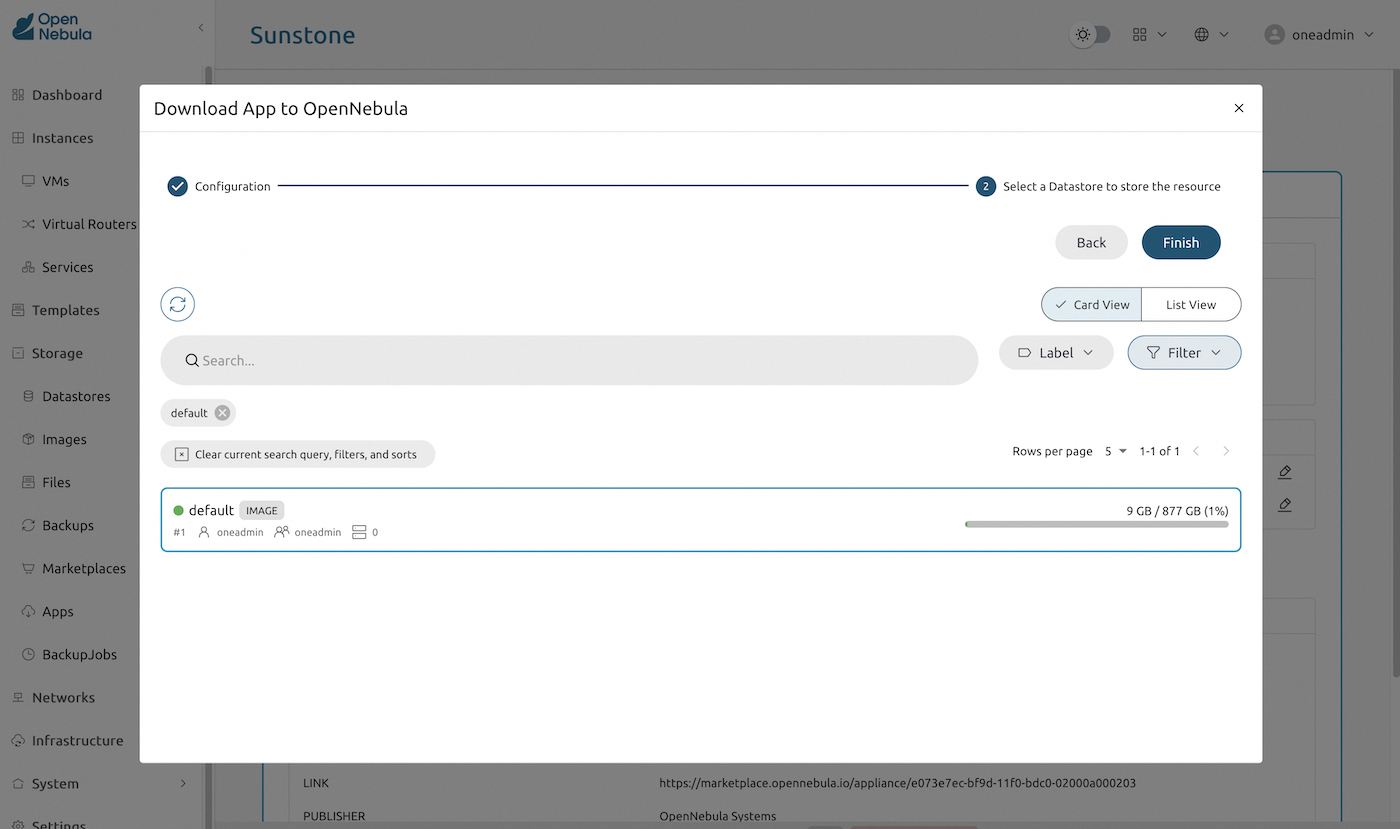
From the OpenNebula Public marketplace, search and import virtual server templates needed for your infrastructure. The example below imports the Debian 13 "Trixie" template:
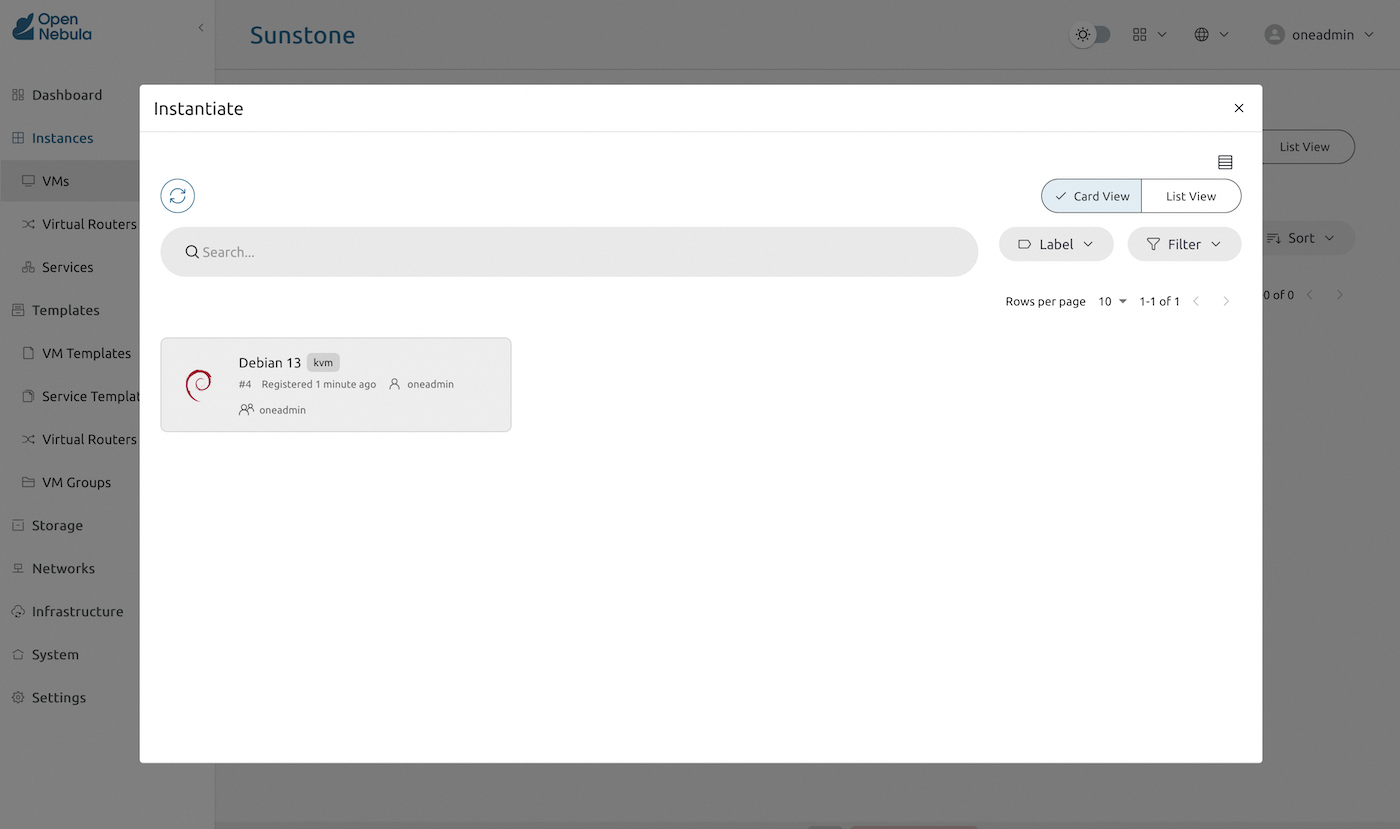
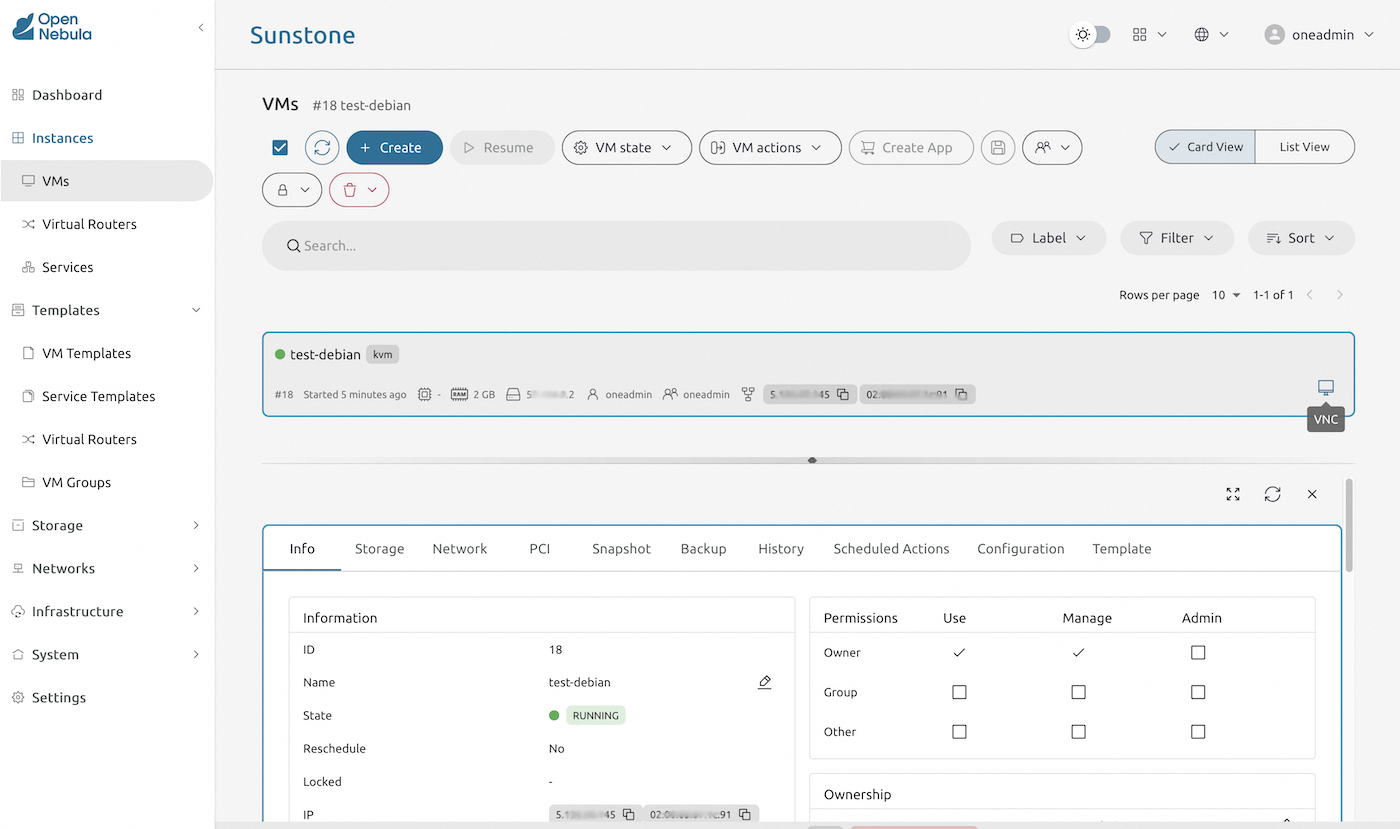
Start a new virtual server
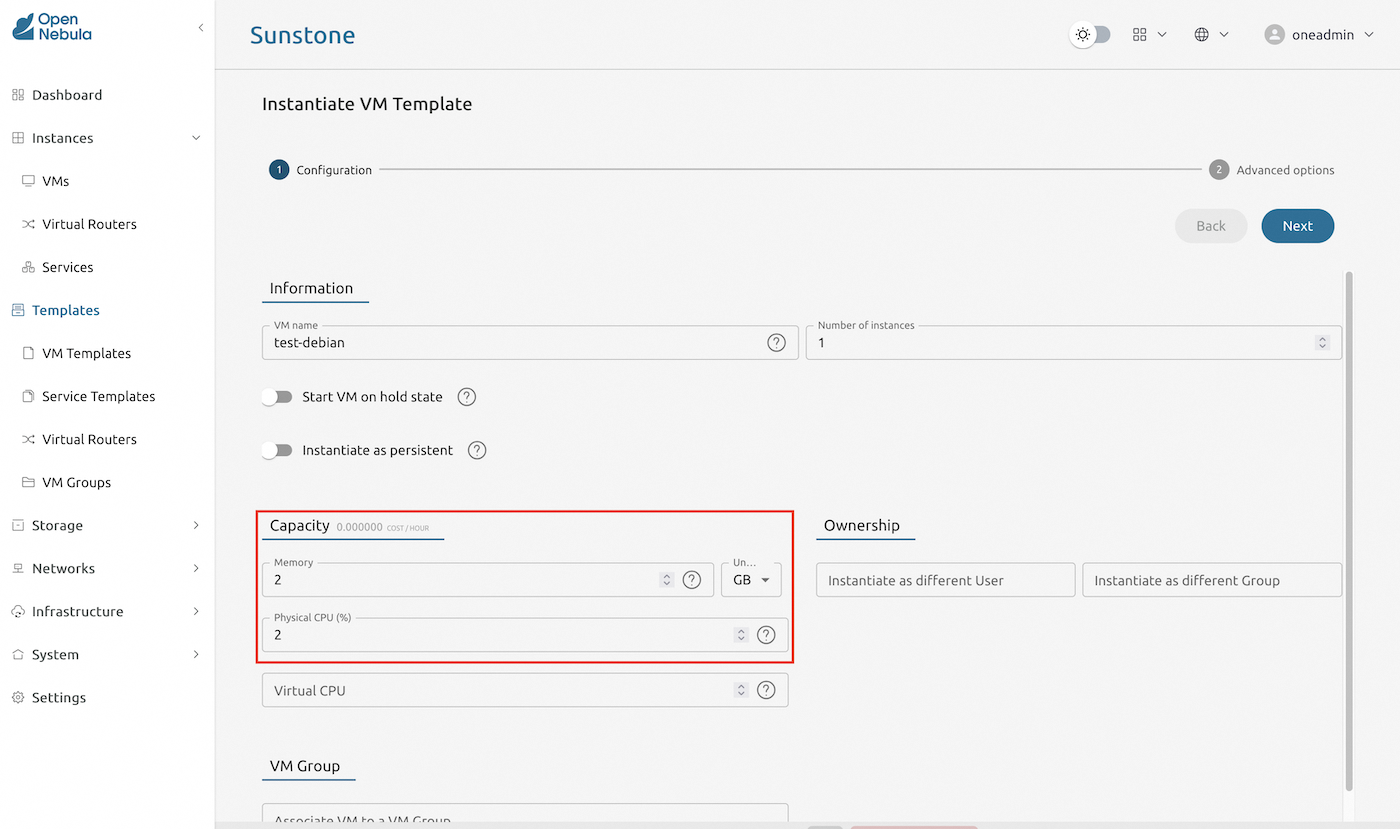
Based on the imported template, create a new virtual server instance.
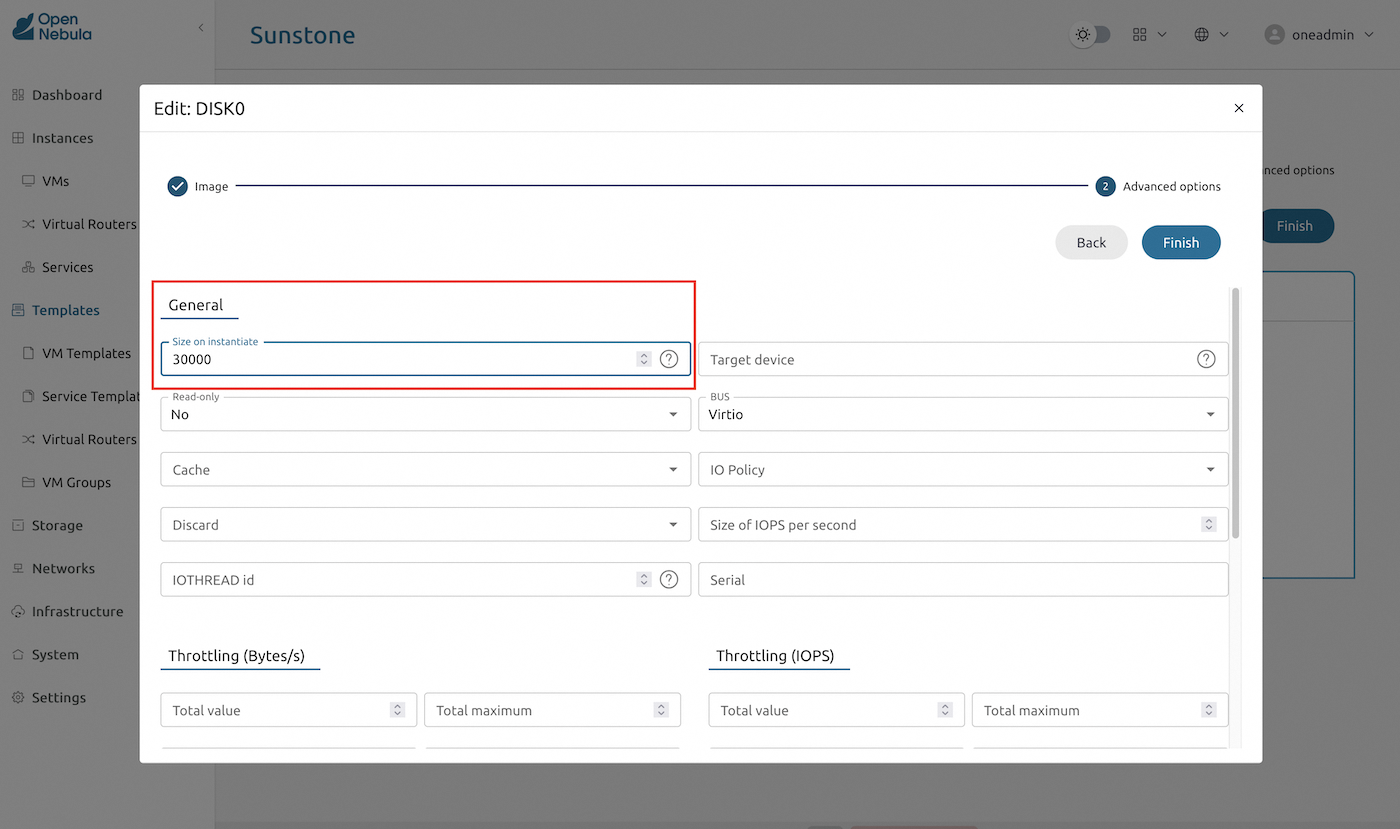
You can adjust disk storage capacity, CPU and RAM allocation during this setup phase.
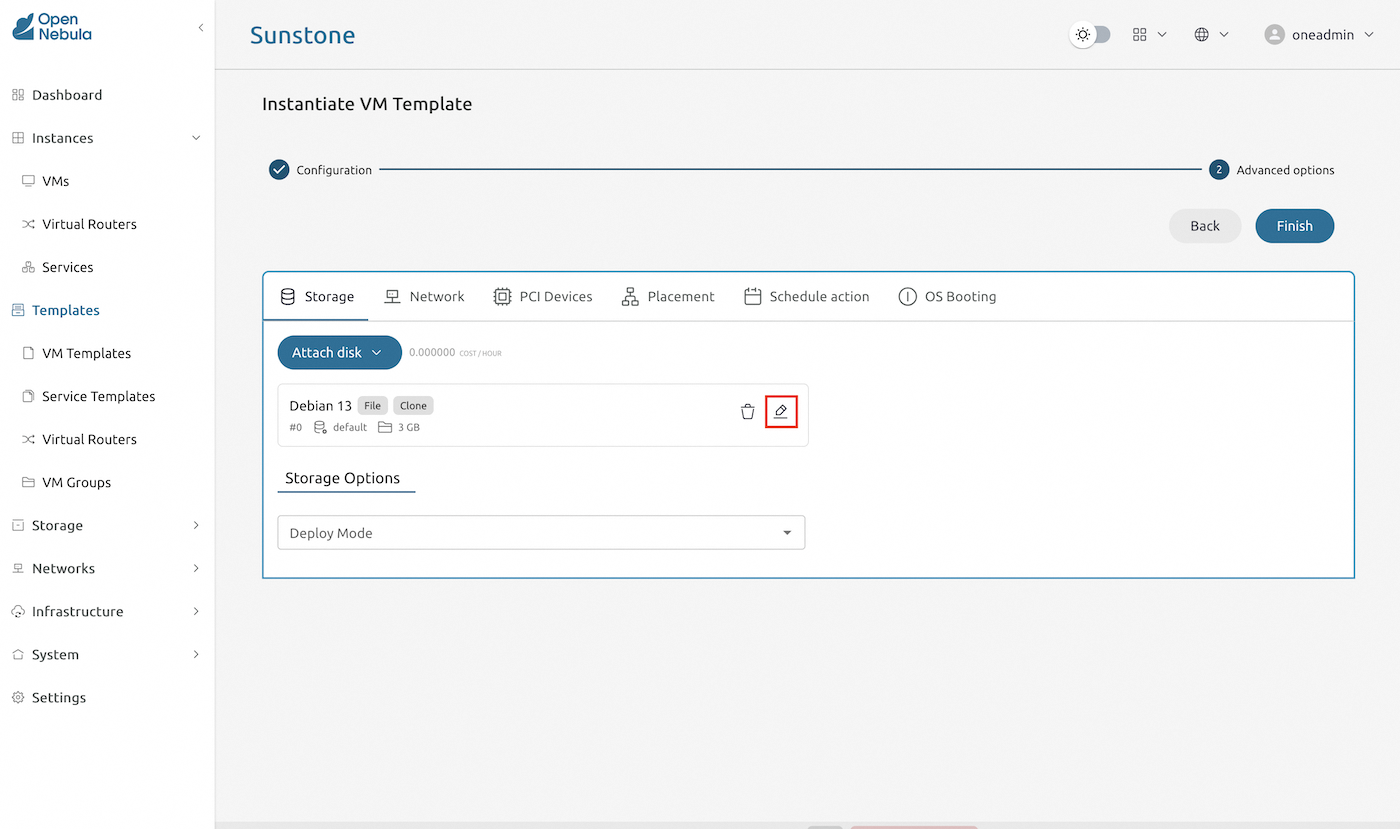
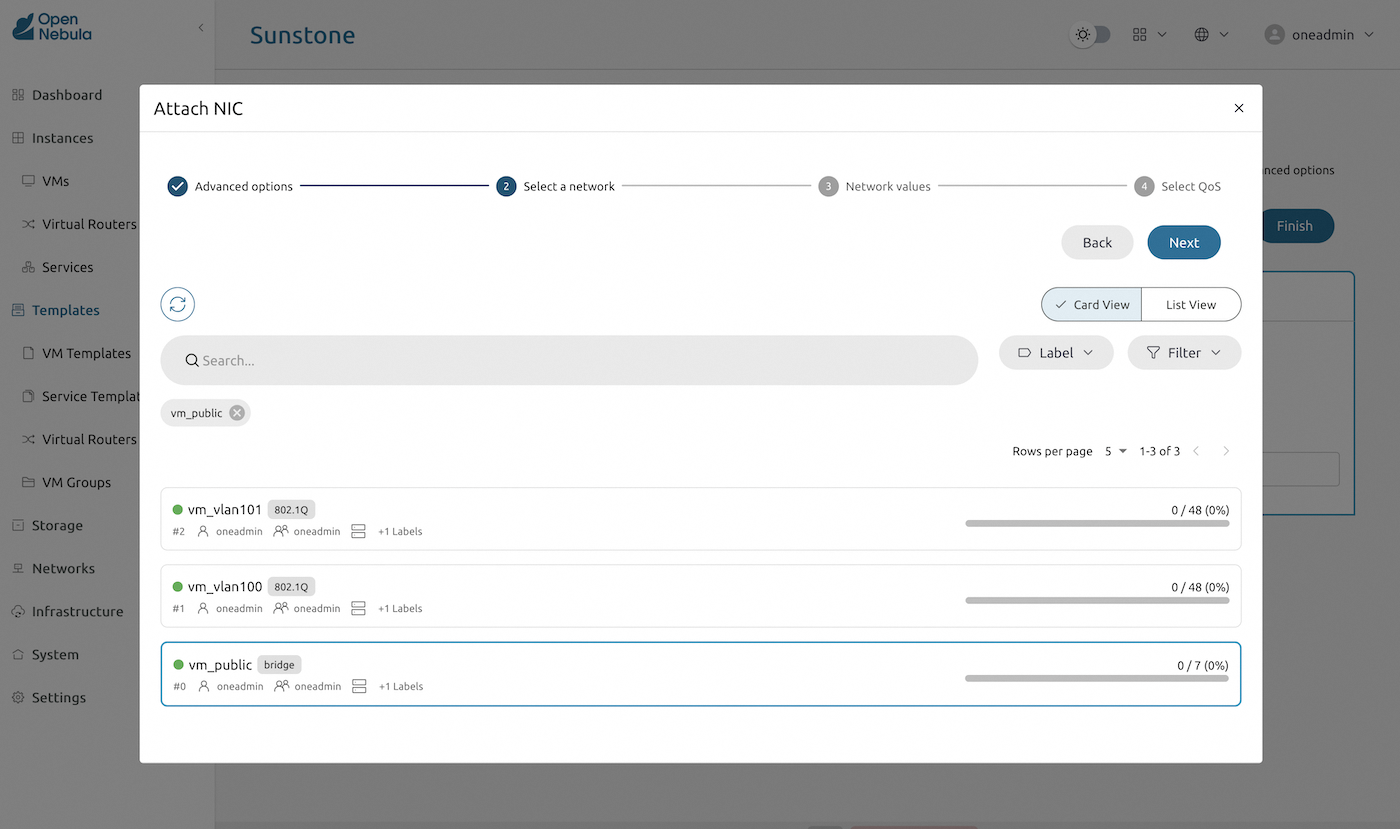
Finally, attach network adapters. In this example, we provide a public IP to this server, based on the public IP range we created during the OpenNebula automated deployment. Without any override, an available IP address from the public range will be picked for this interface.
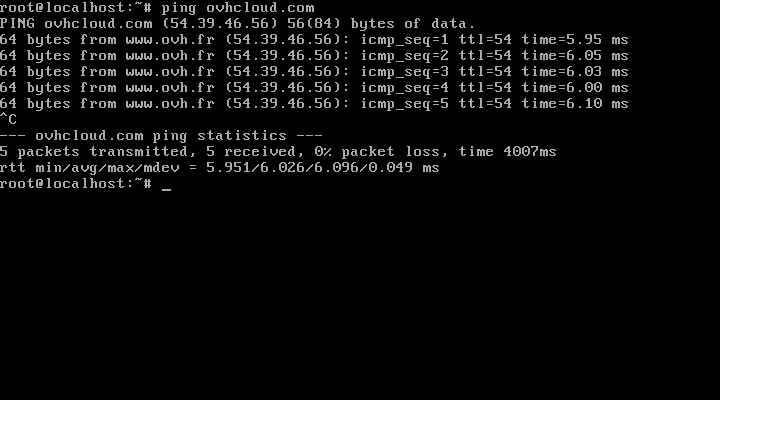
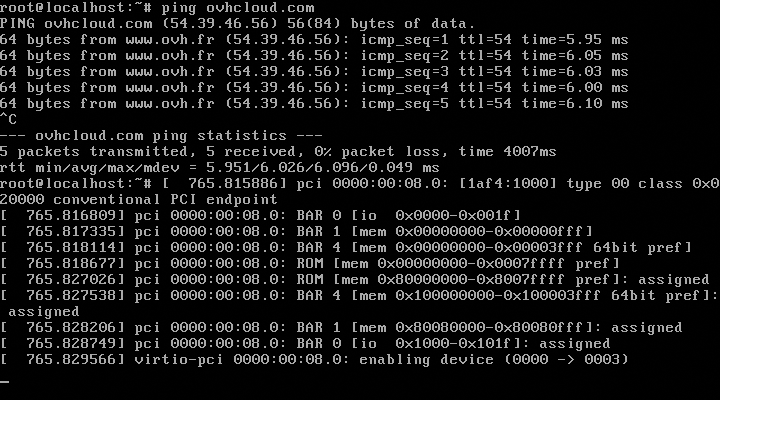
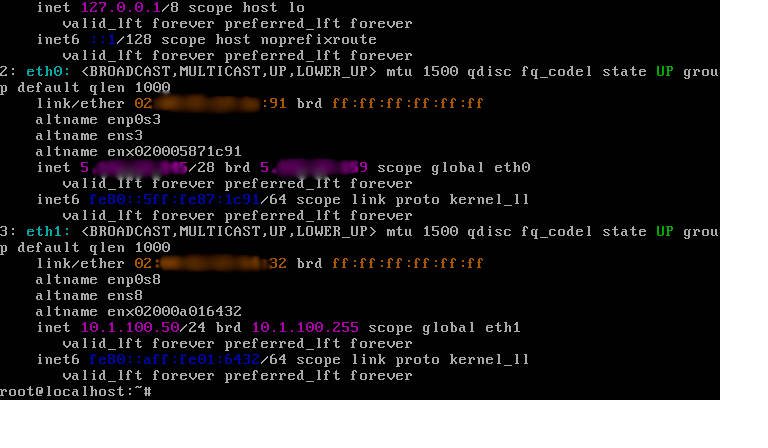
Check connectivity
You can use the virtual server console to check the deployment and the server connectivity. Set up the root password using virtual machine context variables.


Run your virtual server console to validate the deployment.
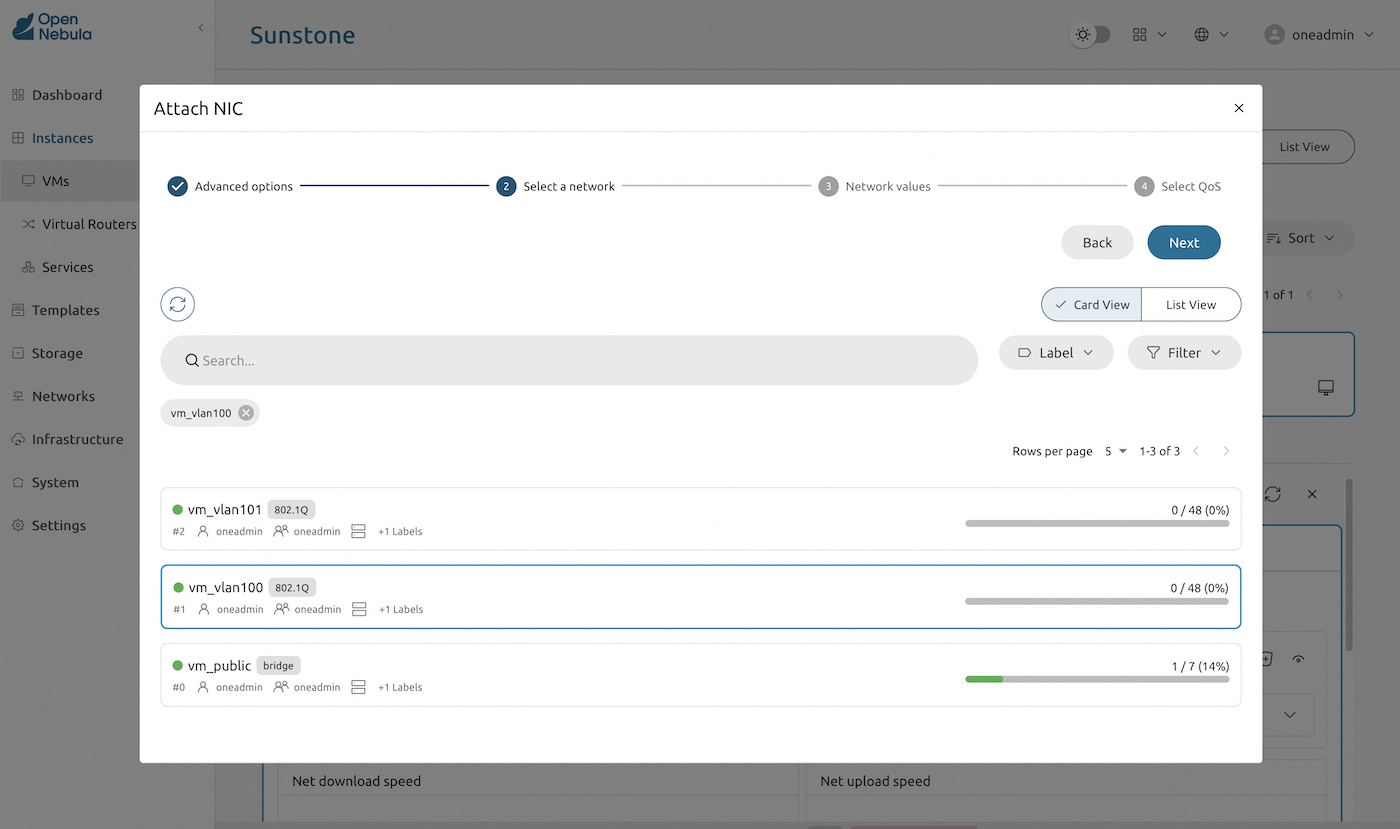
Update virtual servers settings
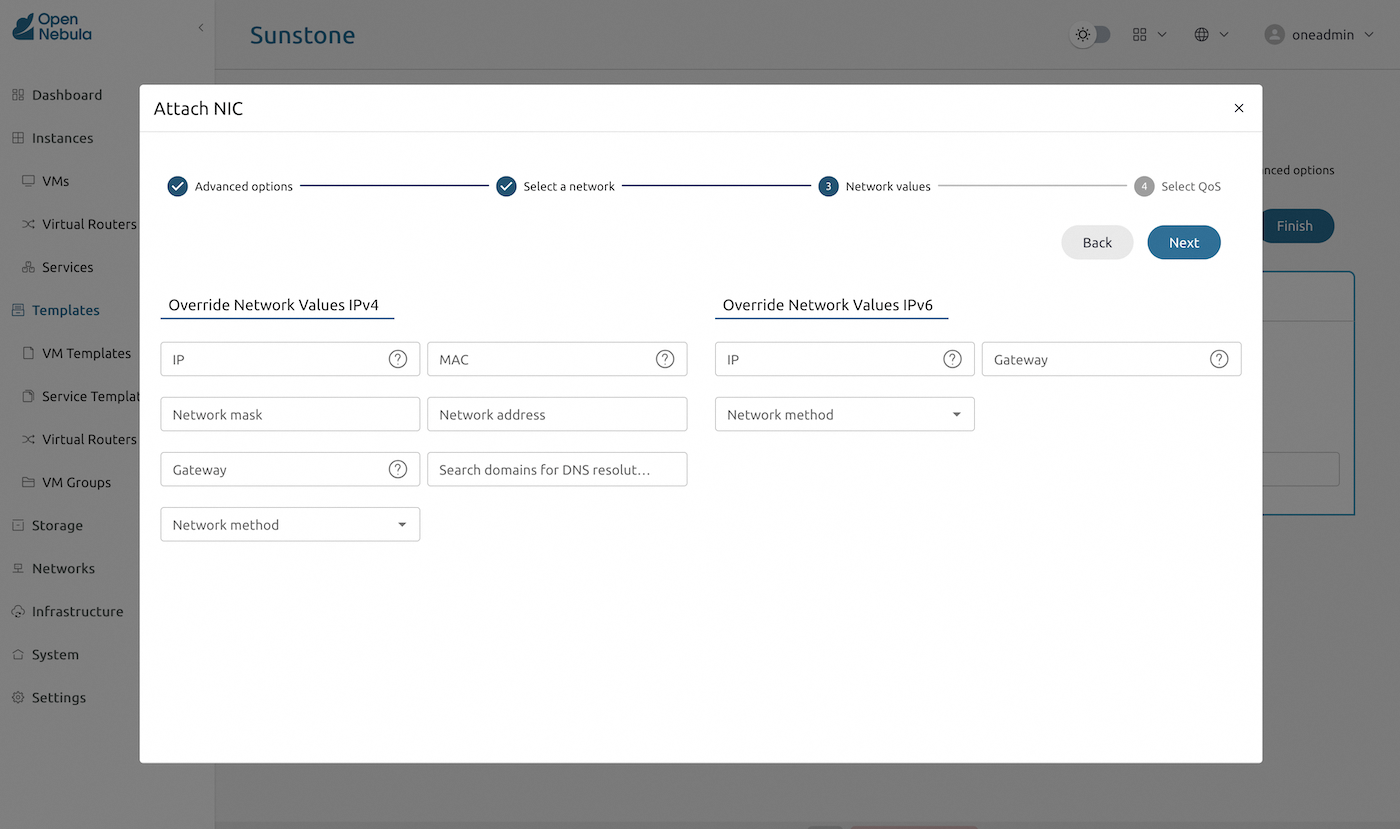
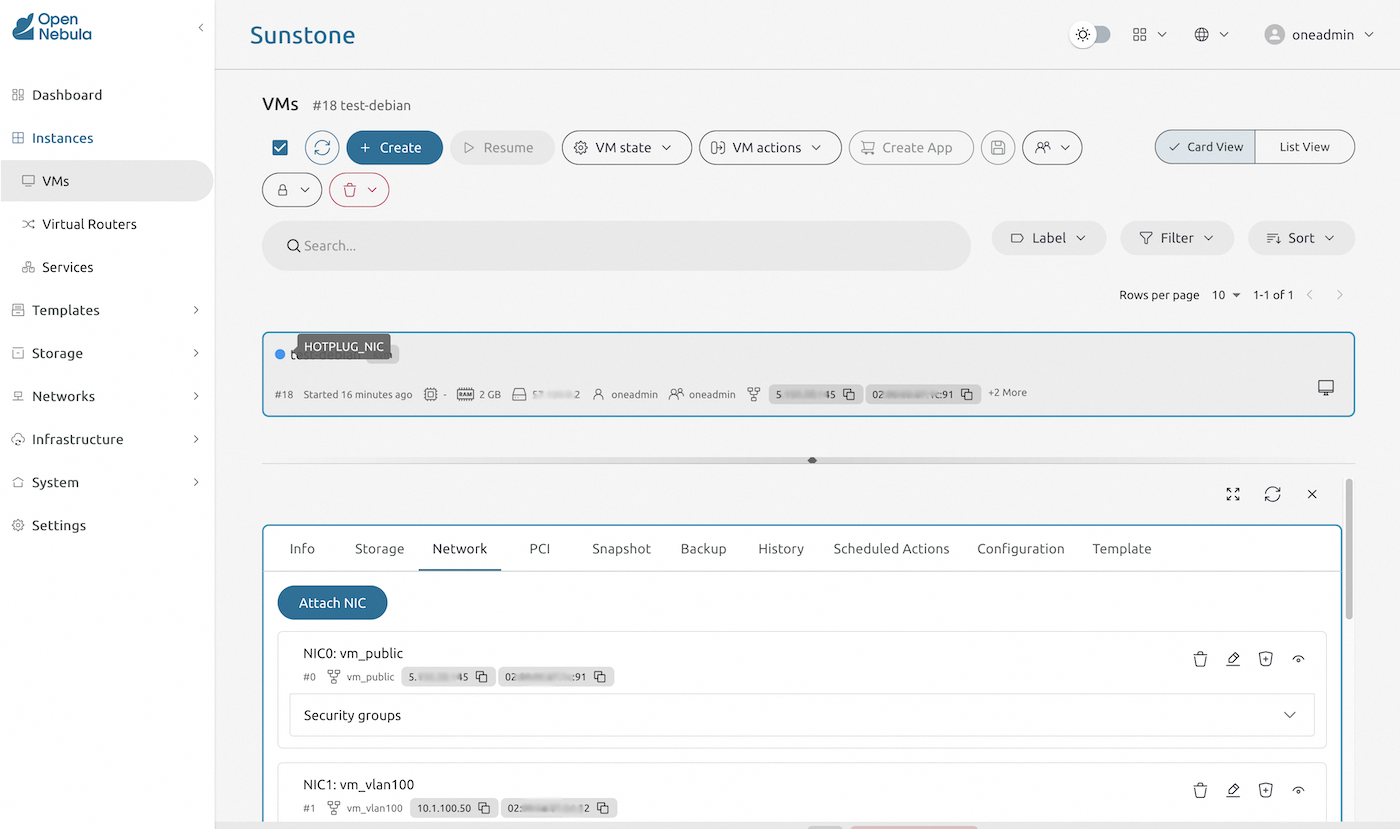
Use virtual server settings to update the server configuration. This example shows the hot-plugging of a private network adapter to the virtual server.
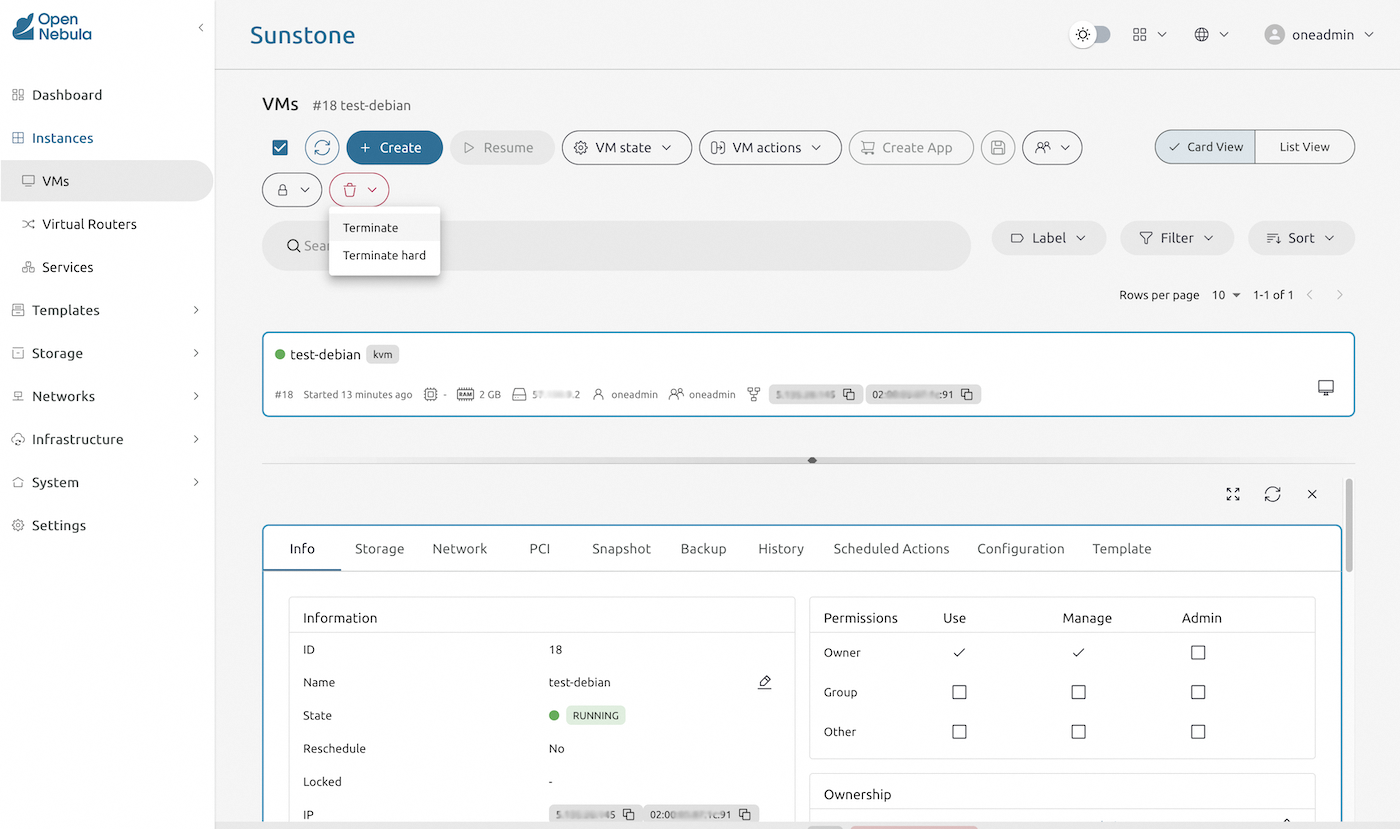
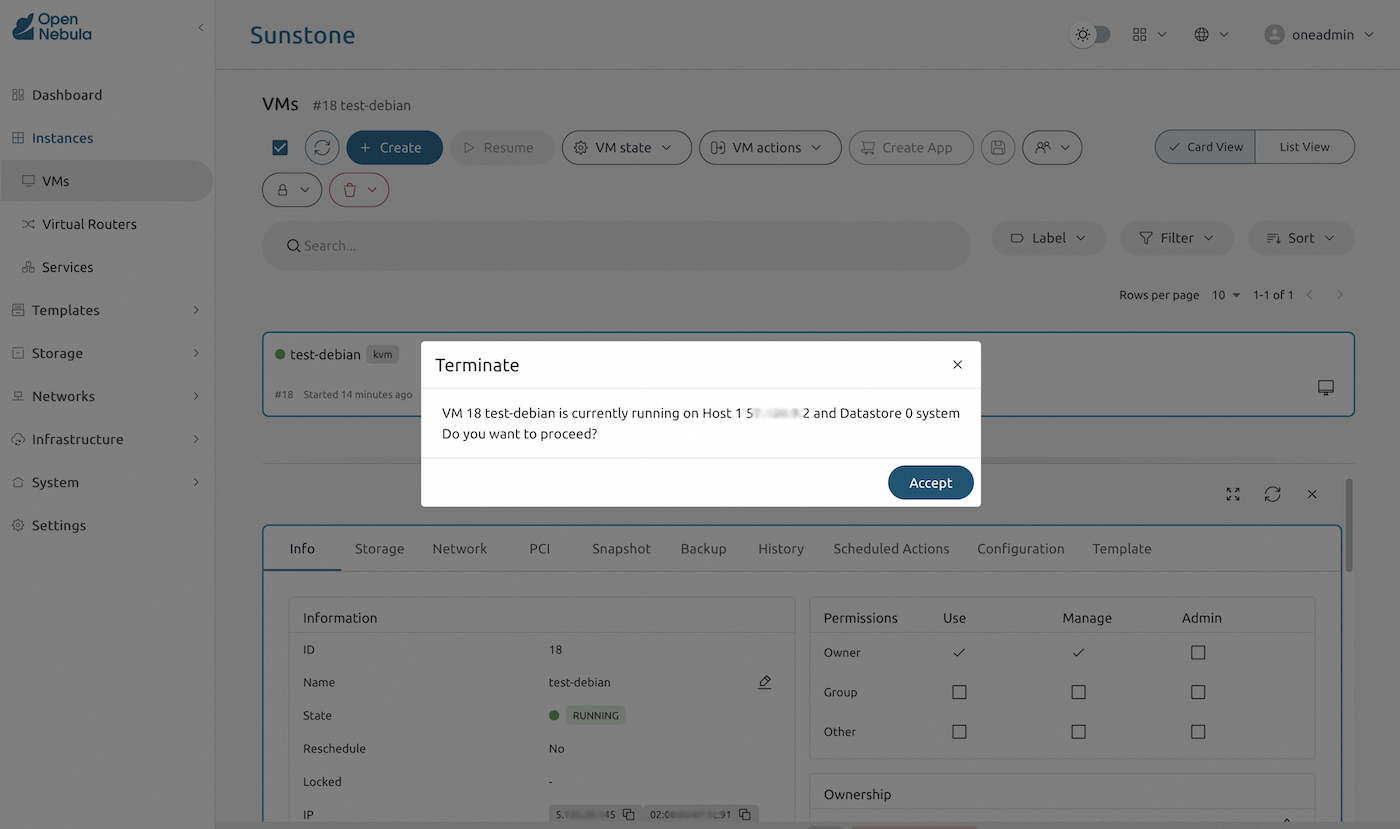
Destroy virtual server
Finally, as a cleanup step, terminate the virtual server by clicking the red "Trash can" icon.
Go further
External resources:
- If you need more information about OpenNebula, you may consult the OpenNebula Website or the official OpenNebula documentation.
- If you need more information about Ansible, you may consult the Ansible page on the RedHat website or the official Ansible documentation.
- The OpenNebula deployment repository used and referenced in this guide is Hosted Cloud OVHcloud.
If you need training or technical assistance to implement our solutions, contact your sales representative or click on this link to get a quote and ask our Professional Services experts for assistance on your specific use case and project.
Join our community of users.

