Web hosting - How to manage FTP users
159 Ansichten
Objective
OVHcloud web hosting plans provide access to an FTP storage space. You can use this FTP space to put your website or application files online, for example. You can access this space via an FTP or SSH user account, and the associated password. As part of your business, you may need to have several FTP user logins for your employees.
This guide explains how to create, modify or delete FTP users on your OVHcloud web hosting plan.
This guide is only valid for Professional and Performance web hosting plans. Only these 2 solutions allow you to activate multiple FTP users.
Requirements
- A compatible OVHcloud web hosting plan
OVHcloud Control Panel Access
- Direct link: Hosting plans
- Navigation path:
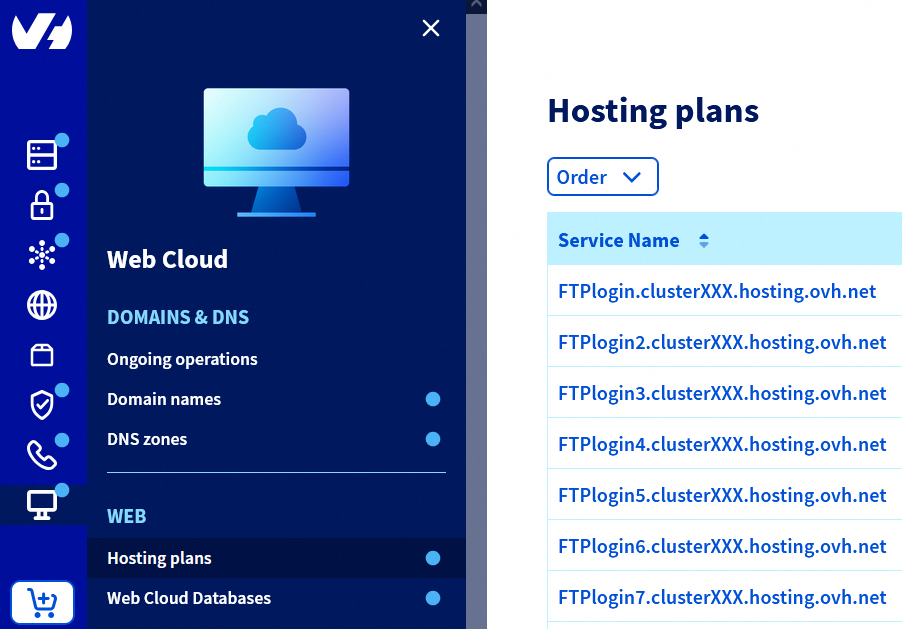
Web Cloud>Hosting plans> Select your web hosting plan
Instructions
Create a new FTP user on your web hosting plan
To create a new FTP user on your web hosting plan via the OVHcloud Control Panel, click on the tabs below to view each of the 6 steps.
Go to the Hosting plans page, then select the web hosting plan concerned.
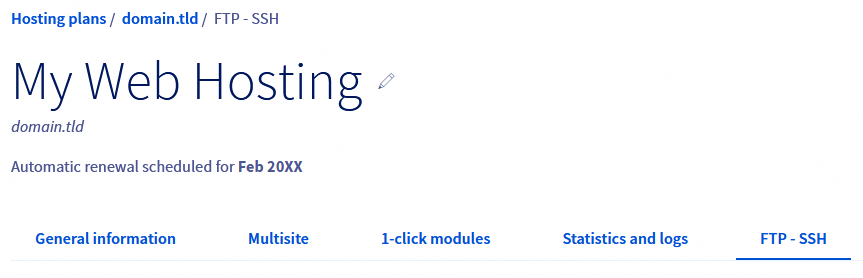
On the page that pops up, click on the FTP - SSH tab.
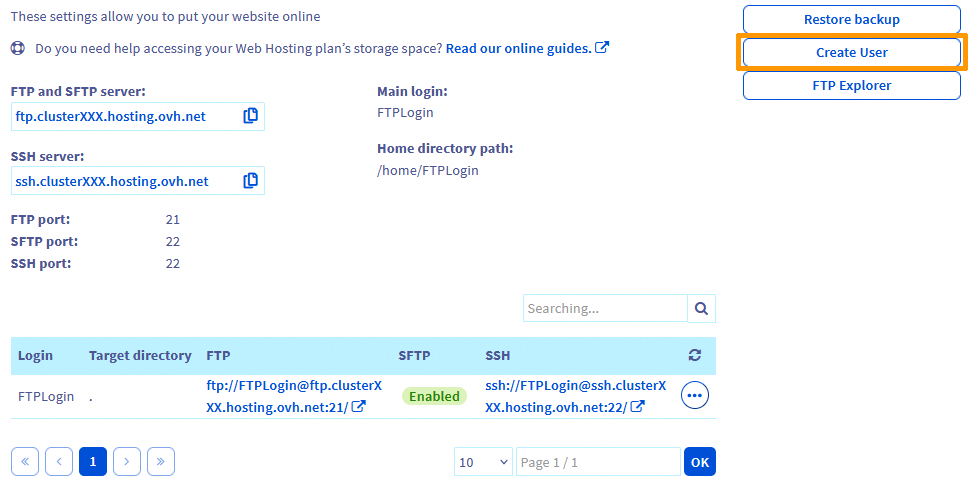
To create a new FTP user, click the Create User button on the right. Depending on the resolution of your screen, the button may be on the bottom of the page.
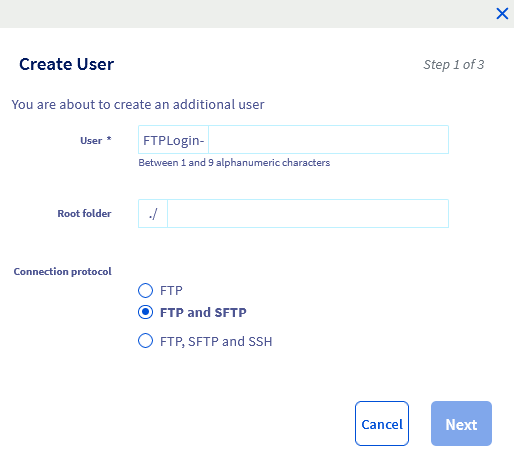
Define the settings for the new FTP user by filling in the following fields:
-
User: Corresponds to the full FTP username that you will define. The new user will need it to log in to your web hosting plan’s FTP storage space. All additional FTP user names created on your web hosting plan will be preceded by your web hosting plan’s main FTP login, followed by a hyphen. For example, if your primary FTP login is
FTPLoginand you create a new FTP useruser1, your new user’s FTP login will beFTPLogin-user1. -
Root folder: It is the name of the directory or subdirectory in which the FTP user will be able to log in to the FTP storage space. For example, if a user needs to access all of your web hosting plan’s FTP storage space, leave this field empty. Otherwise, specify the name of the directory to which they will be authorized to access (e.g.
www,blog,website1,www/development, etc.). -
Connection protocol: Allows you to define the protocols that the FTP user can use to log in to your web hosting plan’s FTP storage space. For example, if you select the third choice (the FTP, SFTP and SSH protocols), the FTP user will be able to connect using all three protocols. This way, the FTP user can log in via the SSH protocol, and manage FTP content using the same protocol.
Once you have set the parameters, click Next.
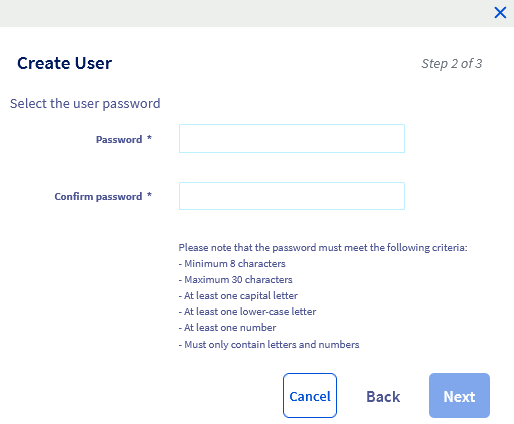
In this second window, you only need to set and confirm the password for the new FTP user in the two fileds. Follow the password policy listed just below the 2 fields.
Once you have chosen and confirmed your password, click Next.
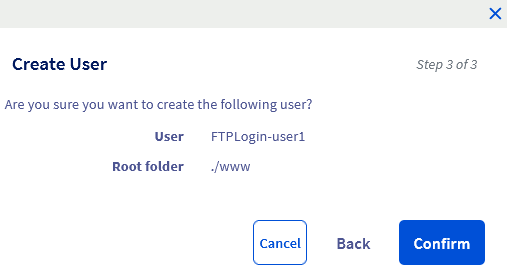
This final window summarizes the settings you have chosen for your new FTP user. If these settings correspond to what you want, click Confirm to complete the request to create a new FTP user on your web hosting plan.
Once the creation request has been validated, it can take up to 15 minutes for the new user to be registered on your web hosting plan.
If necessary, test the new FTP user using our guide “Logging in to your web hosting plan’s FTP storage space”.
Modify an FTP user
To edit an FTP user, click on the tabs below to view each of the 4 steps.
Go to the Hosting plans page, then select the web hosting plan concerned.
On the page that pops up, click on the FTP - SSH tab.
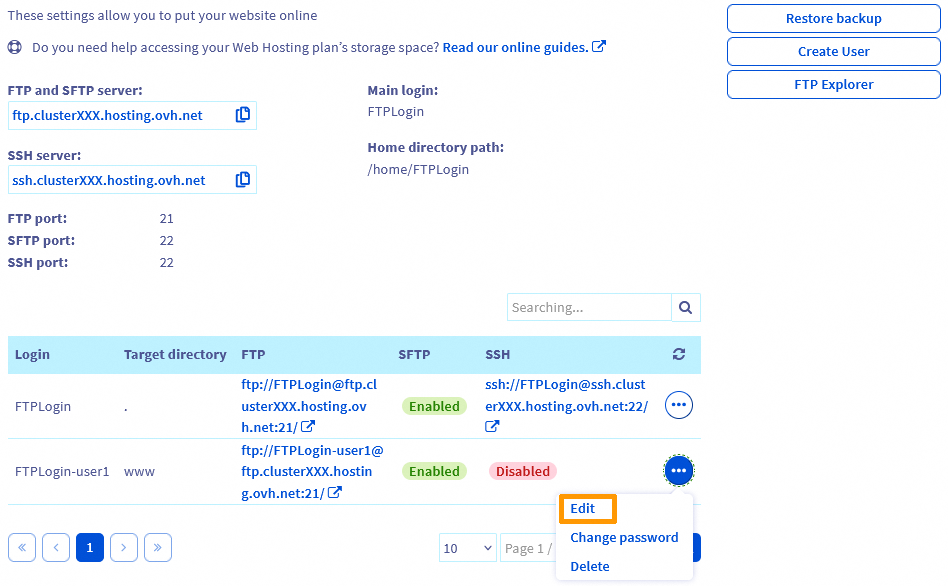
In the table at the bottom of the page, on the right-hand side of the line corresponding to the FTP user concerned, click the ... button, then click Edit.
The following window will appear:
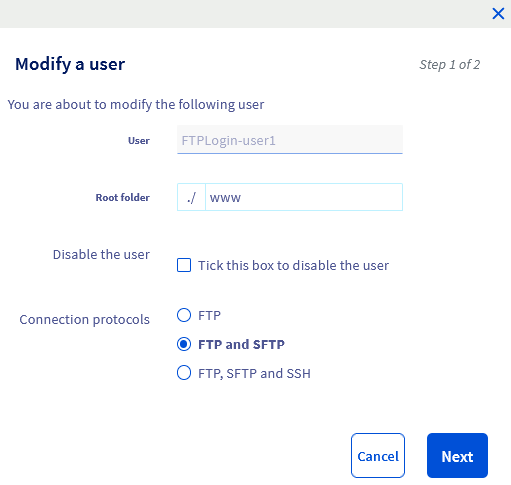
You can also disable the user if necessary by ticking the box provided. This option is useful if you want to prevent a user from accessing your FTP space without deleting the FTP and SSH logs associated with them. These logs will allow you to determine what operations were performed if you notice any unwanted interventions on your web hosting plan.
Once you have made the modifications, click Next. Then check your change requests, and click Confirm to complete the FTP user change request on your web hosting plan.
If you only want to change the FTP user password, please refer to our guide on "Changing an FTP user password".
If you would like to change the FTP username, you must create a new FTP user with the new username you want. You are then free to delete the old FTP user if required.
Delete an FTP user
To delete an FTP user, click on the tabs below to view each of the 4 steps.
Go to the Hosting plans page, then select the web hosting plan concerned.
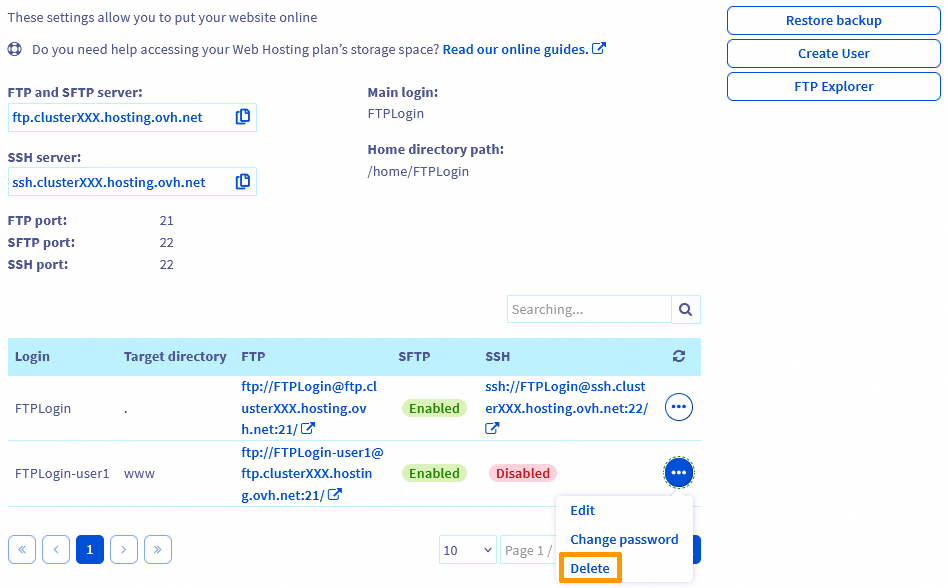
On the page that pops up, click on the FTP - SSH tab.
In the table at the bottom of the page, on the right-hand side of the line corresponding to the FTP user concerned, click the ... button, then click Delete.
The following window will appear:
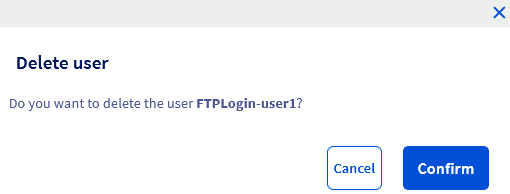
Click Confirm to permanently delete the FTP user from your web hosting plan.
Go further
Logging in to your web hosting plan’s FTP storage space
Accessing a web hosting plan via SSH
Tutorial - Using FileZilla with your OVHcloud hosting
Tutorial - Using Cyberduck with your OVHcloud hosting
For specialised services (SEO, development, etc.), contact OVHcloud partners.
If you would like assistance using and configuring your OVHcloud solutions, please refer to our support offers.
Join our community of users.

