Configure an IP address on a virtual machine
676 Views
Objective
After you have created a virtual machine (VM), you can assign to it a public or private IP address so that the VM has internet and/or private network connectivity.
This guide will show you how to assign a public or private IP address to a virtual machine.
Requirements
- You must have already created a virtual machine.
- You will need an IP block.
Instructions
Retrieve your information
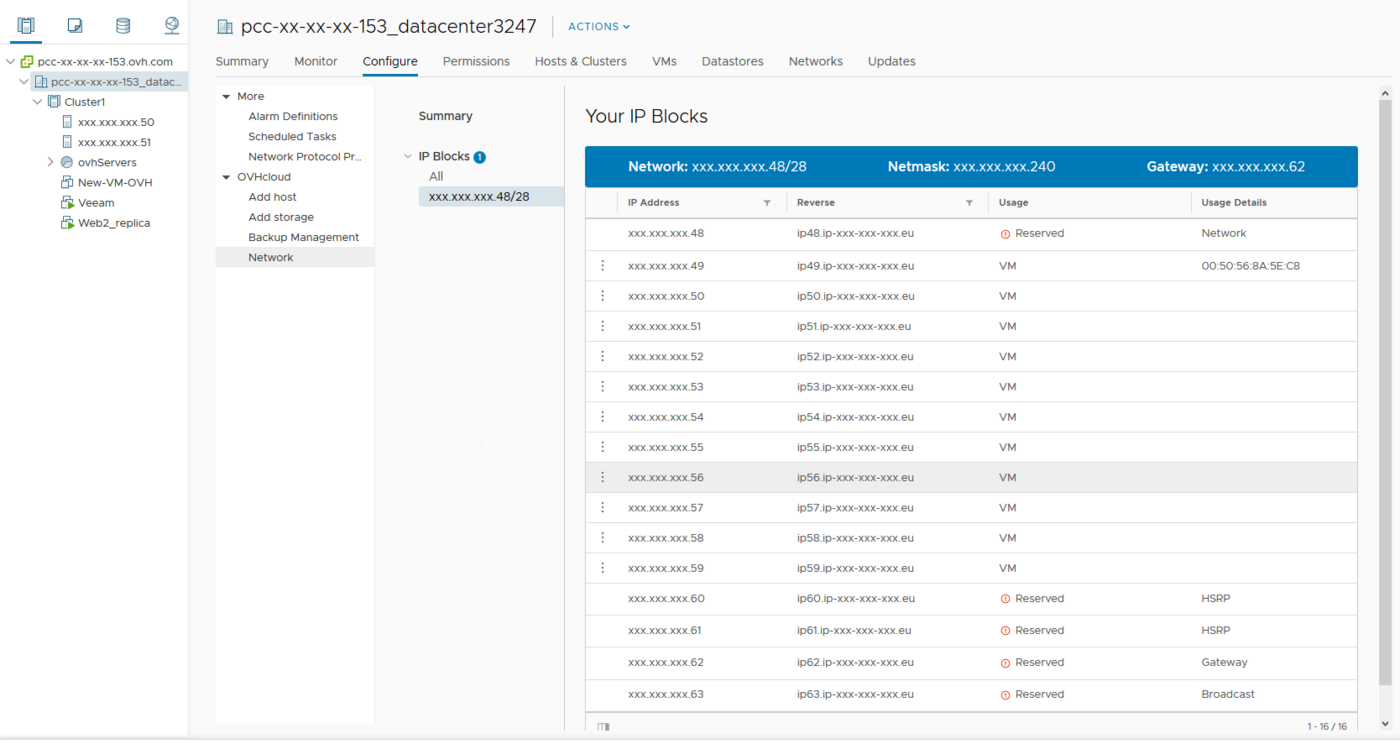
You can retrieve the information of your public IPv4 address block directly from the vSphere client, by going to the Hosts and clusters section. Then click on your datacentre and choose the Configure tab. Then click Network below OVHcloud.
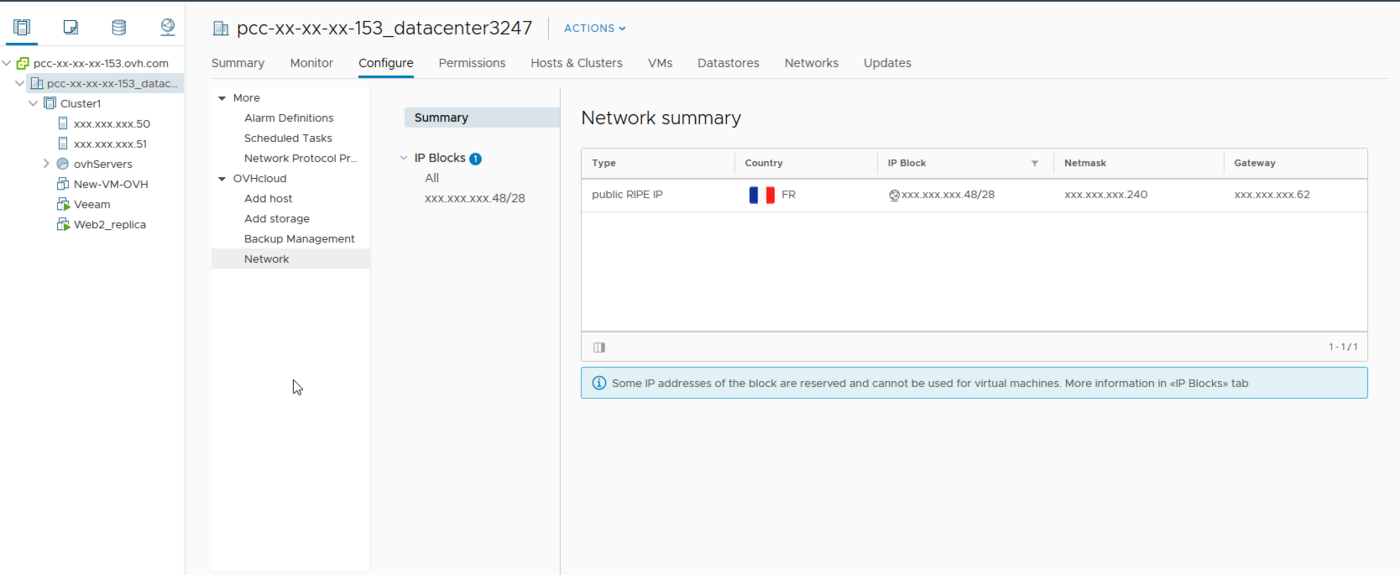
On each block delivered by OVHcloud, 5 IP addresses are reserved for network configuration and should never be used for your virtual machines. This is the first and the last four IPs in the block. A Private Cloud IP block is organized as follows:
- The first IP address marked as
reservedcorresponds to the network address. - The following IPs can be used for your virtual machines. They are marked as
Availableif no VM is using them, or asUsedif they are being used. - The last four IPs in the block are reserved, two are dedicated to OVHcloud routers for operating the block, and the other two are used for gateway and broadcast.
By default, the IPv6 block delivered with your Dedicated Cloud is not activated, so you will need to open a support request to request its activation.
You can retrieve your public IPv6 address block information via the OVHcloud Control Panel by going to the Manage my IPs section.
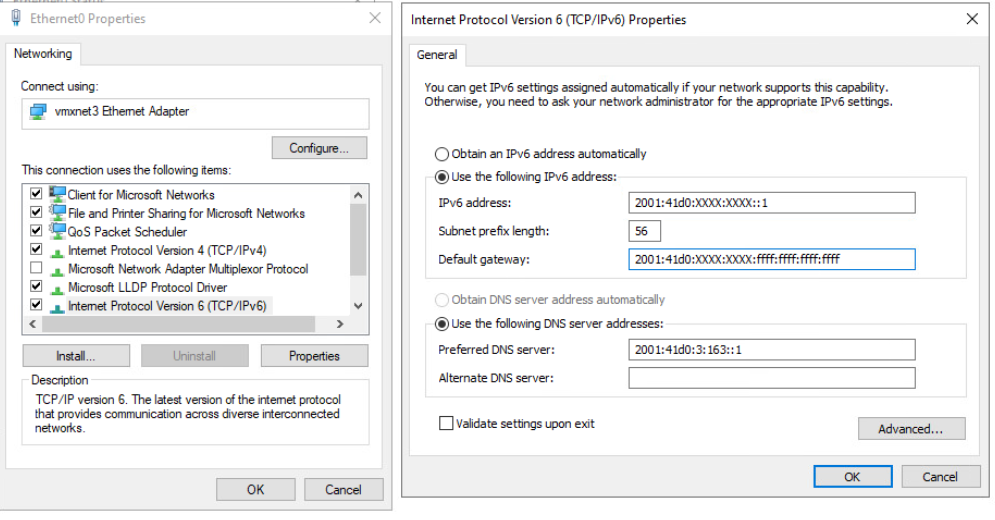
Before you begin, and in order to use the same terminology during the changes, please read the table below. It references terms that we will use in this documentation:
| Term | Description | Example |
|---|---|---|
| YOUR_IPV6 | This is an IPv6 address of the IPv6 block assigned to your service | 2001:41d0:xxxx:xxxx::1 |
| IPv6_PREFIX | This is the prefix (or netmask) of your IPv6 block, usually 64 | 2001:41d0:xxxx:xxxx::/56 |
| IPv6_GATEWAY | This is the gateway (or gateway) of your IPv6 block | 2001:41d0:xxxx:xxxx:ffff:ffff:ffff:ffff |
Configure a public IP address
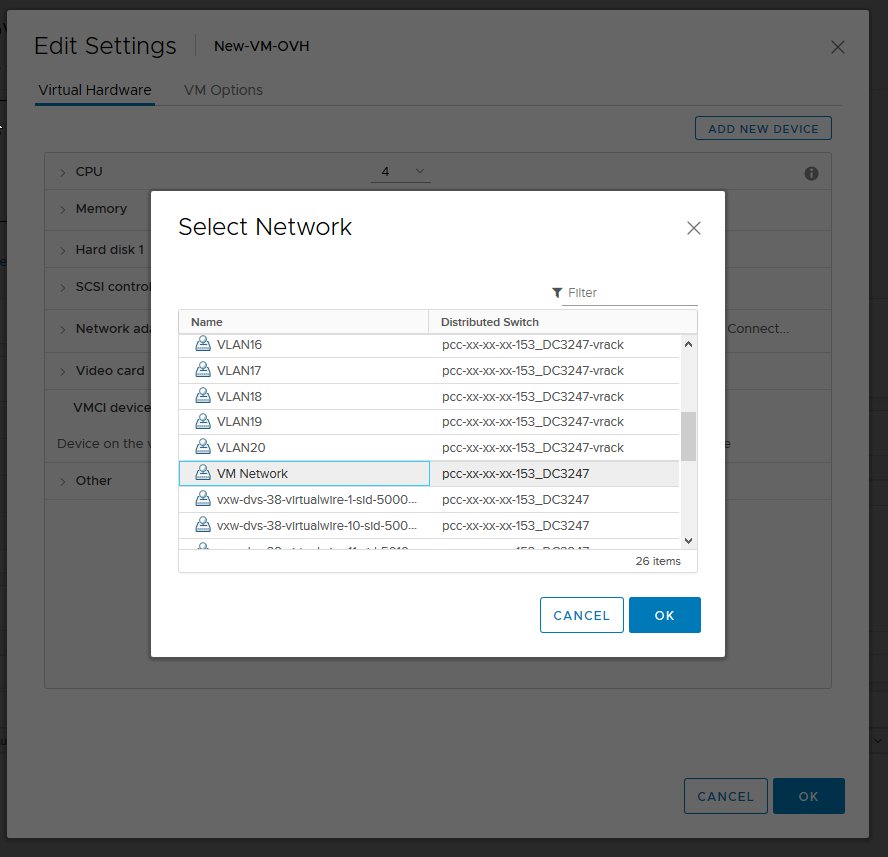
To configure a public IP address on your virtual machine, you must first choose the VMNetwork interface in your VM network adapter settings:
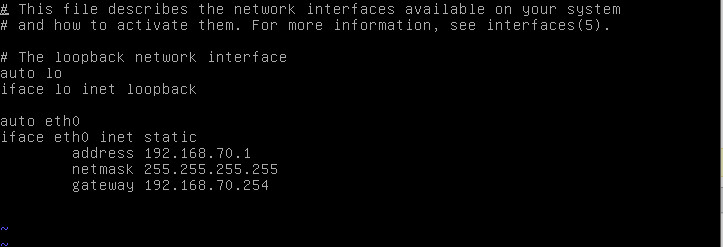
Here is an example of a configuration on the Debian distribution:
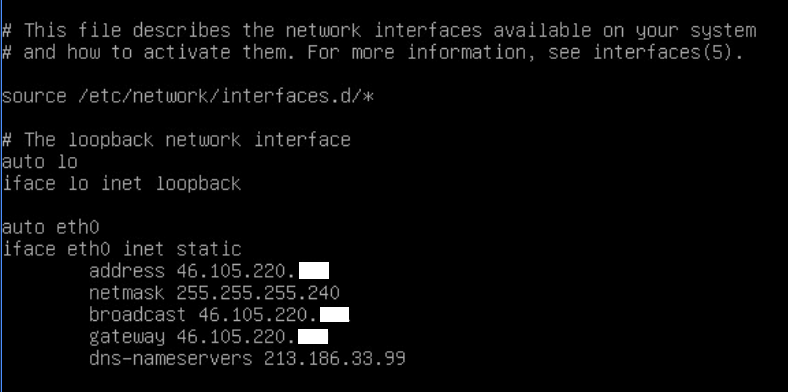
Restart your network system with systemctl restart networking.
You can check the configuration with ip a.
If your virtual machine cannot find the network, make sure that the network adapter is configured on VMNetwork and not on LocalPortGroup or a VLAN, and that the adapter’s connection box is ticked.
Here is an example of a configuration on Windows:
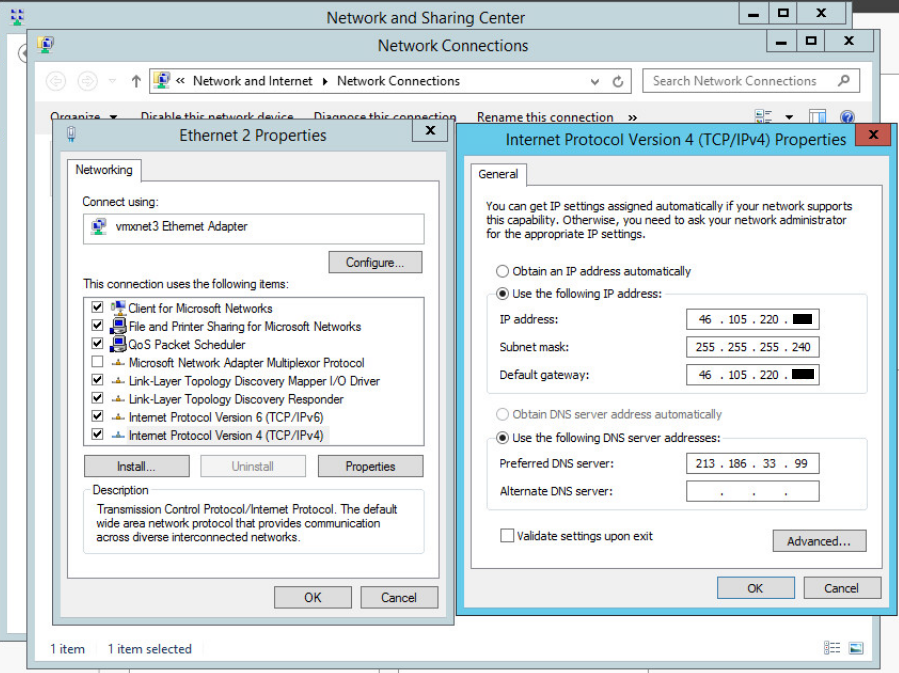
In the Control Panel, go to Network and Internet then Network and Sharing Center and then Modify the network adapter.
To go faster, you can click on the Windows search field and write Run (which corresponds to simultaneously pressing the Windows key and the R key of your keyboard). The Windows command console will open, and you can enter the following command:
Then right-click the network adapter corresponding to the VMNetwork and select Properties. Then select TCP/IP v4 protocol and click on Properties and enter your IP information as follows:
Here is an example of a network configuration on the Debian distribution:

Restart your network system with systemctl restart networking.
You can check the configuration with ip a.
If your virtual machine cannot find the network, make sure to check if the network card is configured on VMNetwork and not on LocalPortGroup or a VLAN, and that the network card's connection checkbox is checked.
Here is an example of a configuration on Windows:
In the Control Panel, go to Network and Internet then Network and Sharing Center and then Modify the network adapter.
To go faster, you can click on the Windows search field and write Run (which corresponds to simultaneously pressing the Windows key and the R key of your keyboard). The Windows command console will open, and you can enter the following command:
Then right-click the network adapter corresponding to the VMNetwork and select Properties. Then select TCP/IP v4 protocol and click on Properties and enter your IP information as follows:
Configure a private IP address
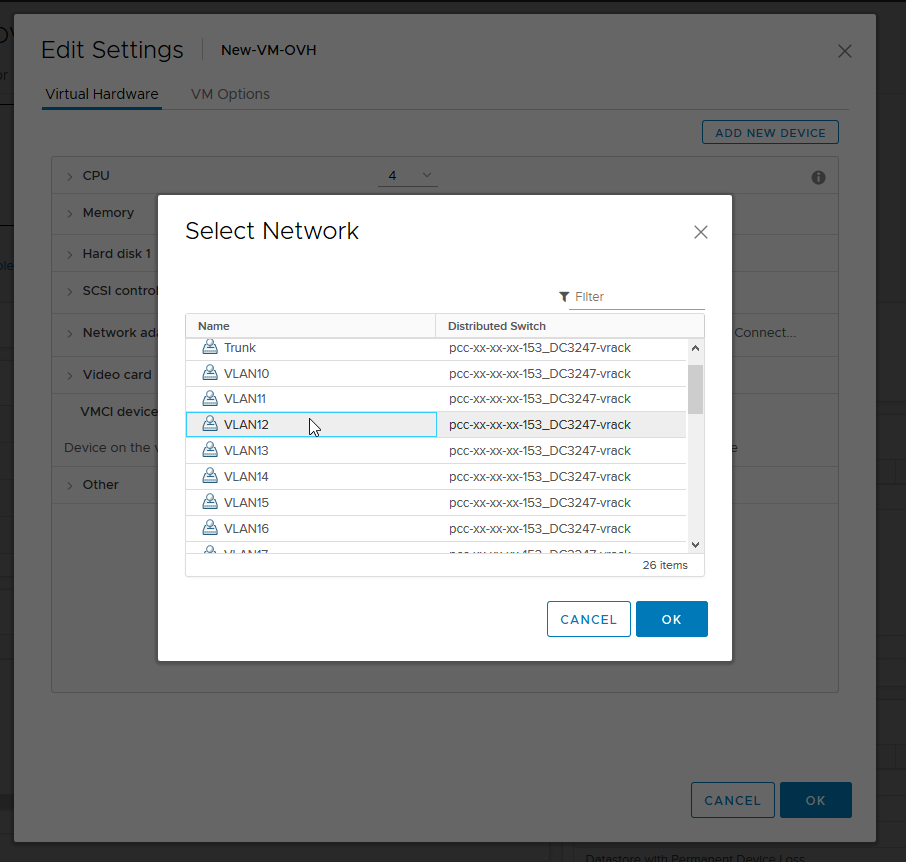
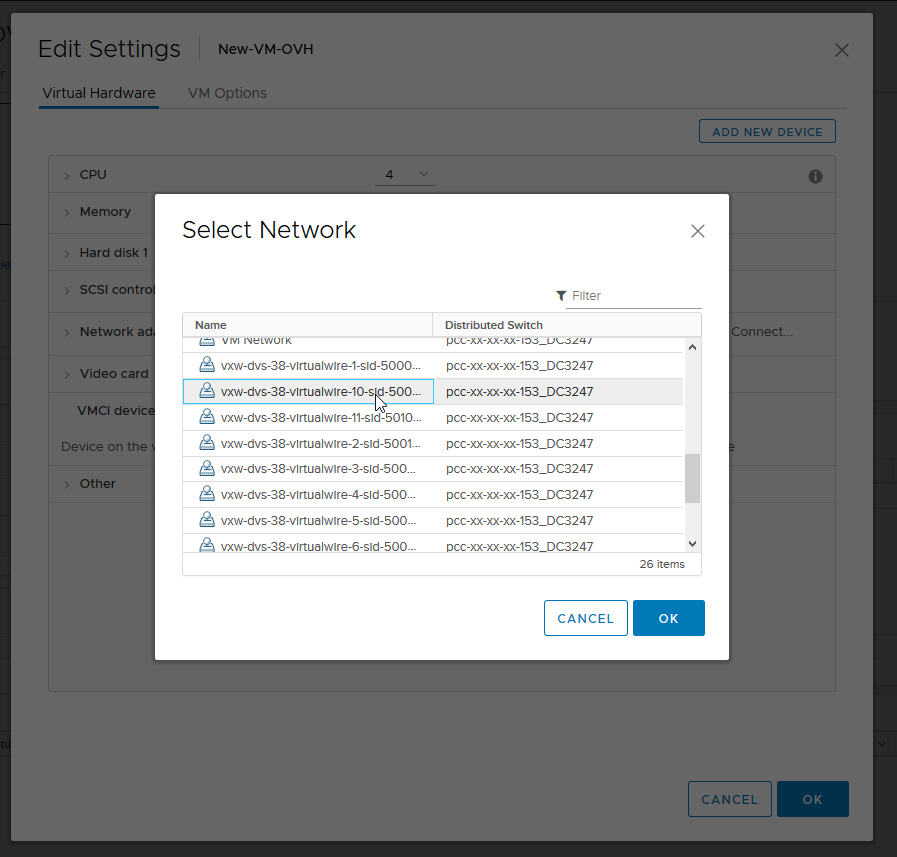
The process for configuring a private IP address is similar to that of a public IP address. However, you must use the network adapter configured for your VLAN or VxLAN.
In your interface options, you can edit the following settings:
-
A VLAN interface (10 to 20 by default and linked to the vRack, you can create more by consulting this guide).
-
A VxLAN interface (vxw-dvs, etc.).
In your virtual machine settings, you can use a VLAN or a VxLAN:

Linux
Here is a configuration example on a Debian operating system:
By editing the interfaces file, you can assign a private IP address on your chosen IP range:
Restart your network system with systemctl restart networking.
You can check the configuration with ip a.
Windows
Here is a configuration example for Windows:
In the configuration panel, go to Network and Internet, then Network and Sharing Centre, and then to Change Network Adapter.
To speed up the process, you can click on the Windows search field and write Run (or press the Windows and R keys at the same time). The Windows command console will open, and you can enter this command:
Right-click on the corresponding VMNetwork adapter and click Properties. Then select TCP/IPv4 protocol and click again on Properties, then enter your IP information as follows:

By modifying this interface, you can assign a private IP address on your chosen IP range:
Go further
Join our community of users on https://community.ovh.com/en/.

