Configuring an Additional IP block in a vRack
1371 Views
Objective
As well as private IP addressing, the vRack also allows you to route public IP traffic through your server's vRack port using a public IP address block.
This guide will show you how to configure a block of public IP addresses for use with the vRack.
vRack supports both IPv4 and IPv6 public routing with Additional IP address blocks. You can find the instructions on how to configure IPv6 blocks in this guide: "Configuring an IPv6 block in a vRack".
This article focuses on Additional IP configuration over a vRack network. If you need guidance on Additional IP configuration with the primary IP (on public network interface), read the following articles:
Requirements
- A public block of IP addresses in your account, with a minimum of four addresses
- Your chosen private IP address range
- A vRack compatible server
- A vRack service activated in your account
OVHcloud Control Panel Access
- Direct link: vRack
- Navigation path:
Network>vRack private network
This feature might be unavailable or limited on servers of the Eco product line.
Please visit our comparison page for more information.
Instructions
For example purposes we'll be using an IP block of 46.105.135.96/28 and eth1 for the secondary network interface, which is dedicated to the vRack.
Also for example purposes, the network configuration file we refer to is located in /etc/network/interfaces. The equivalent file on your server may be located somewhere else, depending on your operating system. The file content may also be different. If you encounter any difficulties, please refer to the official documentation for your distribution.
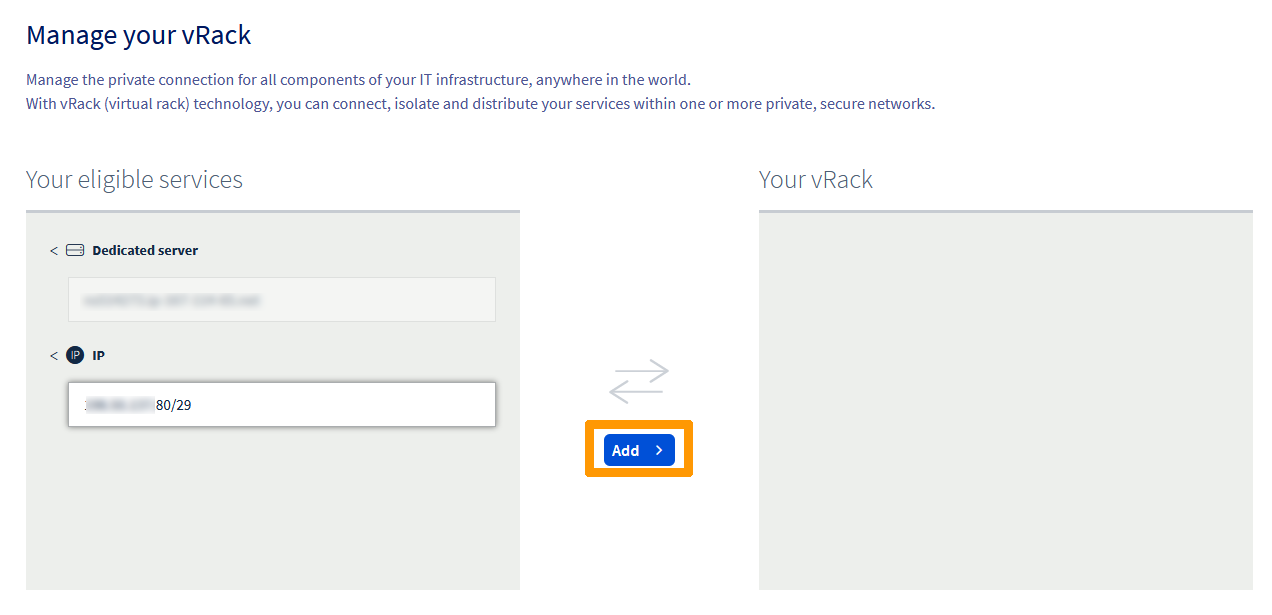
Add the IP block to the vRack
Once an IP block is added to the vRack, it is no longer attached to a physical server.
This setup allows you to configure IPs of the same block on multiple servers, provided that these servers are all in the same vRack as the IP block. The IP block must have at least 2 usable IPs or more for this to be possible.
Select your vRack from the list to display the list of eligible services. Click the IP block you wish to add to the vRack and click on the Add button.
Managing public IP bandwidth on vRack
By default, Additional IP blocks routed via a vRack benefit from a standard public bandwidth of 5 Gbps in Europe/Canada/US and 100 Mbps in APAC regions. For a detailed overview of availability, please refer to public routing options on our vRack product page.
As infrastructure requirements scale, users may require broader bandwidth to support high-traffic public-oriented services, for which OVHcloud provides paid bandwidth options. It is important to note that bandwidth options are applied per-vRack and per-region. Since Additional IP addresses are tied to a region, any bandwidth modification will affect all IP addresses (both IPv4 and IPv6) routed to the specific vRack within that particular region.
During the Additional IP ordering process
Choosing public bandwidth during an Additional IP order
The default public bandwidth can be changed when ordering a new Additional IP block with a vRack network as the backend.
To order a new Additional IP block:
- Open the
Networksection in the left-hand sidebar. - Select
Public IP addresses. - Click on the
Order IPsbutton, near the top of the page. - Select the IP version, then the vRack you want to attach your Additional IP to.
- Select the region you want your Additional IP to be in.
- Choose the public bandwidth you want to apply to your vRack for that specific region.
- Fill in the other options as necessary, then proceed with your order.
From the vRack management page
Modifying vRack public bandwidth on management page
For Additional IP blocks already attached to a vRack, bandwidth can be managed directly through the service configuration page.
To access the management interface:
- In the "Public IP & bandwidth" column, click the
Managebutton for the corresponding vRack.
The management page is organized into two tabs:
- All attached services: For the time being, it redirects to the classic vRack management page. Soon, it will list all the products (Servers, Cloud Projects, etc.) currently linked to the vRack, in a new way.
- Public IP routing: Manages the public IP routing options of your vRack, including public bandwidth.
To modify the public bandwidth:
- Navigate to the
Public IP routingtab. - The interface displays individual management windows for each region (e.g.,
eu-west-par) associated with the vRack, listing all IP addresses attached to that specific region. - Within the window for the relevant region, click the
Modify bandwidthbutton. - Select the desired bandwidth option in the panel that appears on the right-hand side, then click
Proceed to orderto validate the order. - Once paid, the selected bandwidth should be available to your vRack in the chosen region after a few minutes.
Charges for the initial month are pro-rated based on the remaining days, with the full rate effective the next billing cycle.
The selected bandwidth upgrade will apply to all IP addresses in that region for the chosen vRack.
Configure a usable IP address
For vRack purposes, the first, penultimate, and last addresses in any given IP block are always reserved for the network address, network gateway, and network broadcast respectively. This means that the first useable address is the second address in the block, as shown below:
To configure the first usable IP address, we need to edit the network configuration file, as shown below. In this example, we need to use a subnet mask of 255.255.255.240.
The subnet mask we've used in our example is appropriate for our IP block. Your subnet mask may differ depending on the size of your block. When you purchase your IP block, you'll receive an email that will tell you which subnet mask to use.
Download the iproute2 package
Before you begin, download and install iproute2, a package for manual IP routing configuration. This package may already be available on your server — if so, skip to the next step.
Establish an SSH connection to your server and run the following command from the command line. This will download and install iproute2.
Fedora
GNU/Linux configurations
Configure the Additional IP
Using a text editor of your choice, open the network configuration file located in /etc/network/interfaces.d for editing. Here the file is called 50-cloud-init.
Create a new IP routing table
Next, we need to create a new IP route for the vRack. We'll be adding a new traffic rule by amending the file, as shown below:
Amend the network configuration file
For example purposes, the network configuration file we refer to is located in /etc/network/interfaces. The equivalent file on your server may be located somewhere else, depending on your operating system.
Finally, we need to amend the network configuration file to account for the new traffic rule and route the vRack traffic through the network gateway address of 46.105.135.110.
Now reboot your server to apply the changes or alternatively simply enable the new network interface:
Create the file for the secondary network interface
First, copy the primary network interface configuration and adjust it as needed:
Then, open the new file:
- Define the IP settings:
Create a new IP routing table
Next, we need to create a new IP route for the vRack. We'll be adding a new traffic rule by amending the file, as shown below:
Next, create the file needed to apply the new rules:
And paste the following content (please remember to replace our variables with your own values):
Amend the network configuration file
Finally, we need to amend the network configuration file to account for the new traffic rule and route the vRack traffic through the network gateway address of 46.105.135.110.
Edit the following file to add persistent and static routes:
Paste the following content (please remember to replace our variables with your own values):
Now reboot your server to apply the changes or alternatively simply enable the new network interface:
- Configure the Additional IP
Using a text editor of your choice, open the network configuration file located in /etc/netplan for editing. Here the file is called 50-cloud-init.yaml.
- Define the IP settings with the following variables:
Example
Apply the configuration with the following command:
First, verify that your vRack interface is connected or connecting state. In our example, the interface is called eno2.
Next, retrieve the name of the configuration file located in /etc/NetworkManager/system-connections for editing. Here the file is called vRack.nmconnection.
Using the nmcli handler, configure your Additional IP. Replace vRack and other parameters with your own values.
- Add the IP
- Add the Gateway
- Change the configuration from auto to manual:
- Make the configuration persistent
Create a new IP routing table
Next, we need to create a new IP route for the vRack. We'll be adding a new traffic rule (1 vrack) by amending the file, as shown below:
- Add the route
In our example
Restart your network with the following command:
Windows Server
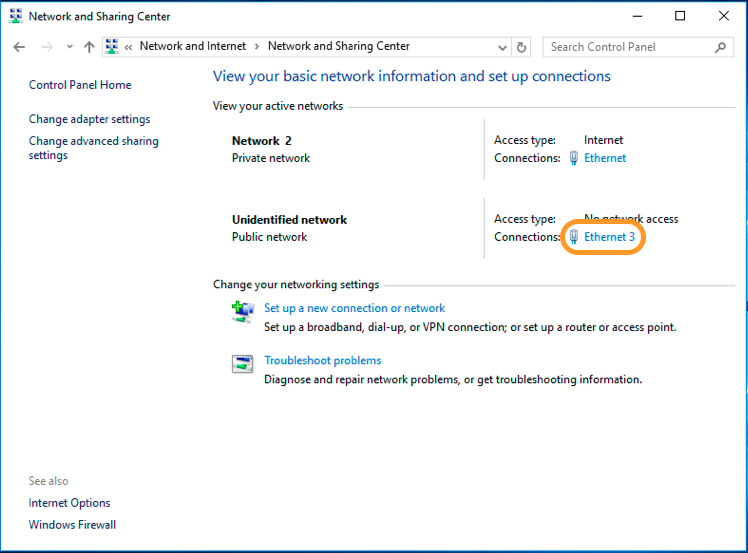
Step 1: Check and configure the secondary network interface
First, check the new network interface information:
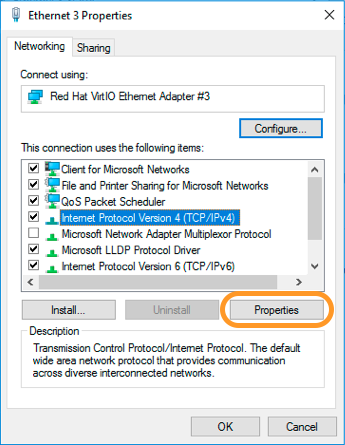
Then, check the properties:

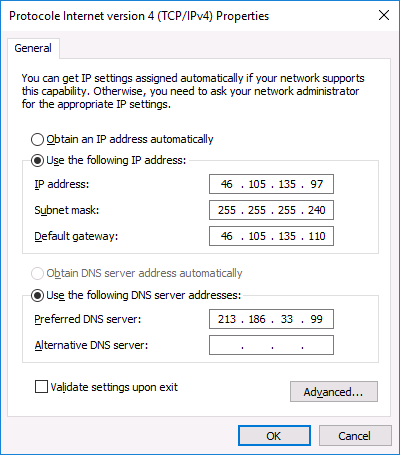
Step 2: IP Configuration
Select the Use the following IP address option:
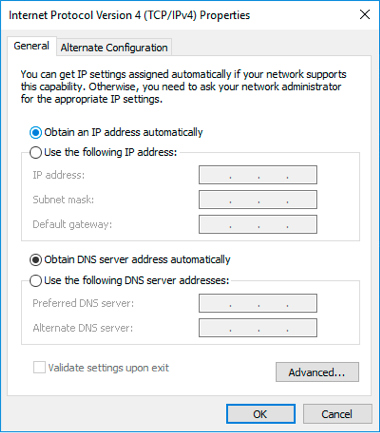
Define the IP information:
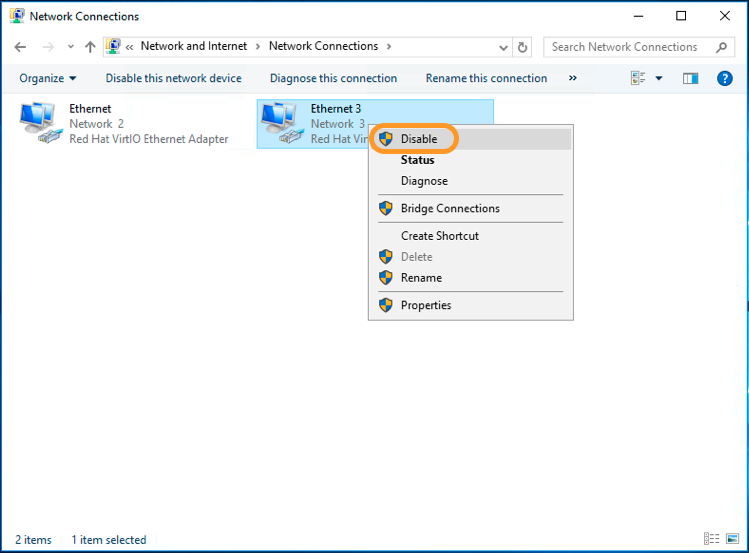
Step 3: Rebooting the network interface
First, disable the interface.
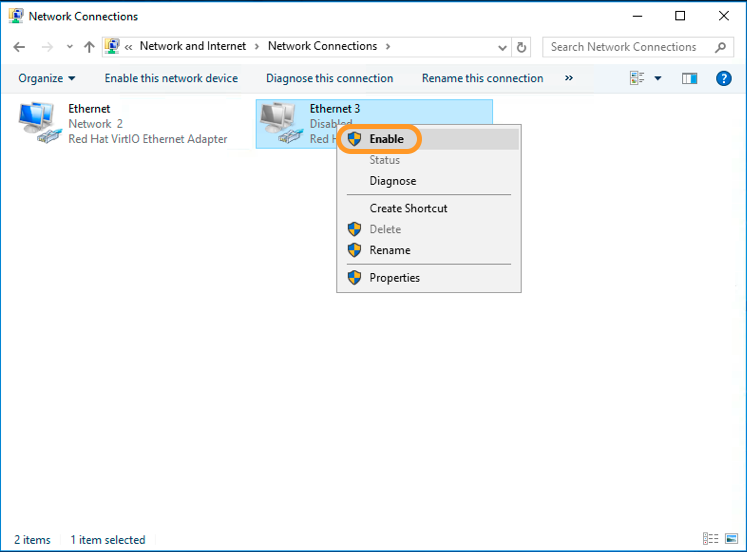
Then, enable the interface.
Troubleshooting
If you are unable to establish a connection from your VM or server to the private network, please send us a ticket from your Control Panel with the following:
- IP source and IP destination
- Ifconfig -a or ipconfig /all from both servers or VMs (setup network configuration interface)
- Ping in both ways
- Arp -a
- Routing table
Include the results above in your ticket.
Go further
Configuring the vRack on your dedicated servers
Creating multiple vLANs in a vRack
Configuring the vRack between the Public Cloud and a Dedicated Server
Join our community of users.

